
The Holiday Season always gives the perfect excuse to add embellishments to anything in your wardrobe. This year, my holiday shopping budget is practically zero due to our several overseas trips. But thanks to the zero dollar budget, I also get the perfect excuse to dig deep into my pile of fabrics and garments. I want to whip out something relatively easy to do for me to wear for an upcoming holiday house party. A hand-me-down Calvin Klein men’s raglan sweater jumps to mind, almost immediately. After several ideas floating around, I eventually settled with making a sequin trim sweater.
The concept is very simple. I want to make this raglan sweater (pictured below) a little bit more dressy, yet casual and comfortable enough to chill and chat with friends at a holiday house party. I also need to be able to wear it for any post-holiday casual house parties or shopping trips.
[shashin type=”photo” id=”8328″ size=”xlarge” columns=”max” order=”user” position=”center”]
At first, I was thinking of removing the grey strips entirely (2 at the front and 2 at the back; 4 strips total) and sew black tulle in their place to give an illusion of the sweater torso being separated from the limbs. However, after looking at how the grey strips are connected to the black rib knitted portions, I ditched the idea, fearing the whole sweater will just fall apart when I removed the grey strips.
So I moved on to the next idea of adding trims on top of the grey strips. I tried different trims I have, but none of them suited the dressy casual feeling I was looking for. Sorry for the funky, uneven lights on these pictures; I did this DIY mostly on week nights and my phone isn’t exactly the best at taking nighttime pictures. But you get the idea, I’m sure.
[shashin type=”photo” id=”8632″ size=”xlarge” columns=”max” order=”user” position=”center”]
Since sweater embellishing seems to be always “in” during holiday season, I then thought about making sequin trims. It seems to fit the dressy casual idea the most. I have no sequin trims (and they’re quite expensive if you buy from Jo-Ann. $6.99 / yard! And I have zero shopping budget, remember?), but I do have some black sequin fabric remnants I purchased at San Francisco’s Fabric Outlet some time ago. I started taking measurements of each grey strips to know how long and wide the trims have to be.
The grey strips at the front measures 1″ wide and 11.5″ long; the ones at the back measures 1″ wide and almost 12.5″ long. To give myself some margin of error, I cut 4 strips of 1″ wide and 13″ long from the sequin remnants.
This was my first time working with sequin fabric, and man, the cutting aftermath was rather messy with all those individual sequin parts falling to the desk and floor.
[shashin type=”photo” id=”8332,8333,8334″ size=”xlarge” columns=”max” order=”user” position=”center”]
I laid one piece of sequin trim on the grey strip section, checking if the width and length are perfect before I began stitching. Fortunately, the width was perfect!
[shashin type=”photo” id=”8335″ size=”xlarge” columns=”max” order=”user” position=”center”]
I want the sequin trims to be sturdy and not fall off after one-time use, so I chose to do hand stitching. Depending on your own sweater and sequin trim, you might be able to get away with glue or with sewing machine. Hand stitching takes time, but the result is more polished. I also sewed several individual sequins to some sparse space of the trims and cut off the trim excess. Here’s a close-up of the hand stitching.
[shashin type=”photo” id=”8336″ size=”xlarge” columns=”max” order=”user” position=”center”]
Hand stitching definitely took a lot of my time, especially with my slow sewing speed. It took me about 1.5 hour to sew one section; so 6 hours for all 4 sections. Then again, the result is really delightful to see. Here’s the picture of how the left back side’s sequin trim is finished.
[shashin type=”photo” id=”8337″ size=”xlarge” columns=”max” order=”user” position=”center”]
After I’m finished will all four sections, I took in 0.5 inch from each sides so the sweater became a bit more fitted. The sweater was originally a little too boxy for me.
[shashin type=”photo” id=”8338″ size=”xlarge” columns=”max” order=”user” position=”center”]
Ta-da!!! The finished DIY sequin trim sweater!
[shashin type=”photo” id=”8370″ size=”xlarge” columns=”max” order=”user” position=”center”]
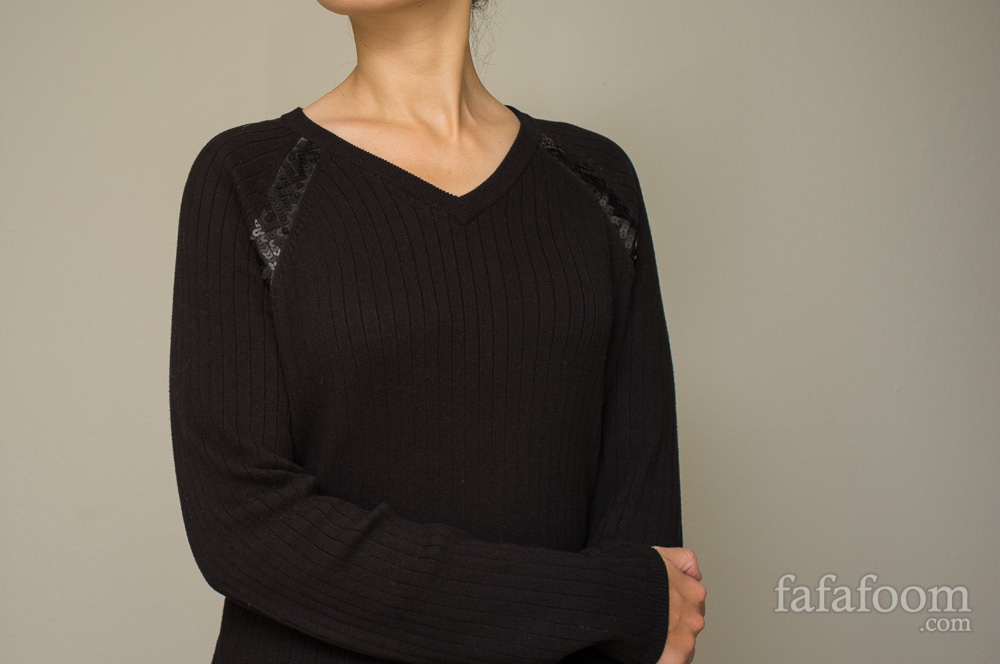
Some more pictures to show the details (I should’ve brushed that sweater before the shoot; oh well :)
[shashin type=”photo” id=”8485,8486,8487,8488″ size=”xlarge” columns=”max” order=”user” position=”center”]
So there you go! Do you catch up on your DIY fashion projects this Holiday season like I do? Whatever you’re catching up with, I hope you have a lot of fun!
Merry Christmas to those who’s celebrating, and until next time,
Musank