
Before I hop on to that airplane, I’m going to share the DIY Projects results I did for the past 2 weeks for Fafafoom’s 300th post. I have continued to be smitten by flower shapes and I was partly thinking of giving some of these flower accessories to my nieces if they think it’s pretty enough. So yeah, why not have the 300th post be a “tribute” to what I (apparently) like to do as DIY Projects?
So without further ado, here are the five DIY flower accessories results!
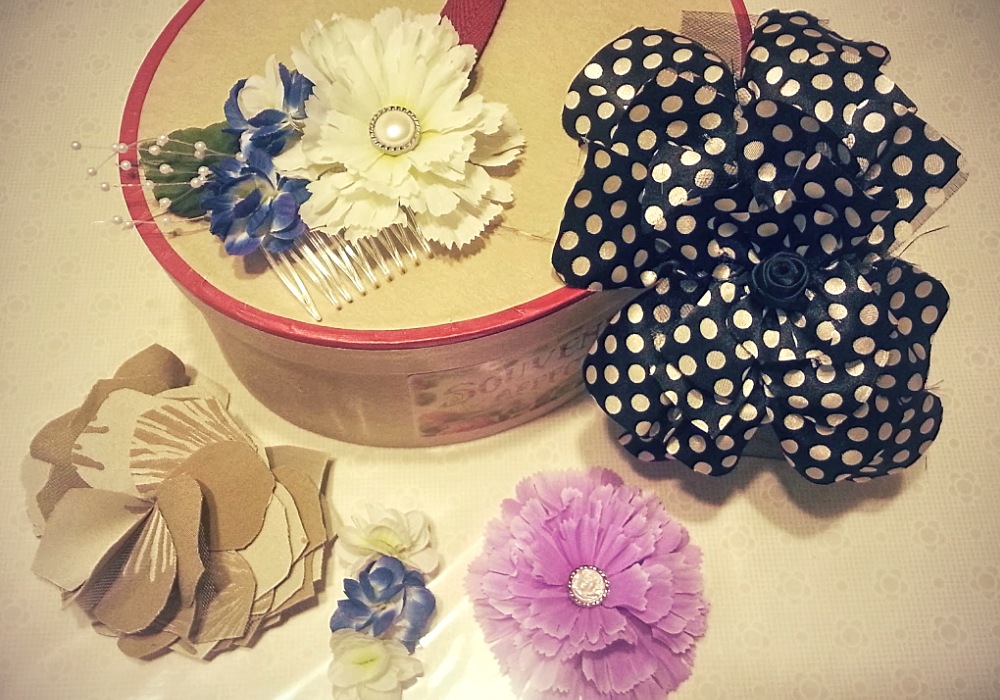
The first is a flower hair comb. I basically glued silk flower petals, leaves, and one of those ivory “twig” fillers to a plastic comb. At the back, I glued a small ribbon trim strip to make the back look more finished (not shown). Honestly, I’m not too thrilled about how those twig fillers shot out at the corner like that, so I probably going to curl them in to make them look prettier.
[shashin type=”photo” id=”7631″ size=”large” columns=”max” order=”user” position=”center”]
These next two are straight forward and relatively easier and faster to make. The purple flower is a brooch; the button I used has rose shape in the middle (so romantic). The smaller one is hair pin with three small petal clusters glued on it. (Update 10/20: I’m happy to say that one of my nieces get the small hair pin!! Yay, I hope she likes it :)
[shashin type=”photo” id=”7628″ size=”large” columns=”max” order=”user” position=”center”]
Now, I admit that the forth one is not the prettiest of the bunch. But it’s a fun process making this flower brooch (thank you Wedding Chicks for the easy-to-follow tutorial!) and I really like the fabric I use for this. This flower brooch is made with flower-shape fabric cut outs (I basically used the smallest size of the “Various Peony Petal Sizes Template“). If you use a pretty, romantic fabric, the results can look like these.
But as you can see below, I use more of a mid-weight fabric to create the cut-outs.
[shashin type=”photo” id=”6655,6654″ size=”large” columns=”max” order=”user” position=”center”]
And I’m actually going to use it to decorate my clutch. Oh, my clutch was originally an iPad case I bought from Target; I inserted some buckram between the outer and lining fabric to give it some stiffness, and I folded it. Voila!
[shashin type=”photo” id=”7629,7630″ size=”large” columns=”max” order=”user” position=”center”]
UPDATE: I started to not like how this flower brooch turned out, so I decided to redo the petal folds on early December. The result worked so much better with this fabric weight. The bloom’s so much nicer and prettier! See the modified version below.
[shashin type=”photo” id=”8452″ size=”xlarge” columns=”max” order=”user” position=”center”]
The fifth one is the one I’m absolutely excited about. I honestly did not think it would turn out as good as it does. I saw a girl at a restaurant wearing black-tulle-layered headband, and the image stayed in my mind for so long that I just have to try making it myself.
Using polkadot shiny polyester fabric, I cut three different sizes of rectangular shapes. The biggest size is about 5″ long and I use them for the base. The middle size is 3.5″ long and I use them as fillers in the middle layers. The smallest ones are 2″ long and they’re on the center. Then I run a top stitch in the center of these cut-outs, and I gather them in the middle.
[shashin type=”photo” id=”7540,7541,7542,7543″ size=”medium” columns=”2″ order=”user” position=”center”]
From here, I cut out two identical small oval shapes from black felt. Then I arrange the polkadot cut-outs and stitch/glue them on one of the felt shapes, sprucing them with black tulle (I just love tulle!) very sparingly. I also created a black rose bud using the same way I did for the DIY Gold and Girly Flower Headband. After all the stitch/glue job is done and the black rose bud is securely in place, I check where to put the petals on the black headband. Using the second felt piece, I glue the polkadot petals securely on the black headband.
[shashin type=”photo” id=”7544″ size=”large” columns=”max” order=”user” position=”center”]
Et voila! I really love this, it’s so cute and cool.
[shashin type=”photo” id=”7632″ size=”large” columns=”max” order=”user” position=”center”]
So there you go. Five Flower Accessories that I get to complete before I go away for a bit. I’m really excited to use some of them myself and give away the rest to my relatives, including some other DIY flower accessories I have done in the past.
[shashin type=”photo” id=”7633″ size=”large” columns=”max” order=”user” position=”center”]
Until next time, everybody! A bientot,
Musank
Trackbacks/Pingbacks