
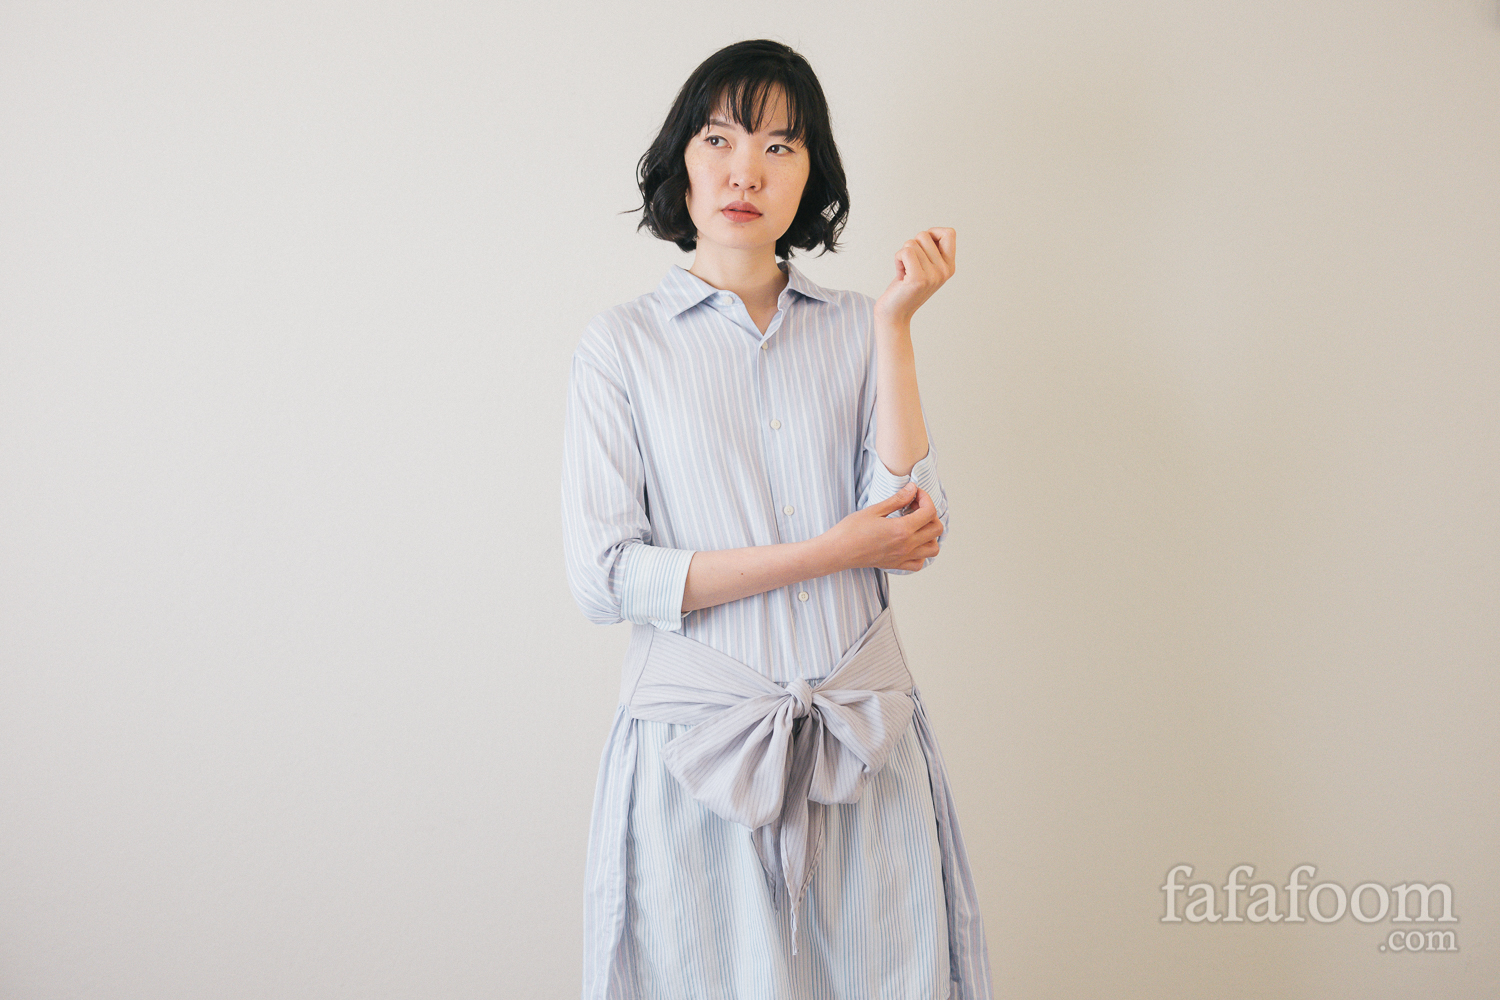
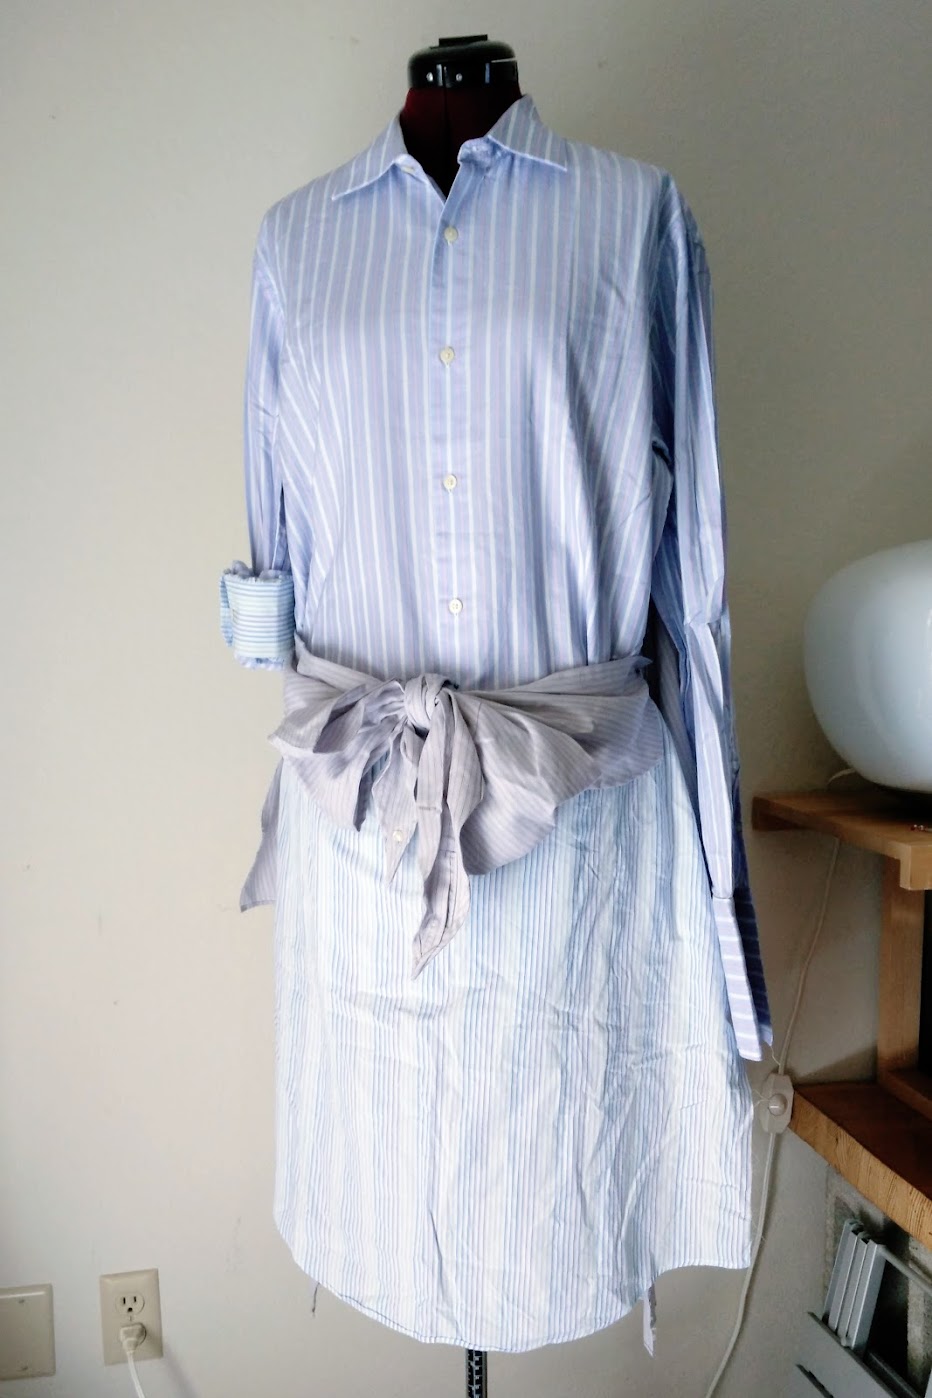
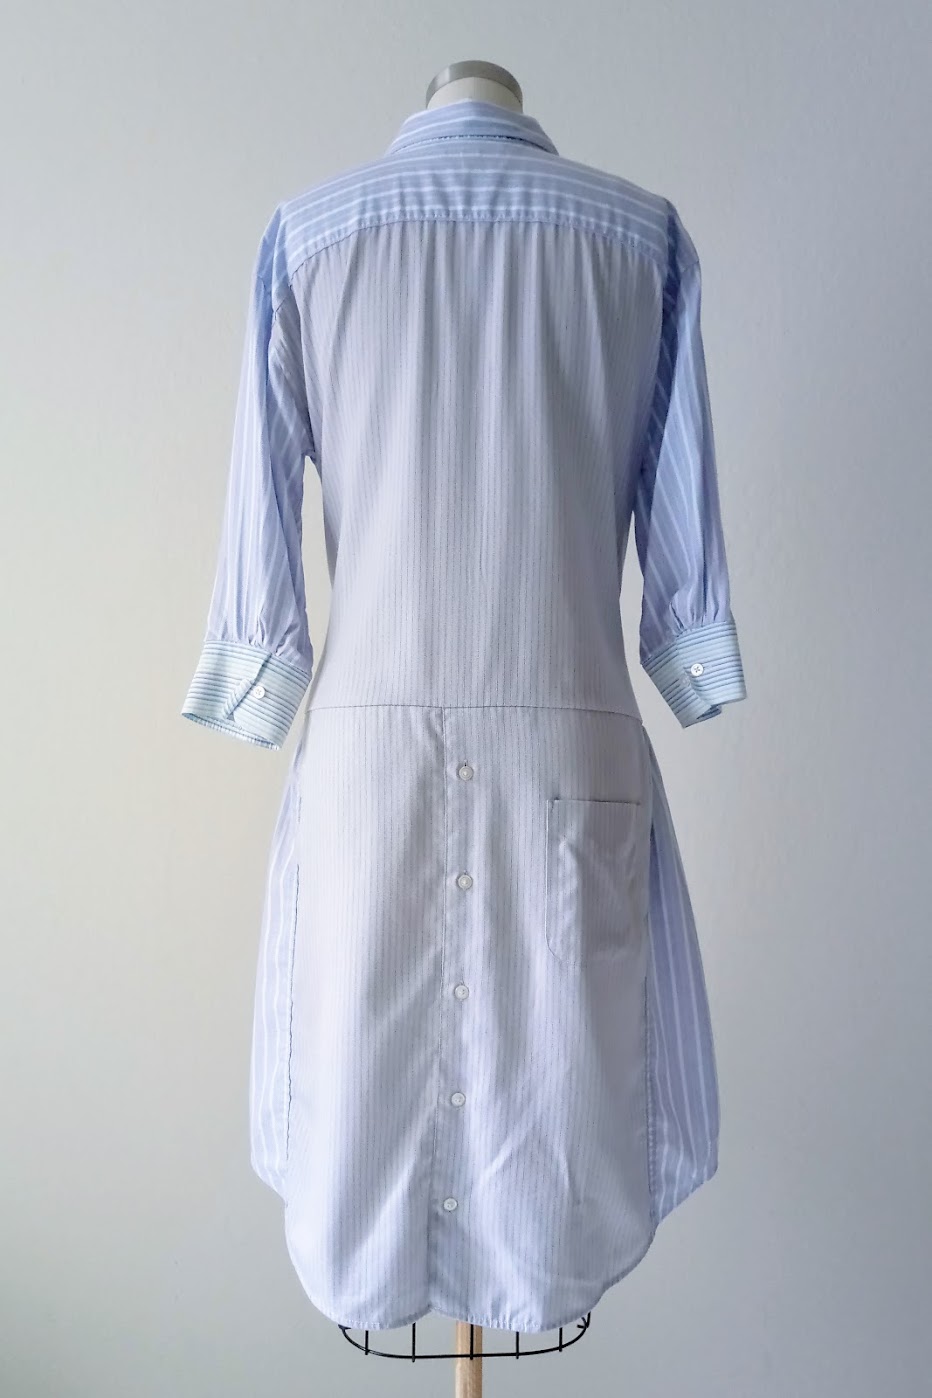
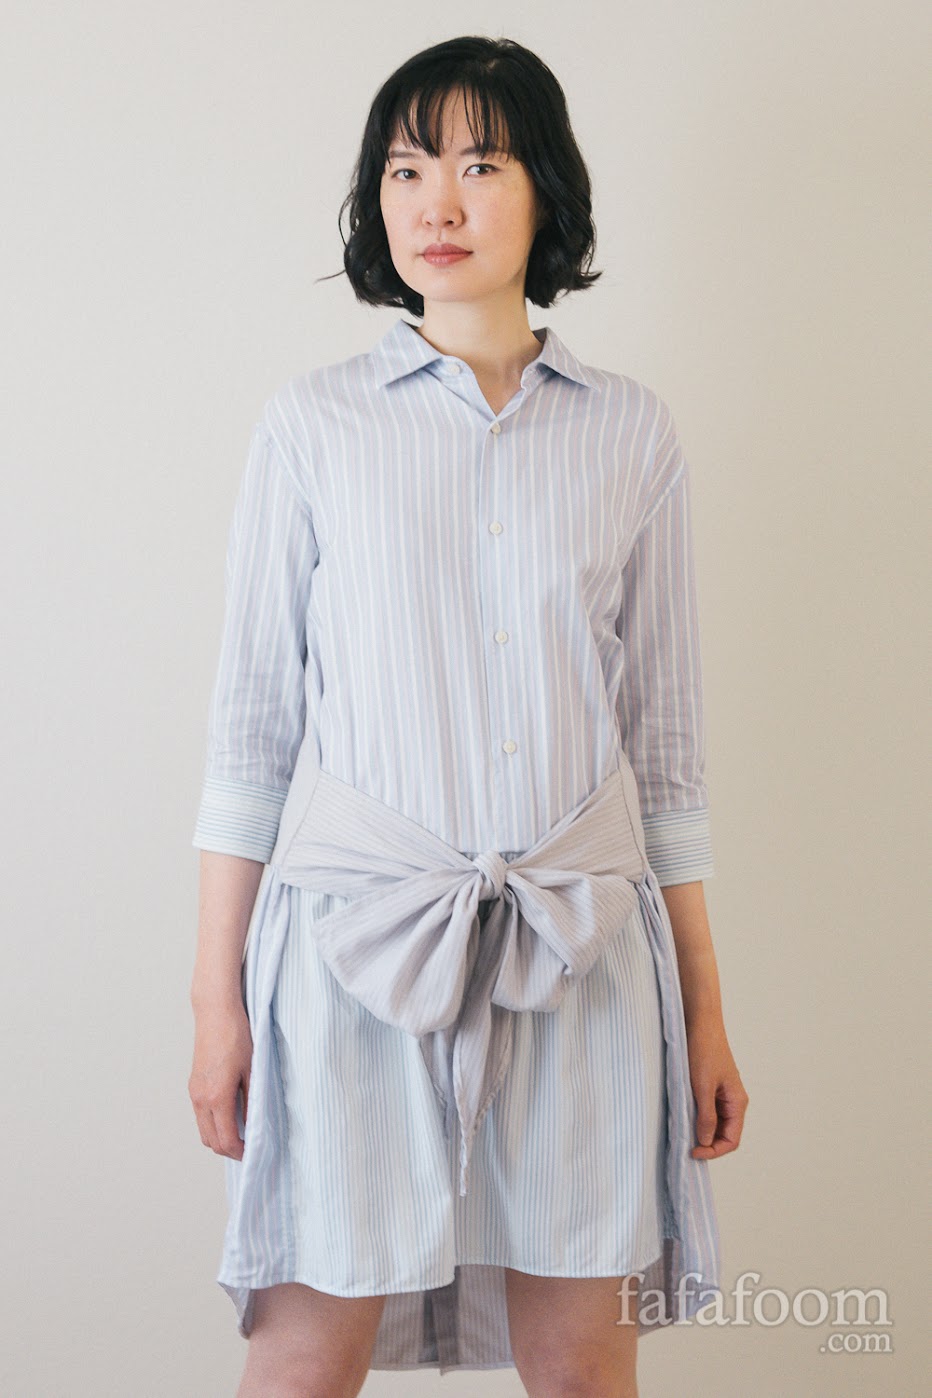
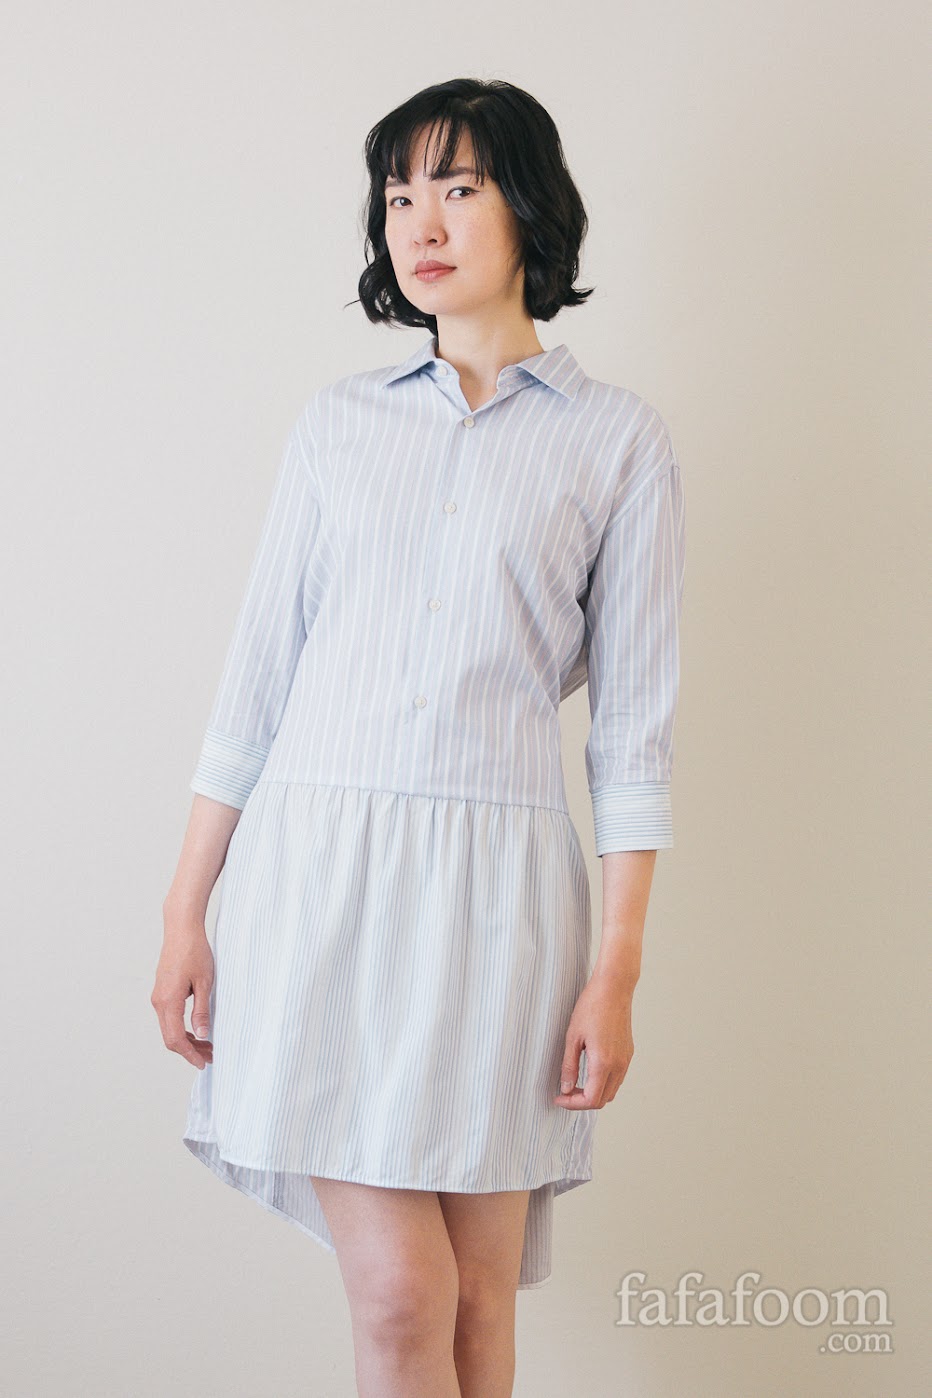
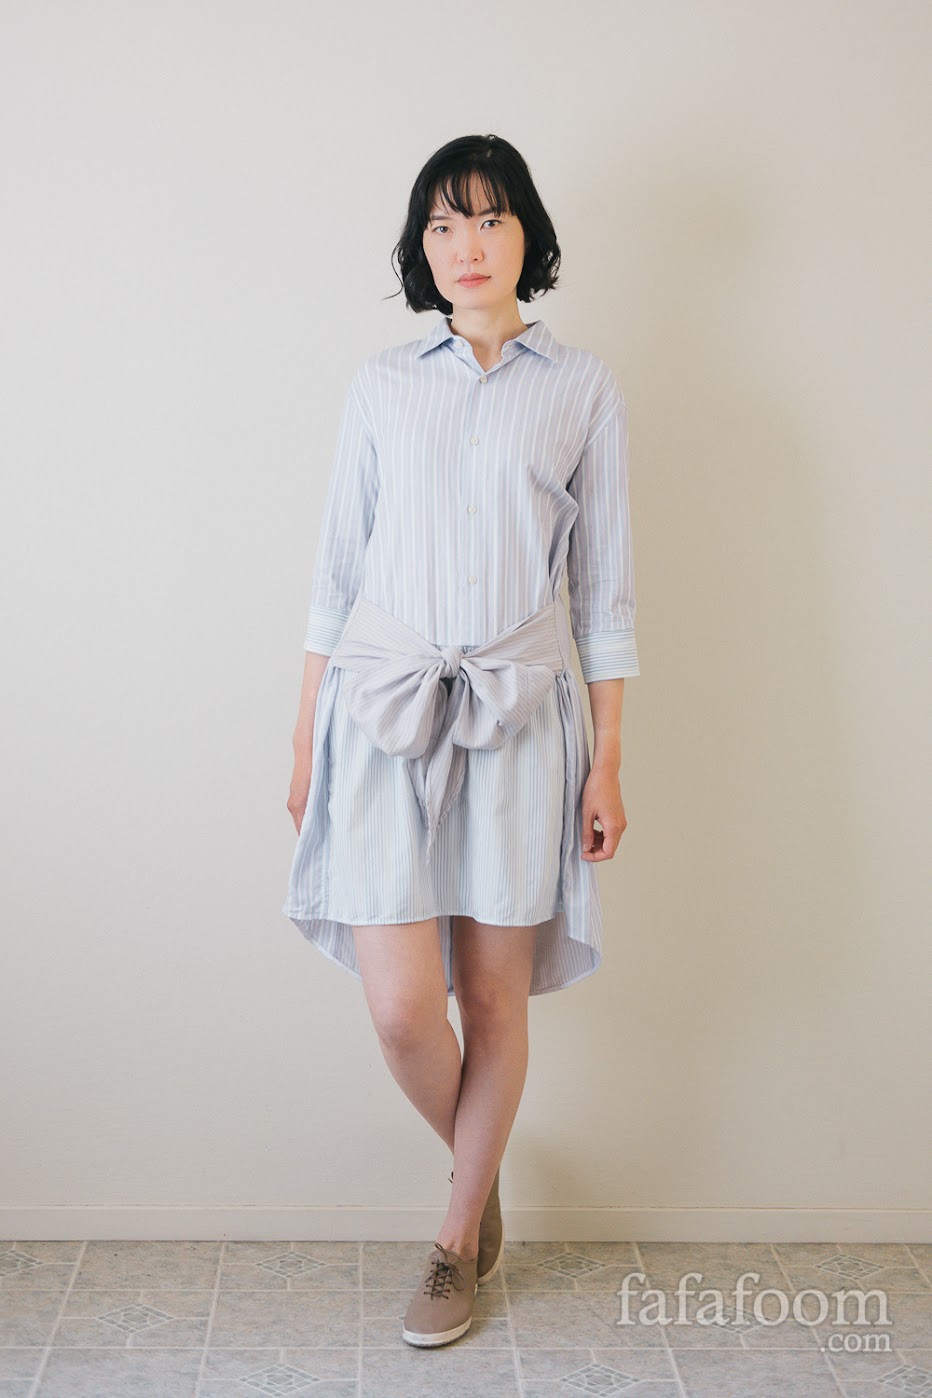
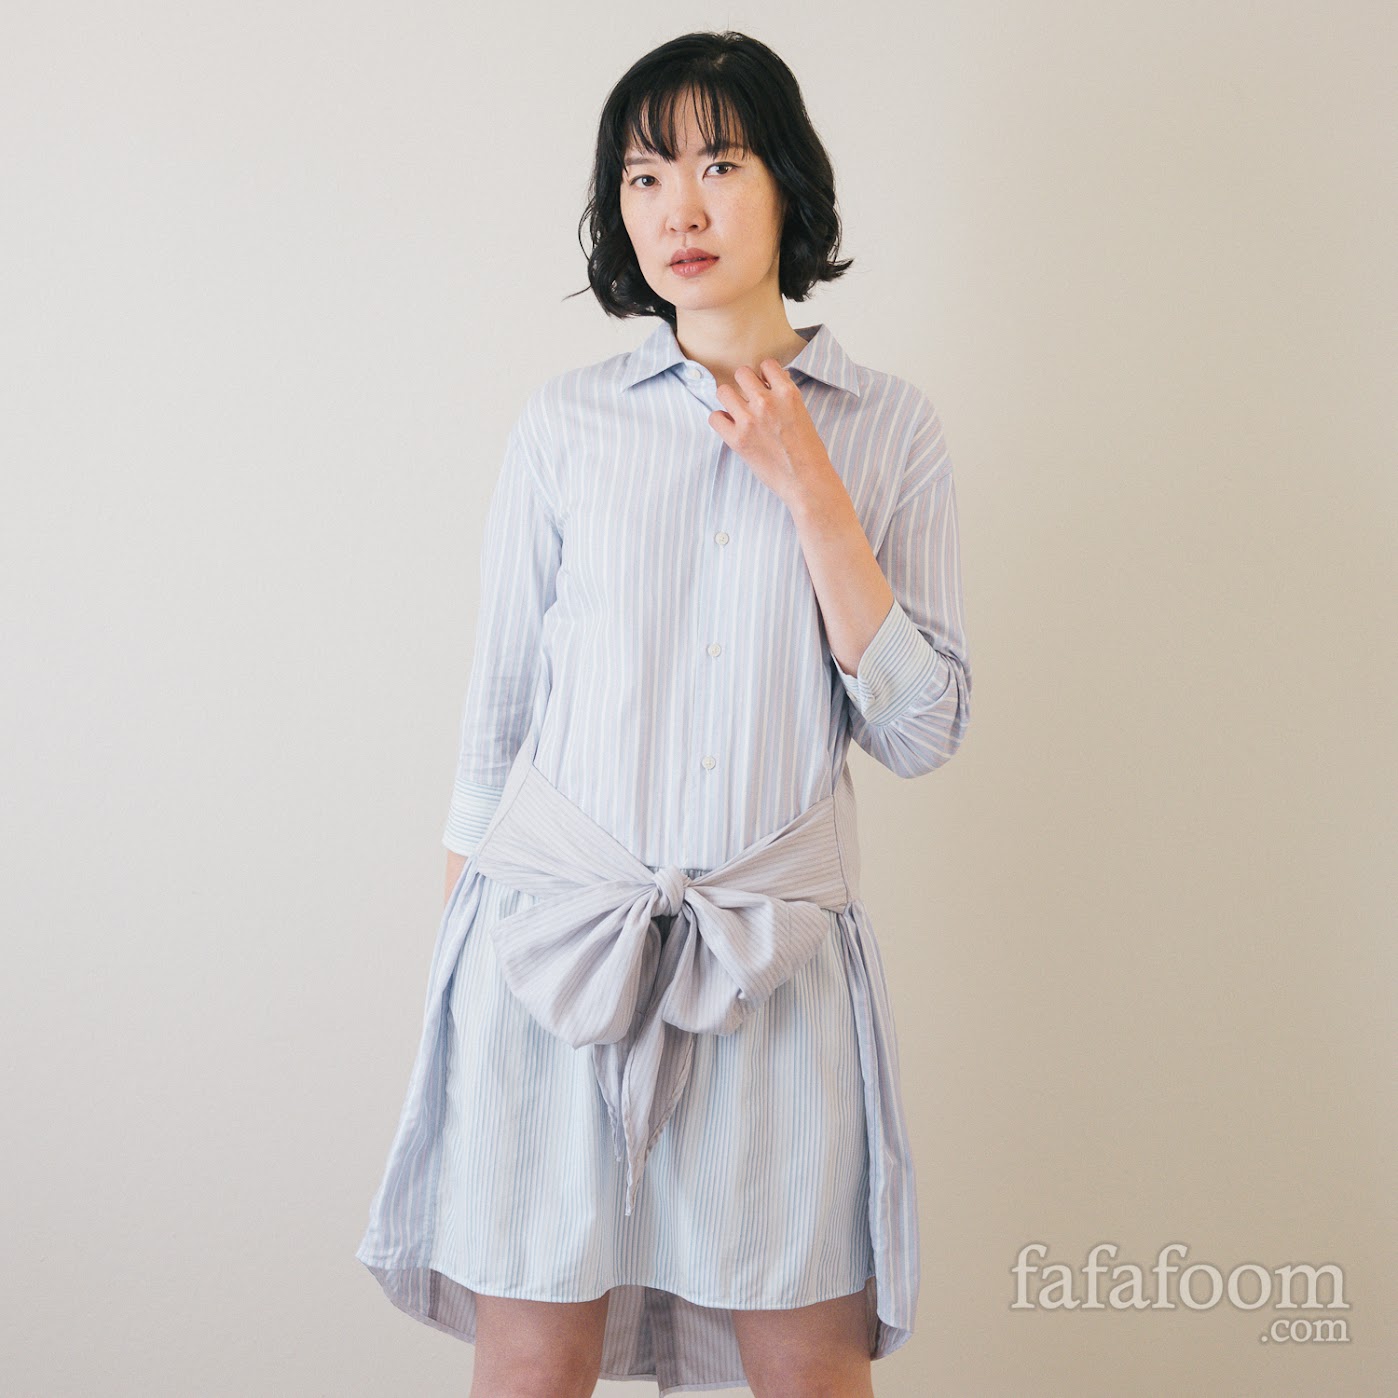
This shirt dress with bow waist tie is assembled from three men’s shirt pieces. Most of the pieces were leftovers from past sewing projects. Lightweight and versatile, the bow can be tied on the front or back.
It’s been several years since I got bitten by refashioning and sewing bug. With each DIY project, I become more aware of leftover pieces. At some point, they accumulate enough to become materials for a project.
This shirt dress with bow waist tie is one such project. It uses leftover pieces from previous DIY projects involving men’s shirt refashions.
The general inspiration comes from Koko Yamase’s Kakkoii Couture Remake book, which features many dress shirt refashions.
.
Ultimately however, this 10 Crosby Derek Lam tie waist shirt dress and this Margaret Howell drop waist shirtdress were the catalysts I needed to start making one of my own.
Subscribe to my newsletter
After finished making two tops using a blue/light blue/white striped men’s dress shirt, I stored the remaining pieces for later use.
I also started working on another project using a gray/lavender/white striped men’s dress shirt, but it got abandoned half way. Somewhere along the line, I thrifted yet another men’s shirt in blue/light pink/white stripes fabric.
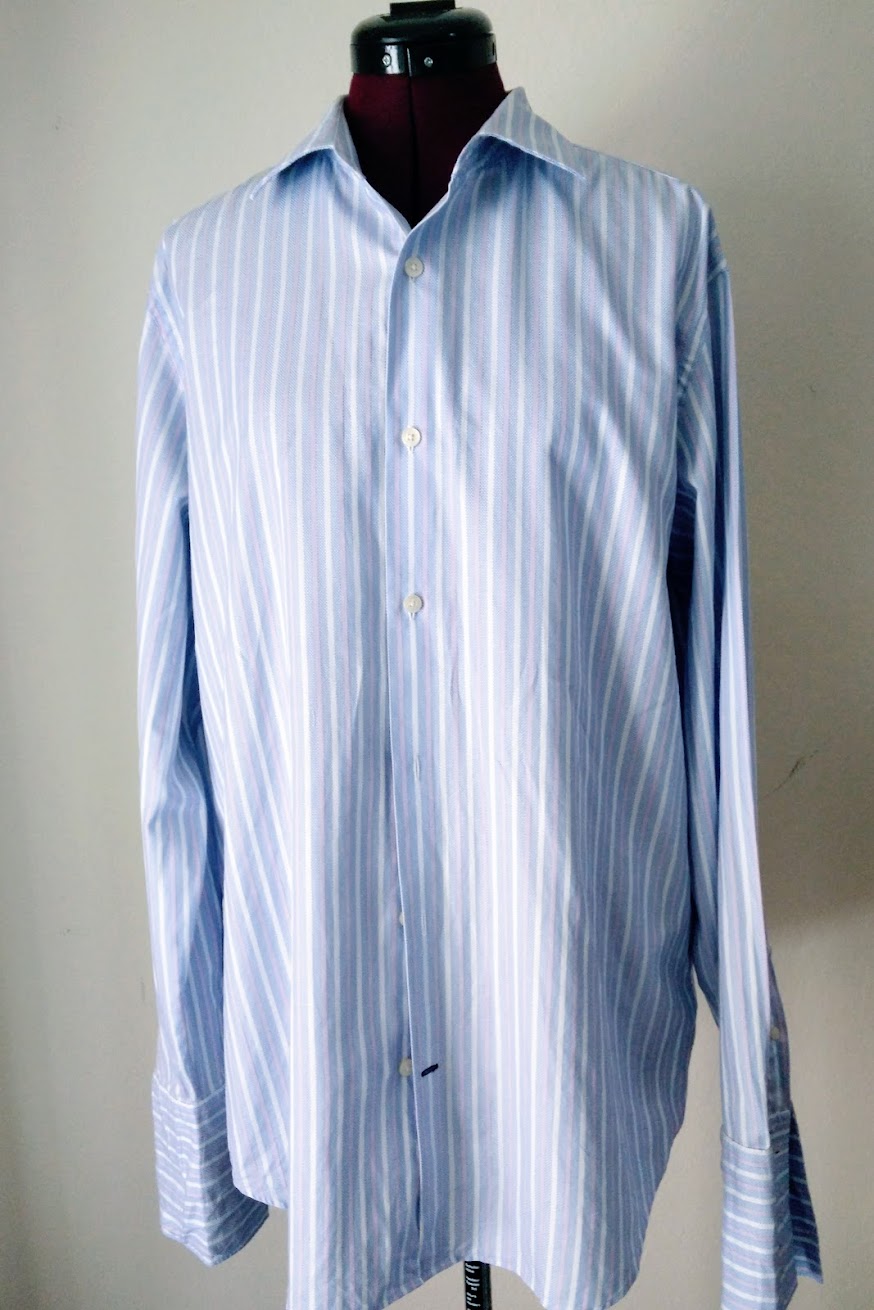
So I gathered them all, as well as one still fully intact woven dress shirt I got from a thrift store a while ago. Below is my complete list of materials for this DIY project.
DIY Shirt Dress with Bow Waist Tie Materials:
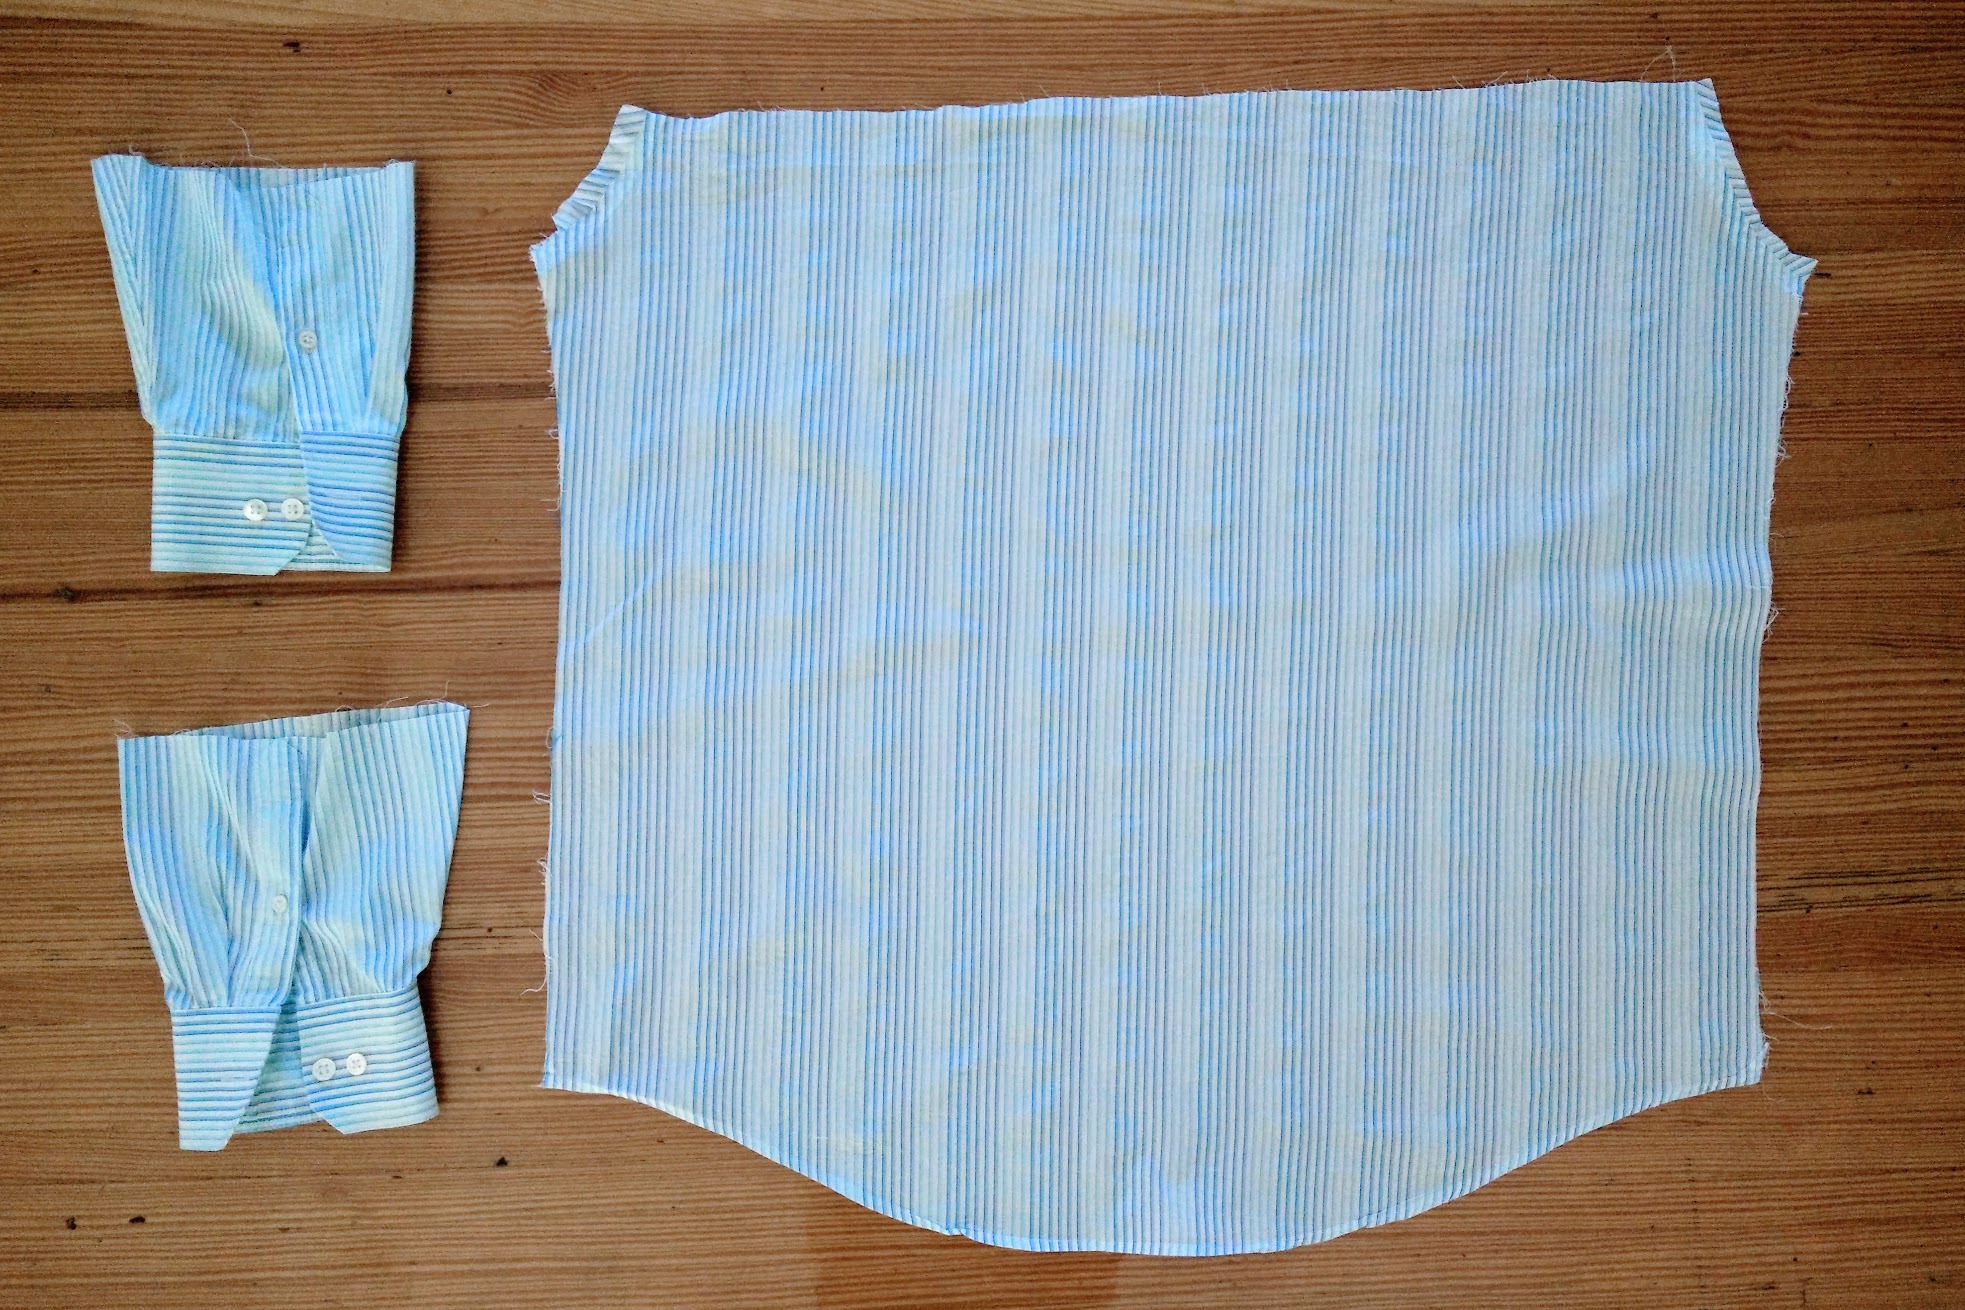
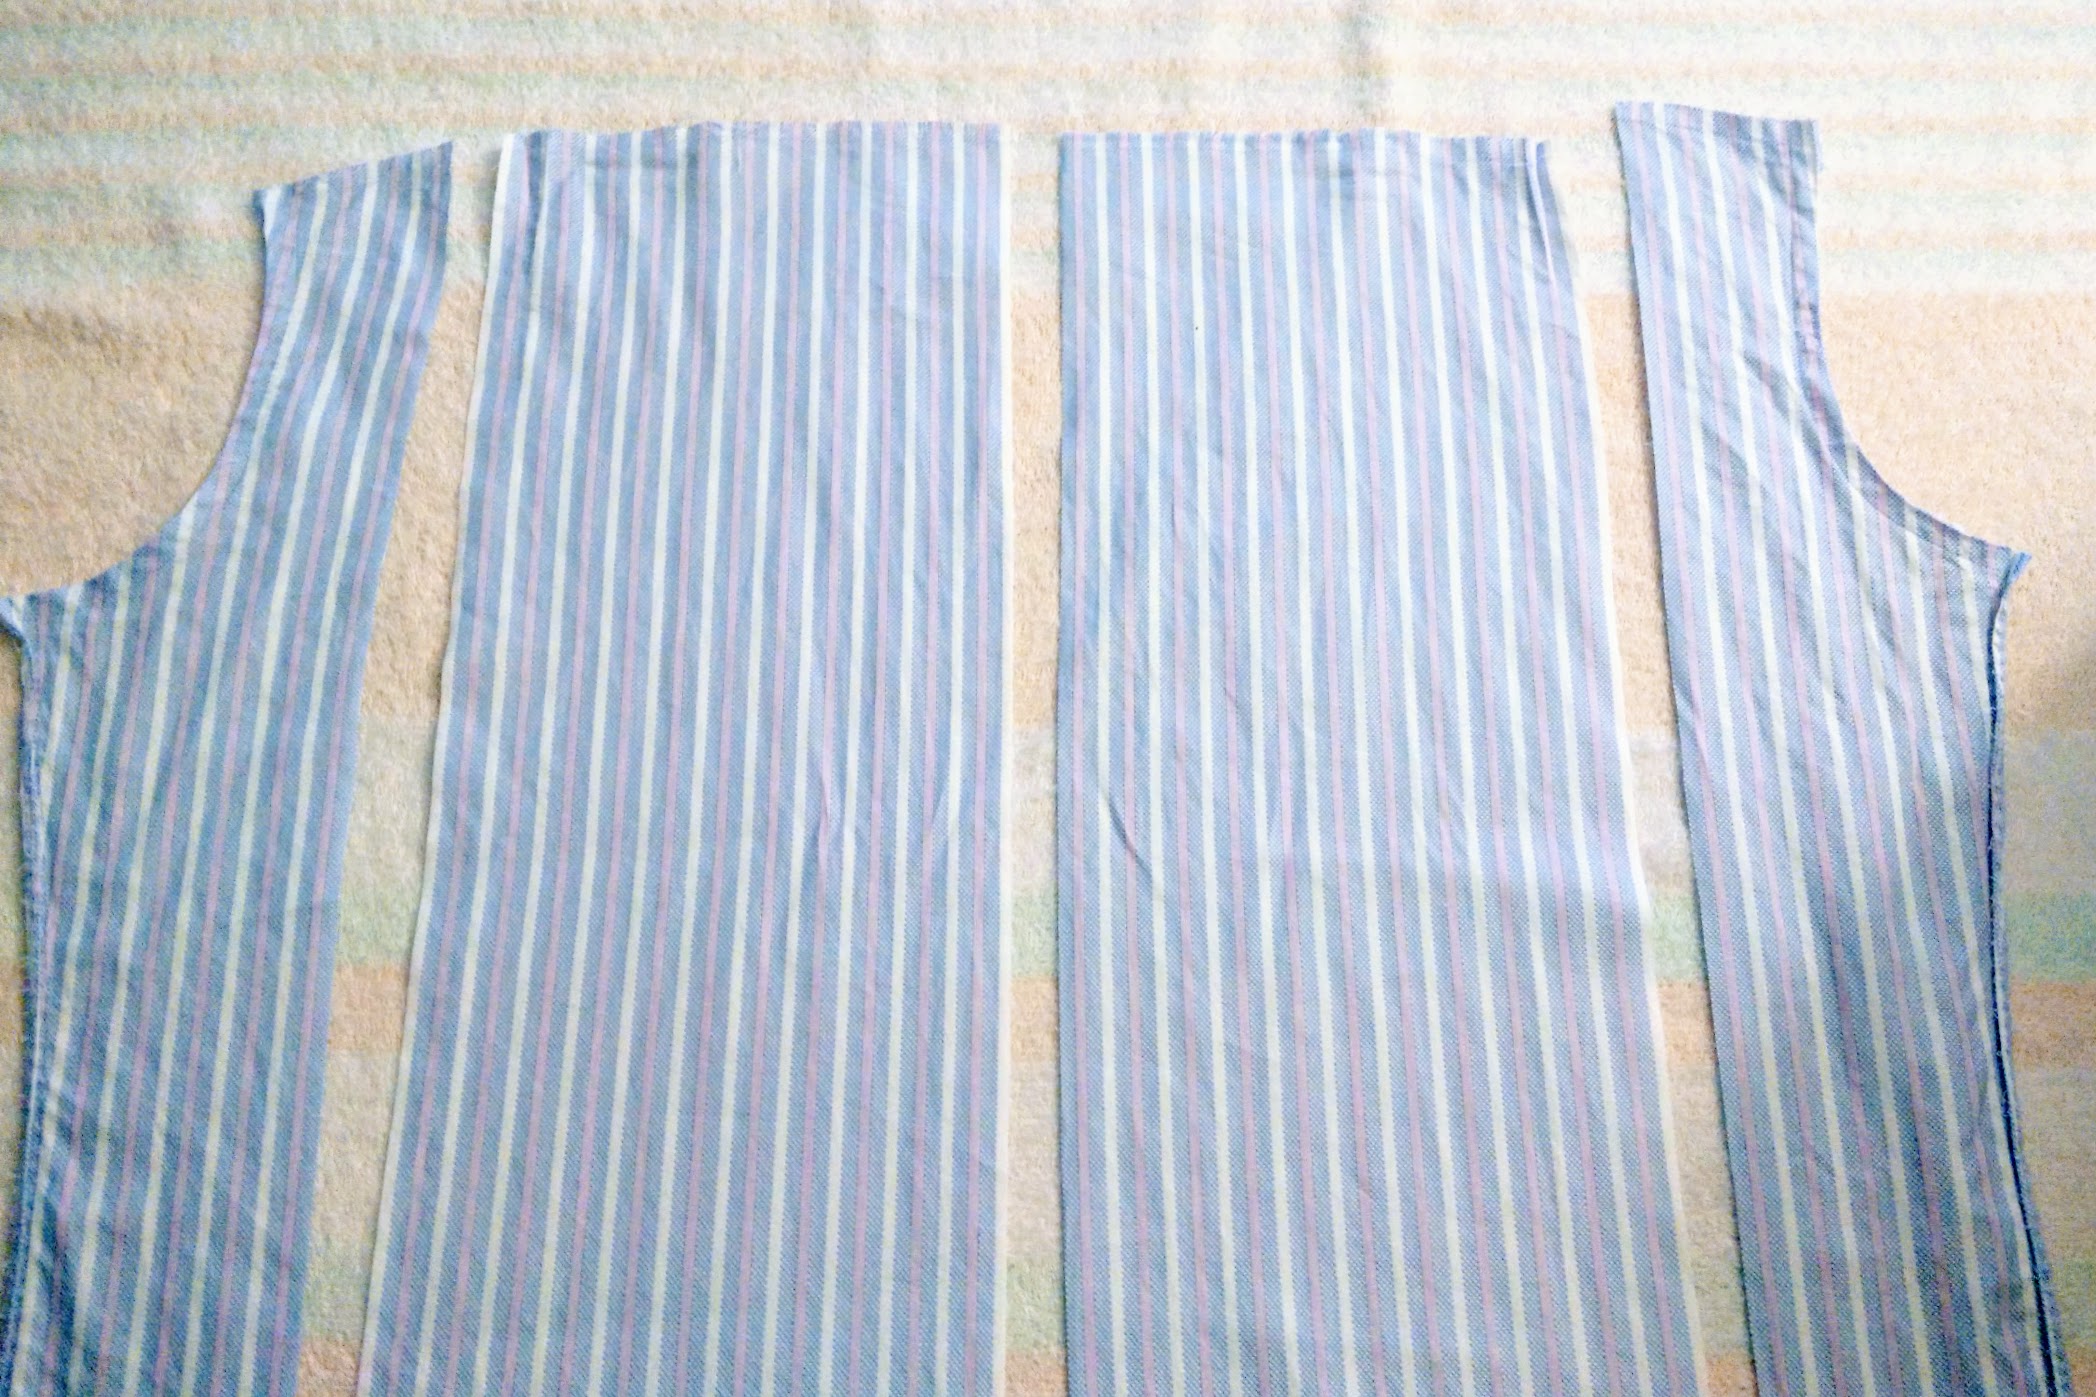
- One whole blue/pink/white striped men’s shirt (pictured below, left)
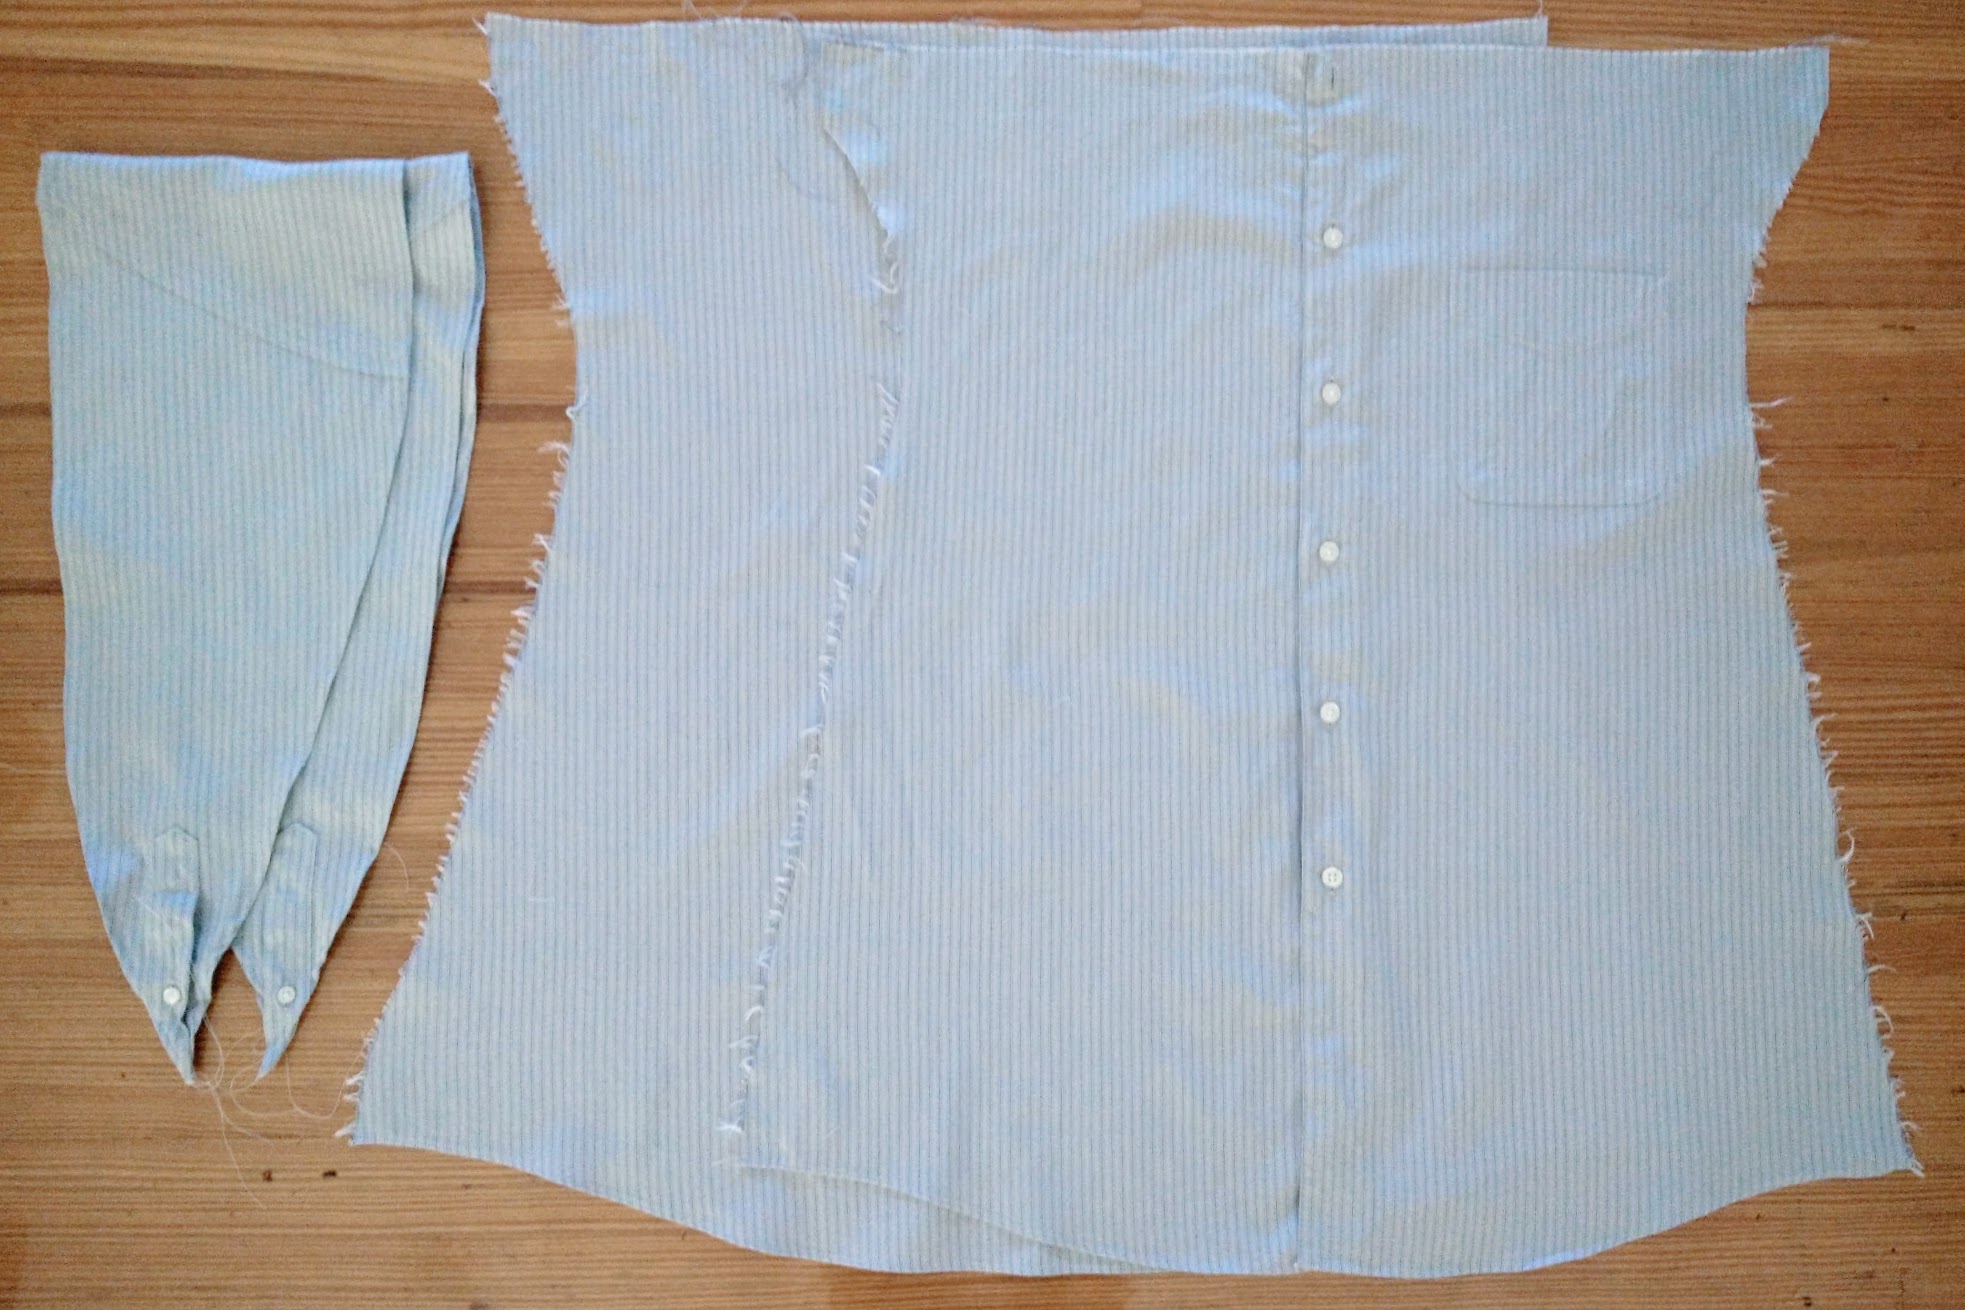
- Pieces from gray/lavender men’s shirt: front panel, back panel, shaped sleeve parts (pictured below, top right)
- Pieces from blue/light blue/white men’s shirt: back panel, cuffs (pictured below, bottom right)
- Mechanical pencil and ruler
- Seam reaper
- Sewing machine (mine is Brother CS6000i model)
- Needle and Ivory thread (I used Schmetz Universal Needle Size 80/12)
Design Preparations
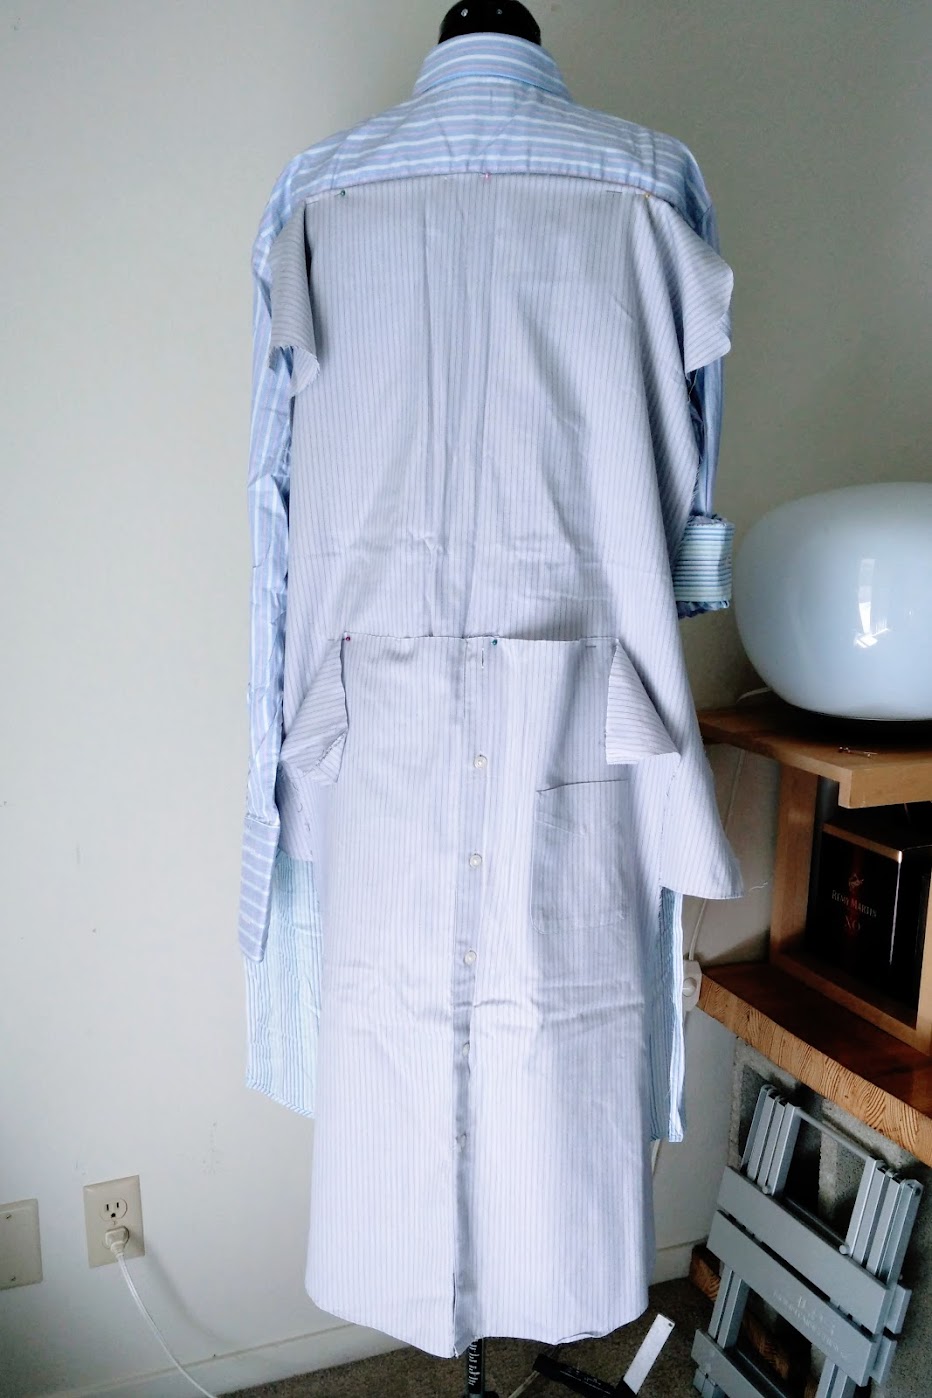
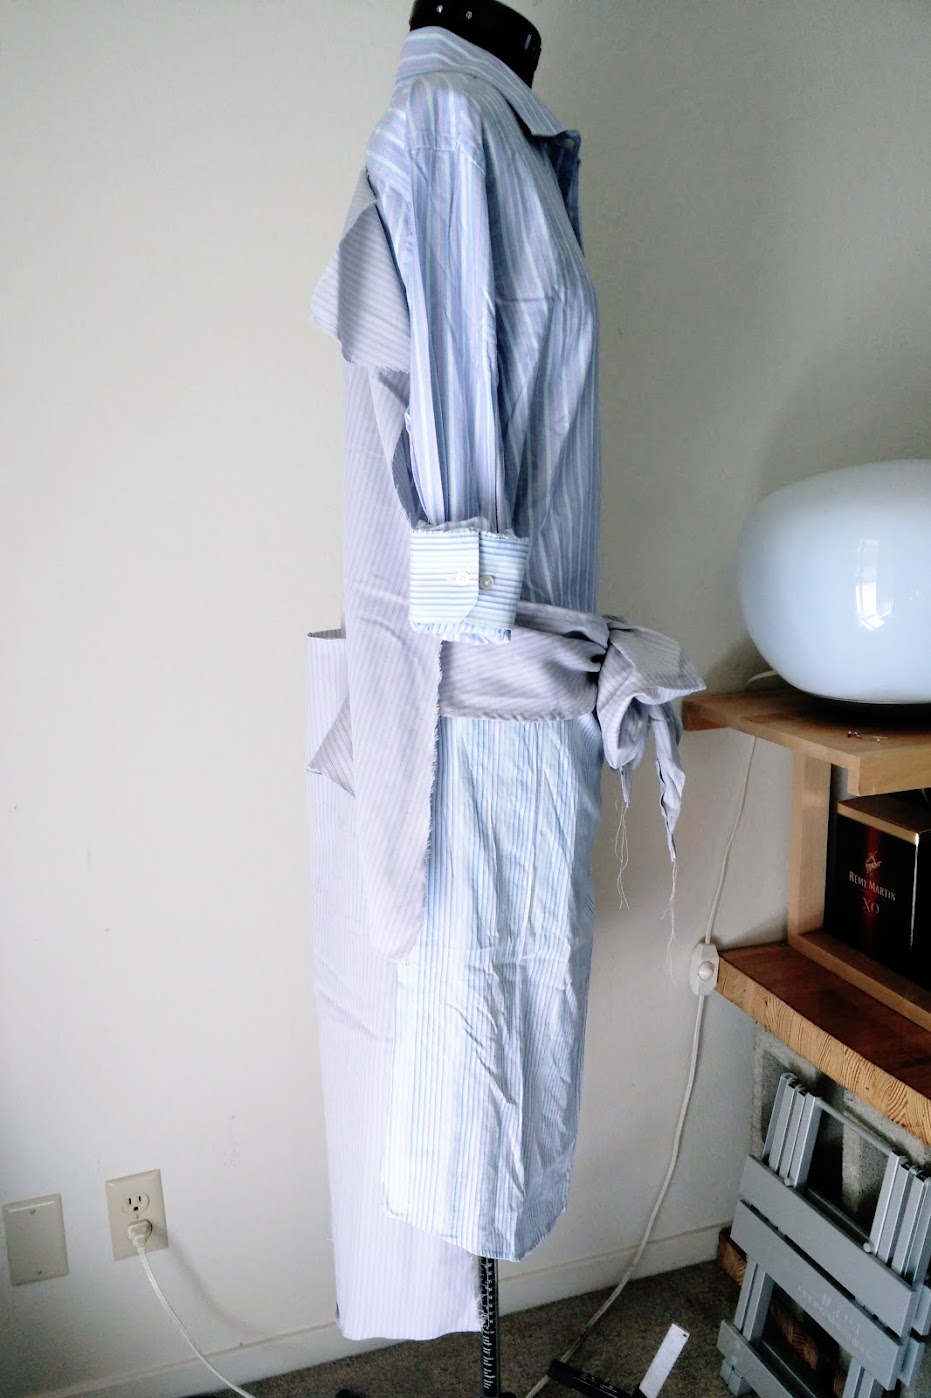
I started the project by casually pinning the shirt pieces on my dress form, played around with several configuration options before deciding on this arrangement.
The process is very casual and organic, and I decided on this rough measurement guidelines:
Center front collar to mid-torso 15.5”
Shoulder to waist 20”
Shoulder to top of waist tie 16”
Waist tie length 24”
Waist length: 23.5” front, 24” back
Skirt length 13.5”
Skirt hem circumference 57”
As a side note, I’m thankful that the colors from all three shirts work nicely with each other. Otherwise, it would’ve been another piece of the puzzle to solve.
Process
For over two weeks of sewing for about 30 minutes to 4 hours a day, I was able to create this shirt with dress bow waist tie. Here’s a run down of my process:
First, I took out the back panel of the blue/pink/white striped shirt and replace it with the back panel of the gray/lavender shirt.
I also trimmed the lower front panel of the blue/pink/white striped shirt to make the shirt’s length match that of the gray/lavender shirt’s back panel.
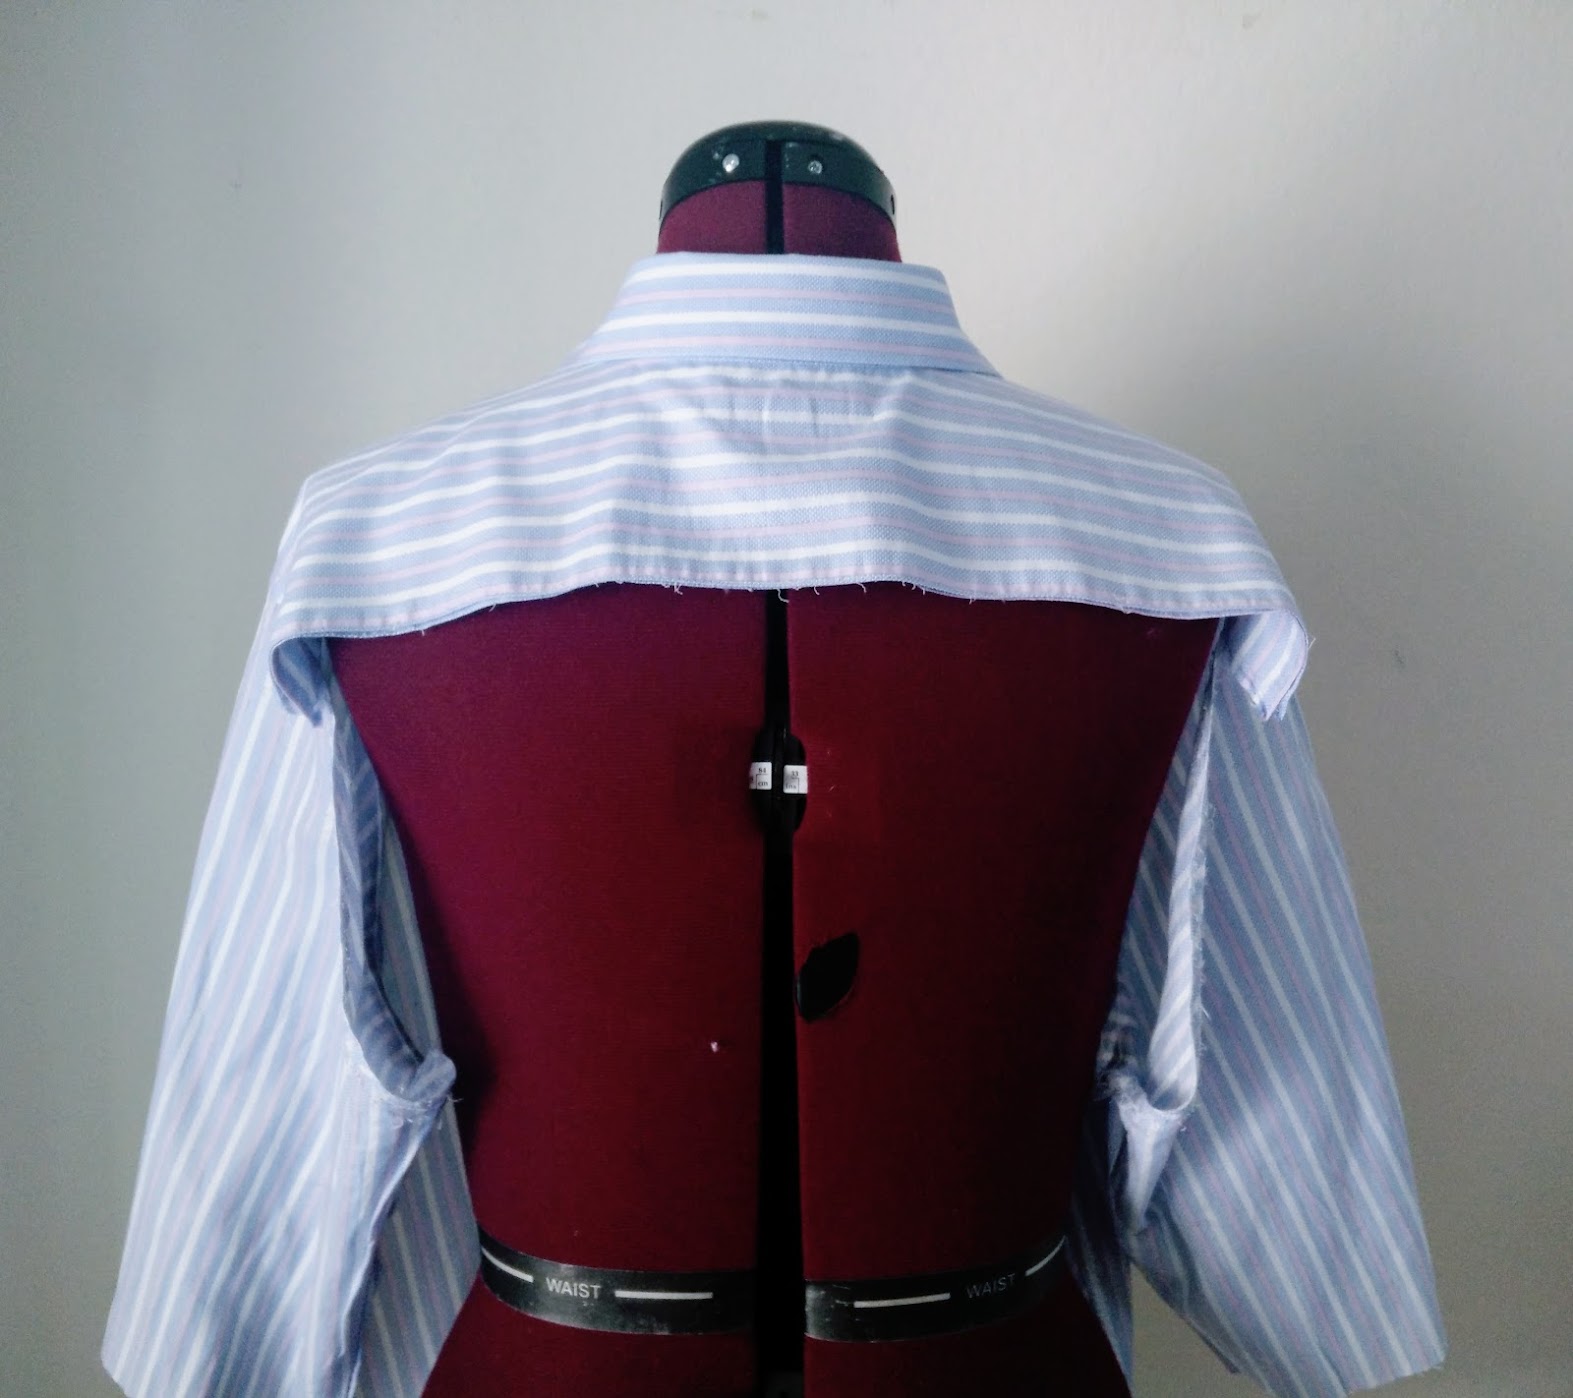

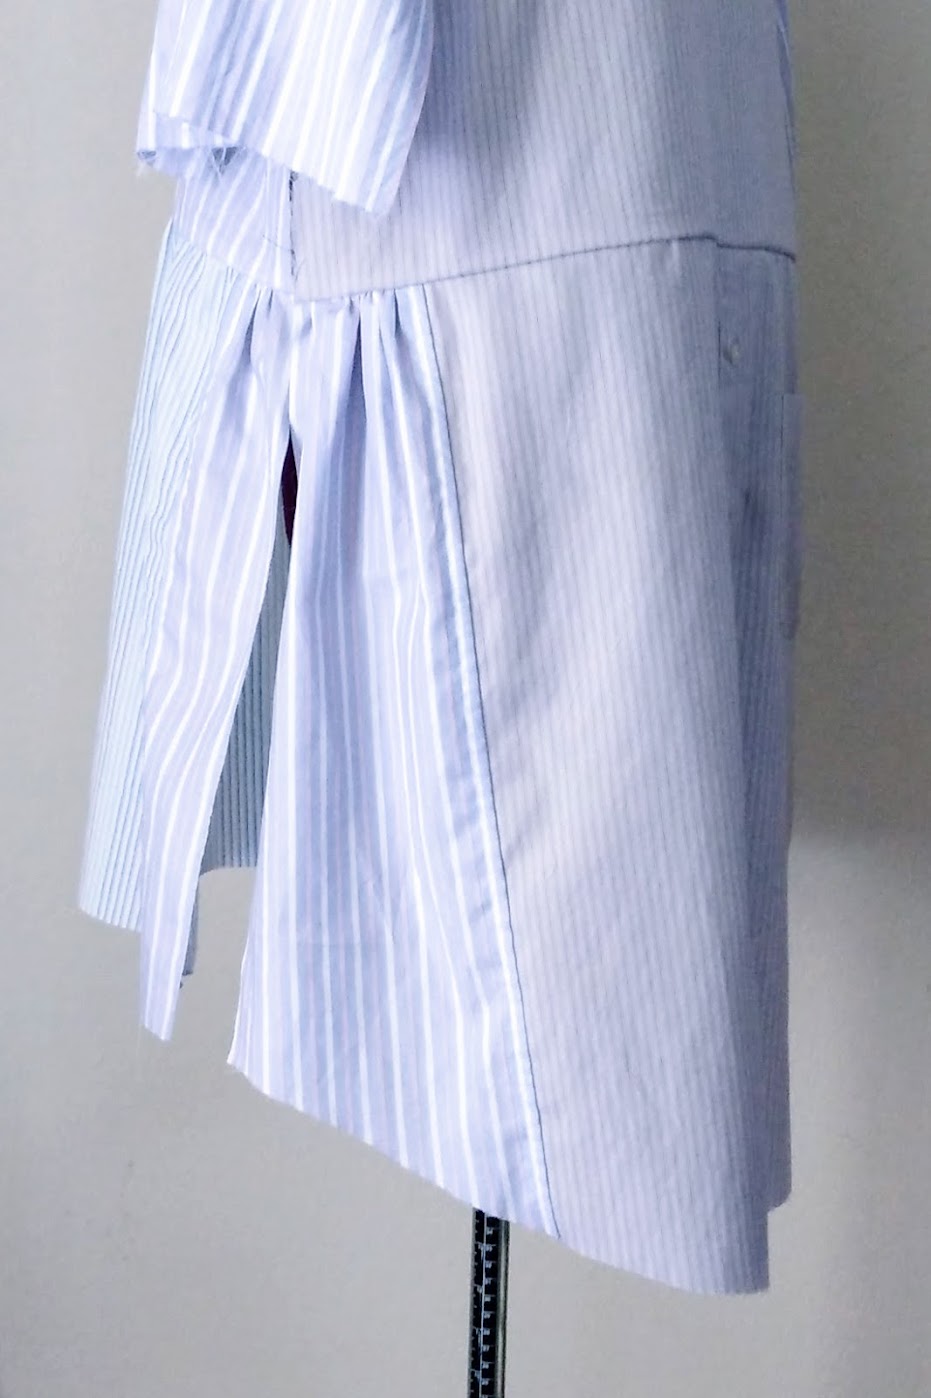
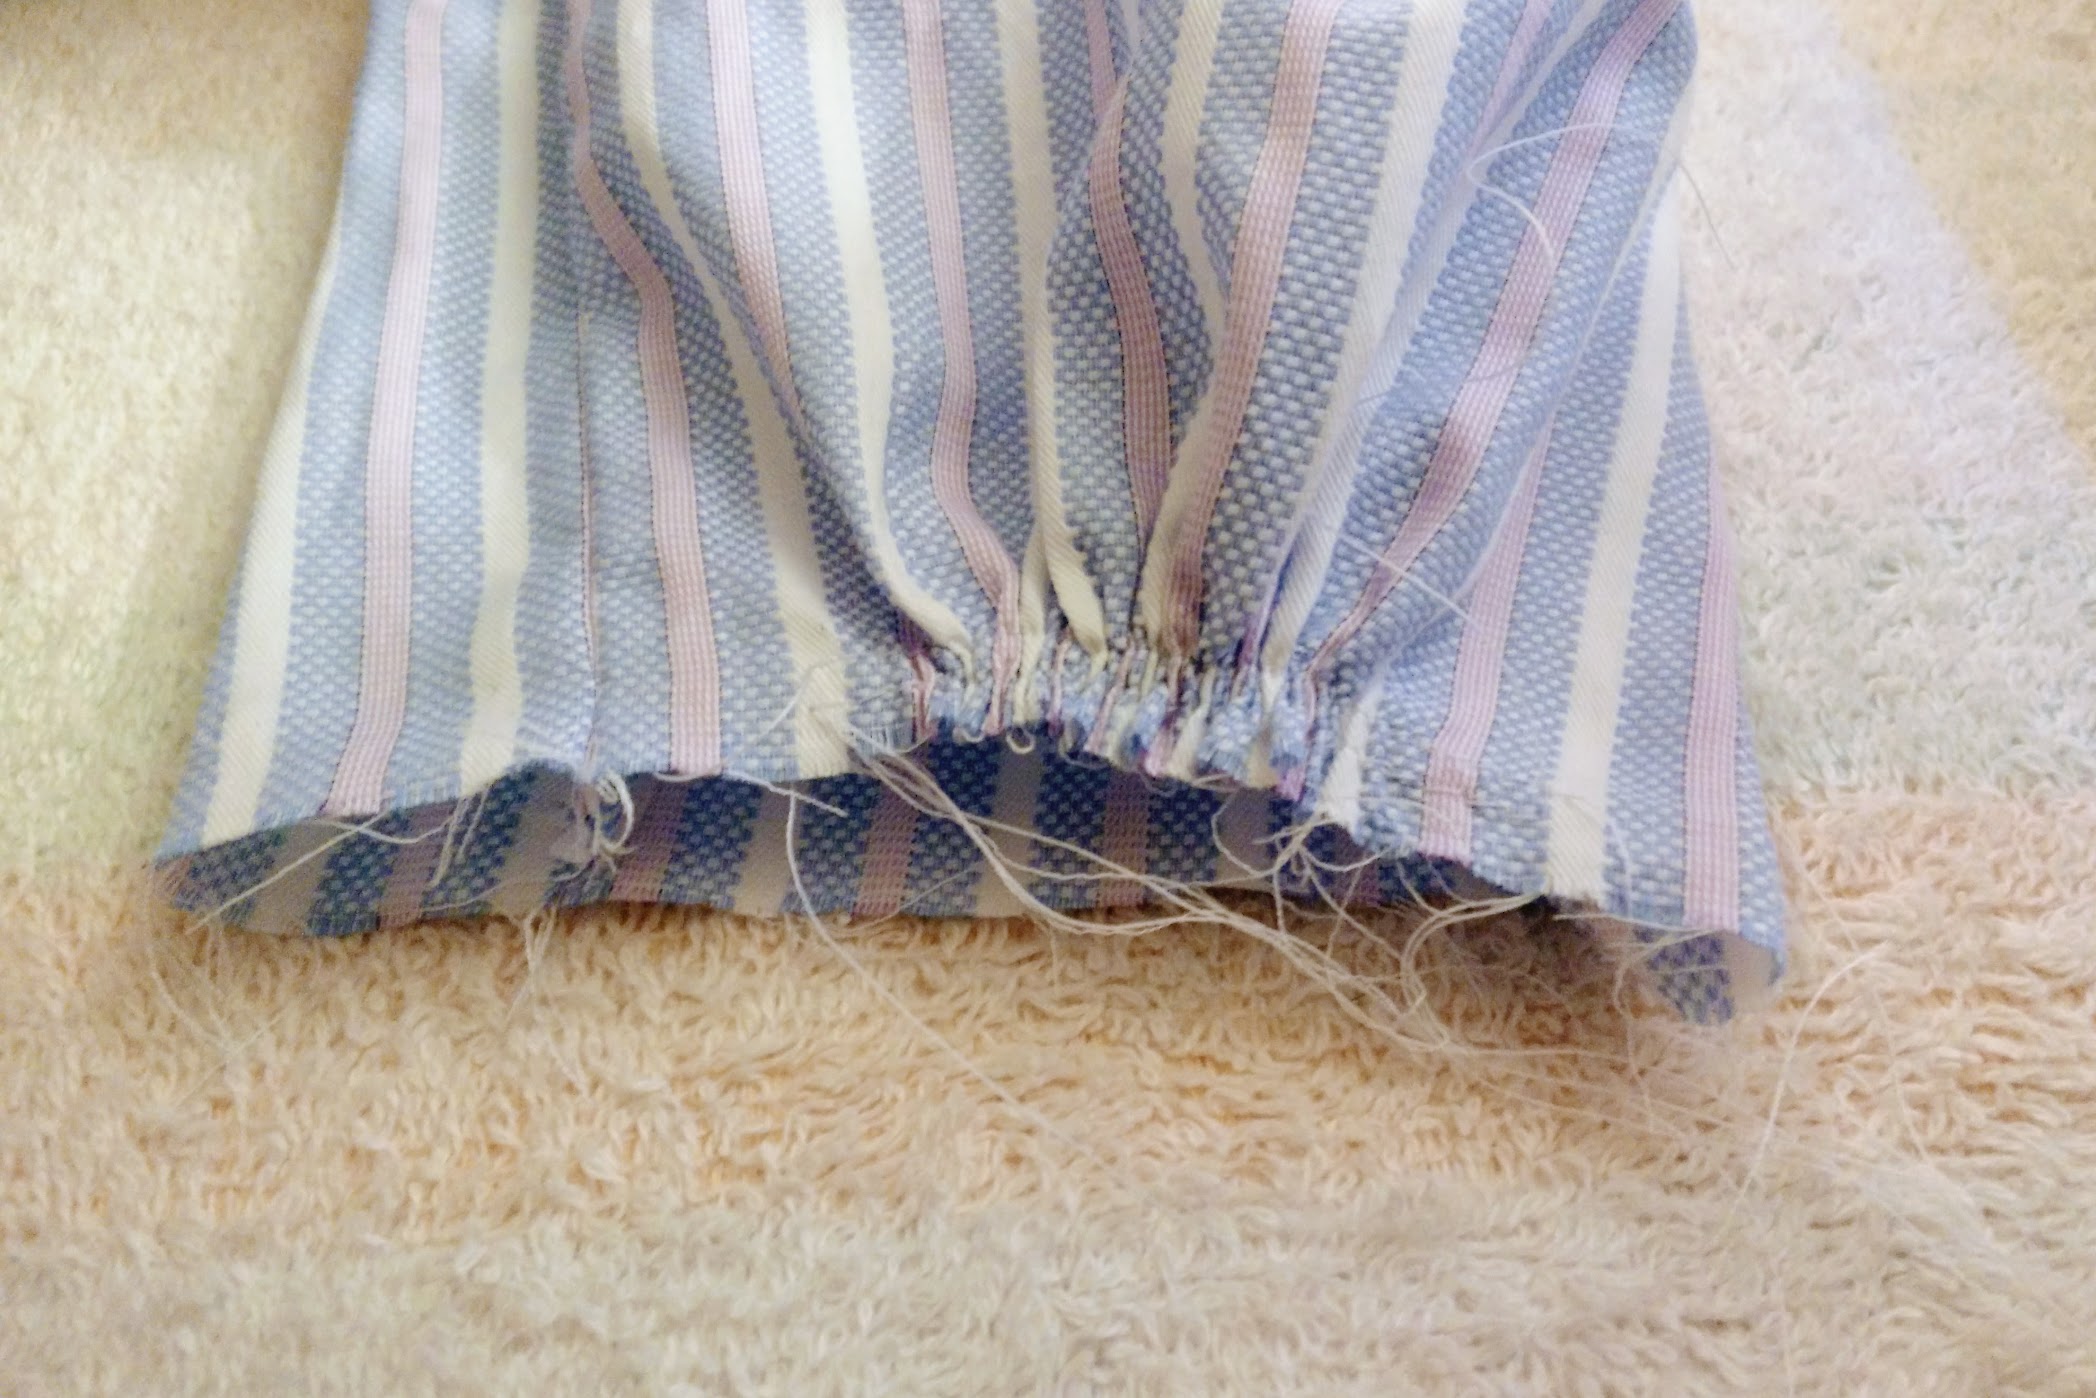
Next, I divided the newly cut blue/pink/white striped back piece to four sections – 2 wide, 2 narrow. This is done to create additional width to the bottom half of the shirt dress.
I attached the wider pieces to each side of the gray/lavender shirt’s front panel. I purposely preserved the curved back so it has a subtle high-low look.

The narrow pieces were attached to each side of the blue/light blue/white shirt’s back panel.
Now I have all the front and back bottom halves ready. The larger curved piece is attached to the top half of the back side, while the smaller rectangular piece is attached to the top half of the front.
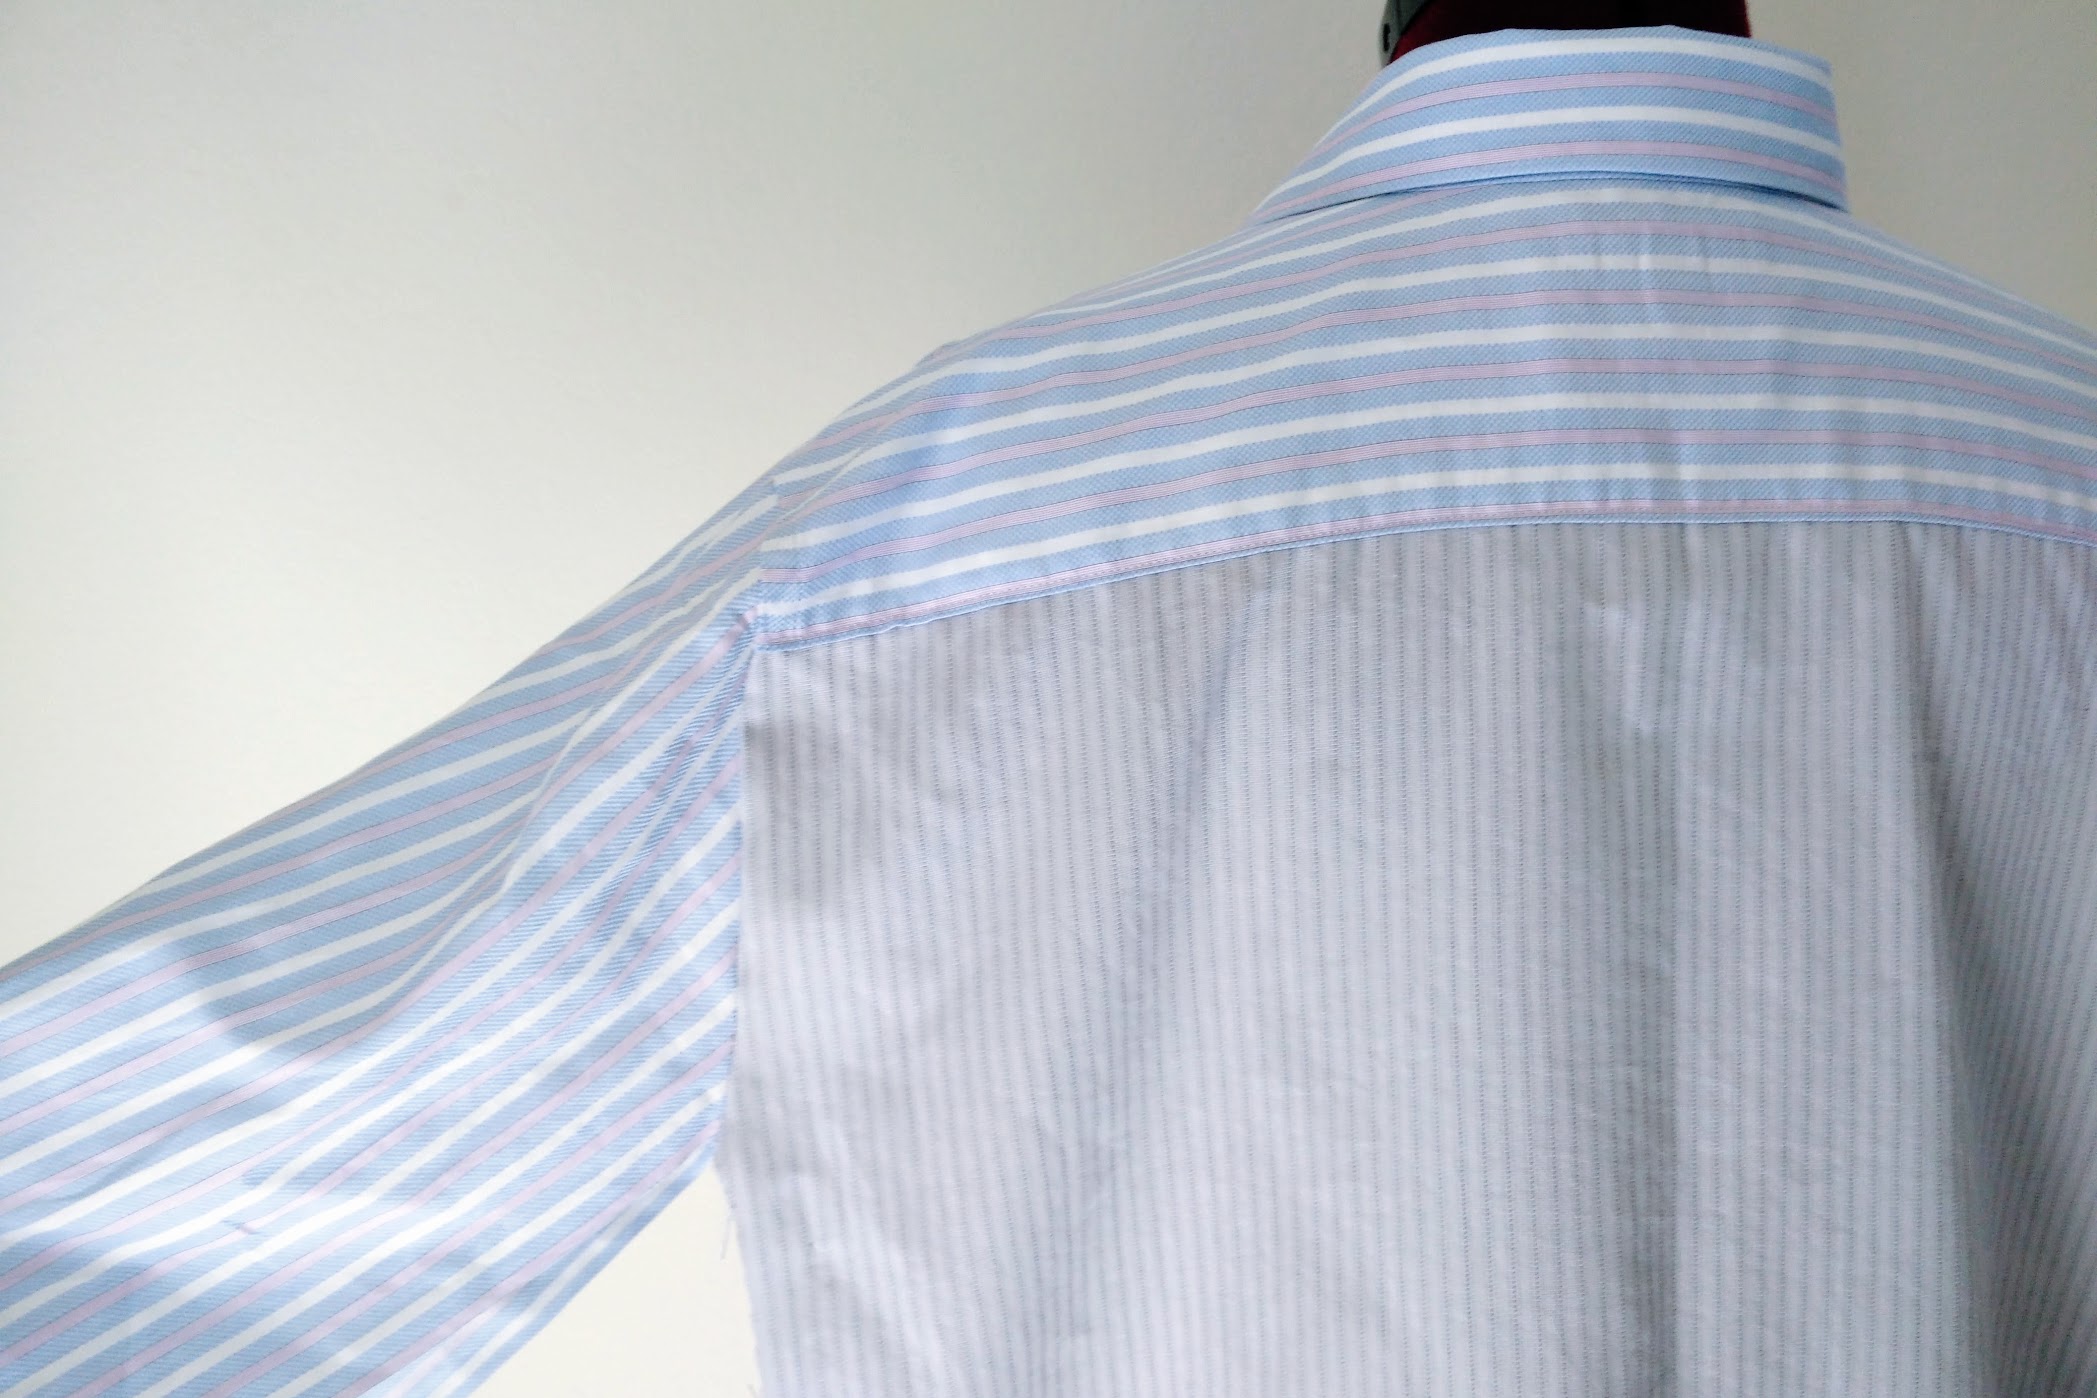
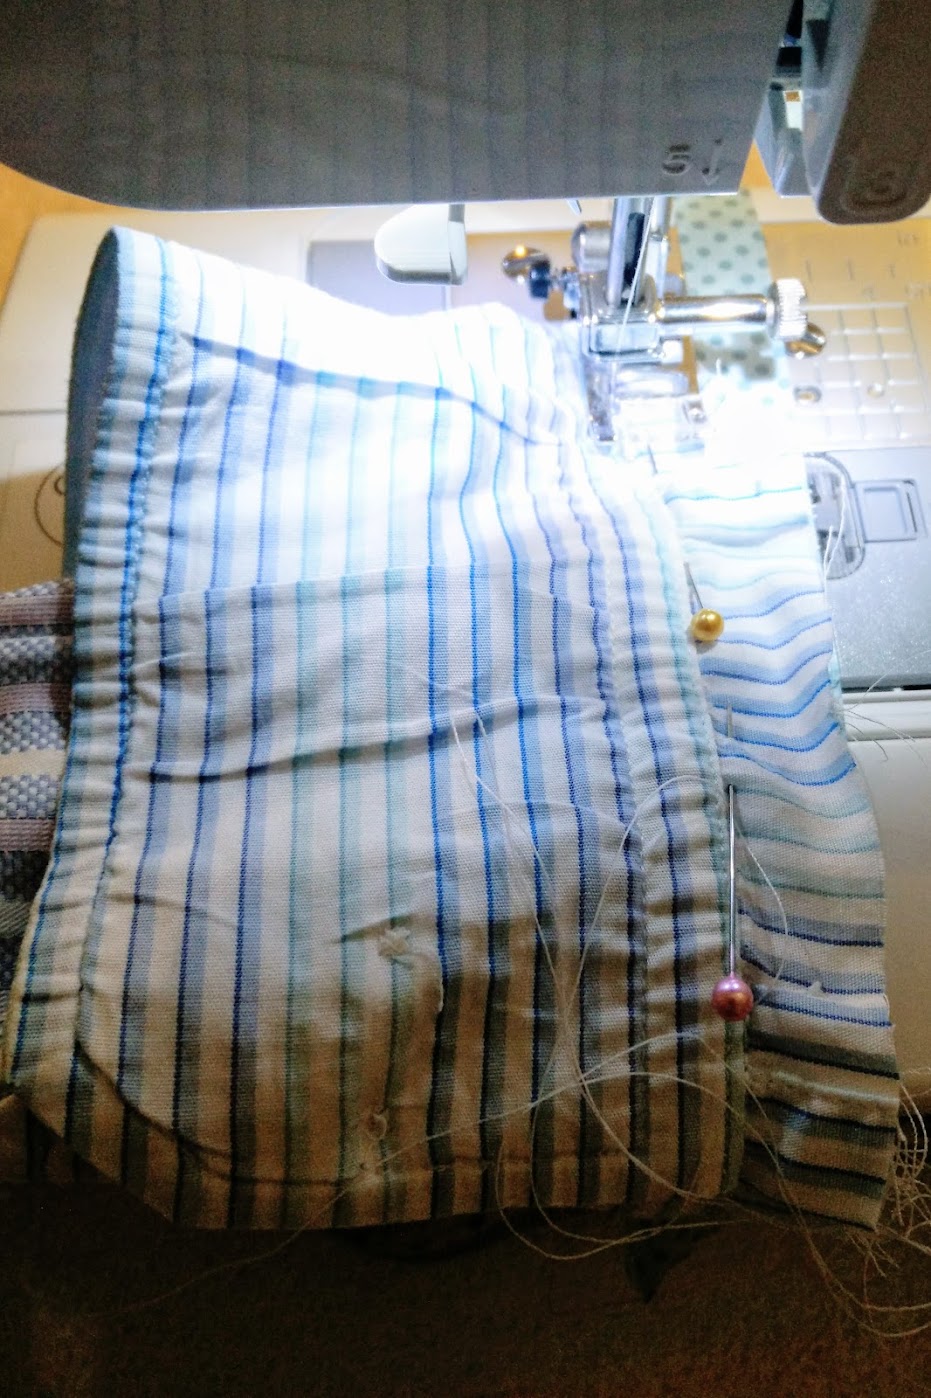
I assembled them, adjusting the hem length and preparing them to have gathers on the edges. Moreover, I also wanted the shirt dress to have elbow-length sleeve, so I chopped off about 8” of the sleeves.
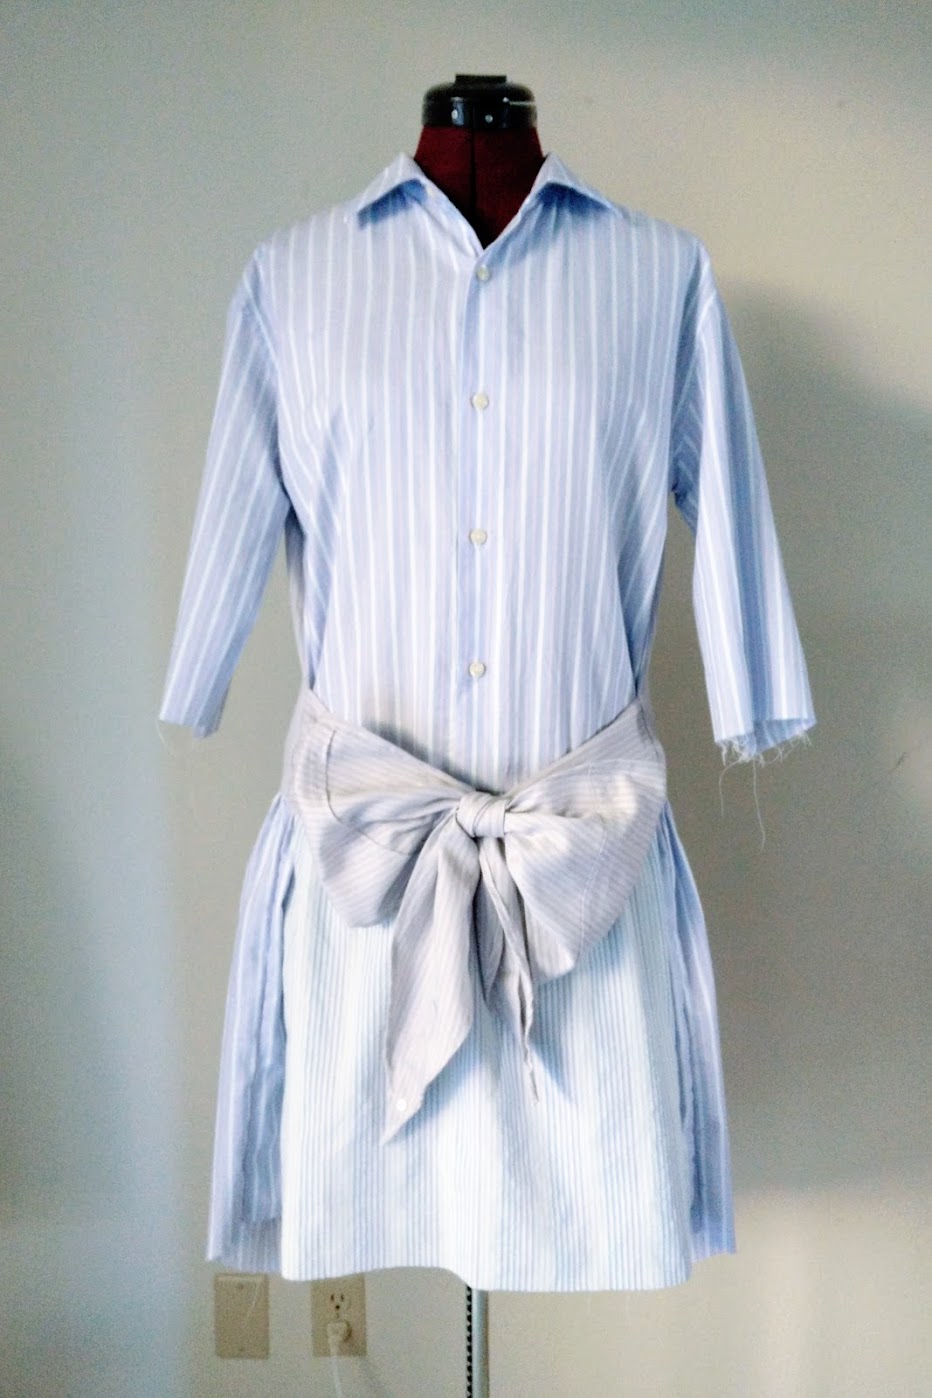
The next to last step is to attach the gray/lavender shirt’s shaped sleeves as waist ties, and finish the side hems.
Last but not least, I cut out the blue/pink/white striped shirt’s shirt to elbow length and attach the blue/light blue/white shirt’s cuffs to the sleeves.
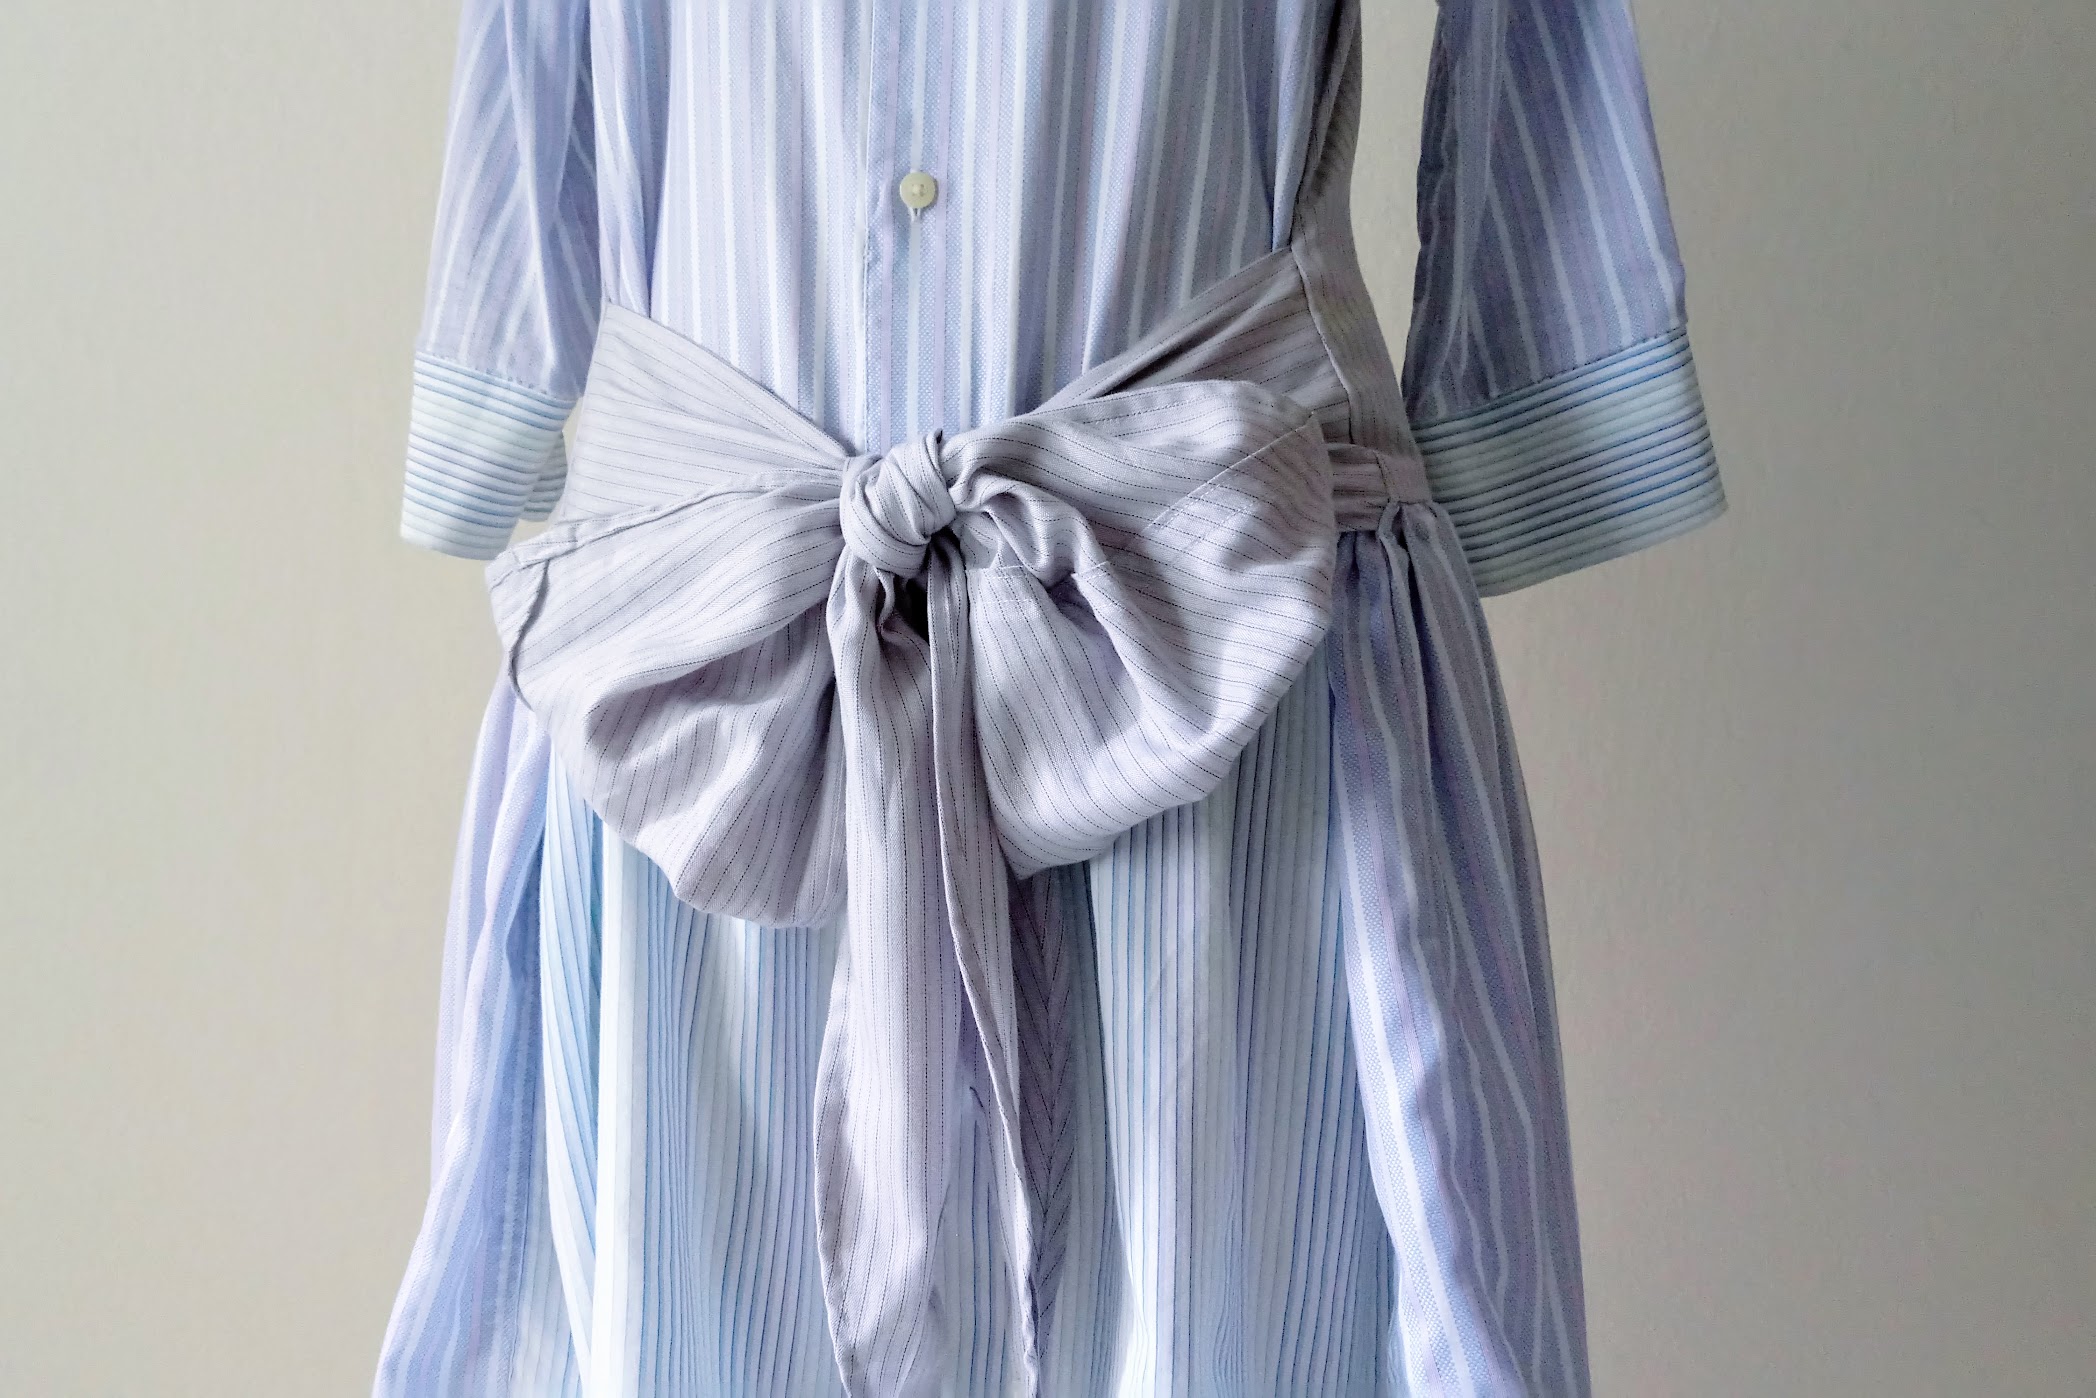
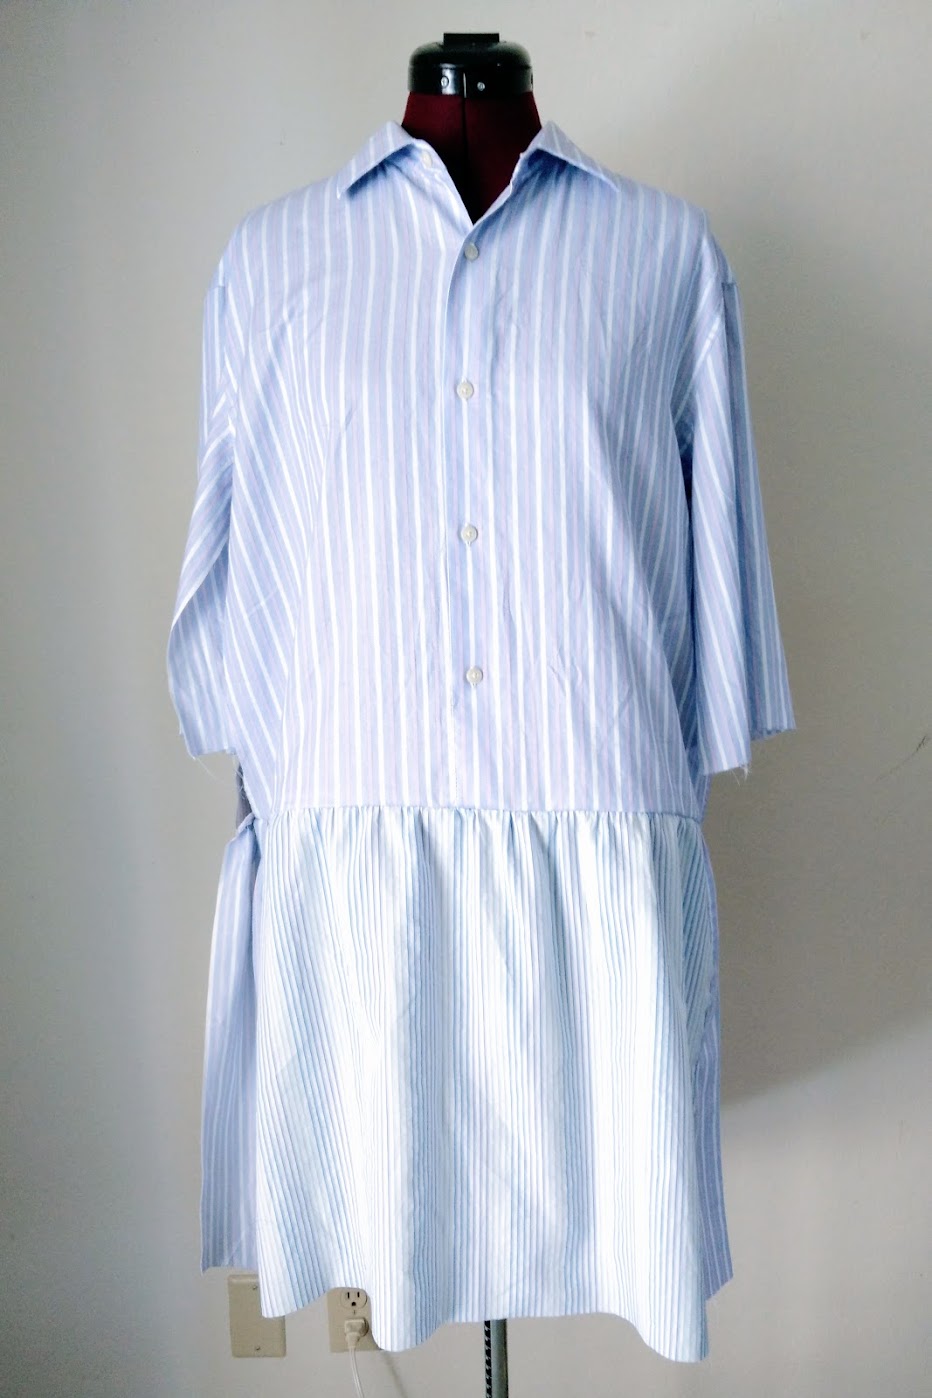
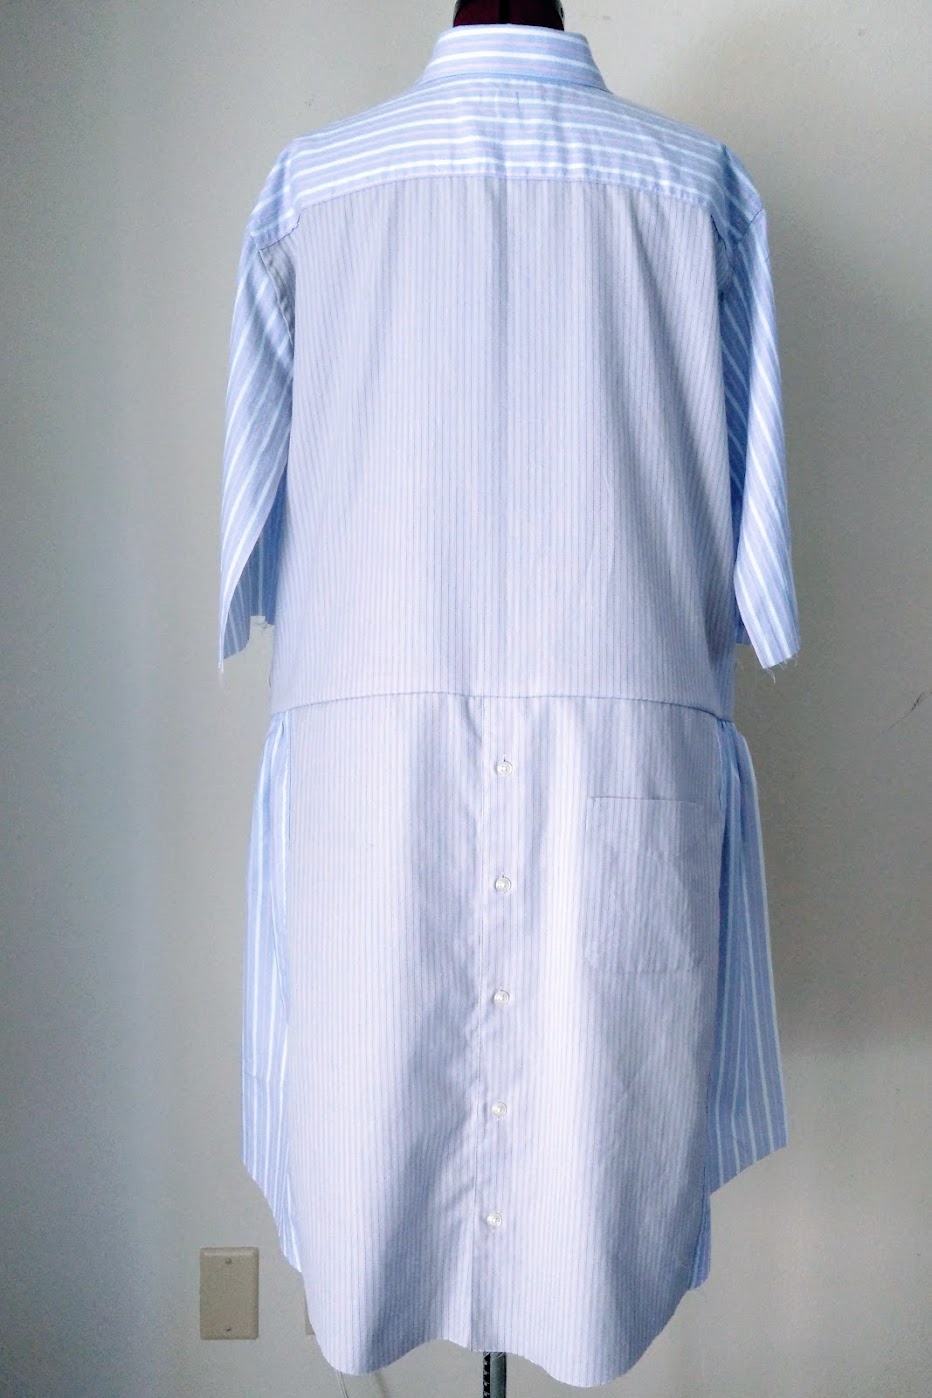
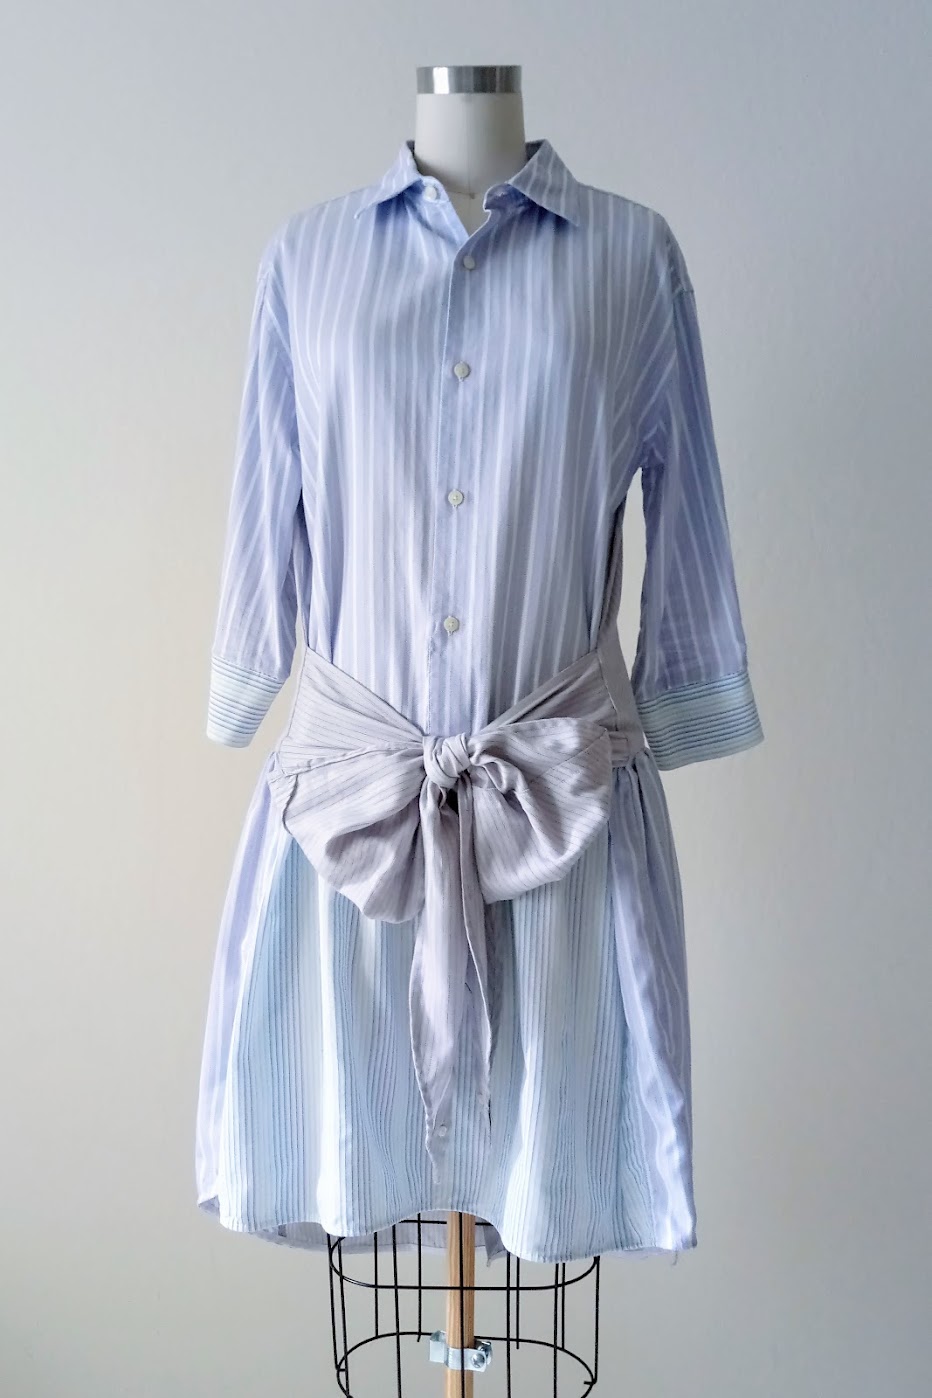
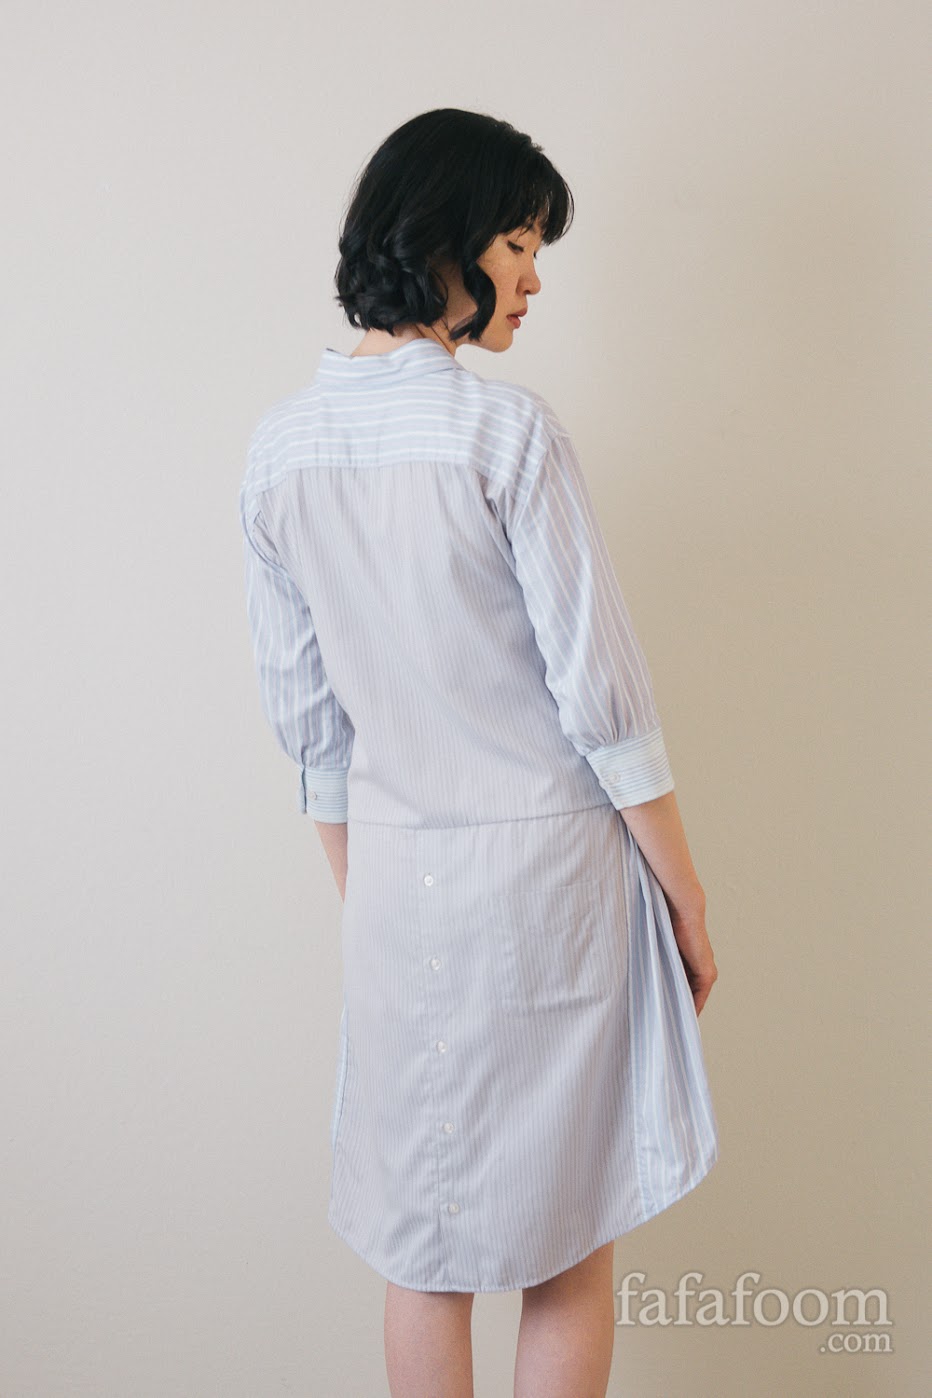
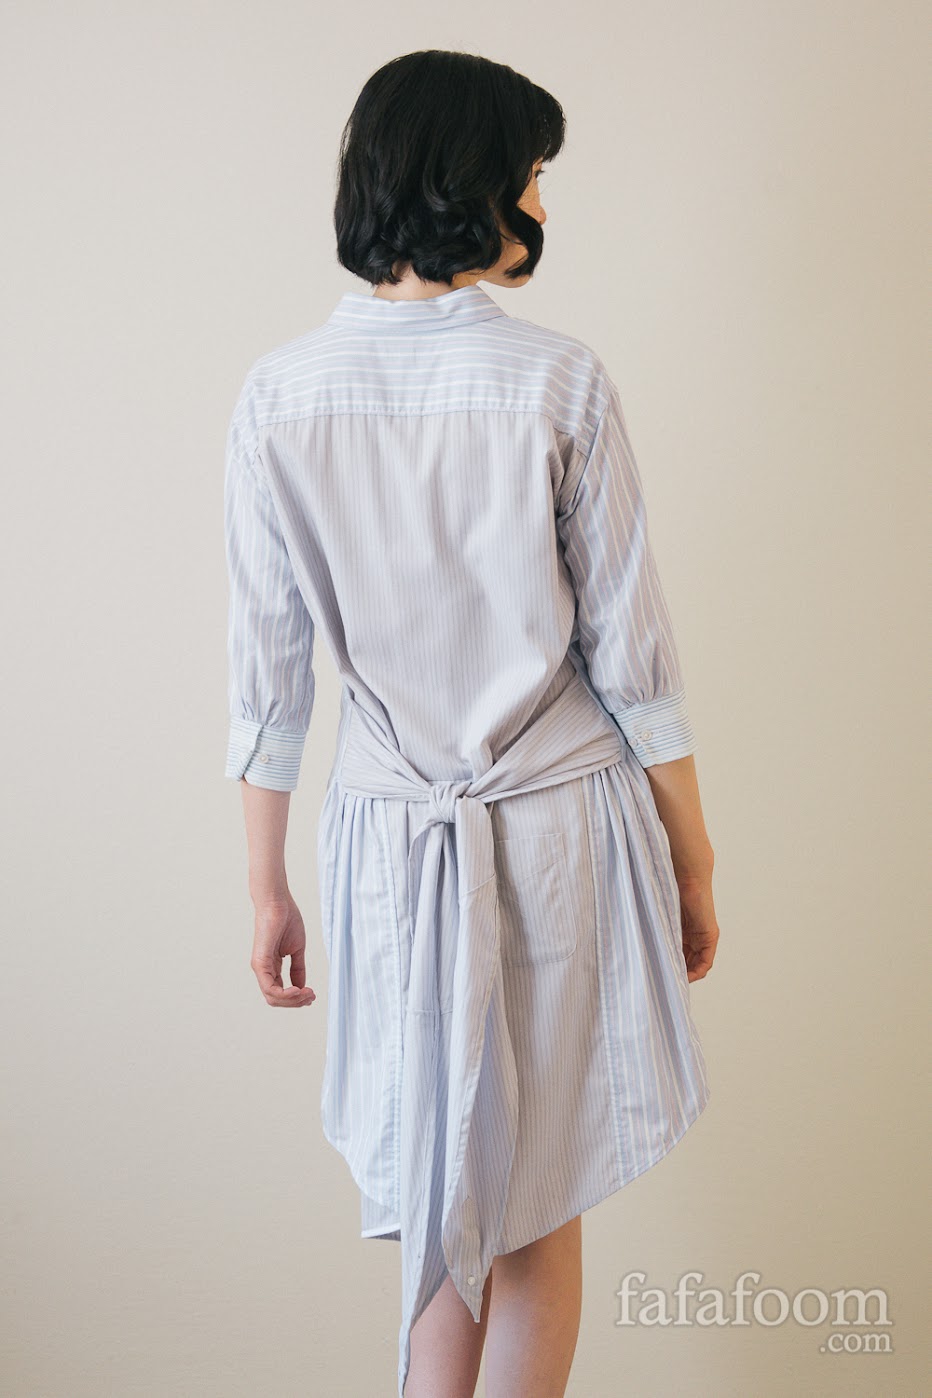
Result: DIY Shirt Dress with Bow Waist Tie
Here’s what the finished garment looked like, and I’m really happy with the result!
Keeping track and preserve leftover pieces from previous DIY Projects turn out to be a good decision. I’m lucky that all the men’s shirt pieces are of similar weight work harmoniously color-wise.

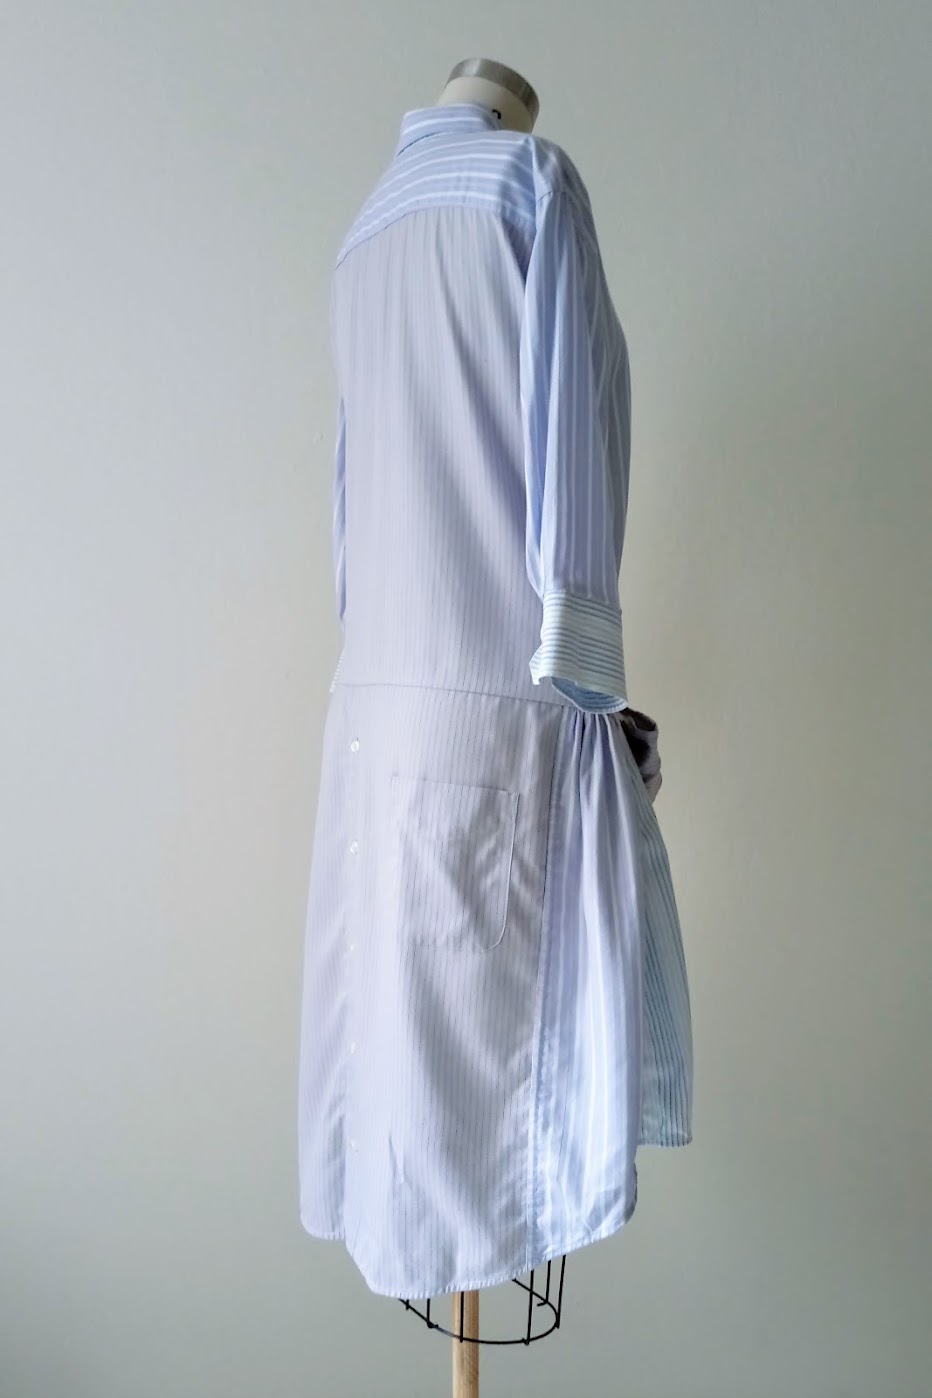
It’s icing on the cake that whenever I wear this shirt dress with bow waist tie, I get so many compliments. I can actually choose to do waist ties on the back or front. They look cute either way!


I continue keeping leftover pieces in my sewing stash for later use whenever the space allows. This practice also serves as continuous reminder to retain control over how many craft supplies I have on my disposal, so I don’t blindly adding things to the stash.
Wish me luck so I can keep myself disciplined! I can’t wait to see what kind of future DIY projects take shape using leftovers.
As always, feedback and comments are welcome :)
Thanks for reading; until next time,
Musank
Disclaimer: I may earn a small commission for my endorsement, recommendation, testimonial, and/or link to any products or services from this website. Thank you for your support!
Never Miss a Post
Enter your email below to receive the latest Fafafoom Studio post in your inbox.
Browse more posts
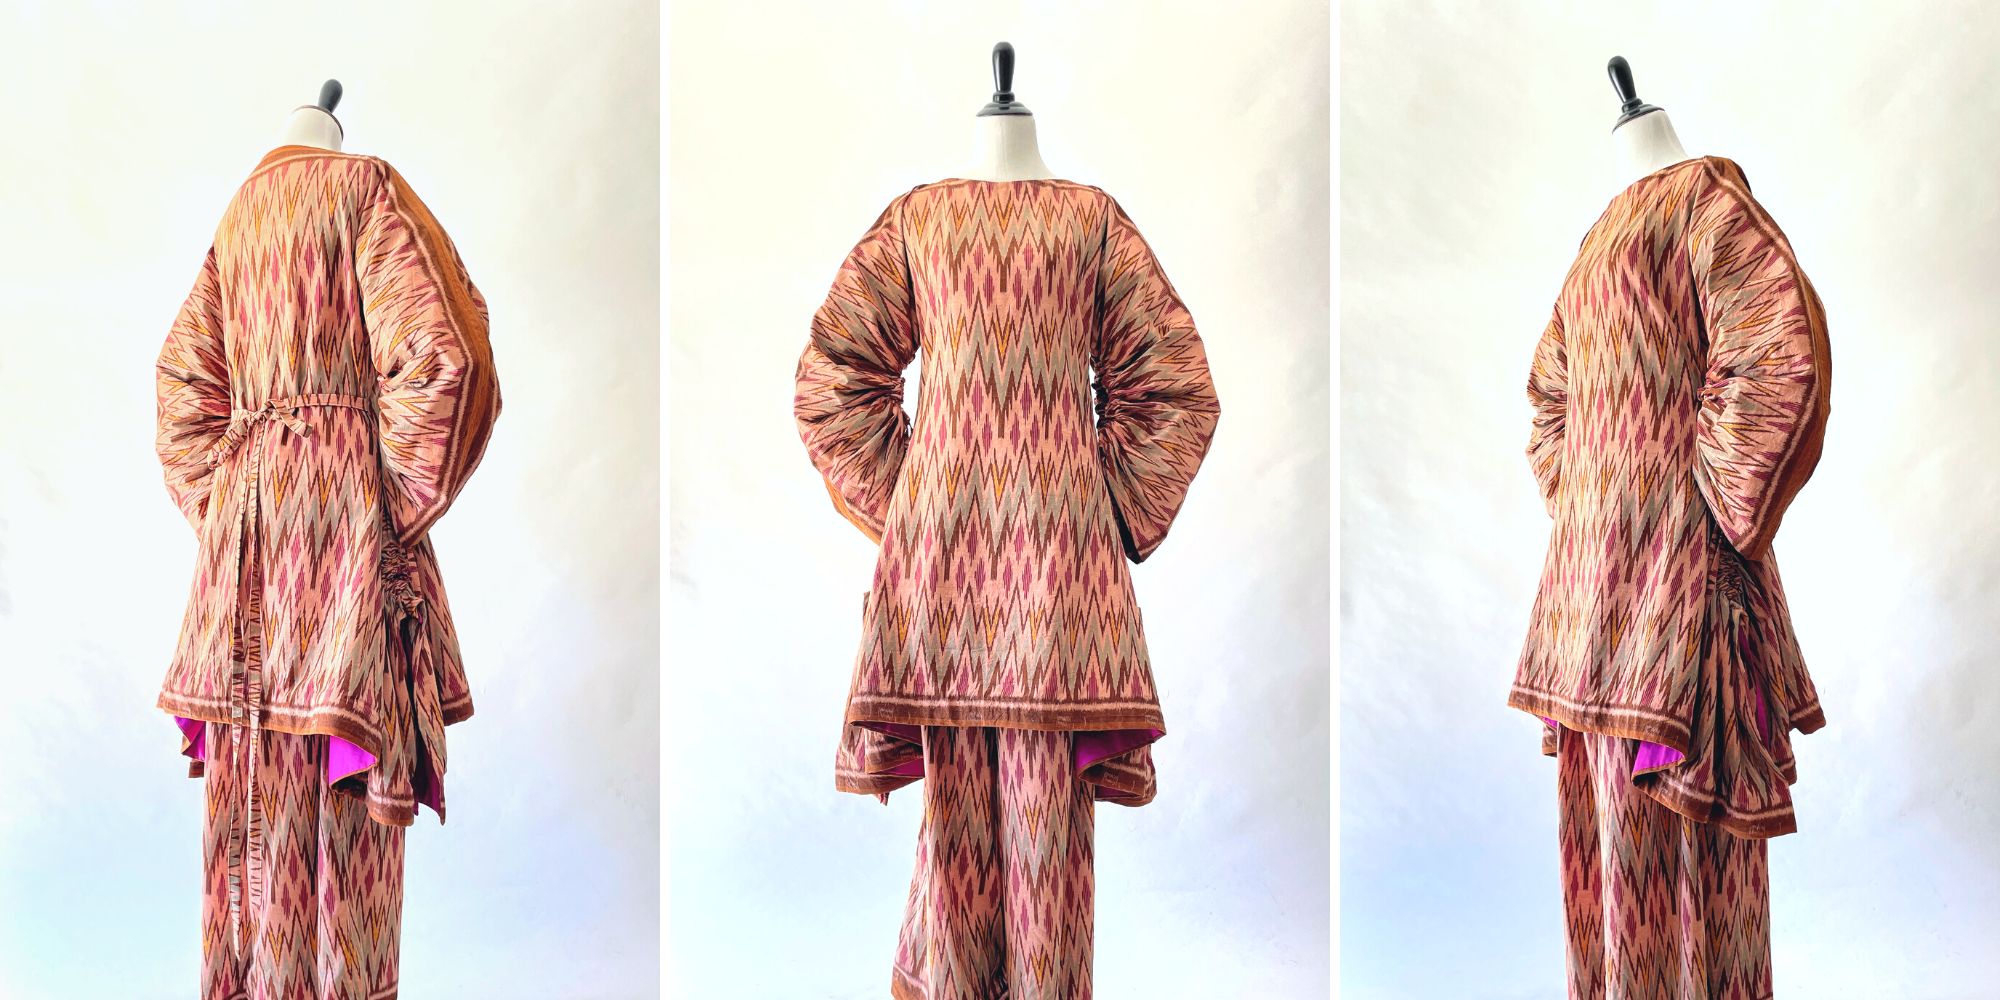
Interpreting Kebaya, Making a Modern Ethnic Ensemble
Modern Ethnic outfit is my interpretation of kebaya dressing. They are made using vintage ikat textile and inspired by several free minimal-waste patterns. Only on fafafoom.com.
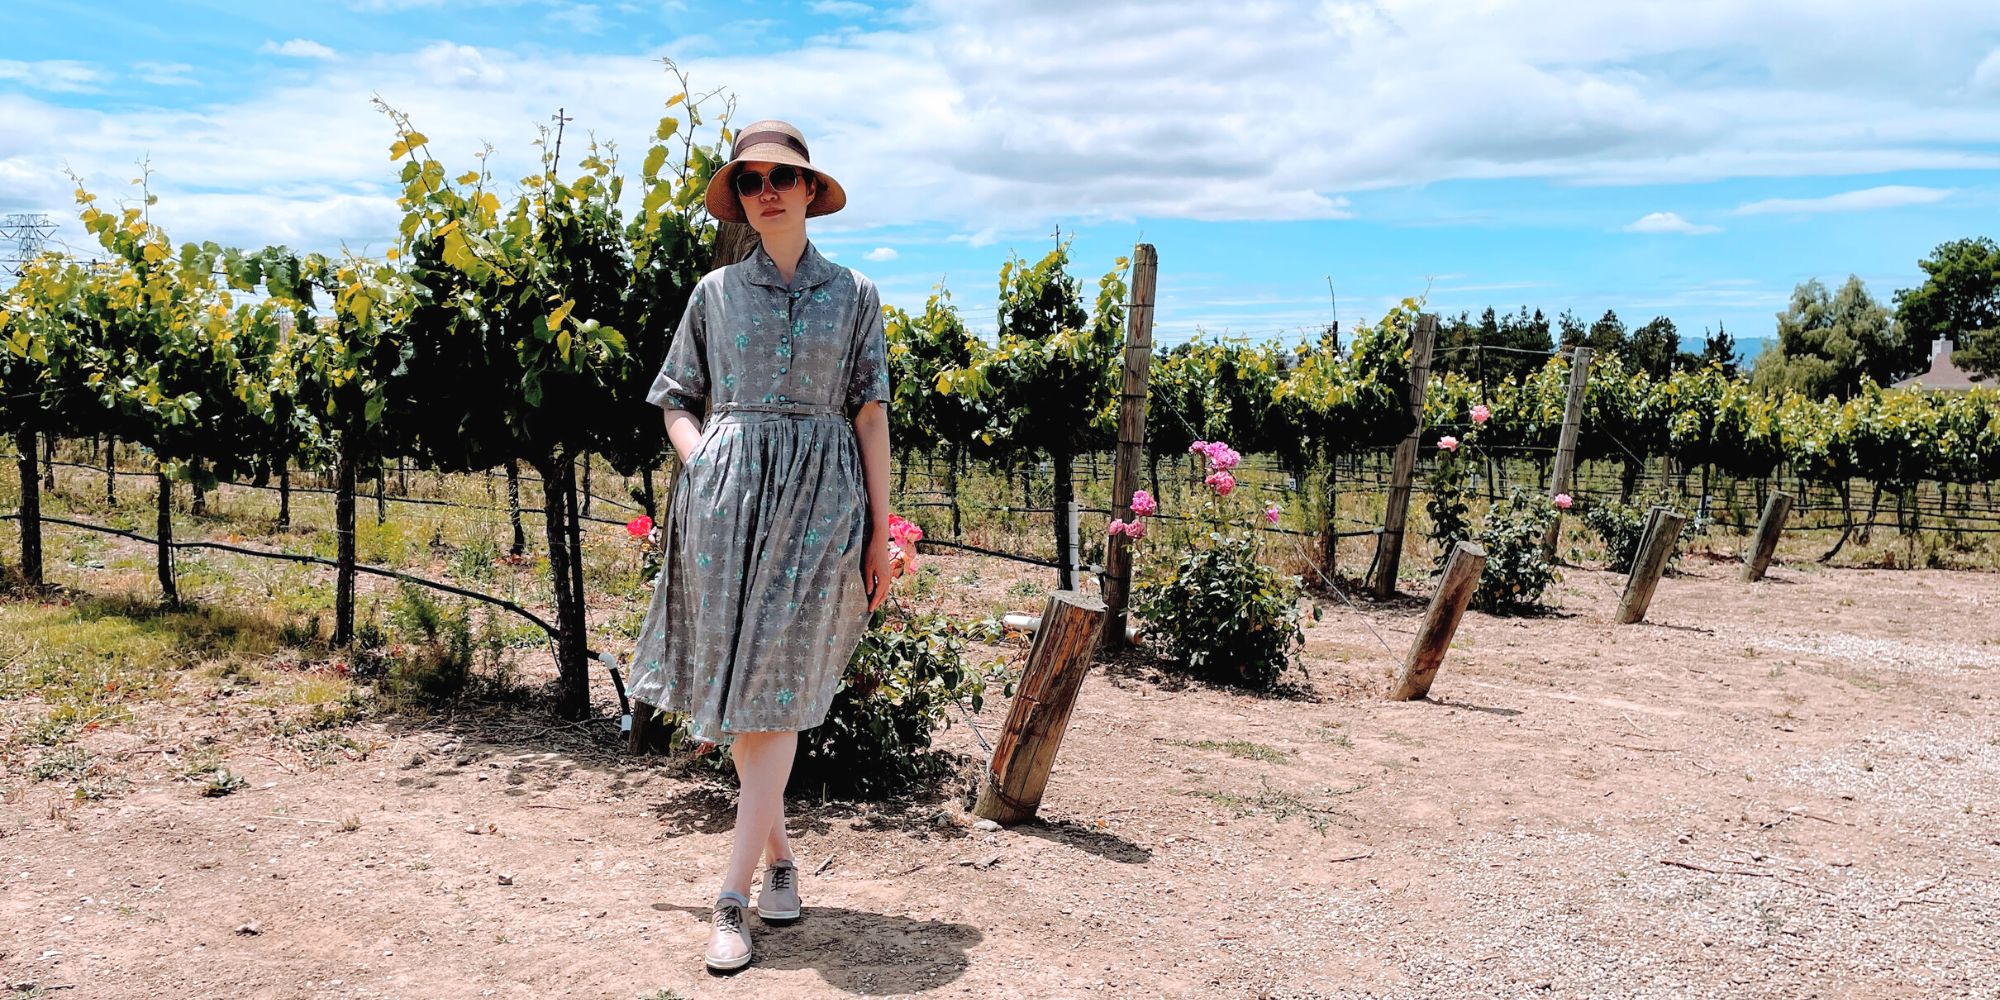
Restoring a 1950s Atomic Age Dress
Restoring and repairing a beautiful 1950s Dress for my summer 2022 wardrobe. Smart alterations include lining and inseam pockets. Only on fafafoom.com.
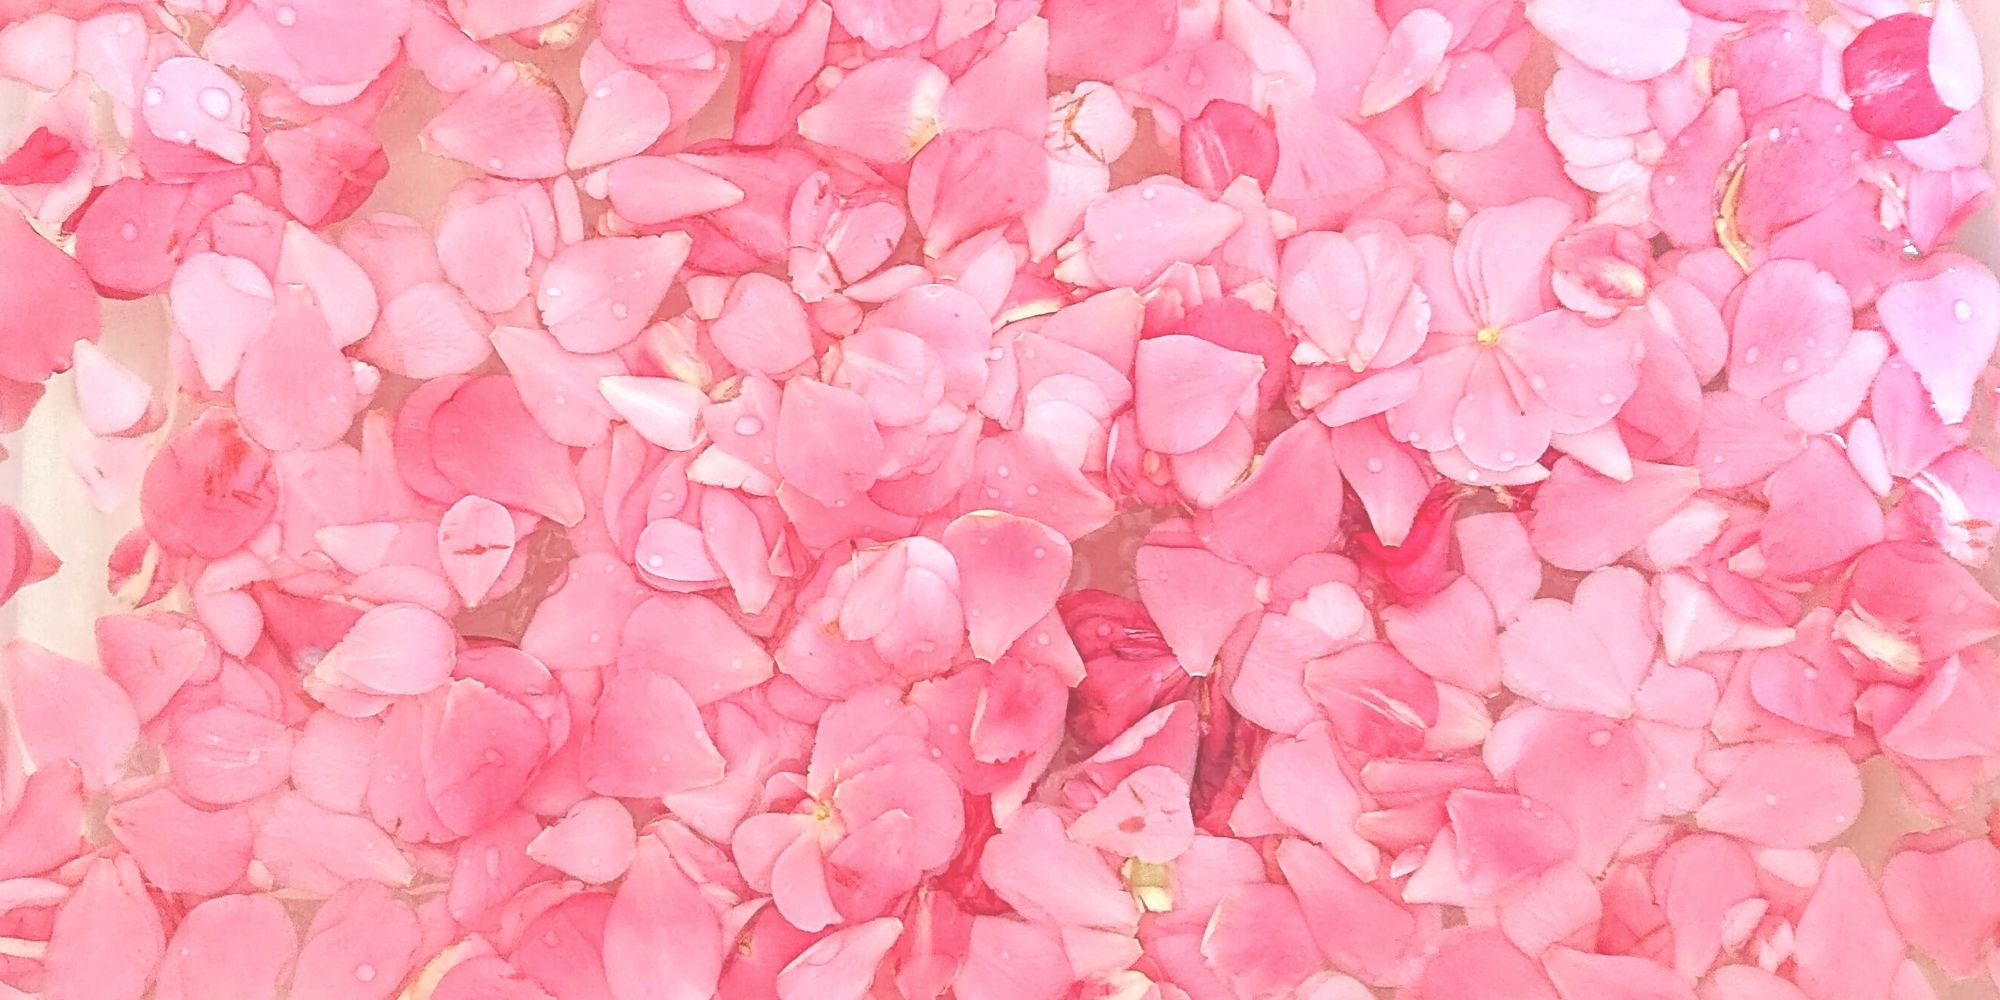
Pink Delight! Natural Dyeing with Camellia Flowers
My next experiment is dyeing with camellia flowers. Amongst all natural dyeing projects I have done so far, this is my favorite. Check out the pink delights! From fafafoom.com.
5 Slow Fashion Tips for a More Sustainable Wardrobe
Five slow fashion tips to help you transform your sustainable wardrobe for a cleaner, greener future. A guest feature from Reese Jones for Fafafoom.com.
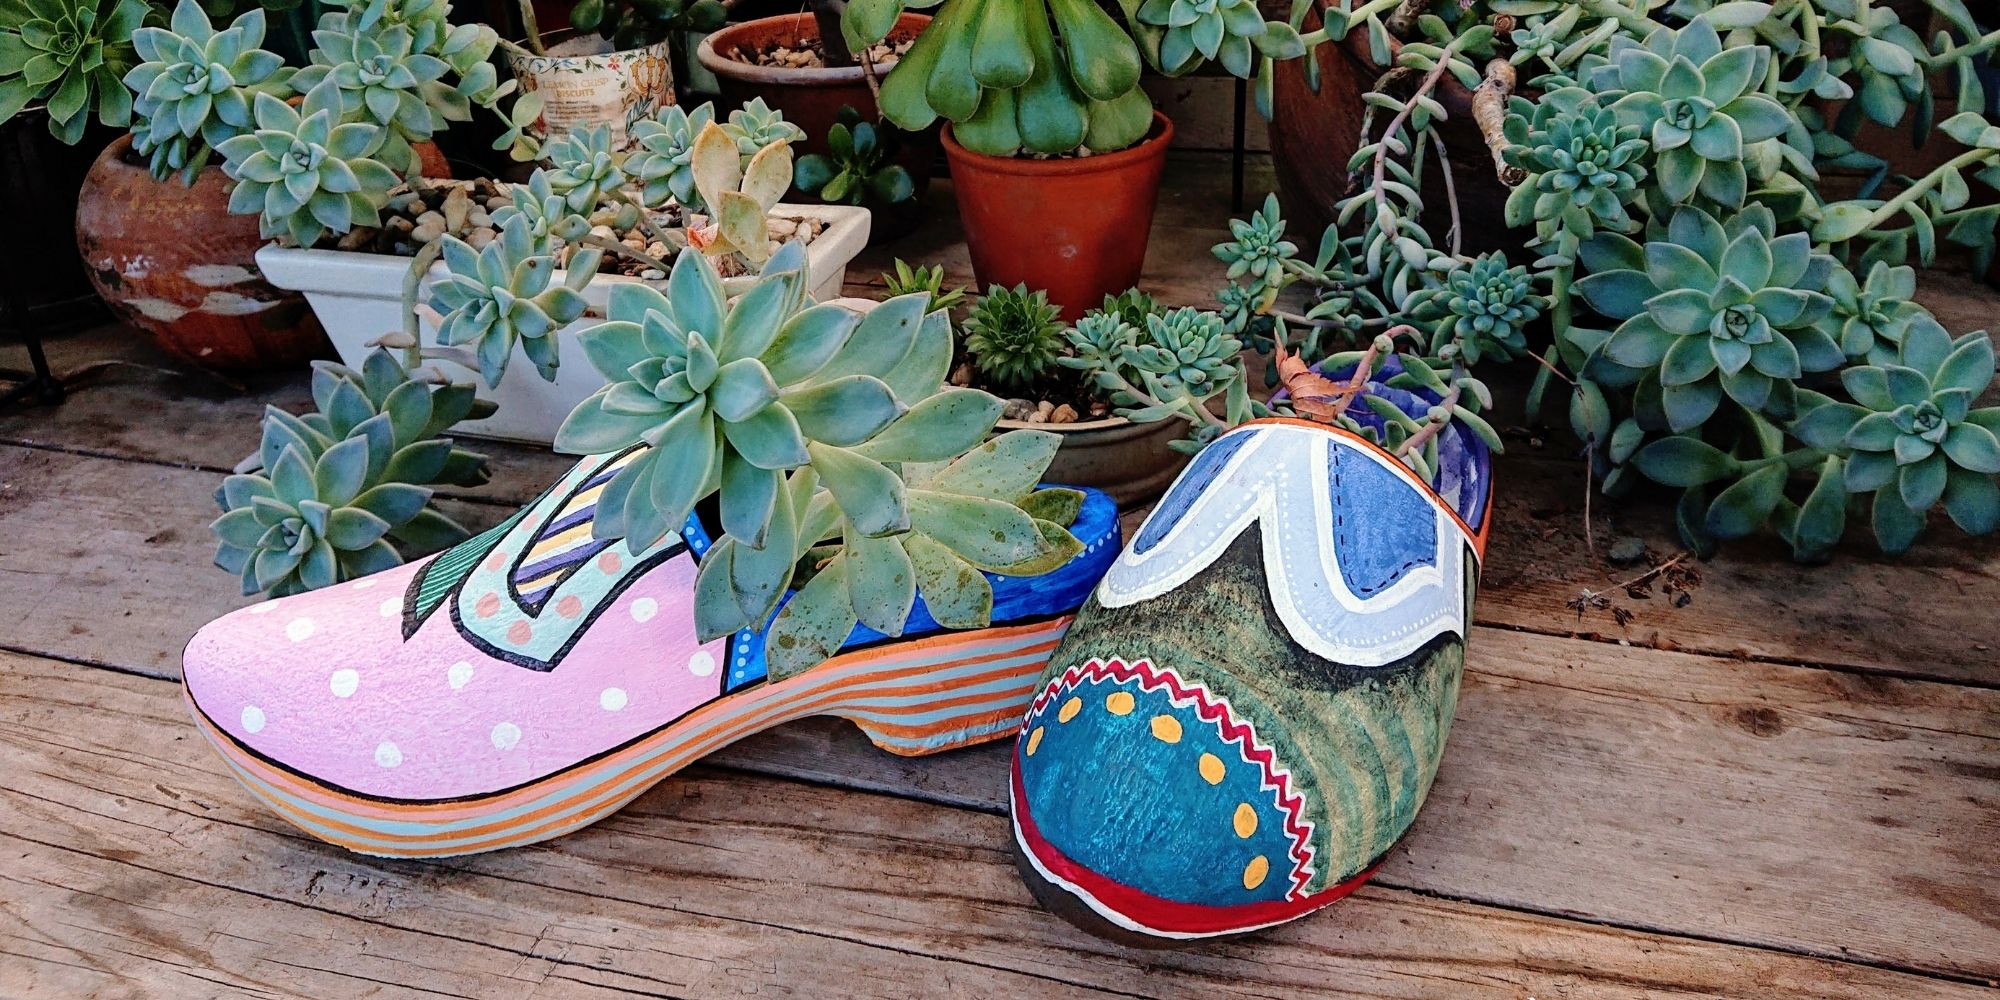
Upcycling and Repairing Ideas for Garden Decor
The garden has become a special place, especially during Covid-19 pandemic. During shelter-in-place period, I made garden decors by upcycling locally sourced items.
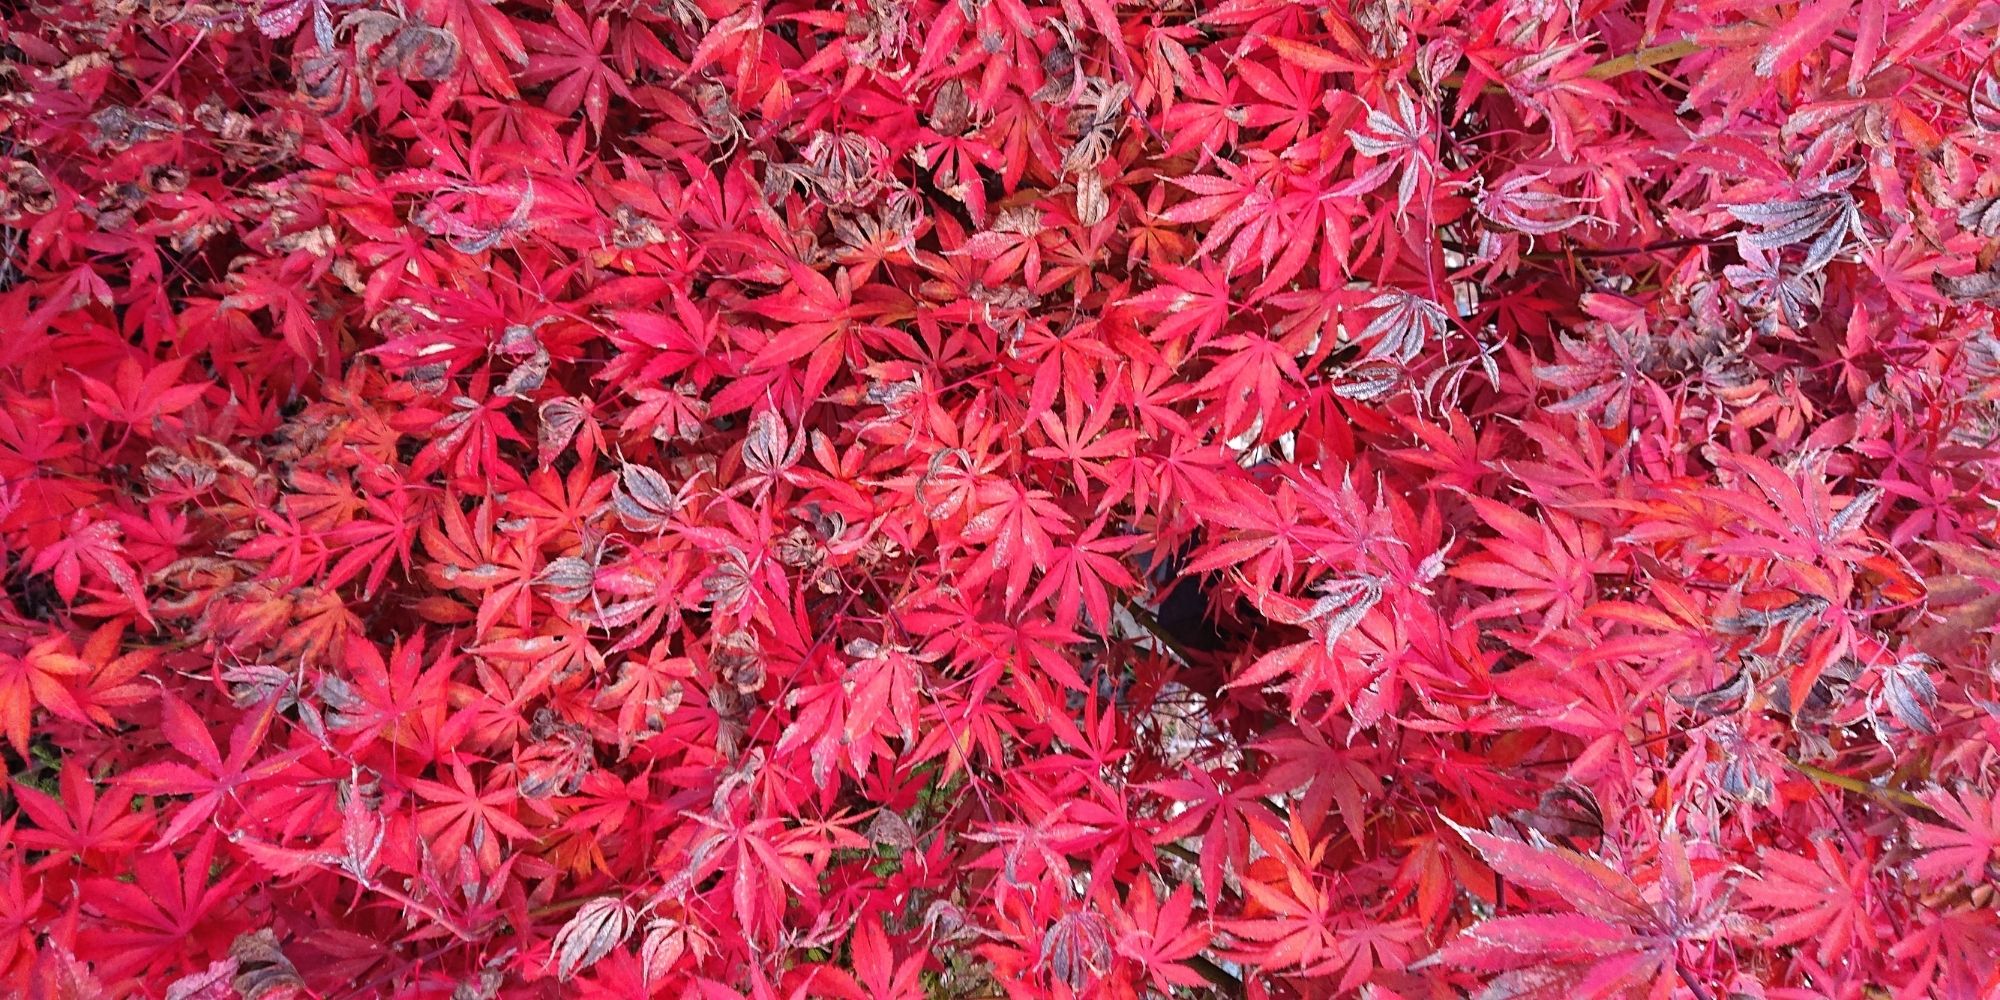
Natural Dyeing with Japanese Maple Leaves: Notes from a First-timer
Notes from my first natural dyeing experiment with Japanese maple leaves in fall season. Three batches of dyeing using fallen leaves sourced from two different trees in the garden. So much to learn and enjoy afterwards.