
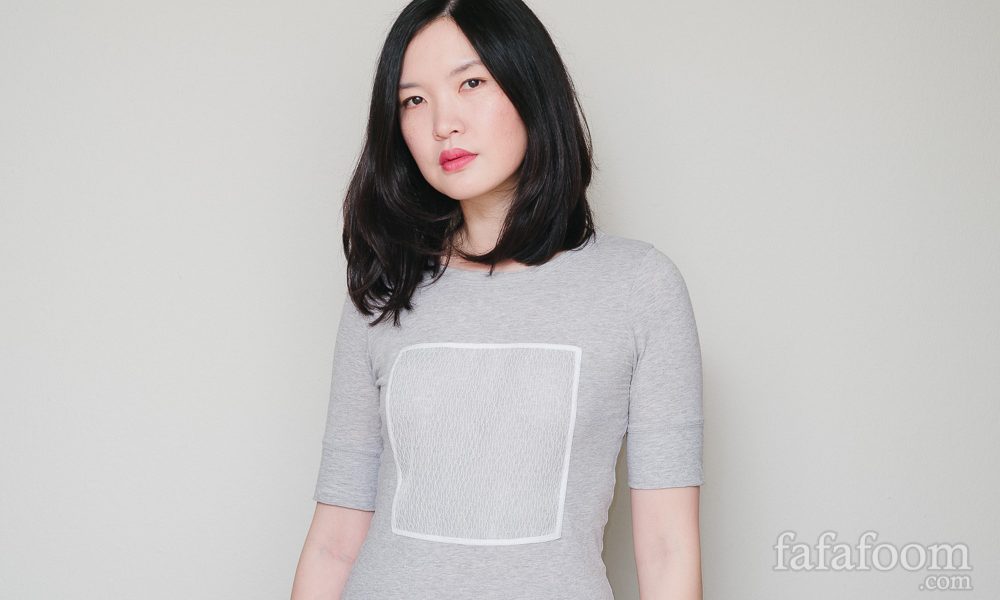
A refashioning project that’s long overdue. It’s good to see DIY Square on a Tee alive and rocking! It’s a simple use of a pretty fabric sample I got from Fabmo.
So…how do you like my new haircut…I mean, my latest refashion project? For those of you following me on Instagram, you might feel a sense of déjà vu. You think you’ve seen my previous Instagram posts featuring this DIY Square on a Tee on a dress form, right? And by the way, please excuse the naming…somehow I was thinking of “snakes on a plane” (no, I have not and will not see that movie) when I was thinking about a simple title for this post.
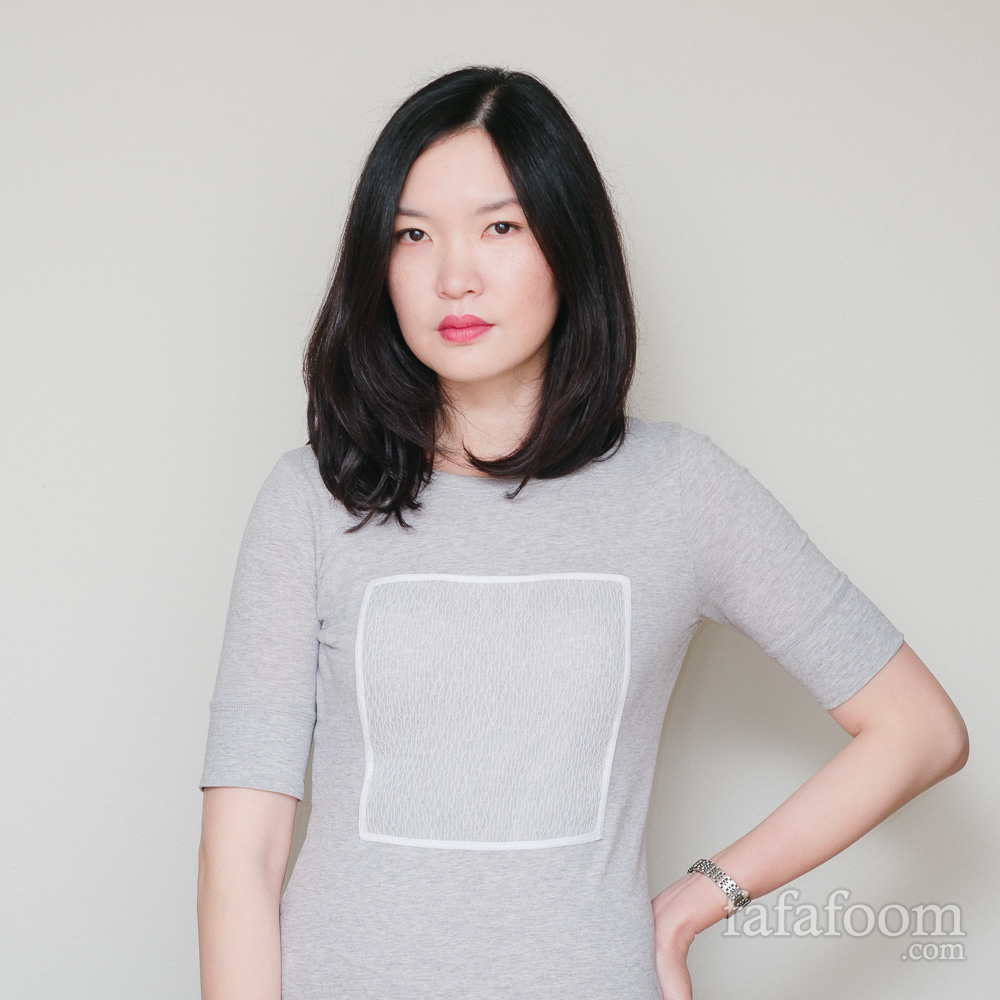
Well, truth be told, this DIY project has been in-progress for a long while. Not because it took a long time to do, but because I just had to prioritize other things. It’s only recently that I finally got to finish it, and I’m quite pleased with the result! The idea was to revitalize this basic heather grey, not-quite-3/4-sleeve tee which I bought at Target several years ago that’s still in excellent condition despite frequent wear. I’d like to wear it more, but this tee became too basic, boring.
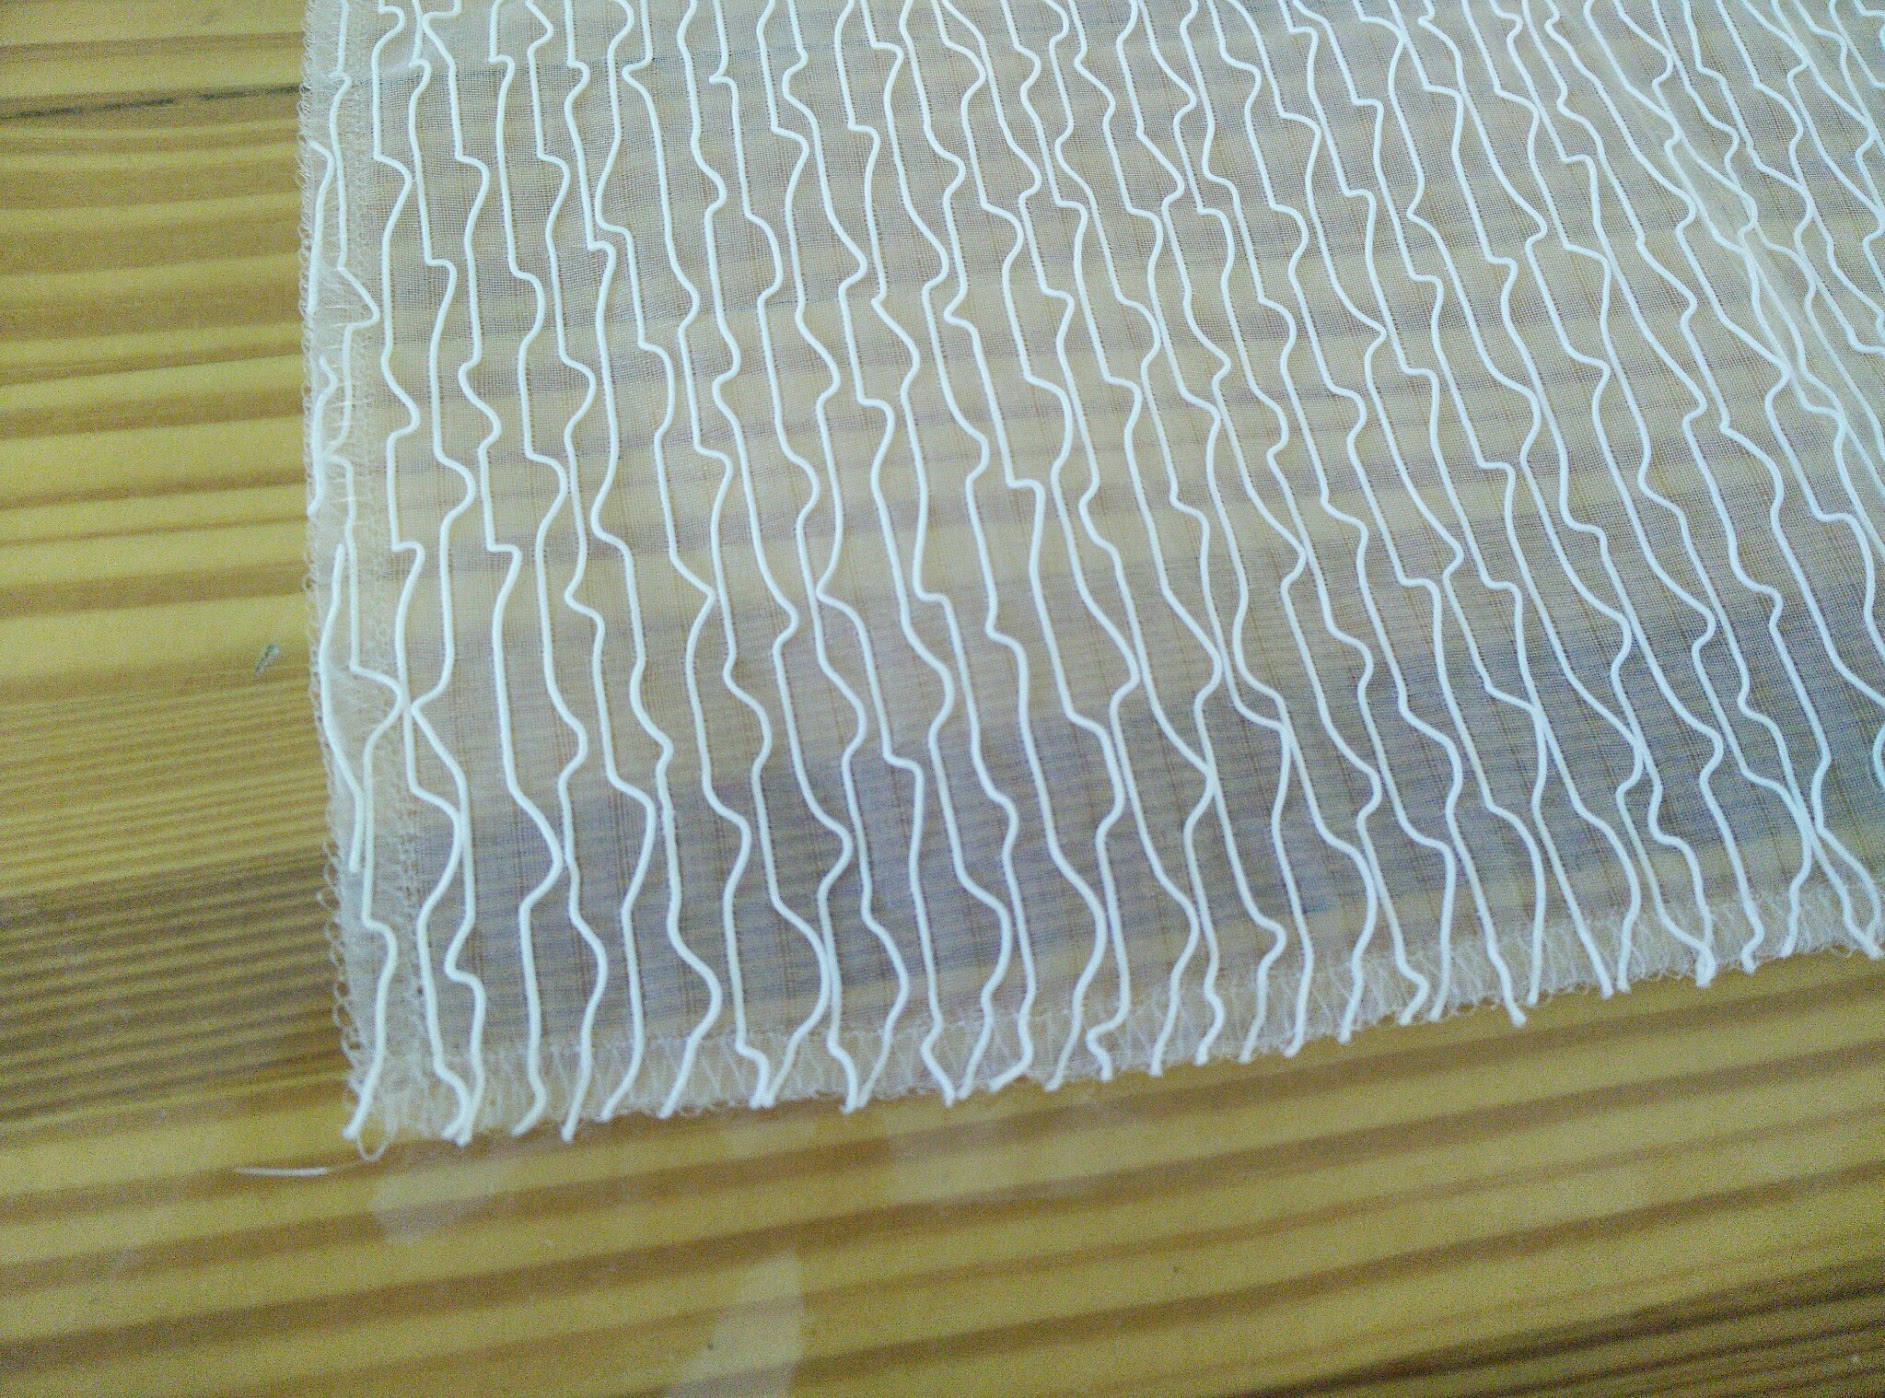
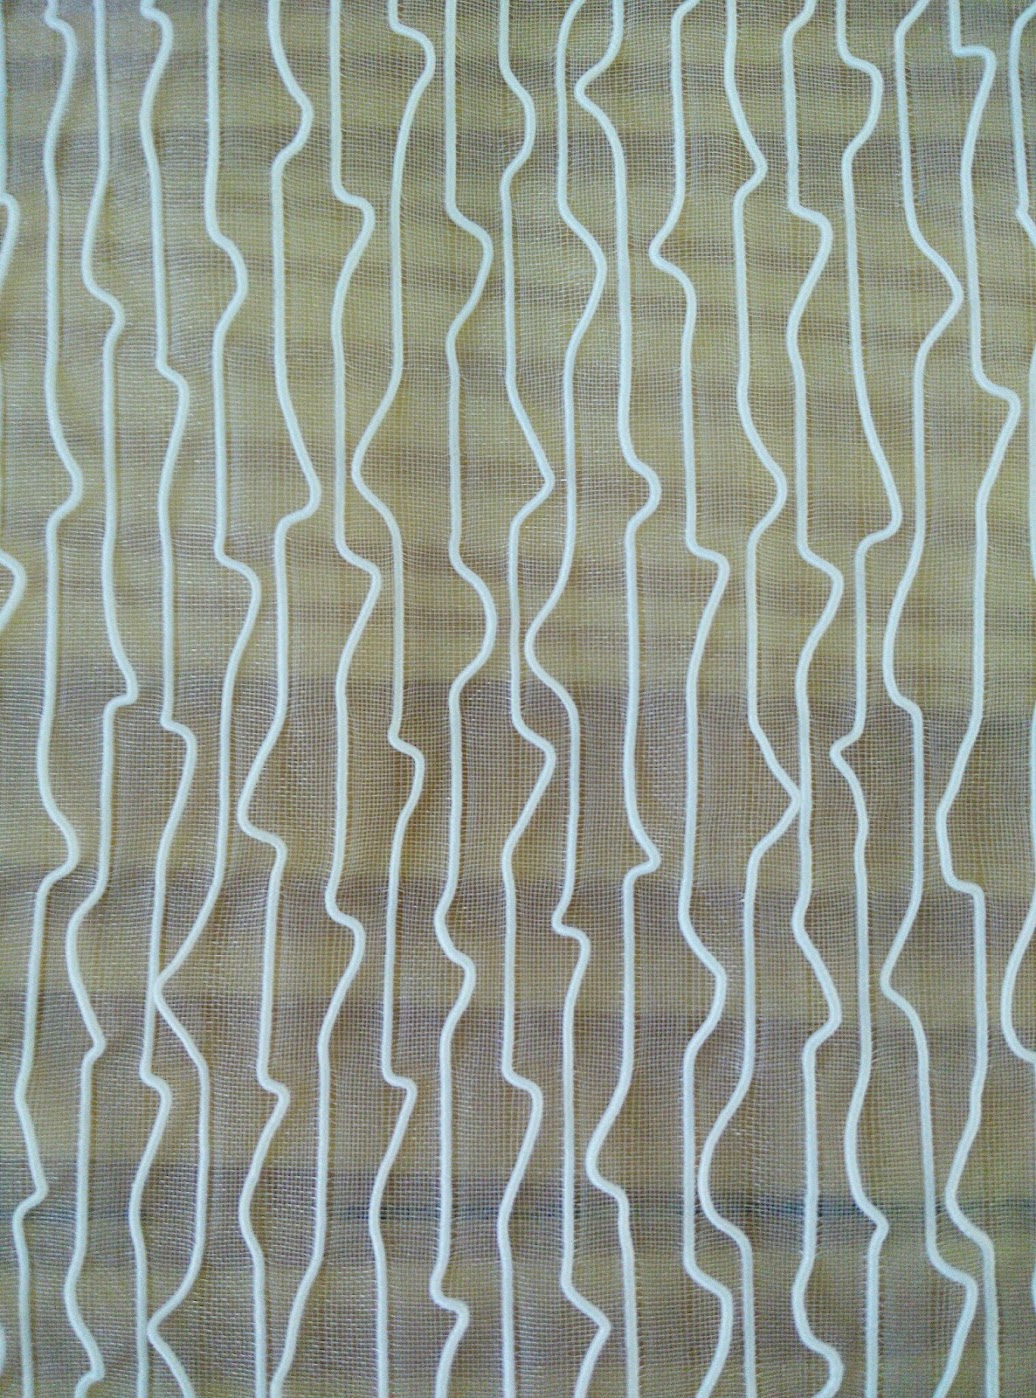
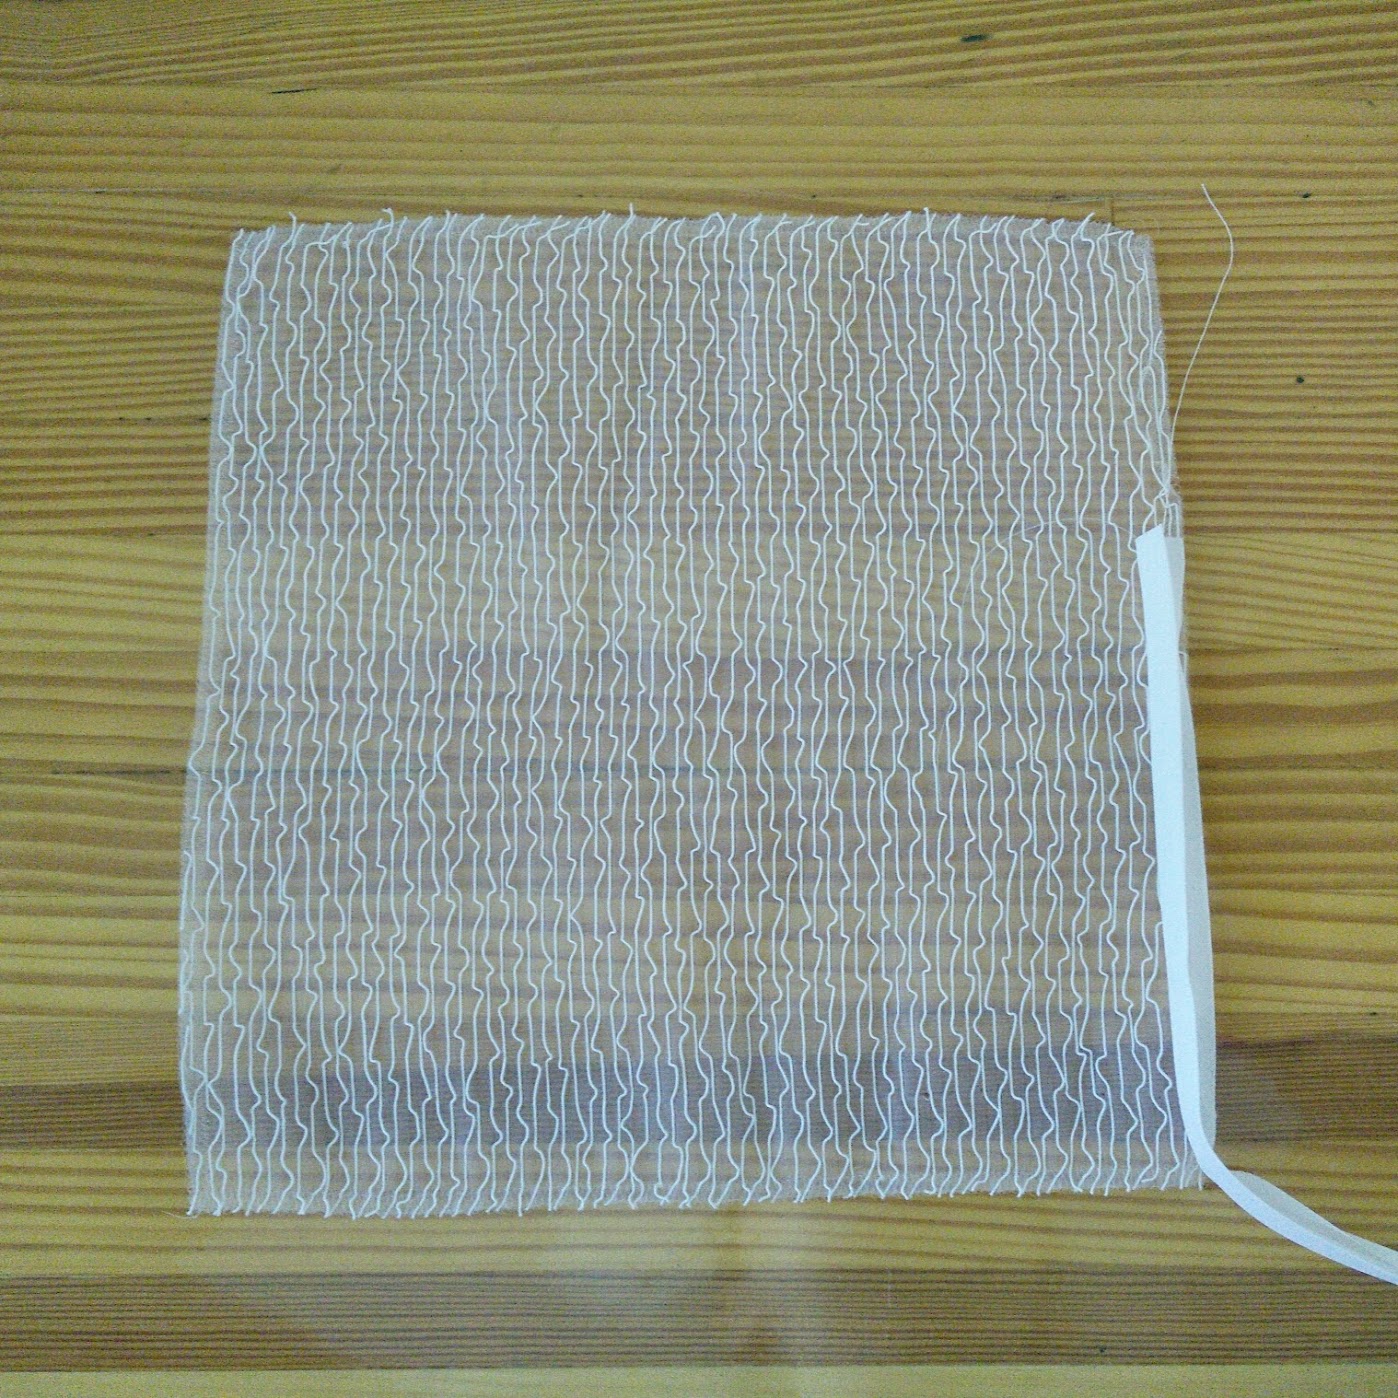
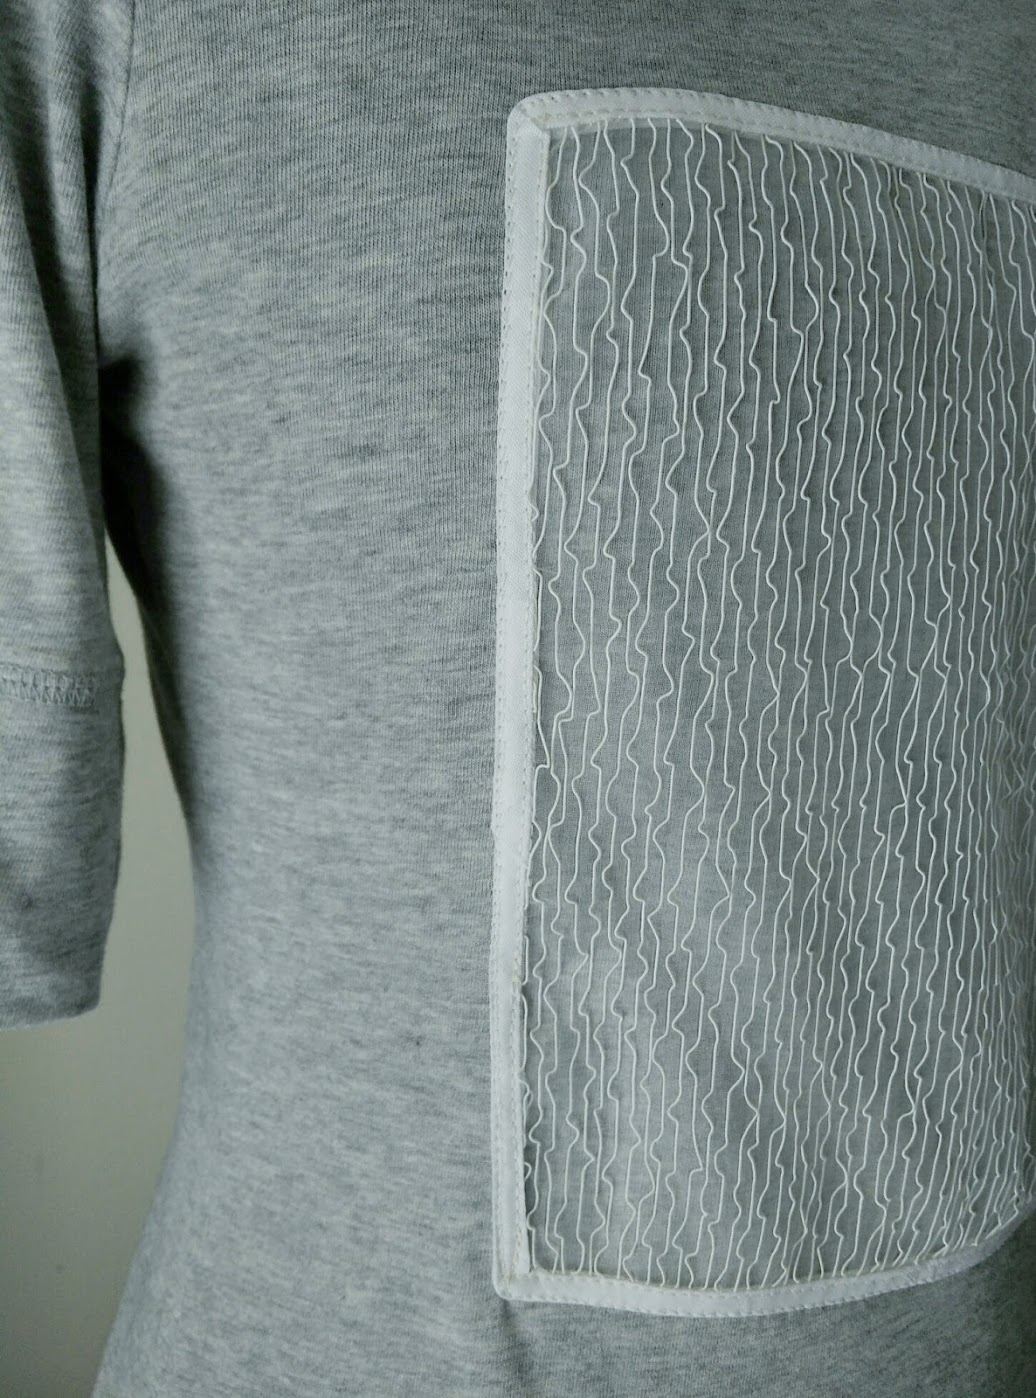
Thank goodness for this piece of mixed fabric, approx 8.5 in. x 8.5 in. It’s a piece of fabric sample for interior design(?) that I got from Fabmo, my source of all things fabric and wallpaper samples. This piece of delicate-looking fabric square has a good structure that I wanted to highlight, and I’m glad the process was painless and straightforward for the most part. And now I’m excited to wear this DIY Square on a Tee on regular basis, even wear it to work! Yay!!!
Subscribe to my newsletter
List of Materials:
1. a slightly stretchy crew neck tee – I feel this type of neckline works best for adding a square-shaped decoration on the front. A tee with jewel neckline will also work, but a V-neck tee won’t look that good, in my opinion.
2. a fabric square decoration – in this case, it’s my 8.5 in. x 8.5 in. fabric sample
3. bias tape
4. needle and thread for temporary hand stitching
5. dress pins
6. sewing machine mine is Brother CS6000i model)
Below are the photos of the fabric sample square up close, for those who are curious.
How to Make:
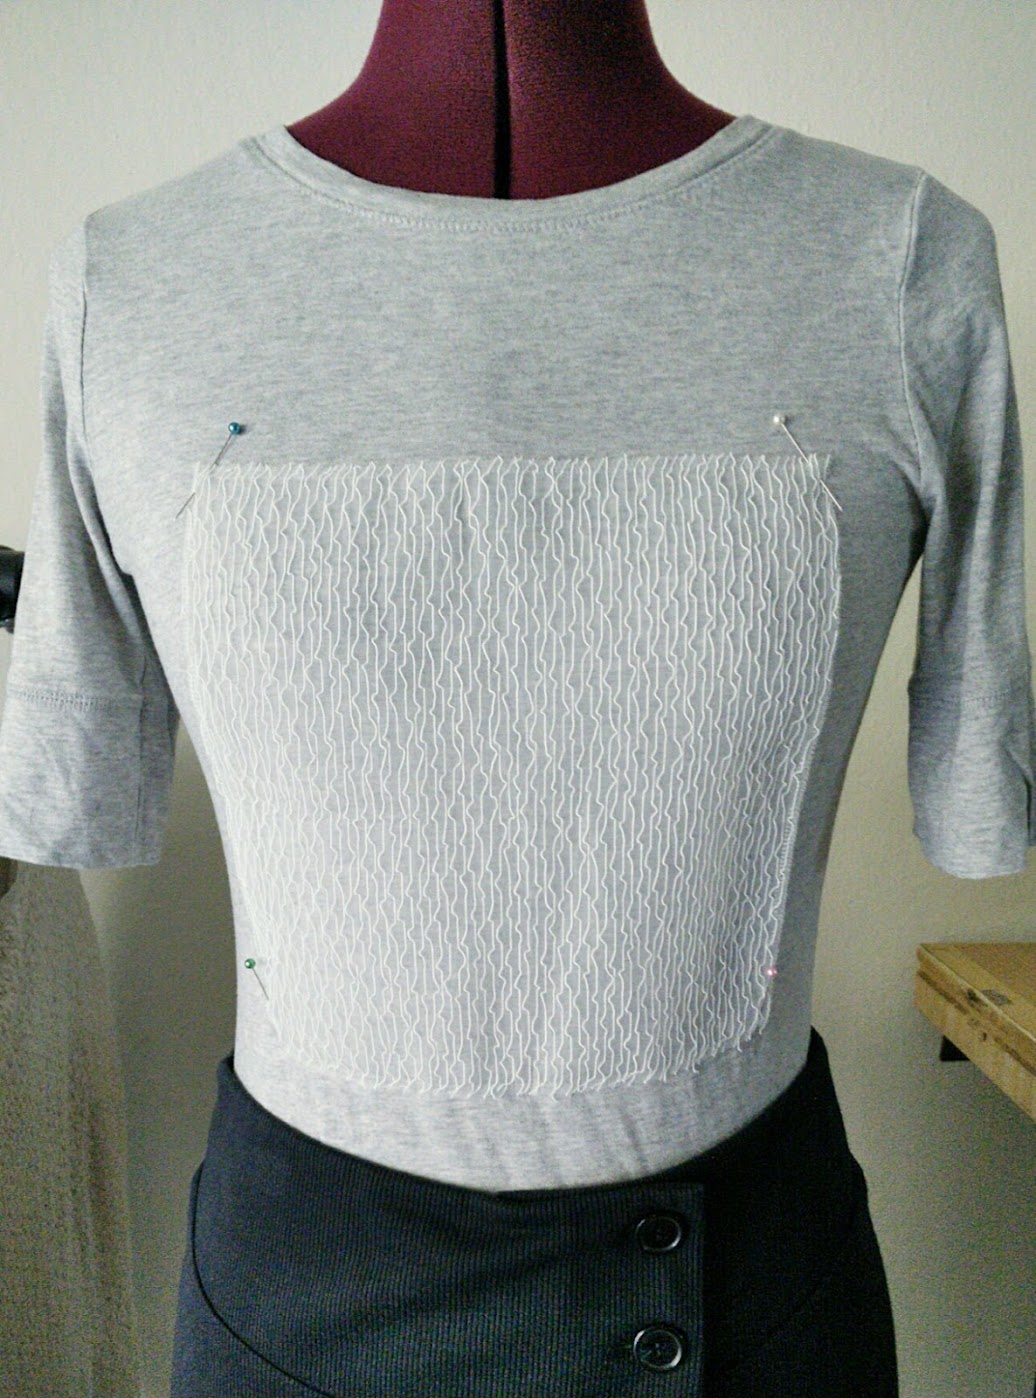
The first thing I did was to put the tee on my dress form, and then roughly pin the square fabric in place. I re-positioned the fabric several times before pinning the four corners.
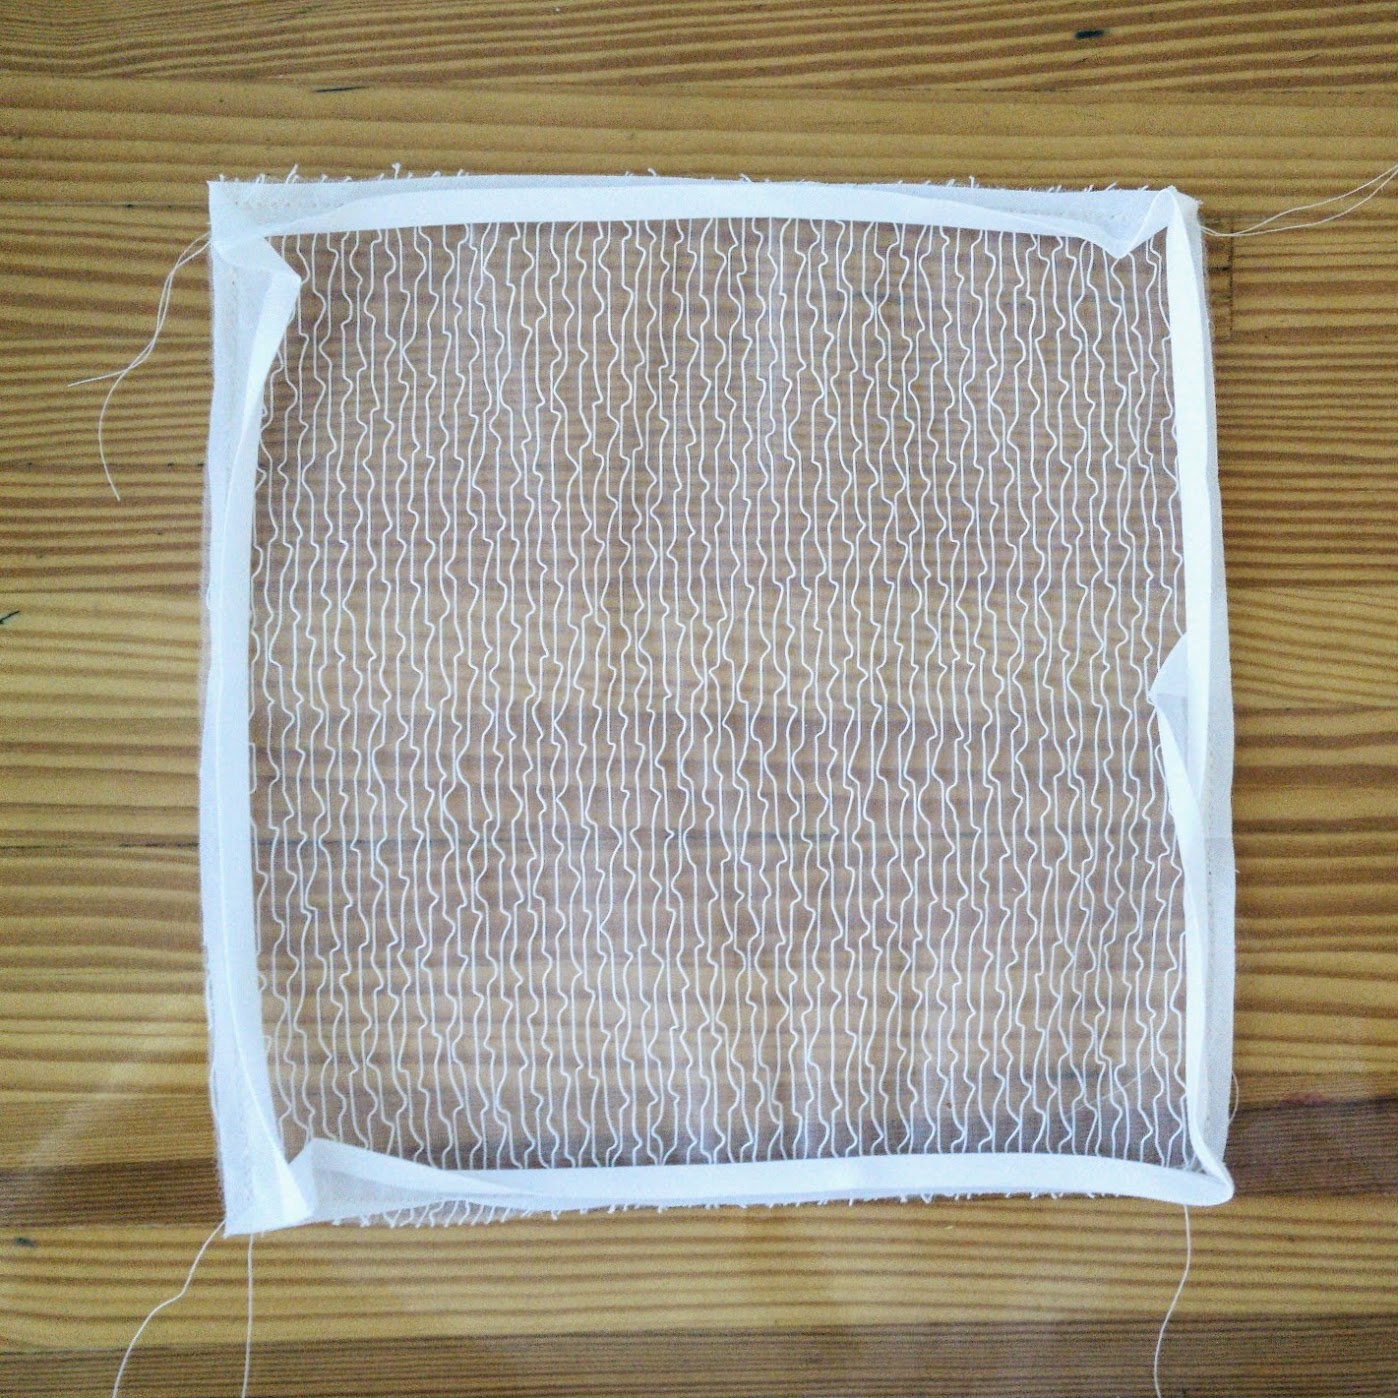
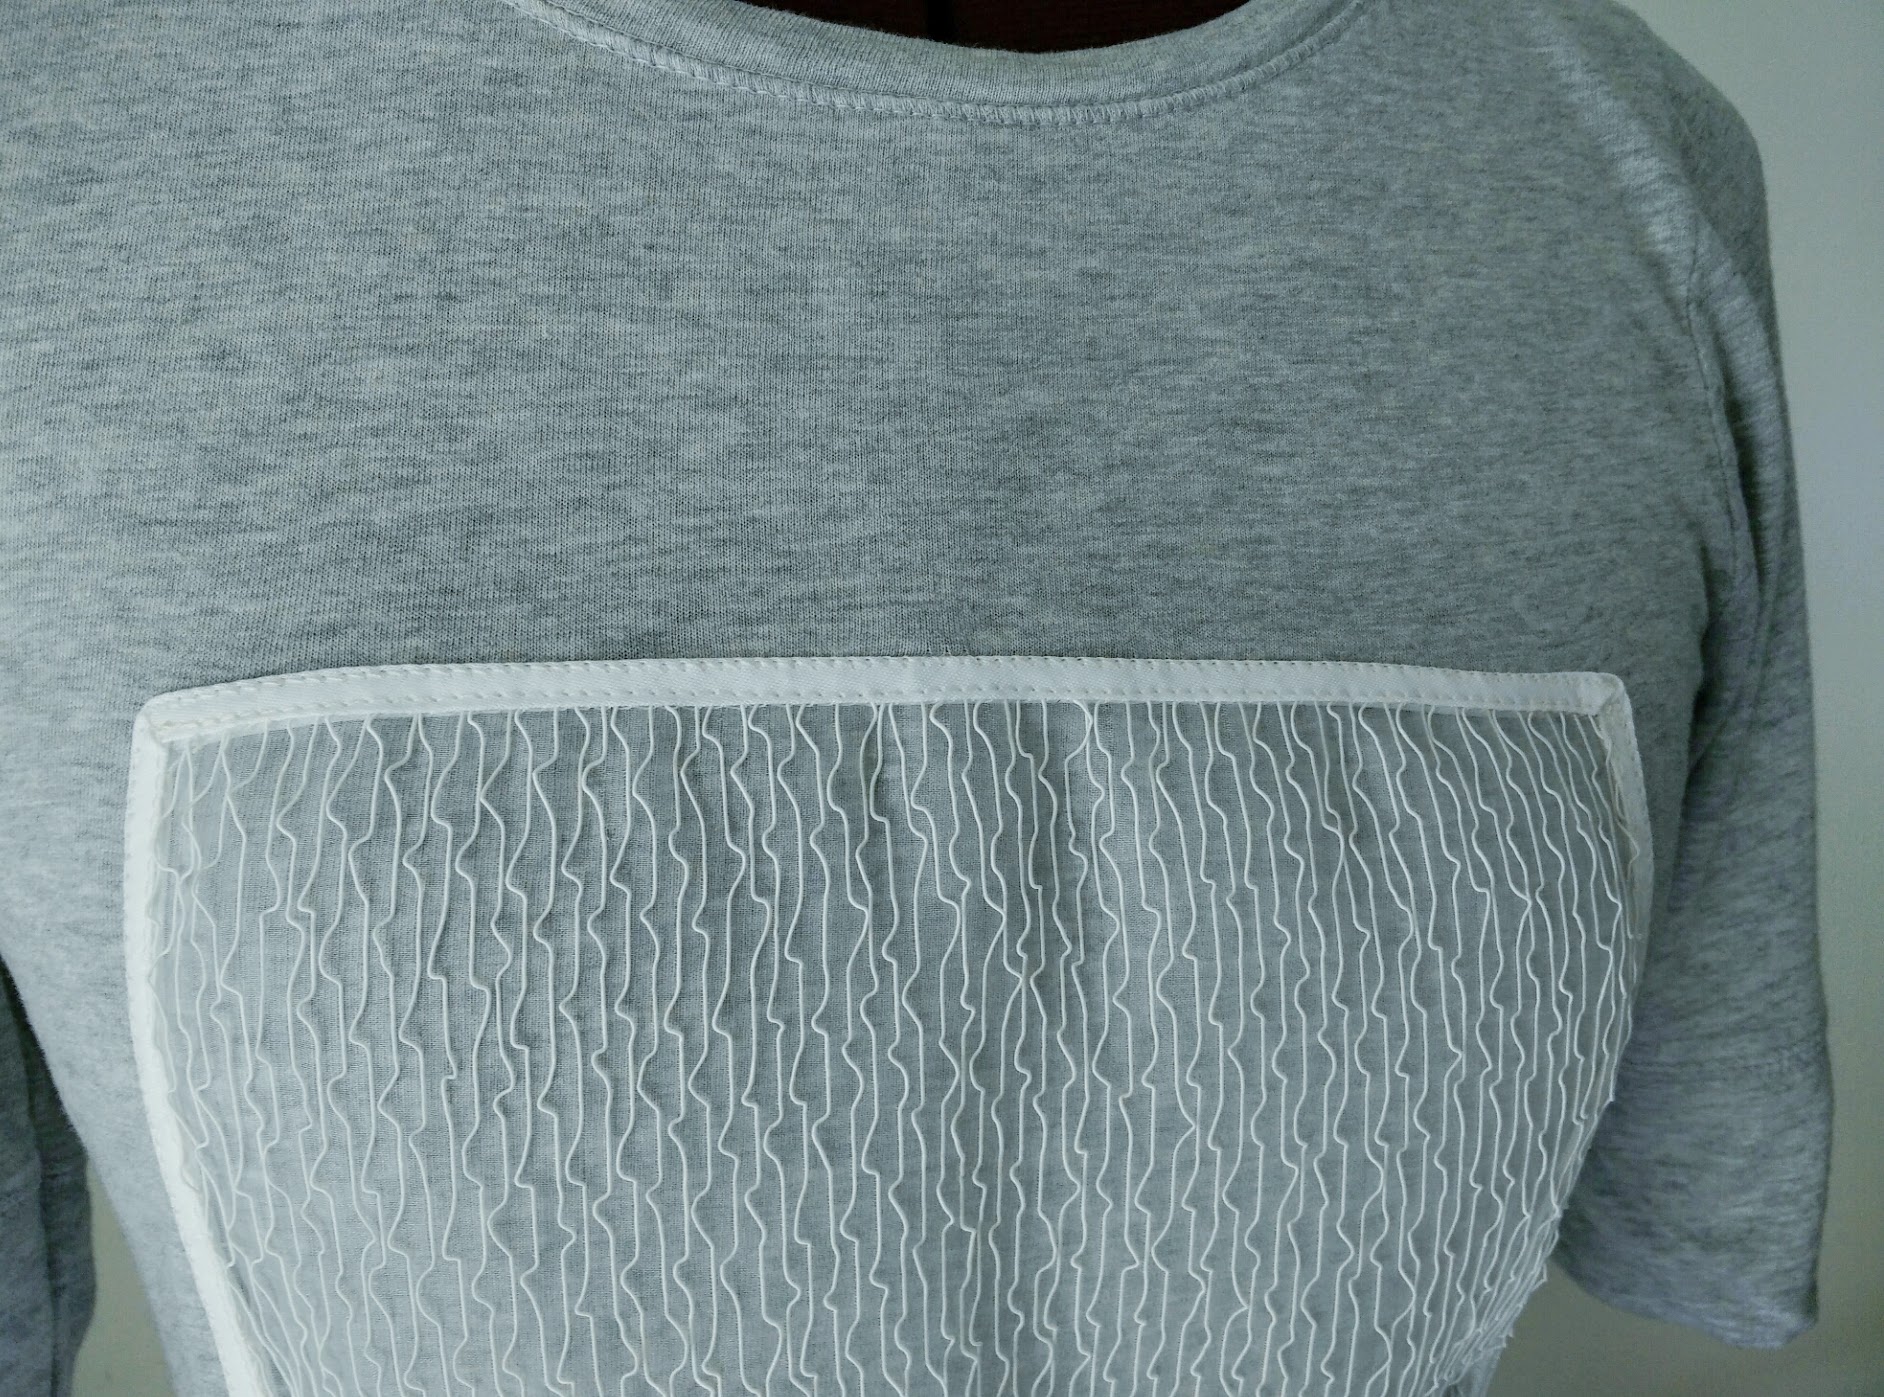
Initially, I was just going to sew it in place on the front of my tee after fitting it on my own torso, but I changed my mind. I wanted to create a “frame” around the fabric square piece, so I sewed some white double-fold bias tape around the piece. Thank you Kathy from merrimentdesign for the awesome tutorial!
After I was done making the “frame” around the fabric square, it’s time to re-fit the square first on the dress form, then on myself. I made mini adjustments on the square’s placement, and then I made sure they were pinned securely on my slightly stretchy tee. I was so in the zone at this stage so there were no photos taken :)
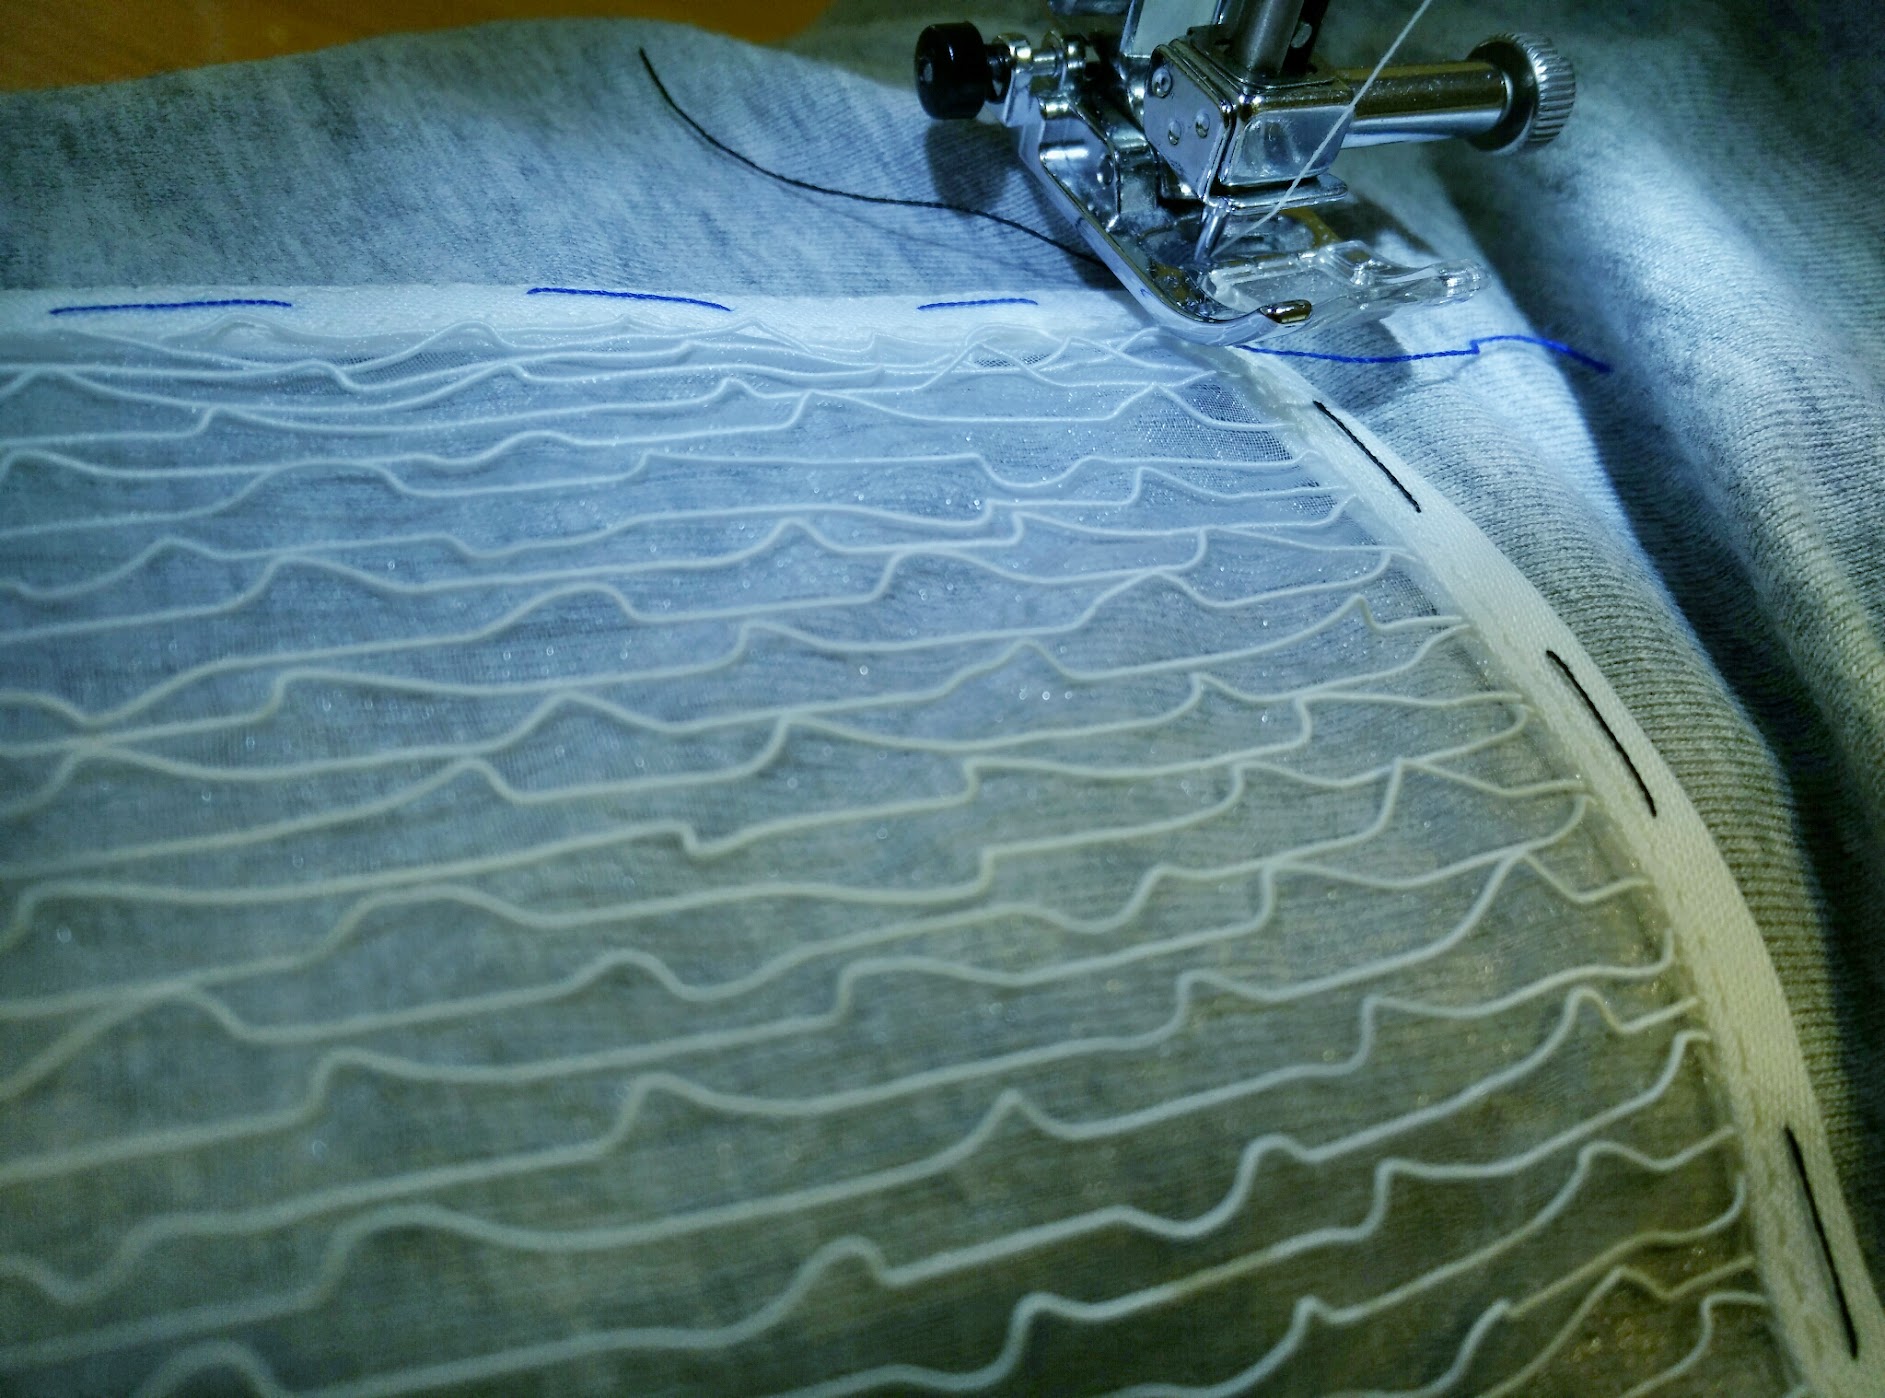
After I carefully got out of the tee, I made temporary basting stitches around all four sides of the fabric square, to make sure it did not move around when I finish it with my sewing machine. This step proved to be crucial and very rewarding, as the fabric square was placed exactly where it needed to be when all’s said and done.
After I took out the temporary stitch threads and did some finishing touches, the DIY Square on a Tee is done!
Here are some photos for the finished refashion project on my lovely dress form:
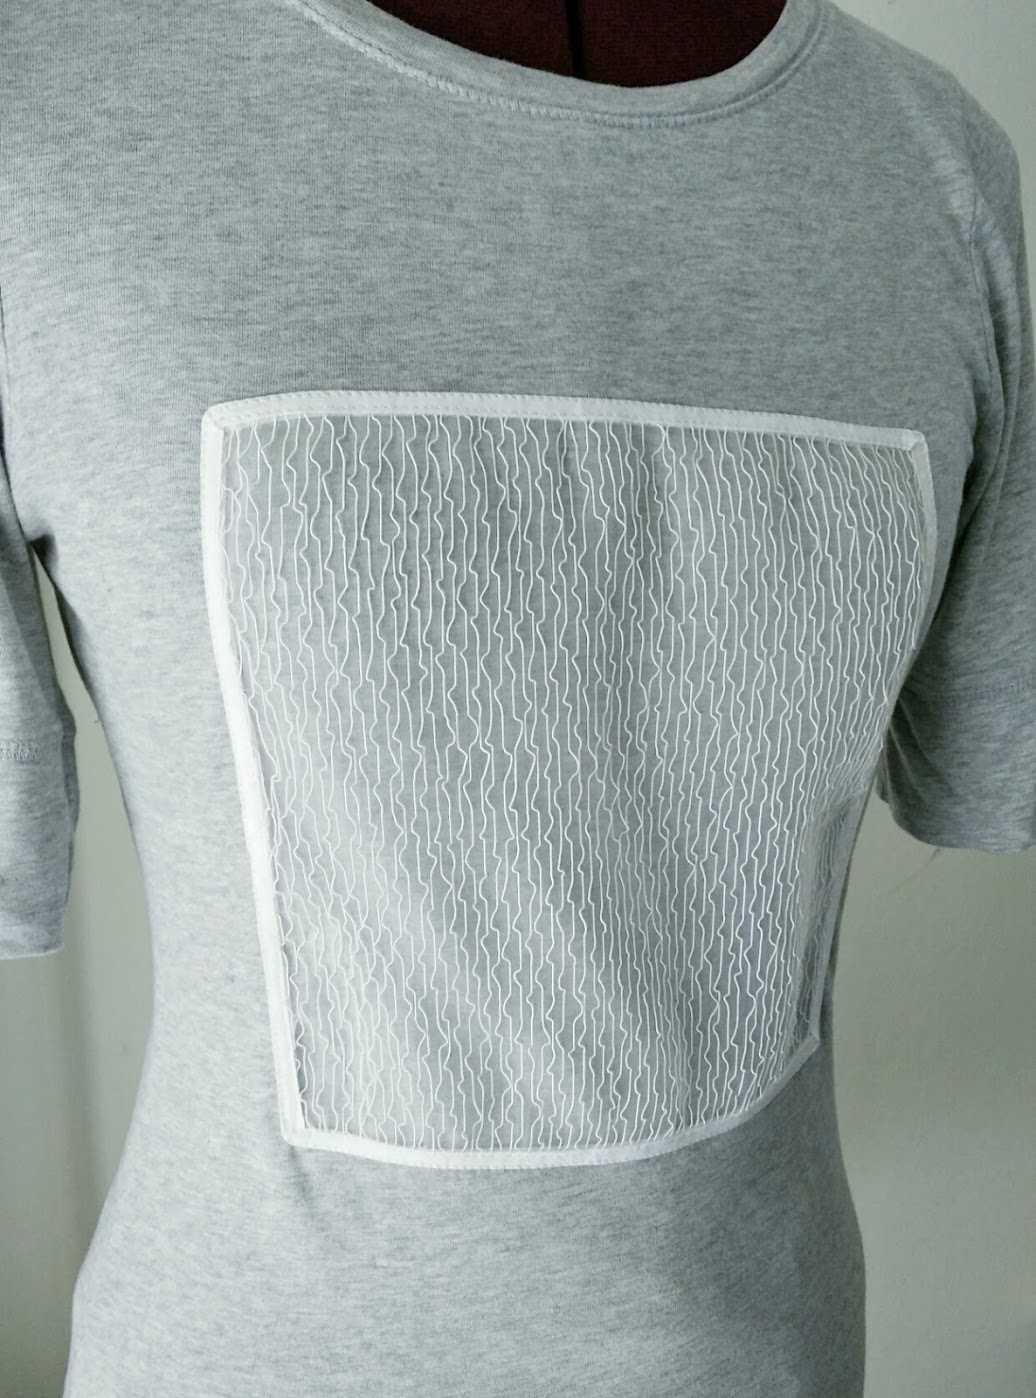
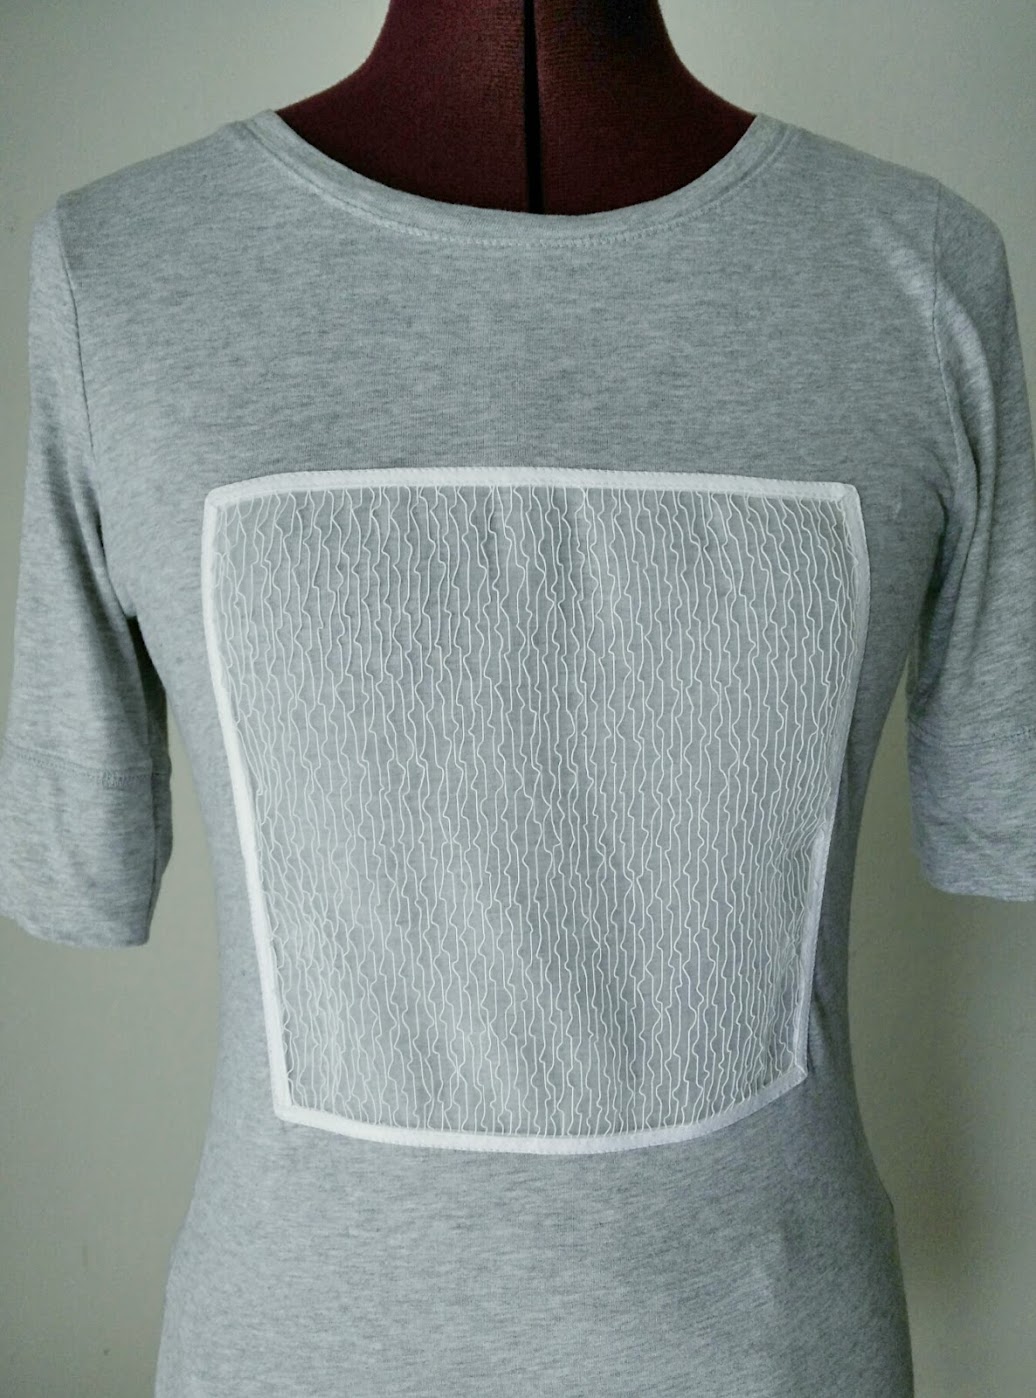
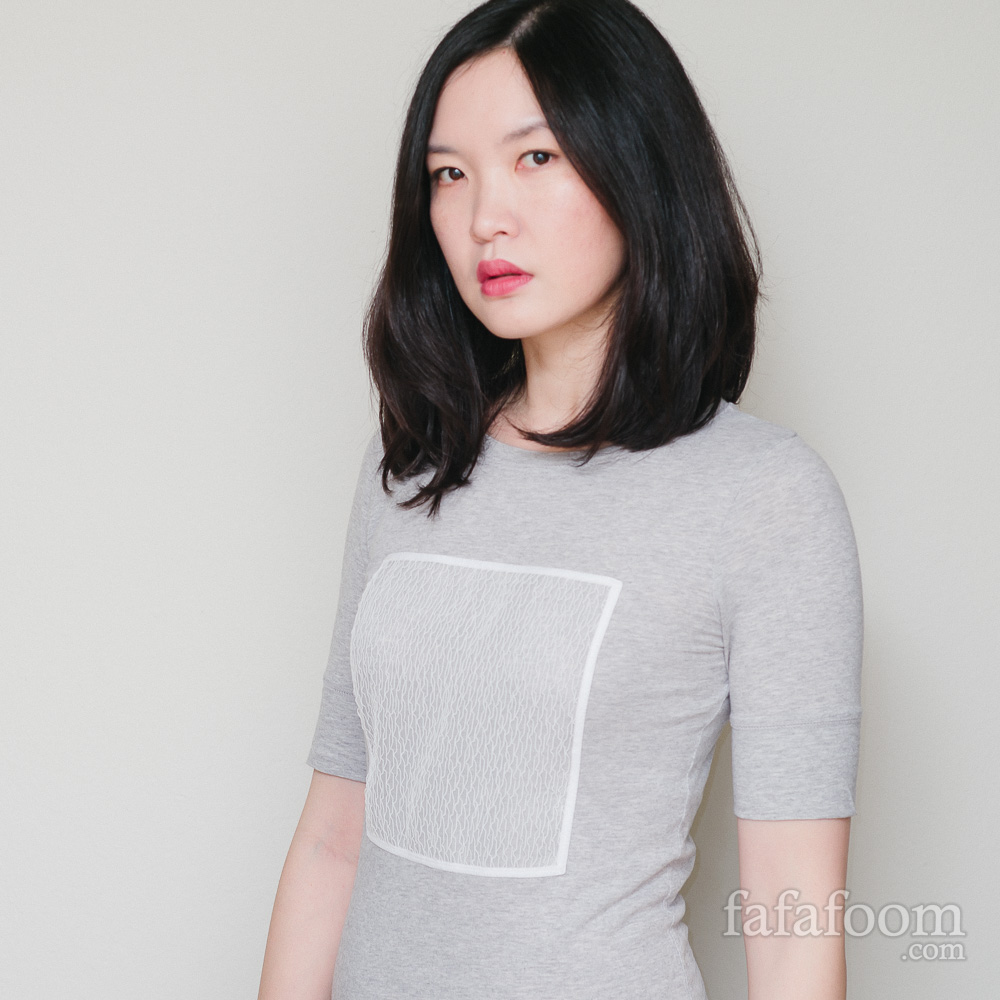
The Result: DIY Square on a Tee
Finally, time to model the finished project! And since I got a new hair cut (thank you Su from Nabi Salon for the gorgeous long bob cut), it’s time to flaunt that as well!
I also tried layering the tee over a semi-transparent shirt (from ASOS). A dress shirt with thicker fabric won’t work, but a lightweight fabric like this one works well in balancing the tee, I think.
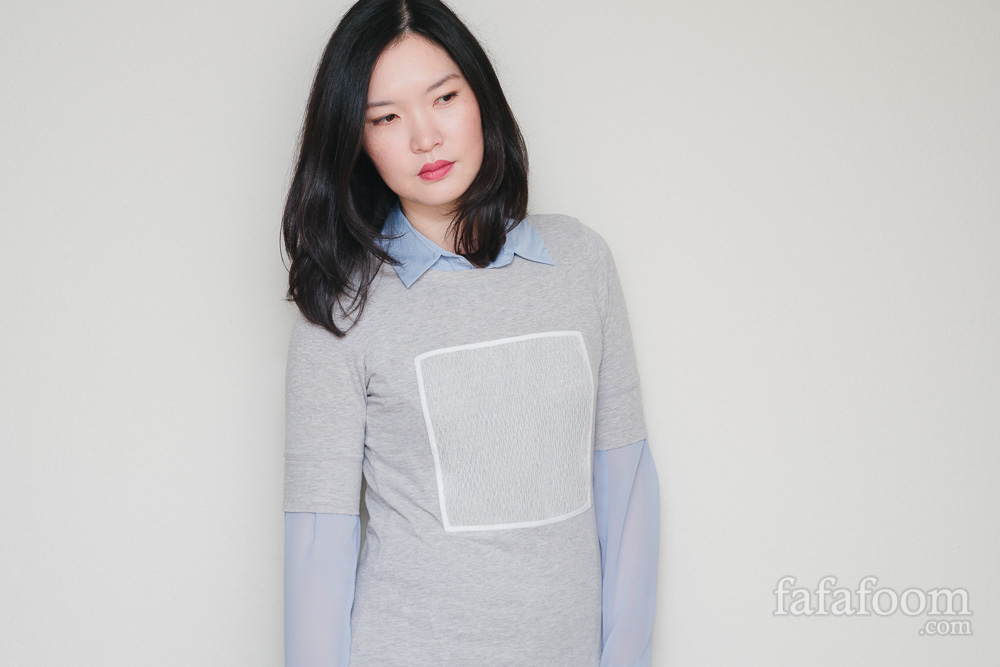

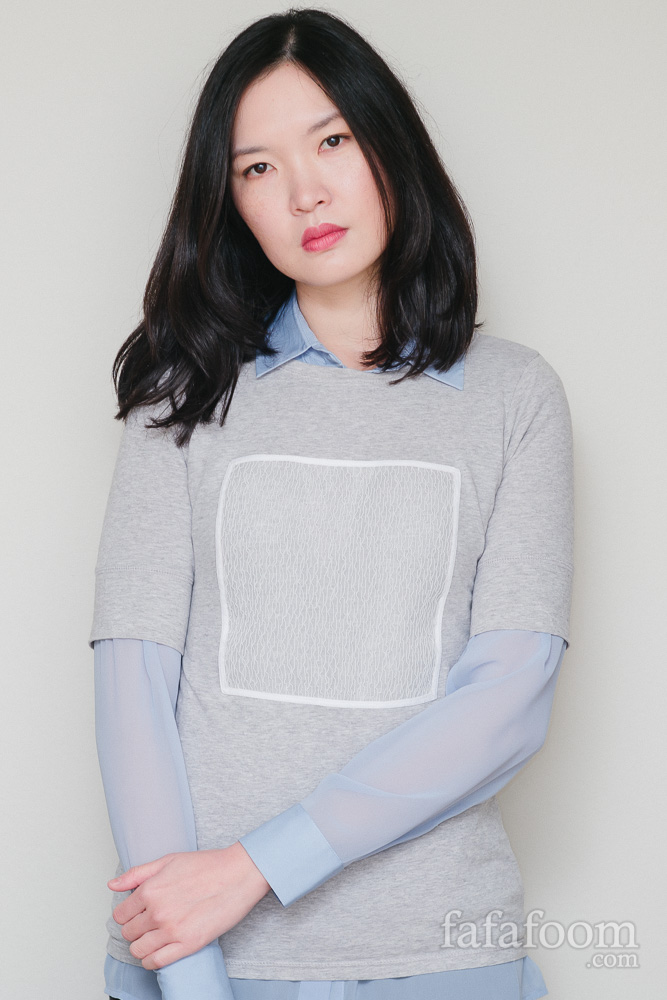
Now I’m thinking of wearing this tee layered on a shirt, with jeans, a pair of black boots, and a grey anorak jacket for work! Note to self: I need to do that sometime soon.
So there you have it! What do you think about my DIY Square on a Tee? When I wear this for work, I will surely post the outfit on Instagram :)
Thanks for reading; until next time,
Musank
Disclaimer: I may earn a small commission for my endorsement, recommendation, testimonial, and/or link to any products or services from this website. Thank you for your support!
Never Miss a Post
Enter your email below to receive the latest Fafafoom Studio post in your inbox.
Browse more posts
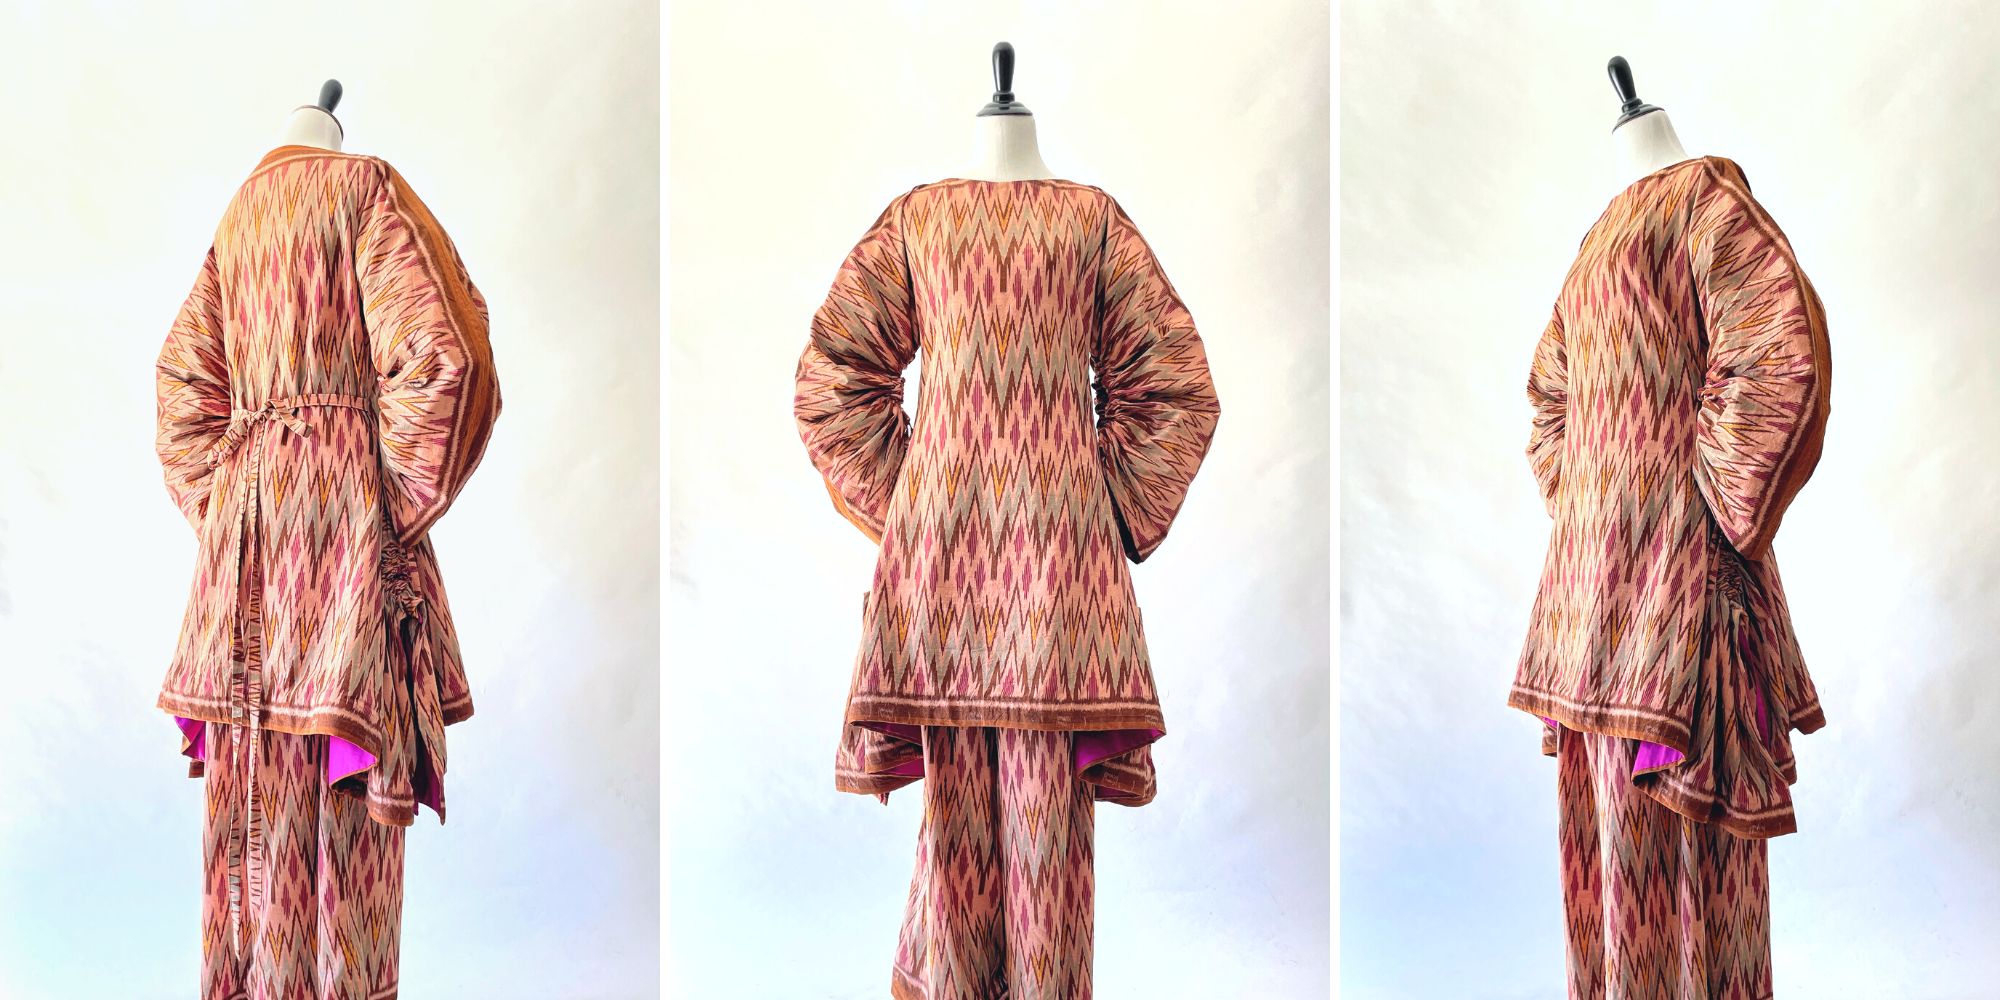
Interpreting Kebaya, Making a Modern Ethnic Ensemble
Modern Ethnic outfit is my interpretation of kebaya dressing. They are made using vintage ikat textile and inspired by several free minimal-waste patterns. Only on fafafoom.com.
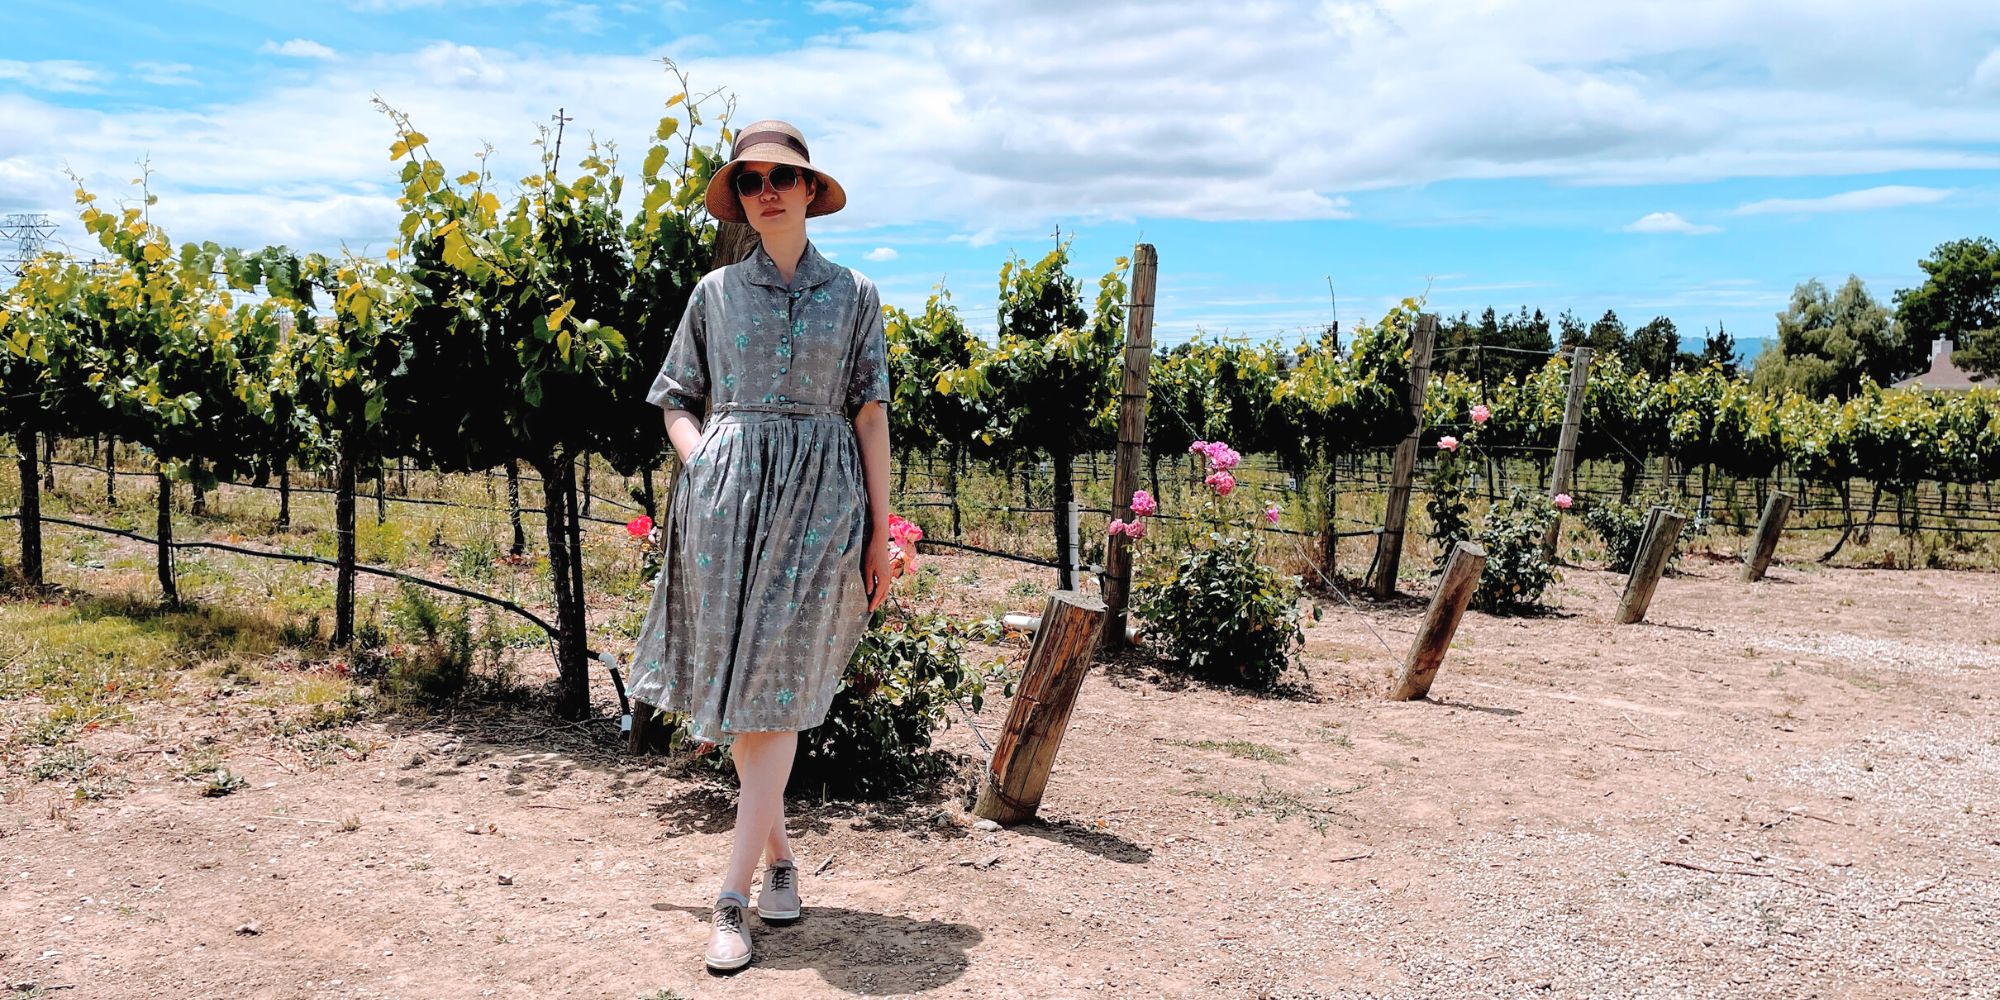
Restoring a 1950s Atomic Age Dress
Restoring and repairing a beautiful 1950s Dress for my summer 2022 wardrobe. Smart alterations include lining and inseam pockets. Only on fafafoom.com.
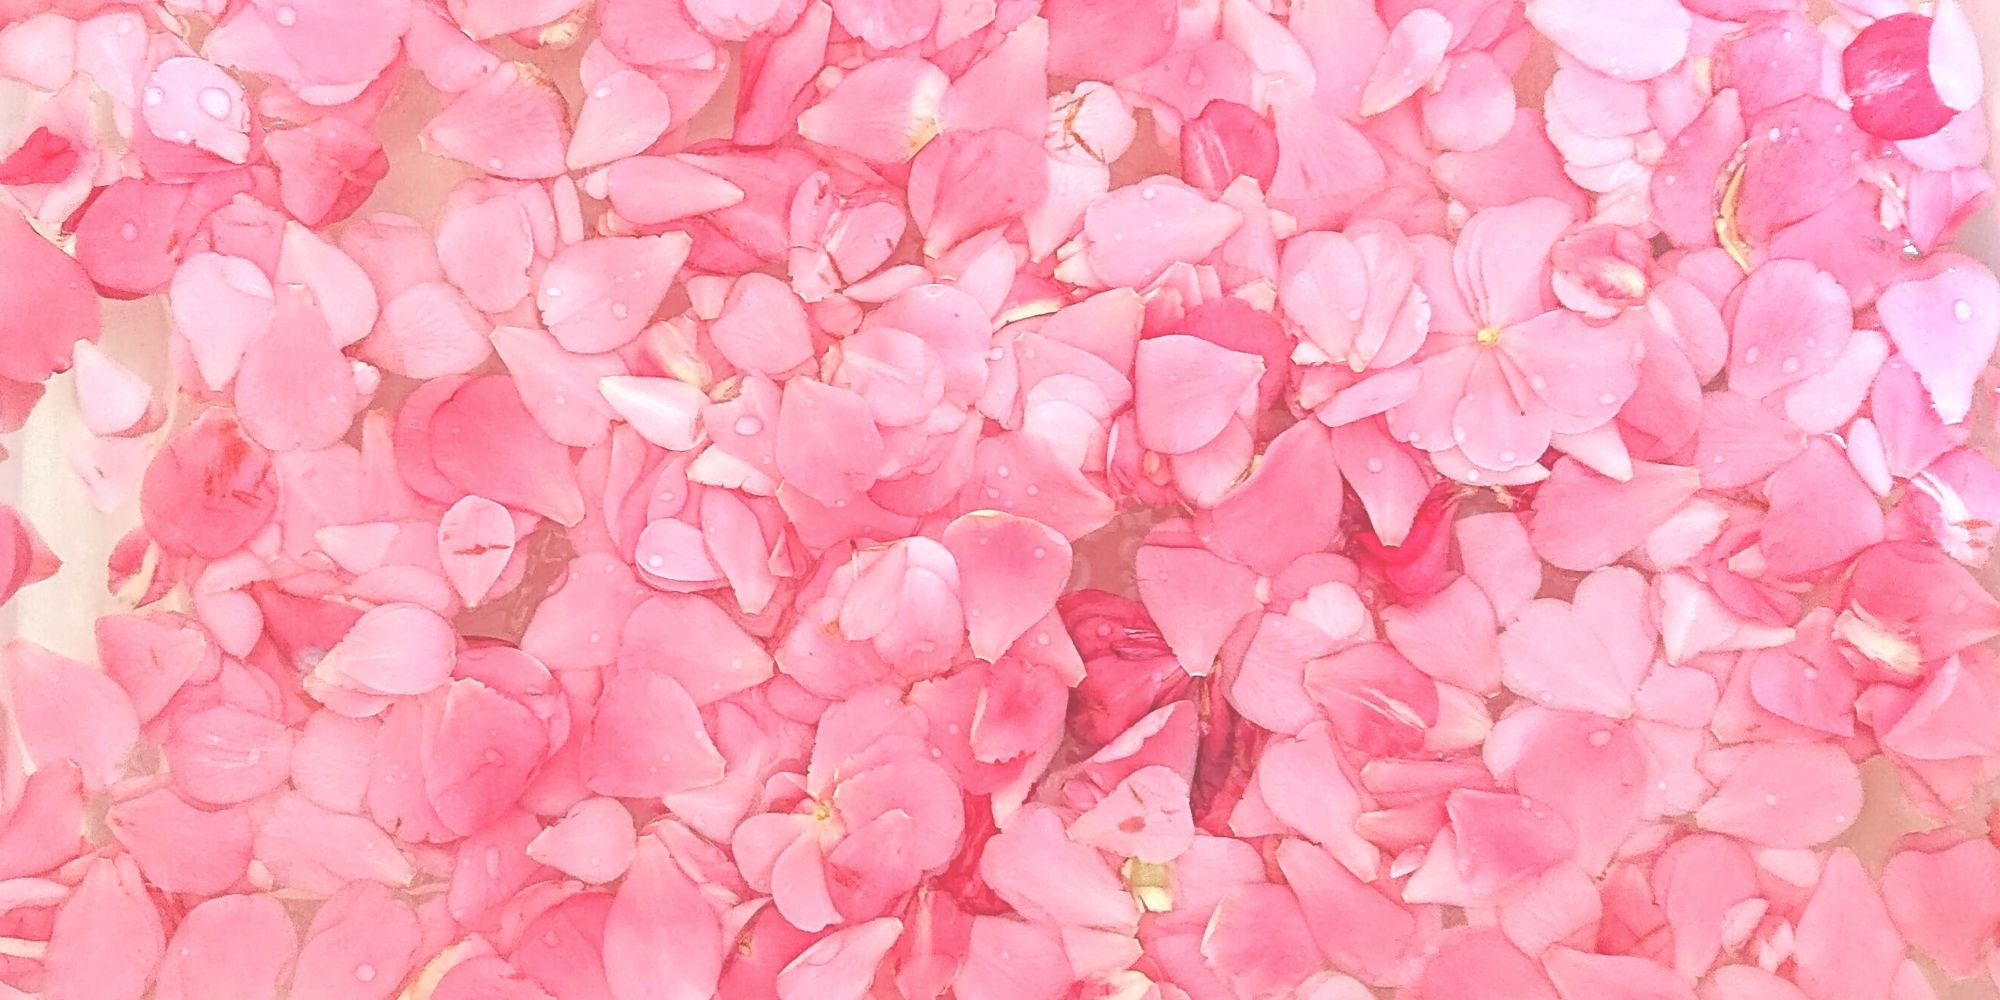
Pink Delight! Natural Dyeing with Camellia Flowers
My next experiment is dyeing with camellia flowers. Amongst all natural dyeing projects I have done so far, this is my favorite. Check out the pink delights! From fafafoom.com.
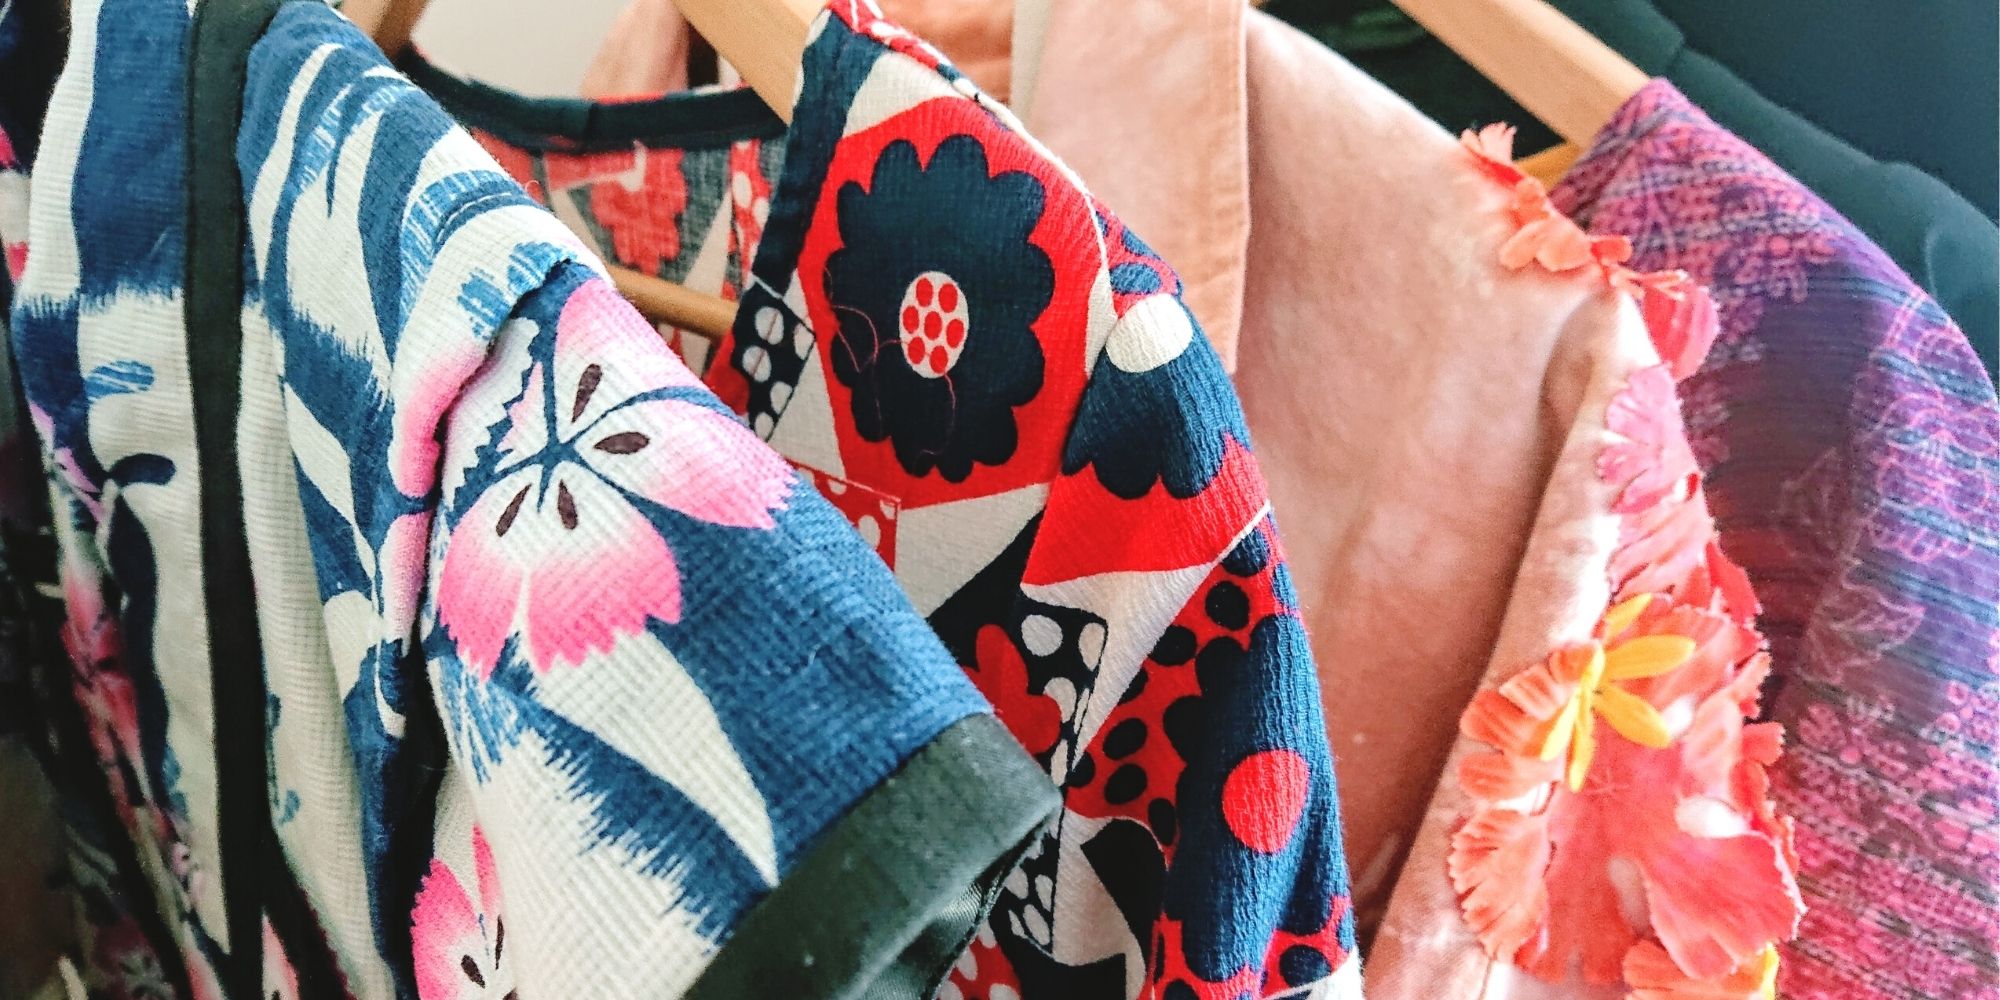
5 Slow Fashion Tips for a More Sustainable Wardrobe
Five slow fashion tips to help you transform your sustainable wardrobe for a cleaner, greener future. A guest feature from Reese Jones for Fafafoom.com.
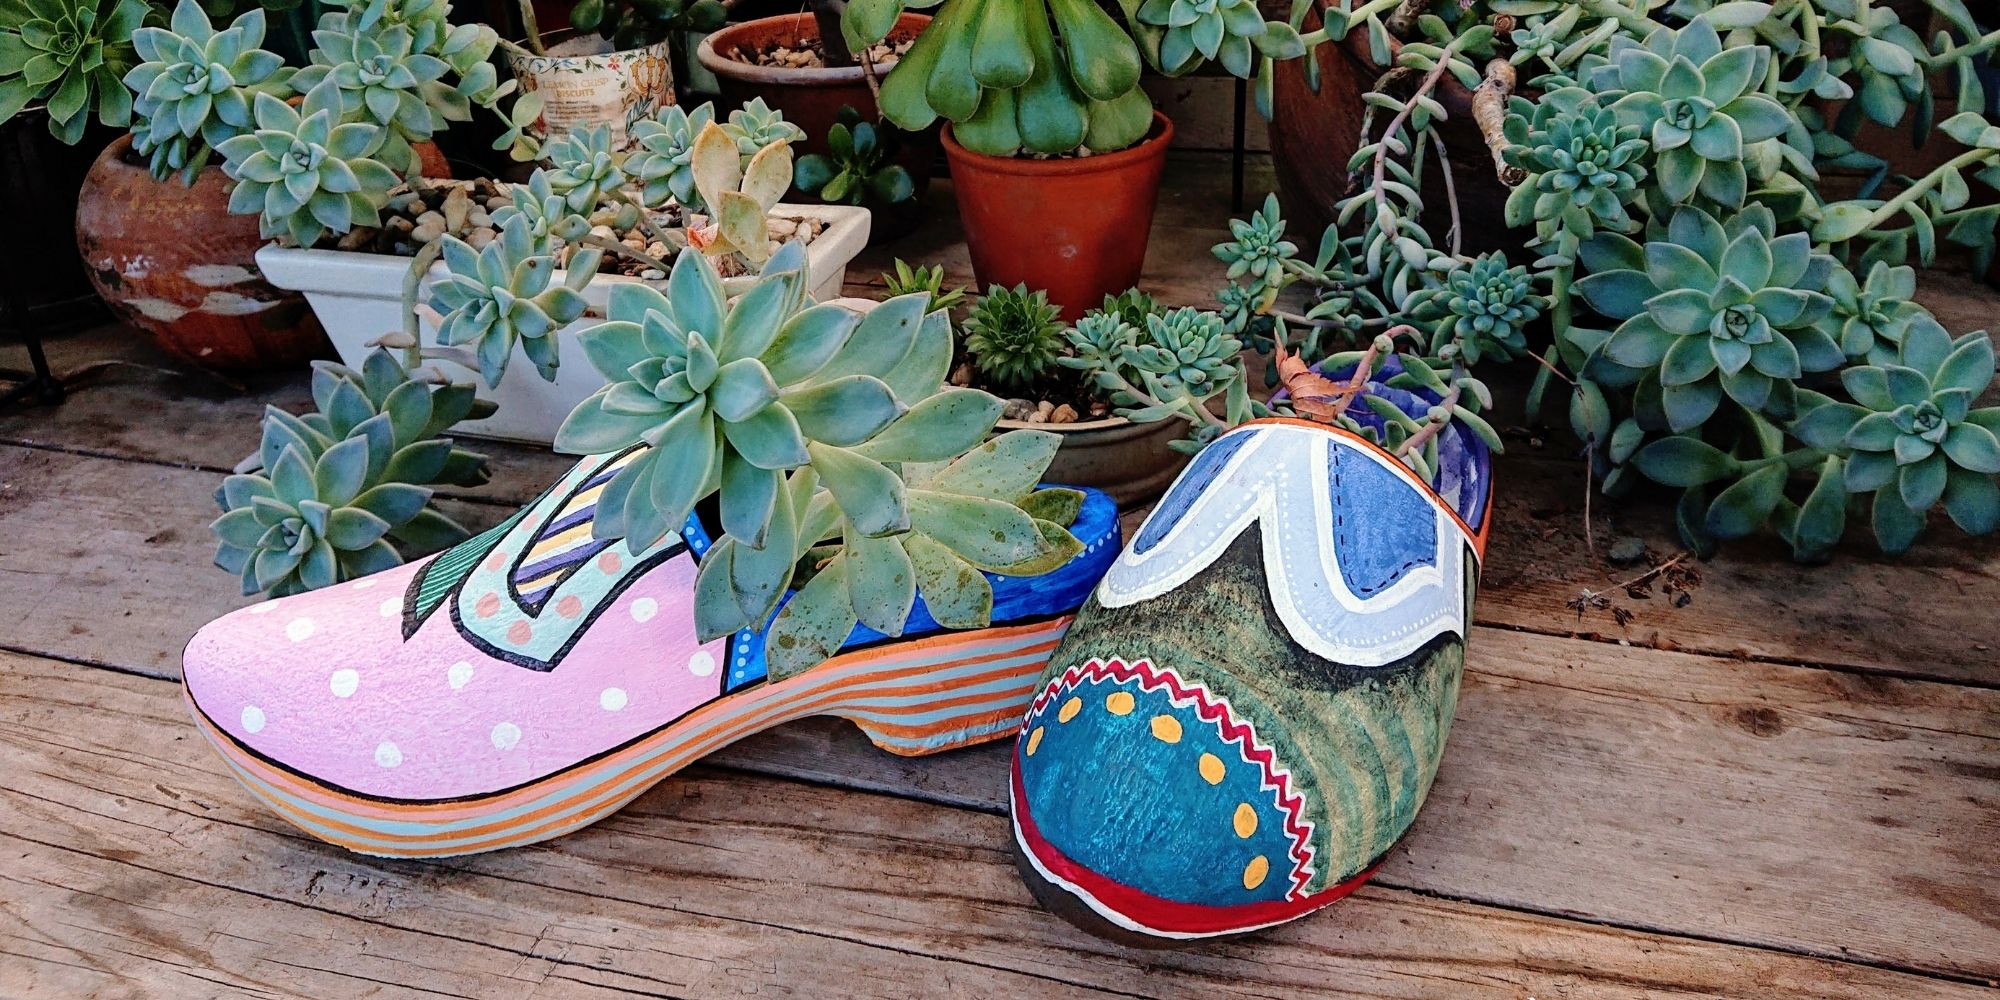
Upcycling and Repairing Ideas for Garden Decor
The garden has become a special place, especially during Covid-19 pandemic. During shelter-in-place period, I made garden decors by upcycling locally sourced items.
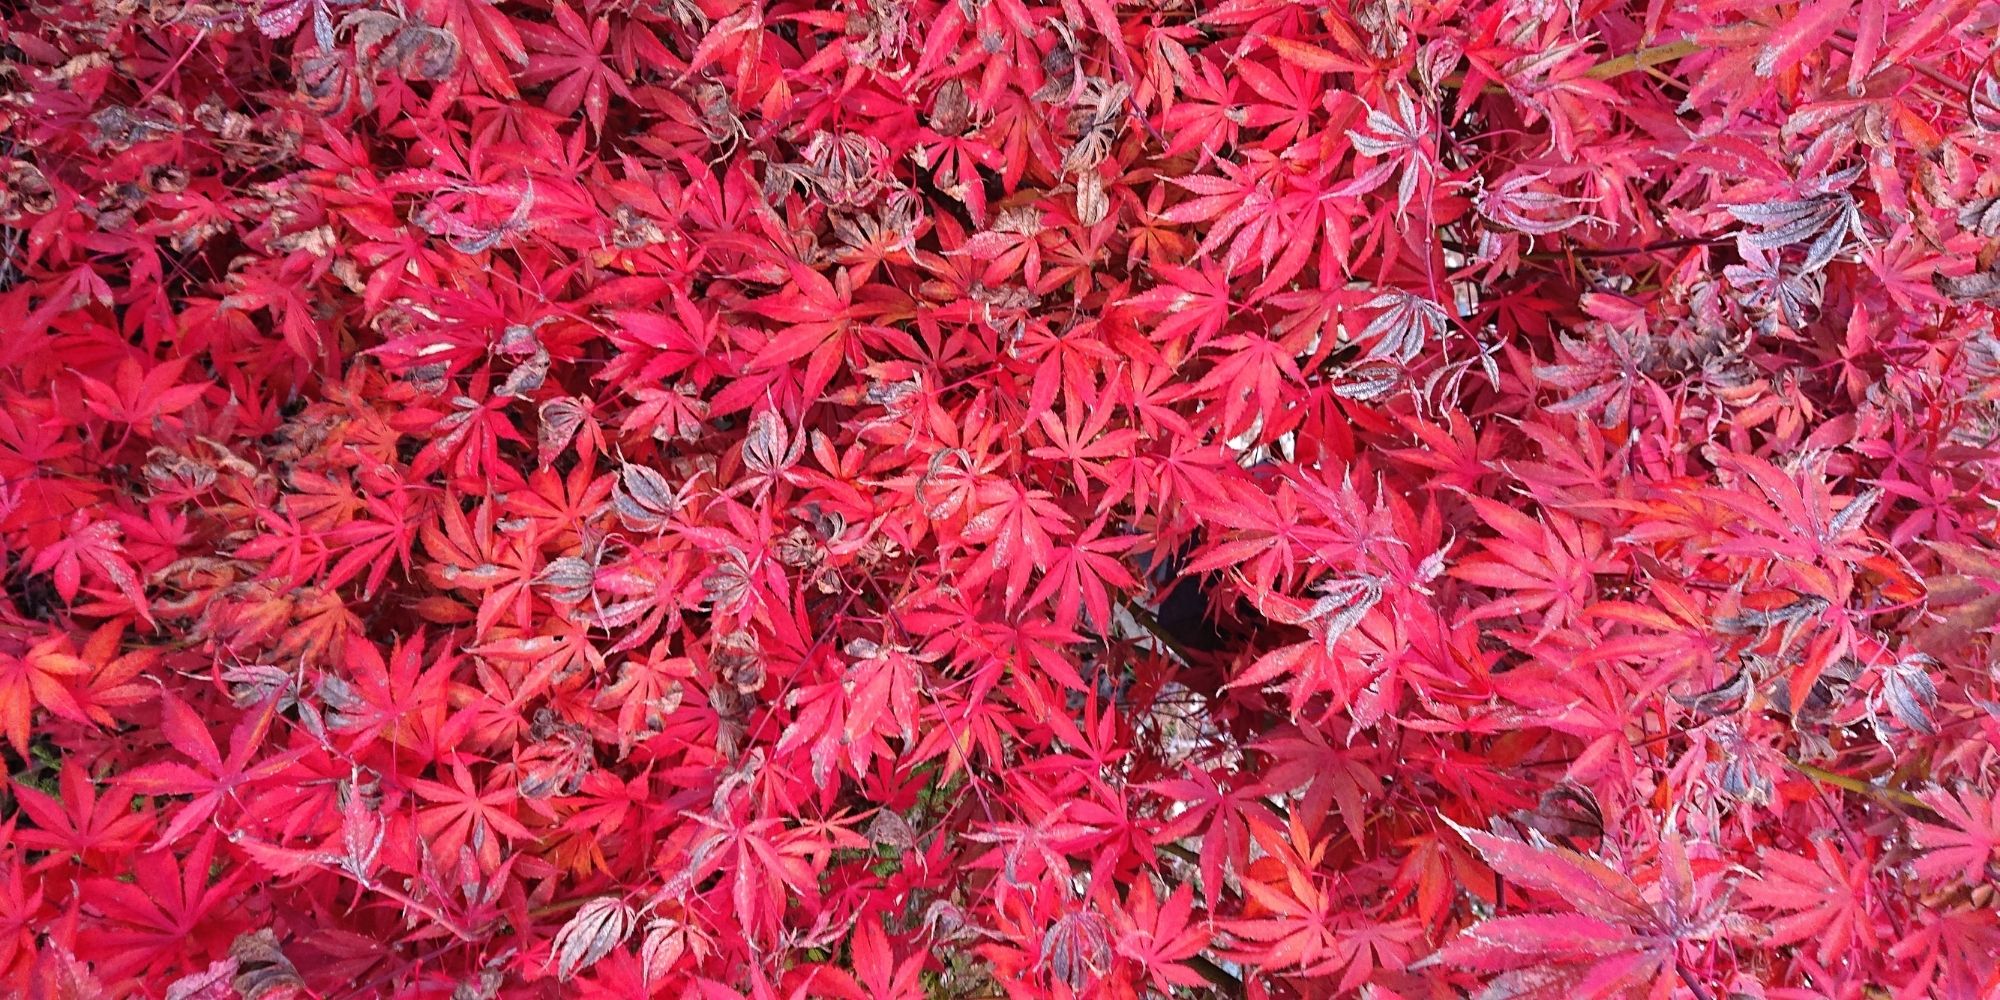
Natural Dyeing with Japanese Maple Leaves: Notes from a First-timer
Notes from my first natural dyeing experiment with Japanese maple leaves in fall season. Three batches of dyeing using fallen leaves sourced from two different trees in the garden. So much to learn and enjoy afterwards.