
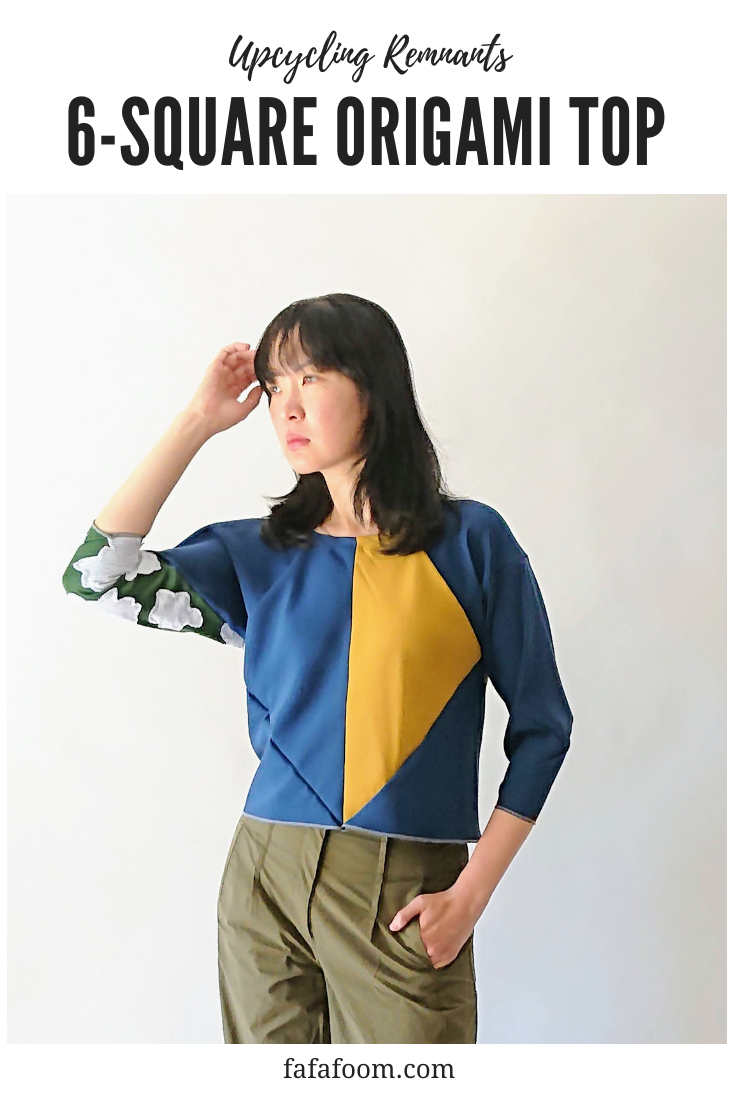
Made following a Handwoven magazine’s 1996 article, the 6-square origami top only has square-shaped pattern pieces and very straightforward to assemble. The timeless top is easily adjustable and can be highly personalized depending on the sewist!
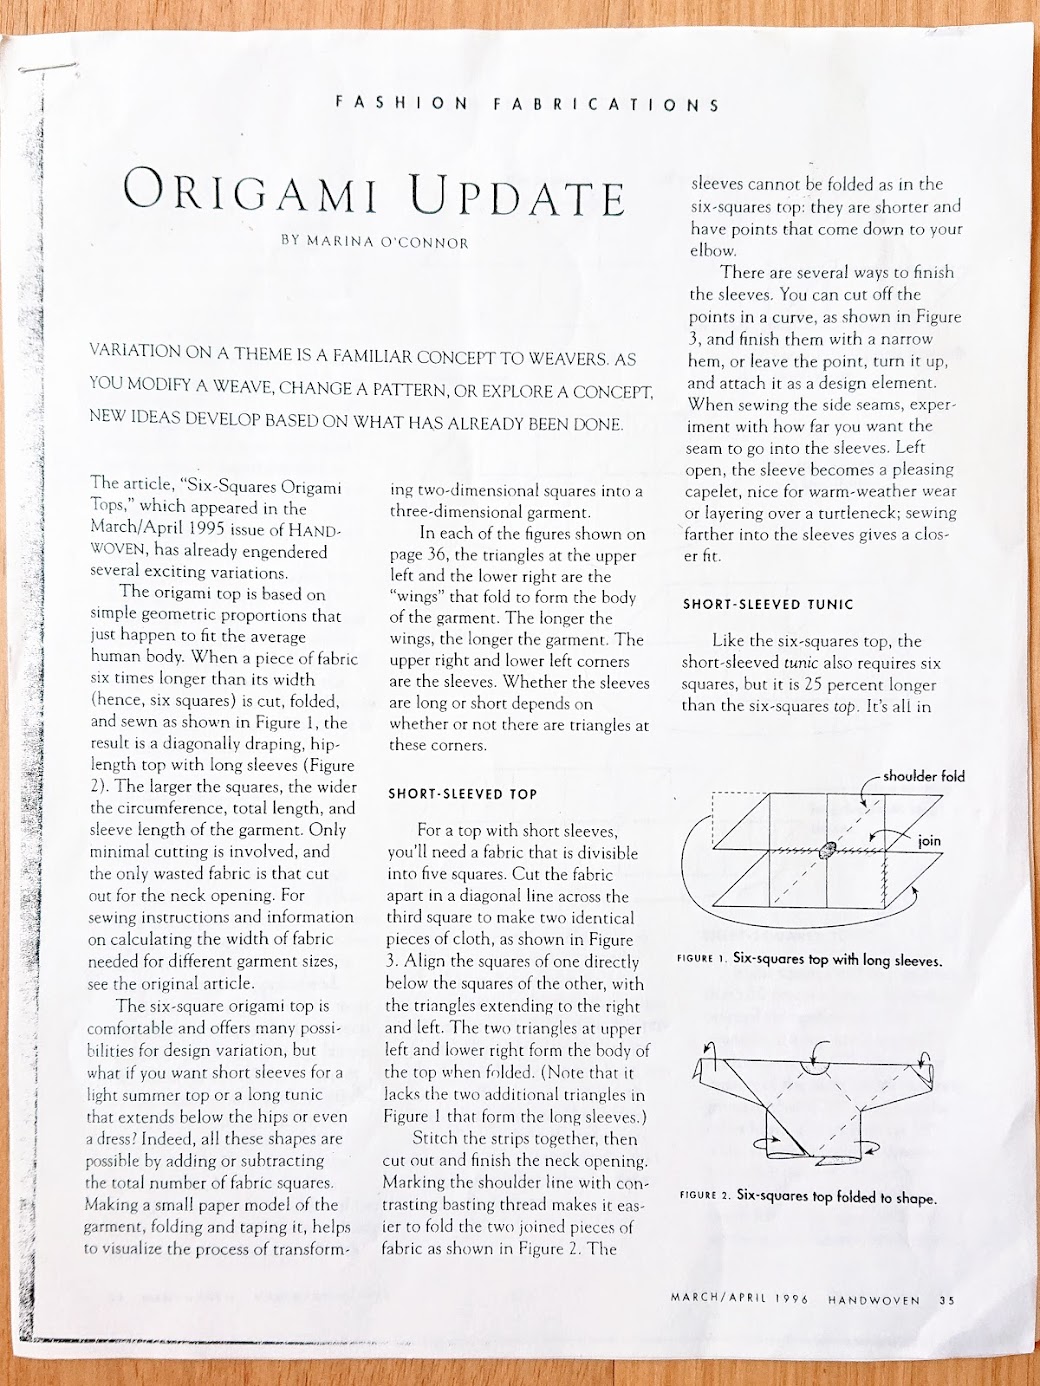
If the linen handkerchief dress is inspired by a 1977 article, the 6-square origami top faithfully follows the overview and illustration of Origami Update article of Handwoven, March/April 1996 issue. My floor loom weaving teacher gave me a copy of this article, and it took me a couple years before I actually tried making a 6-square origami top.
After it was done, I was berating myself for not making it sooner. It was straightforward, classic yet fresh, and oh so comfortable. It’s only natural that I made a second one.
Subscribe to my newsletter
The 1996 Article
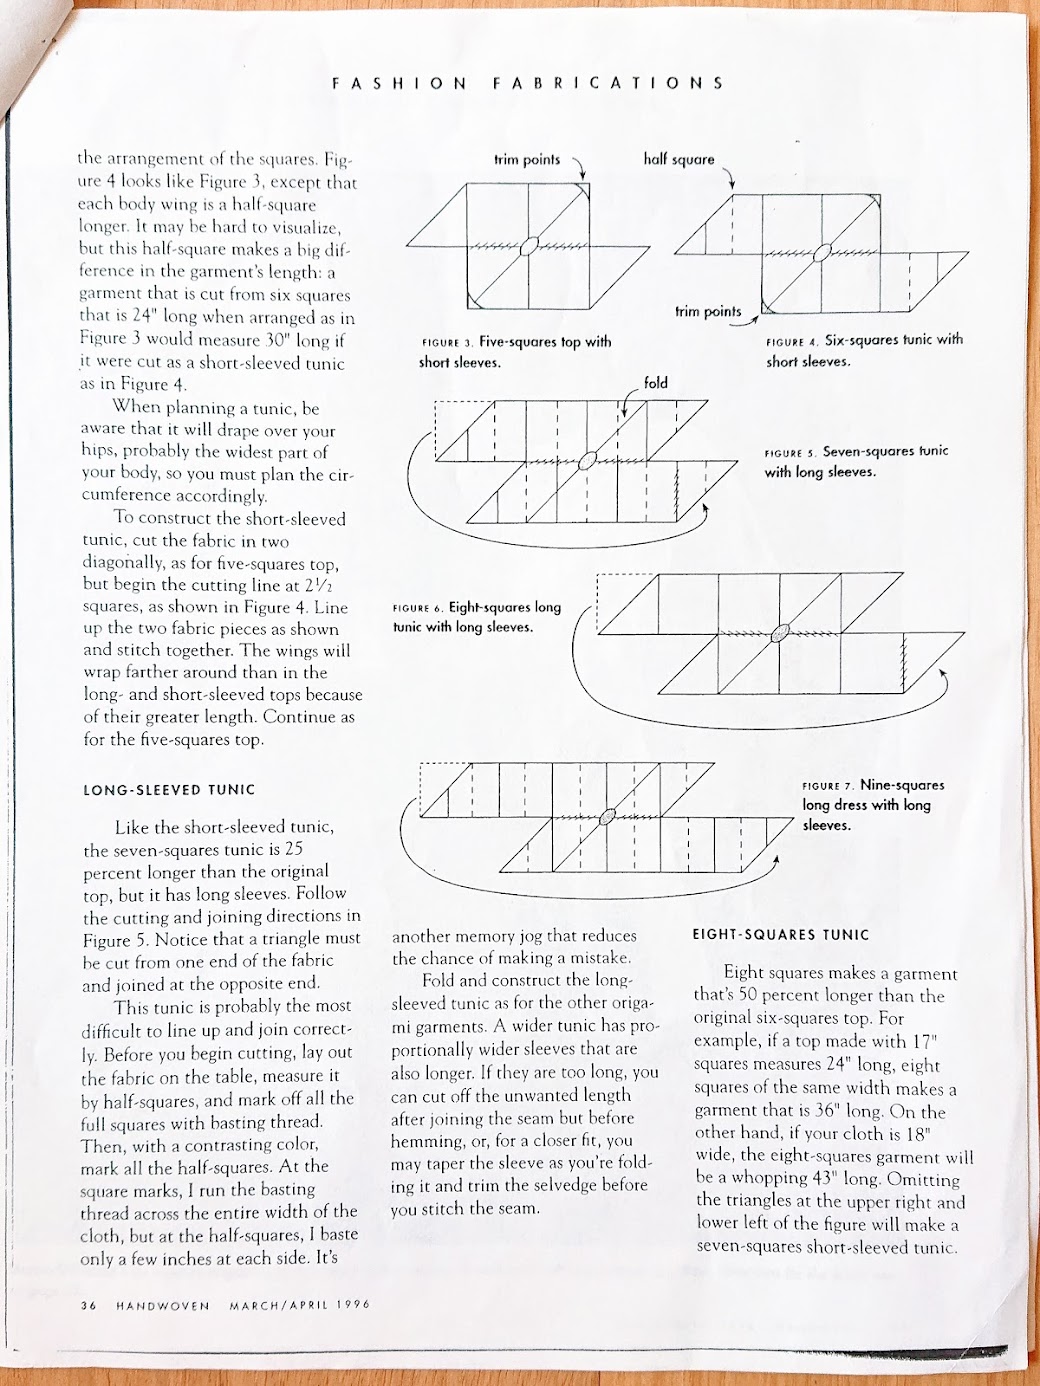
I took pictures of the Origami Update article below, so you’re welcome to read it in its entirety. The six-square top, which has long sleeves, is only one variation mentioned. You can make 5-square short sleeve top, 7 and 8-square tunics, or 9-square long dress. The concept and methods of making are the same.
As of today, I have made two 6-square tops. I made one last year using of a couple of used and no-longer-wanted MUJI pillowcases. It consists of 5 full squares and two triangles. The only measurement I needed to figure out was how big I wanted the square to be.
For that, I measured a straight line from my jugular notch (the mid-point between your clavicles) to my waist. The length of the garment is the diagonal length from one square point to another point across it. I could compare that number to my side-to-side measurement across the bust. If the latter is bigger, then I would use my side-to-side measurement instead.
Then I divided that number with square root of 2 (which is 1.414 when rounded to three decimal points) to know the length of one square side. Before adding seam allowance, one square side for my 6-square top is 15 inches long.
Long story short, I followed the visual instructions and hoped for the best. I opted to do exposed seams finishing. The first top looks like this. I love wearing it around the house, the pillowcase material is so comfy, and it looks quite stylish too!
By then, I realized this is going to be a good project for upcycling a bunch of remnants. Maybe you’re making a bunch of masks, clothes of any kind for yourself, friends and families. Or maybe you run a small batch production and have accumulated remnants from the factory’s cutting floors. Maybe you get a bunch of remnants from someone else and don’t know what to do with them. Maybe you accumulate a bunch of remnants from multiple sewing projects and cannot bring yourself to discard them. Maybe you’re an avid quilter and have much experience dealing with square shaped fabrics?
So how about having fun mismatching remnant pieces, sewing / serging them, cutting five or six (or seven, eight, nine) squares, and making an origami garment for yourself or someone special?
Materials + Tools
You’re welcome to use the article pictures above to make any type of origami top you prefer. For this article, I’m focusing on my making of the second 6-square origami top. Here’s the list of materials:
- Fabric remnants (preferably knit) enough to make 6 squares of your chosen size
- Freezer paper for stabilizer
- Masking tape
- Drafting paper scrap for making neckline
- Bias tape for neckline finishing
- Iron and board, pressing ham
- Extra fine silk pins
- Needle and thread for temporary hand stitching
- Sewing machine (mine is industrial Juki DDL-5550)
- (optional) Overlock / serger machine (mine is Brother 1034DX)
Cutting the fabrics
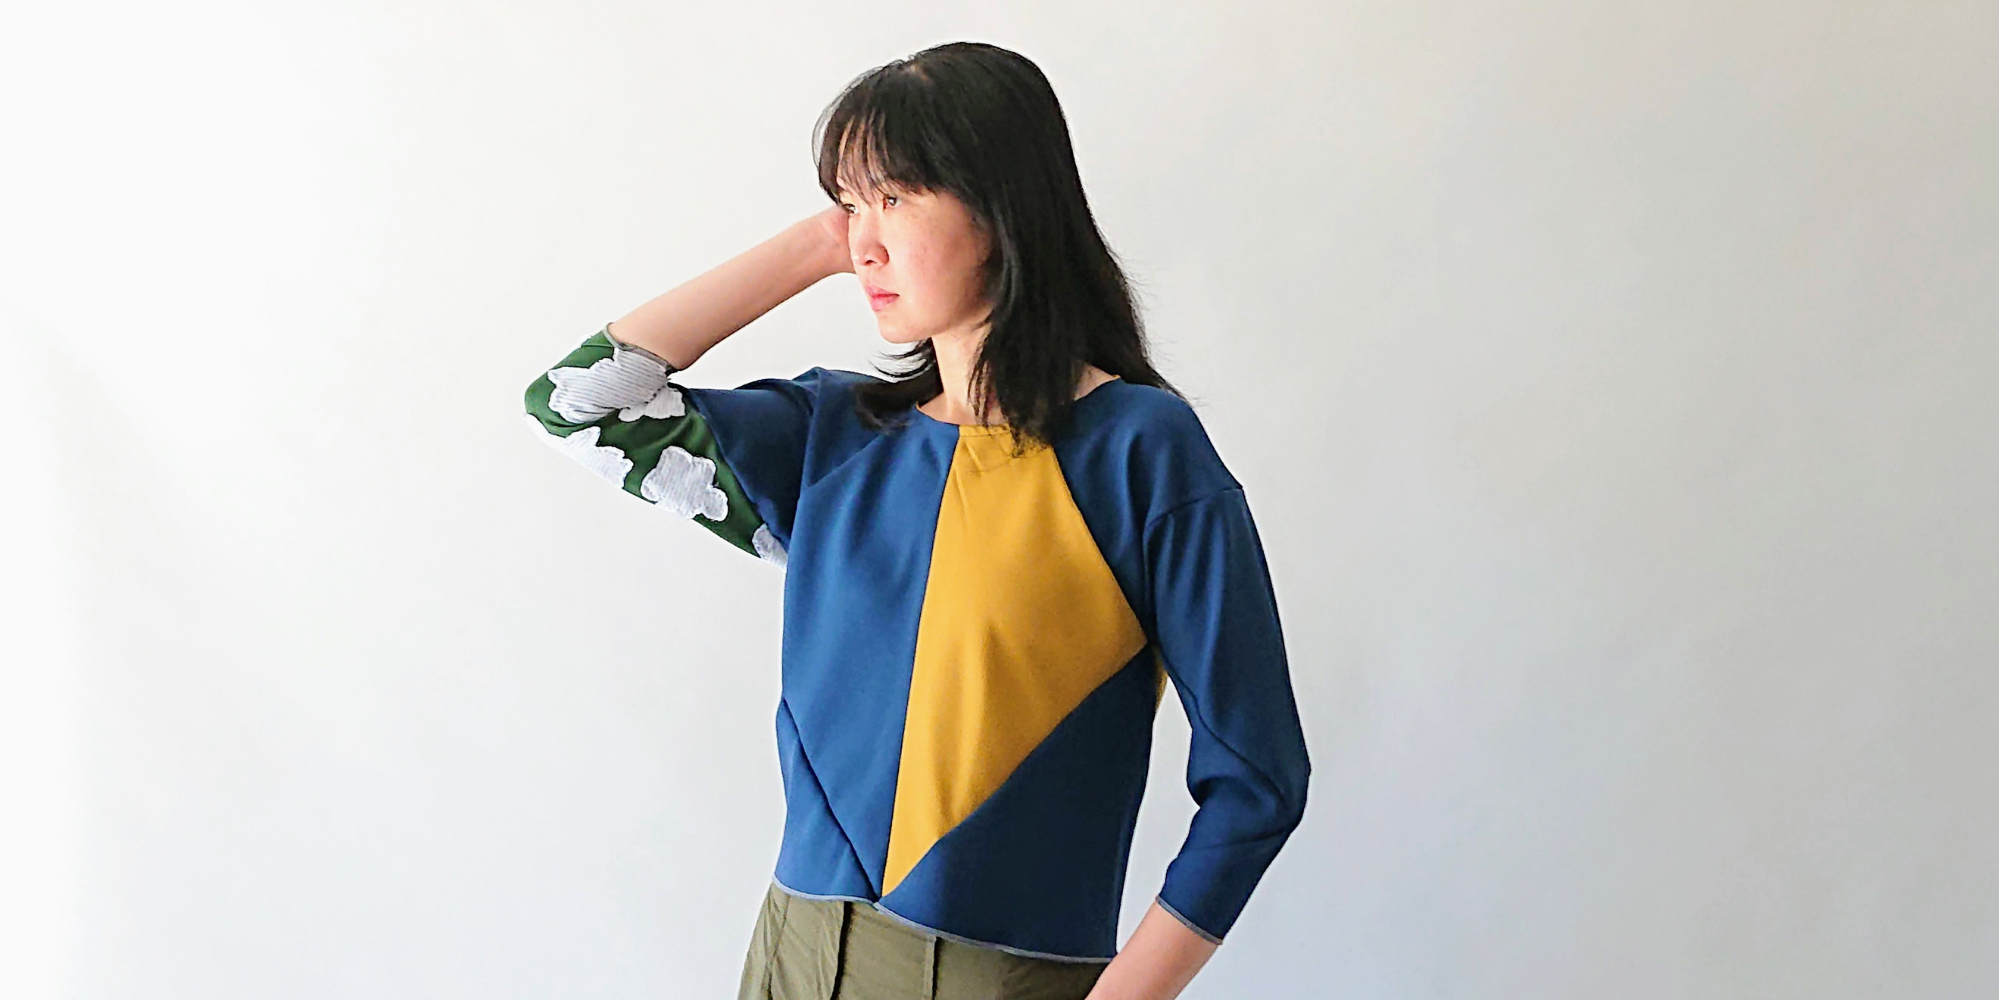
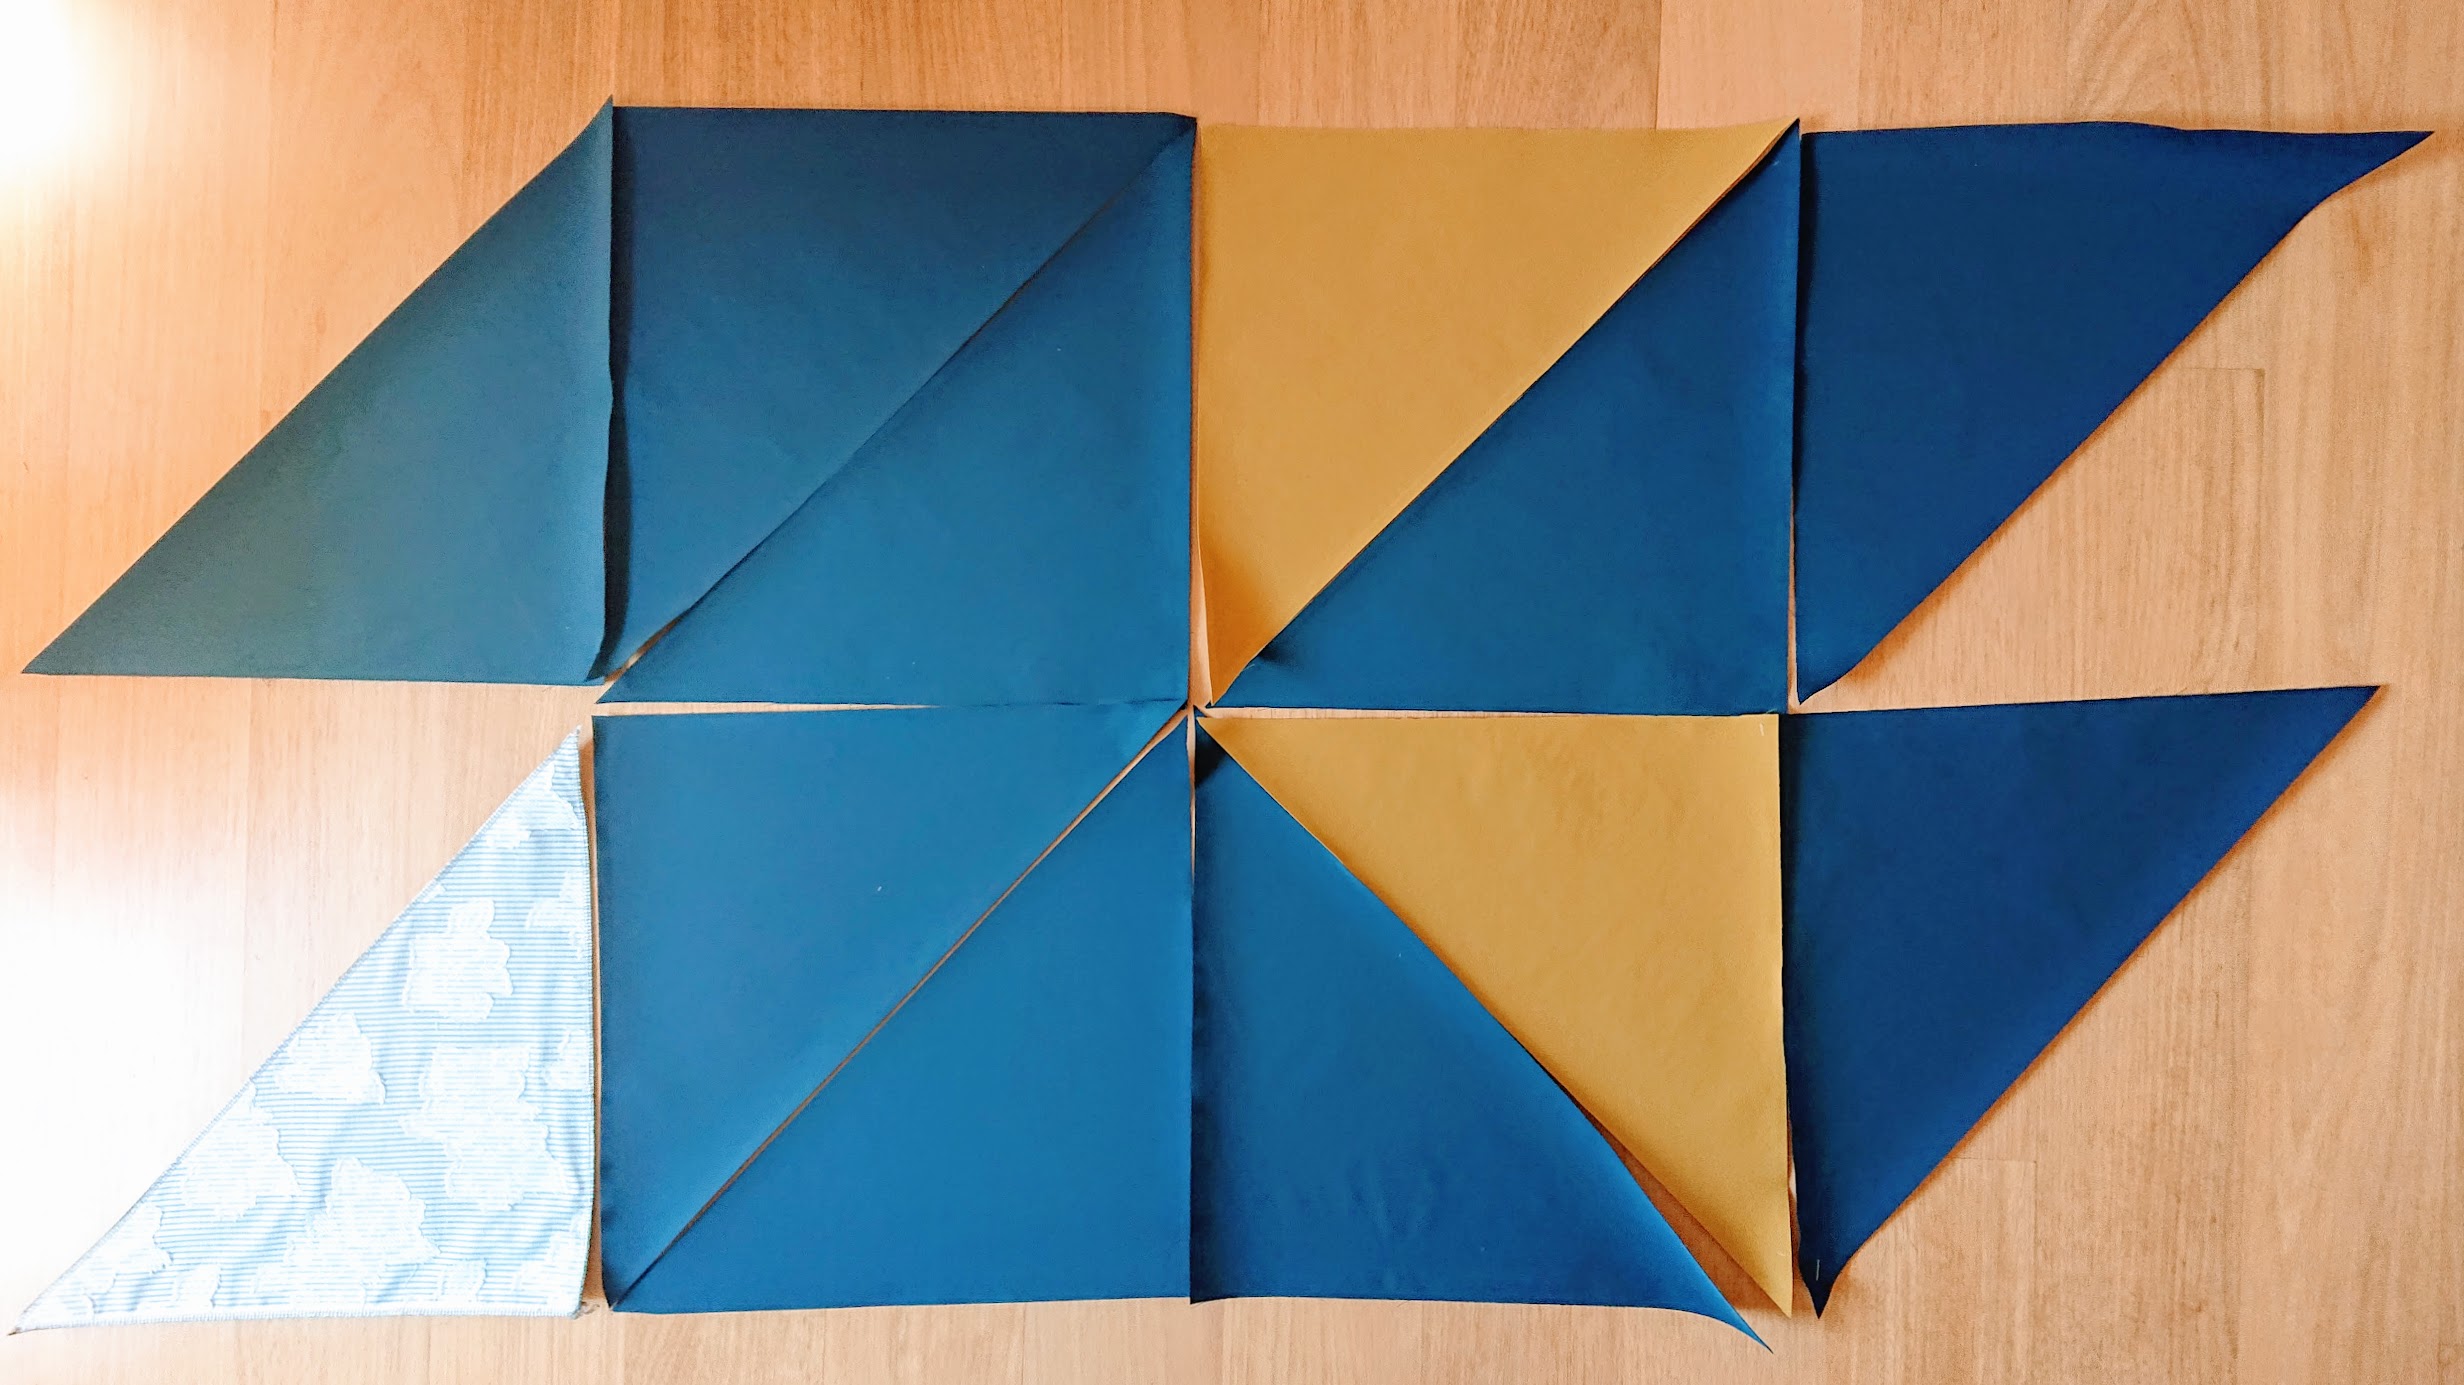
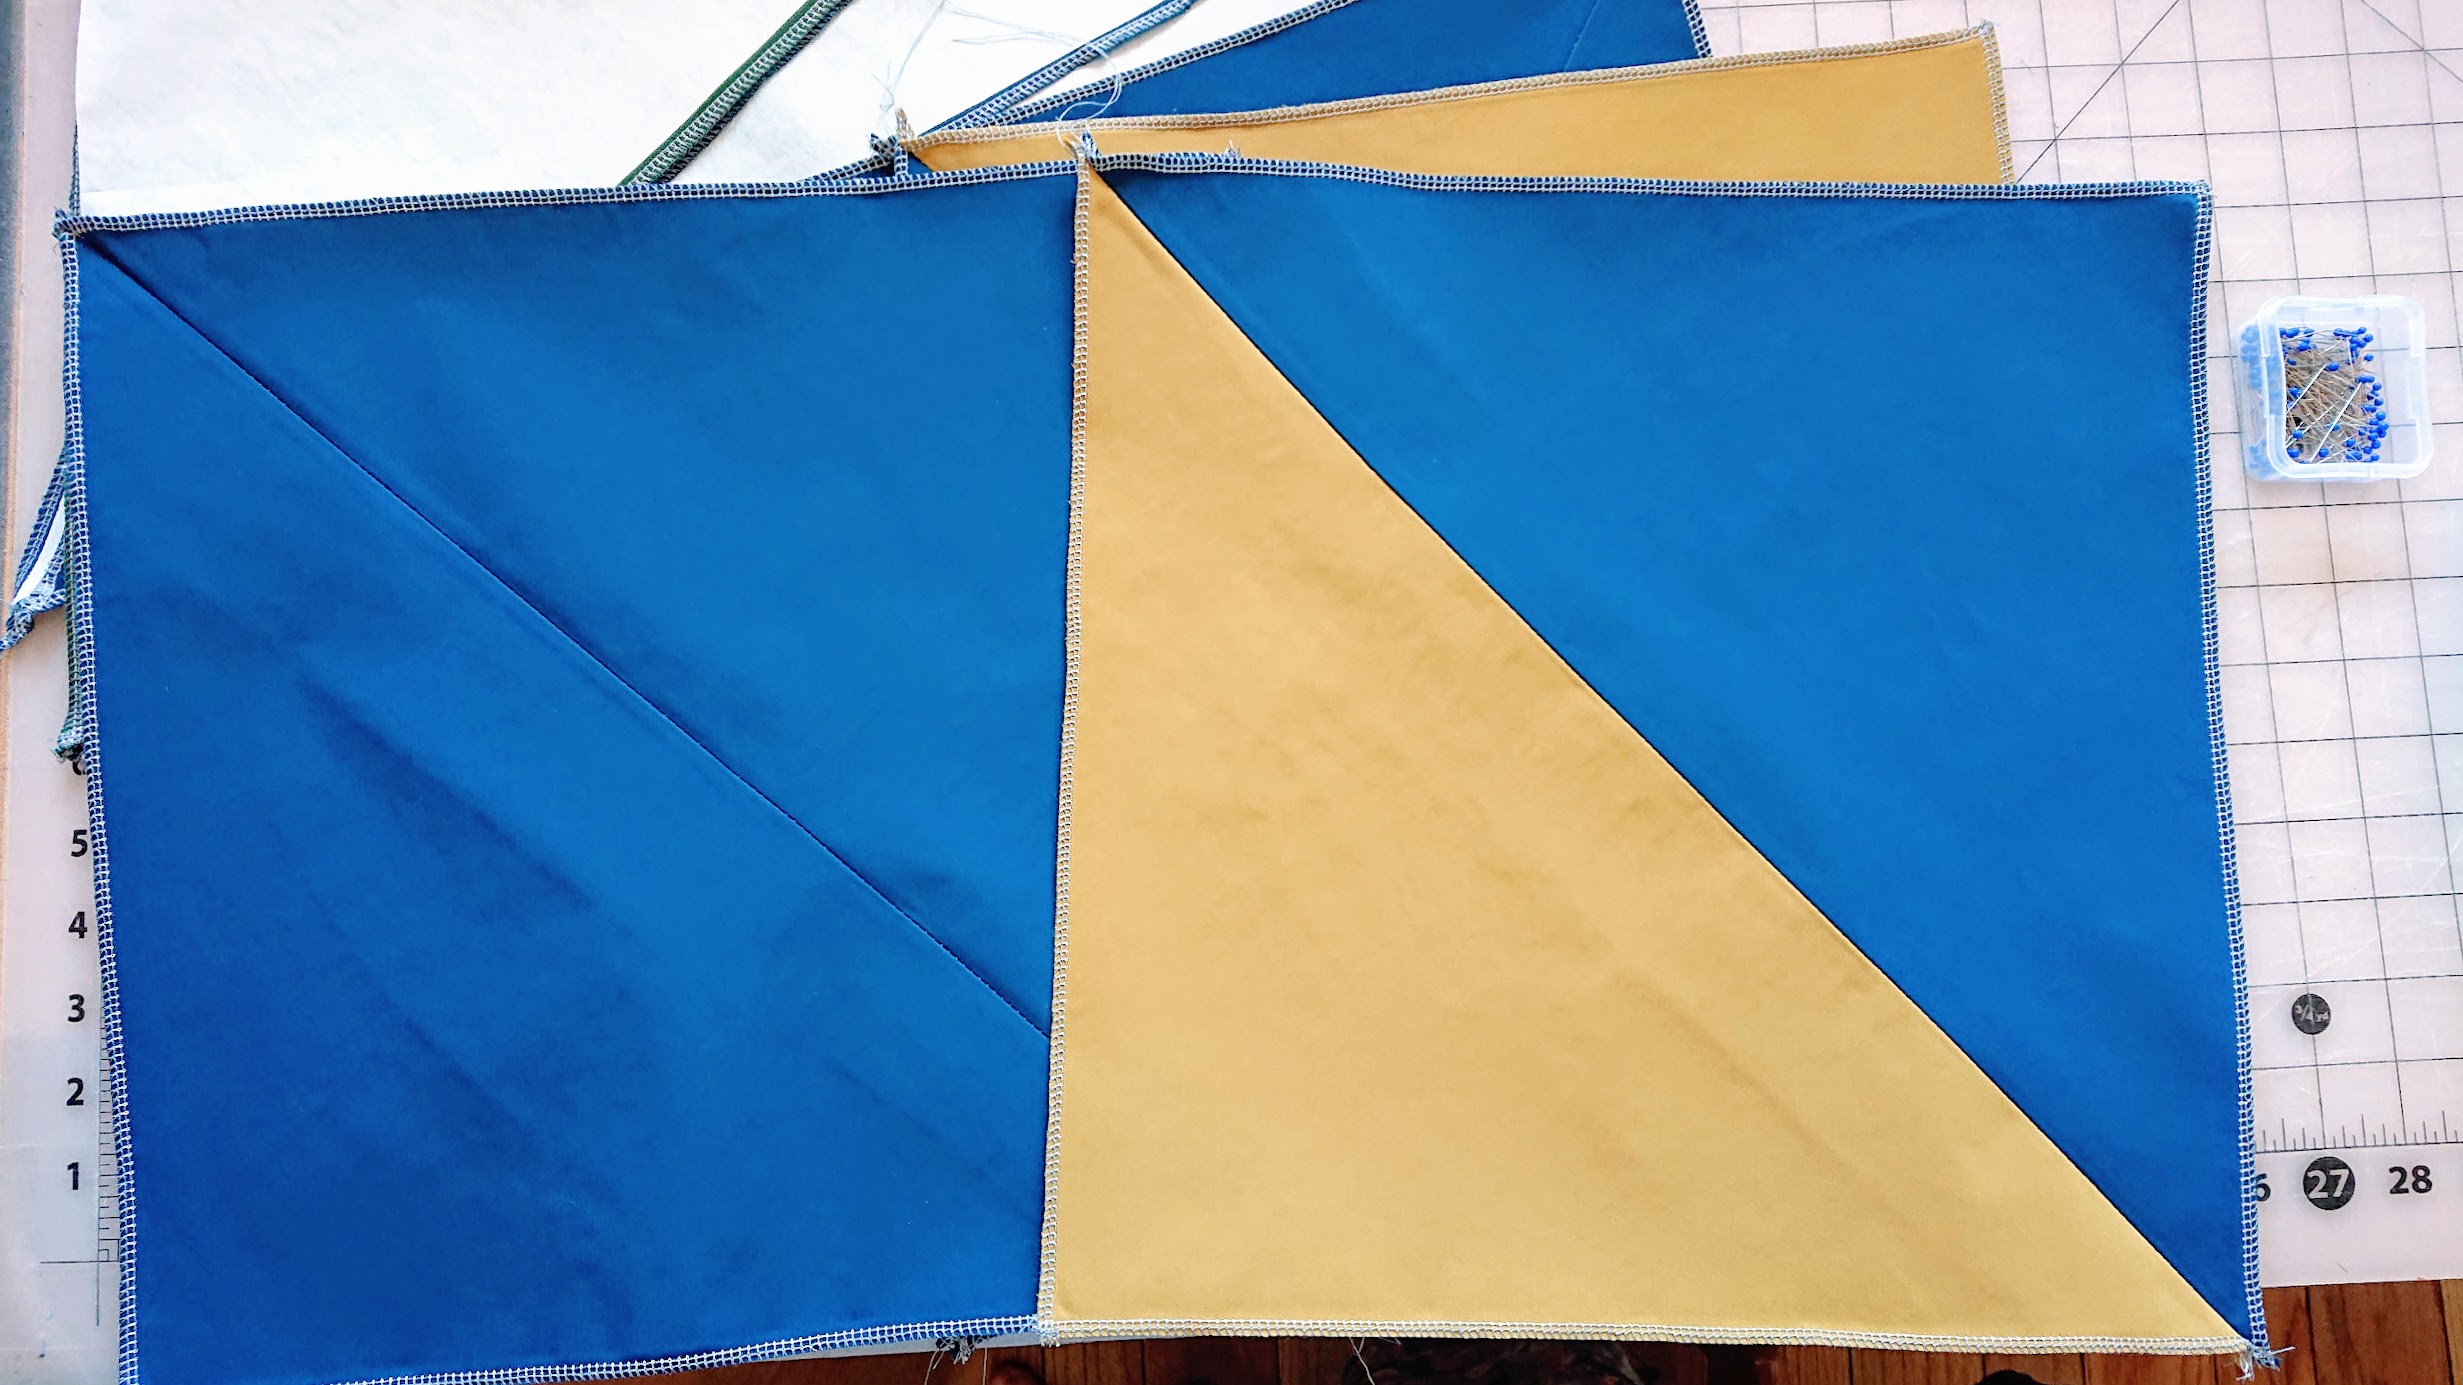
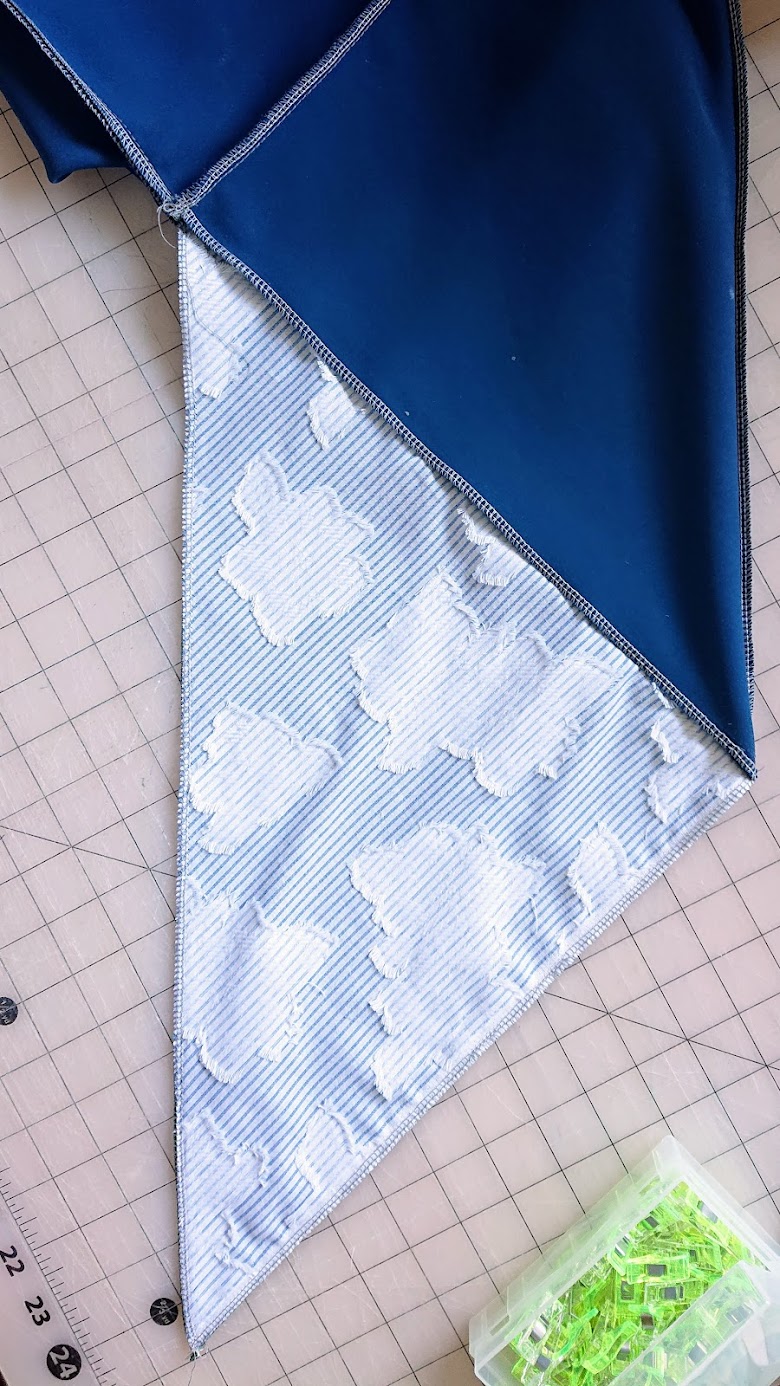
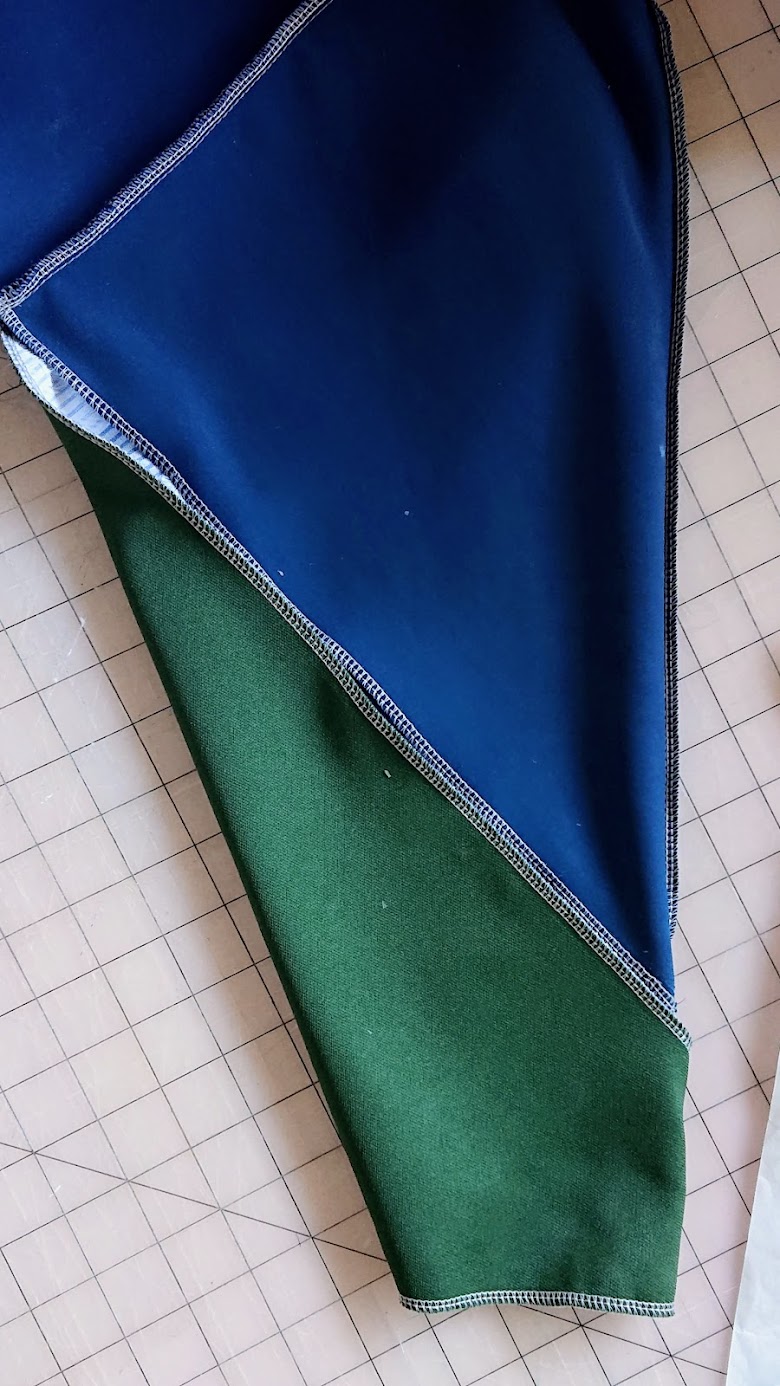
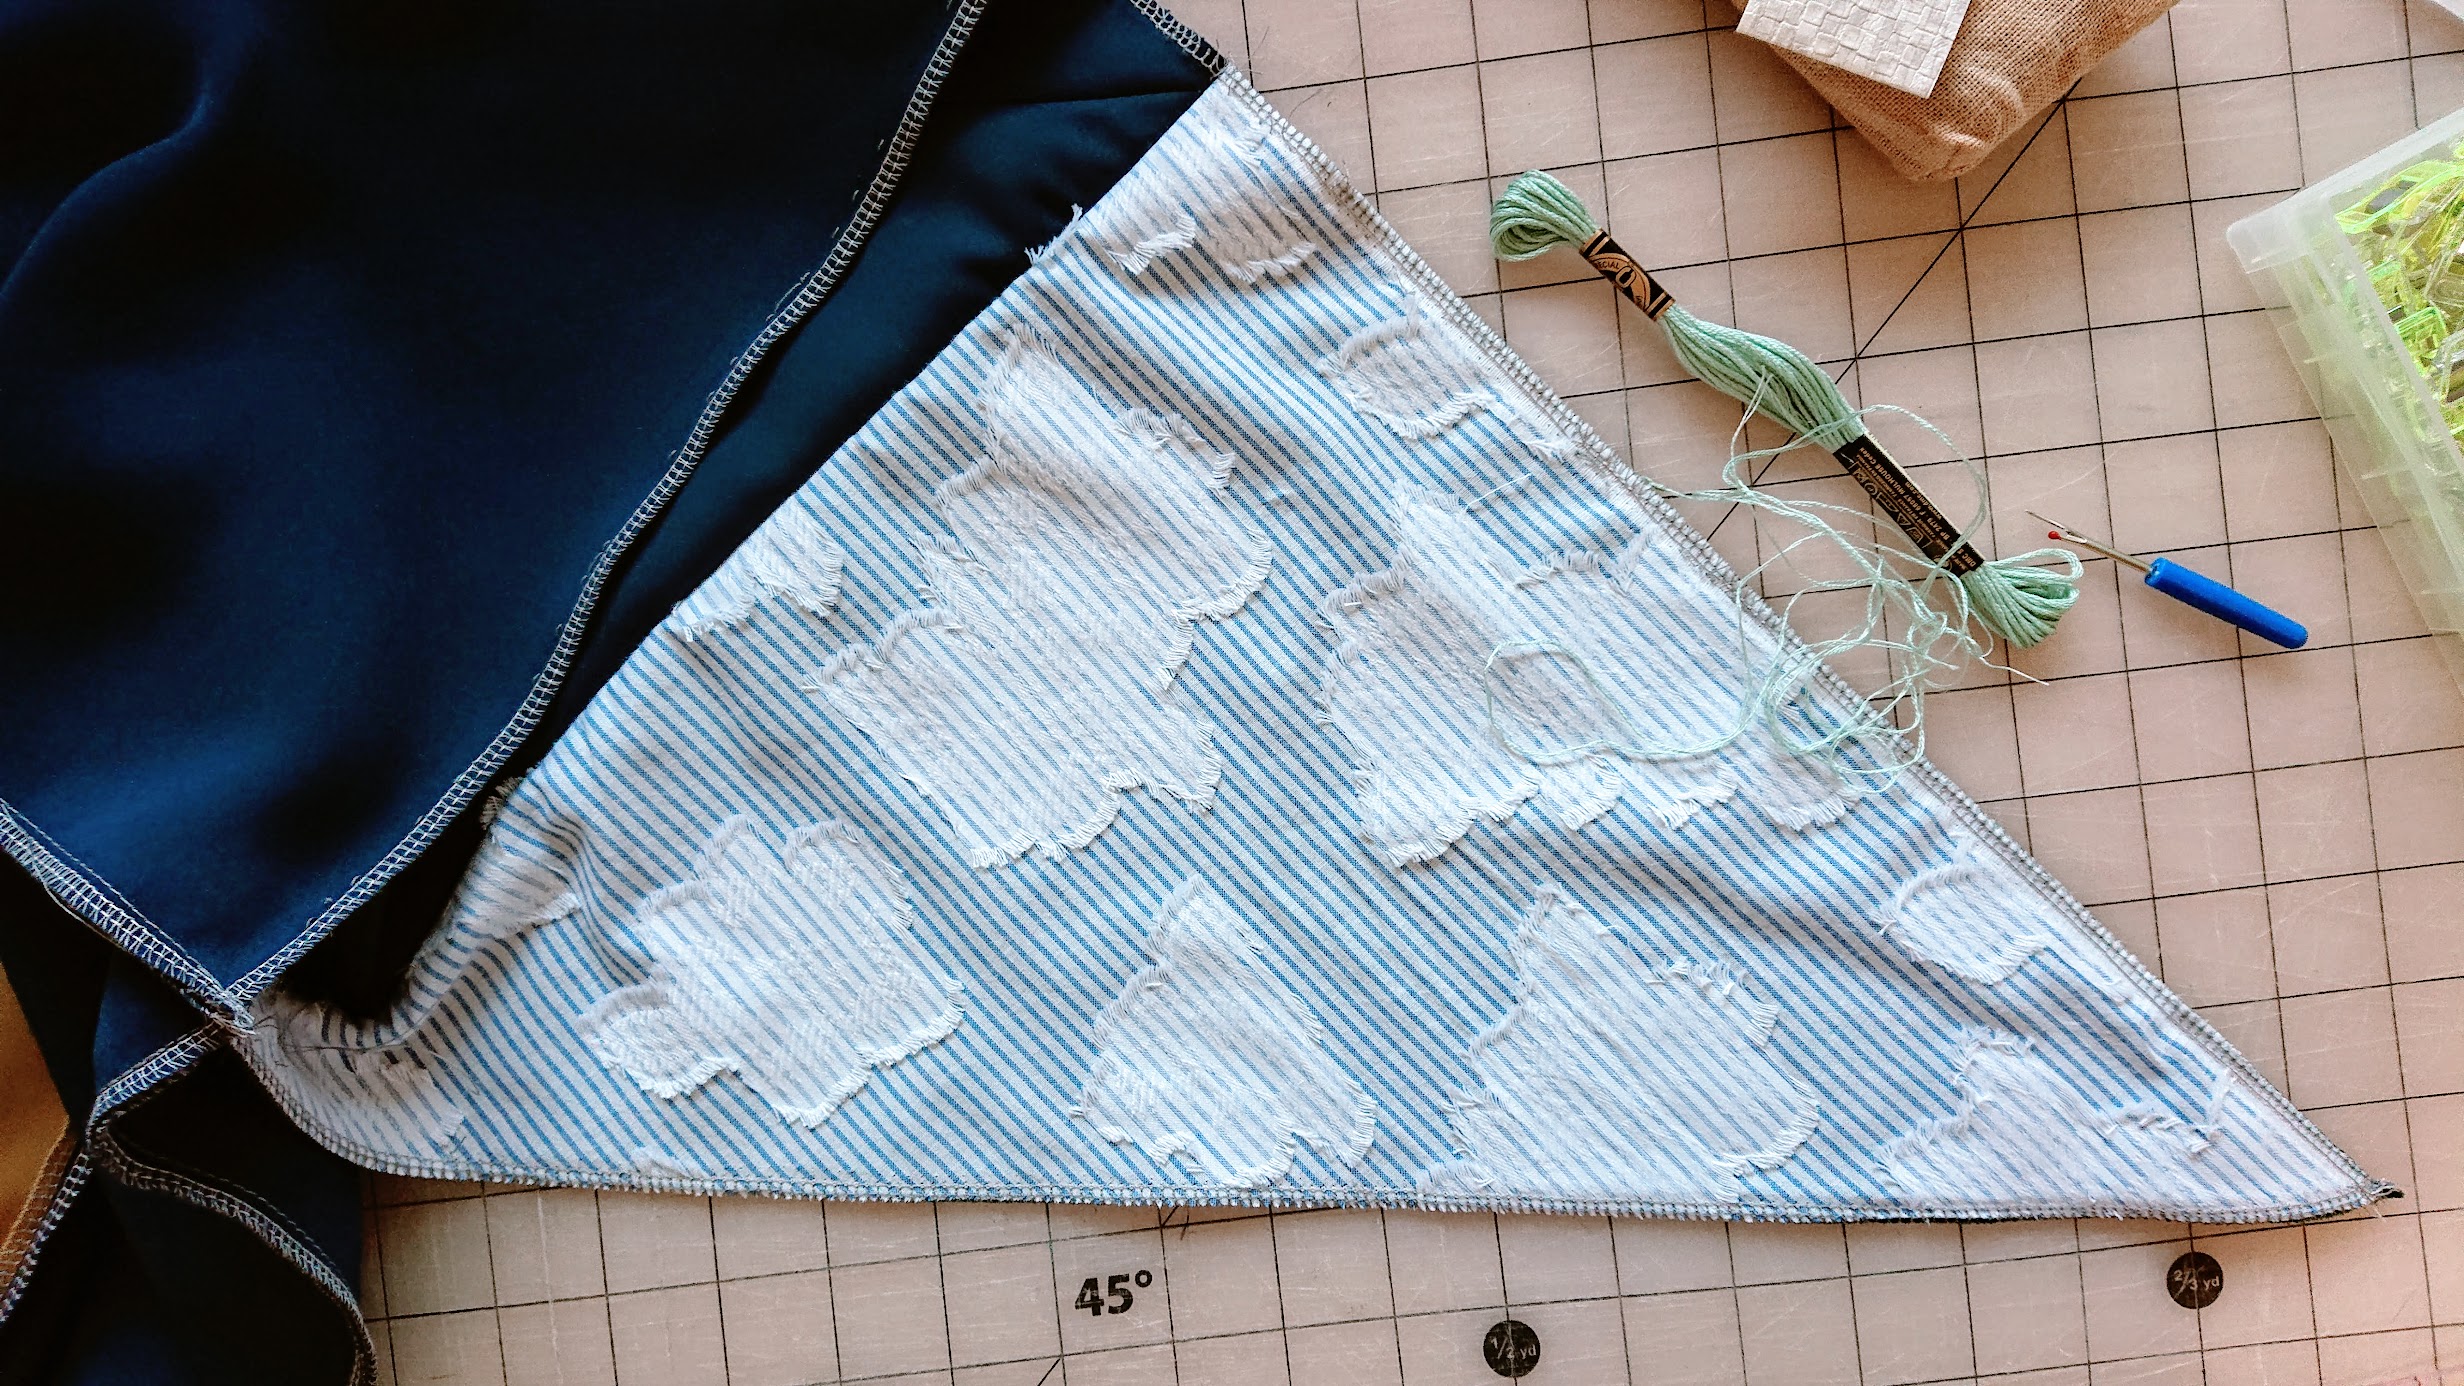
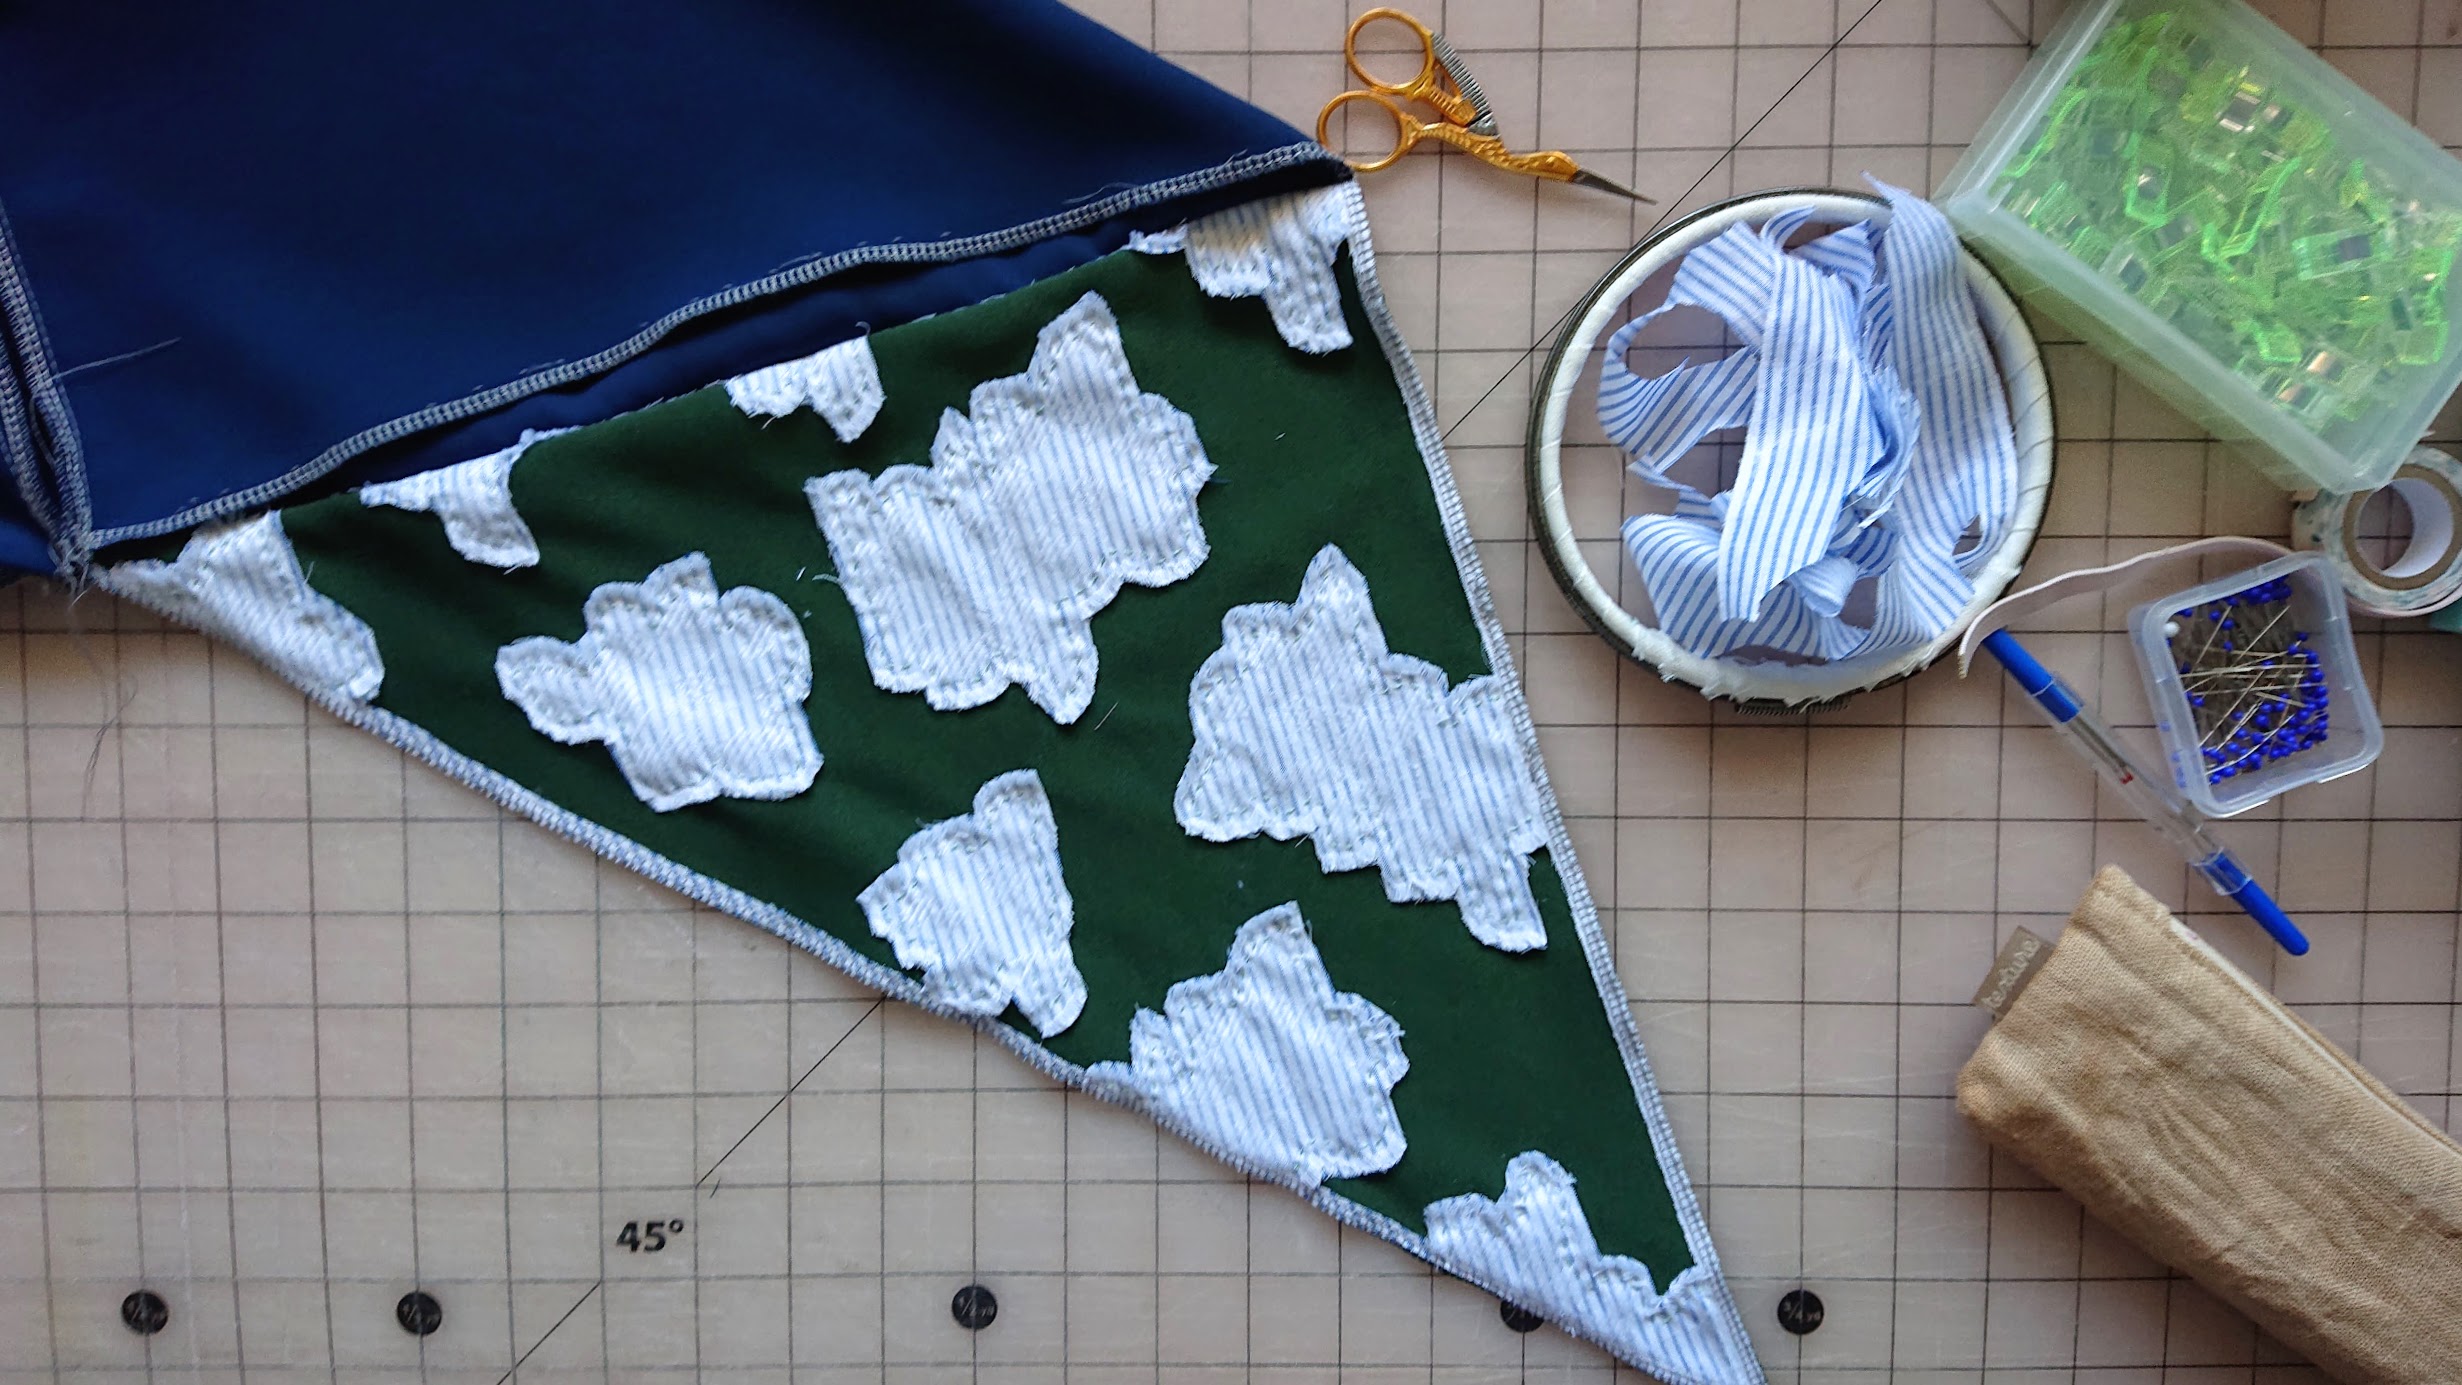
I rummage my remnant stash and pick these blue and yellow knit remnants gifted to me from San Francisco based clothing label purplemaroon. They are loosely triangular shaped, so that means I need to have 12 triangles to make a six-square origami top. I don’t have enough blue remnants, so I pick a forest green knit and one striped woven remnant with cloud-like motifs and layer them on top of each other as the 12th triangle.
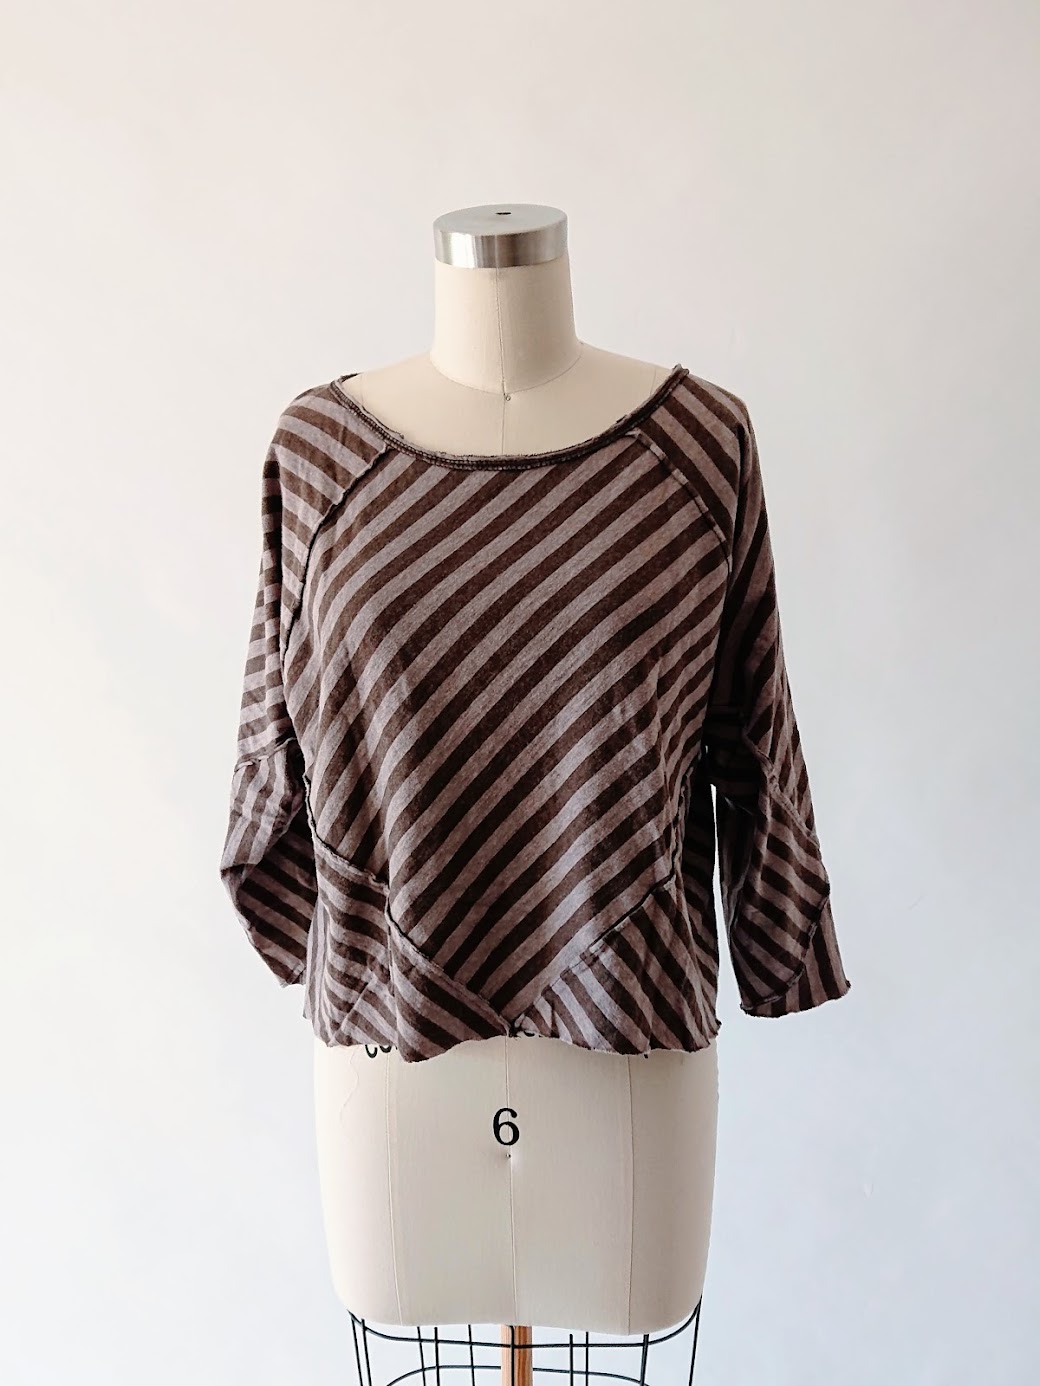
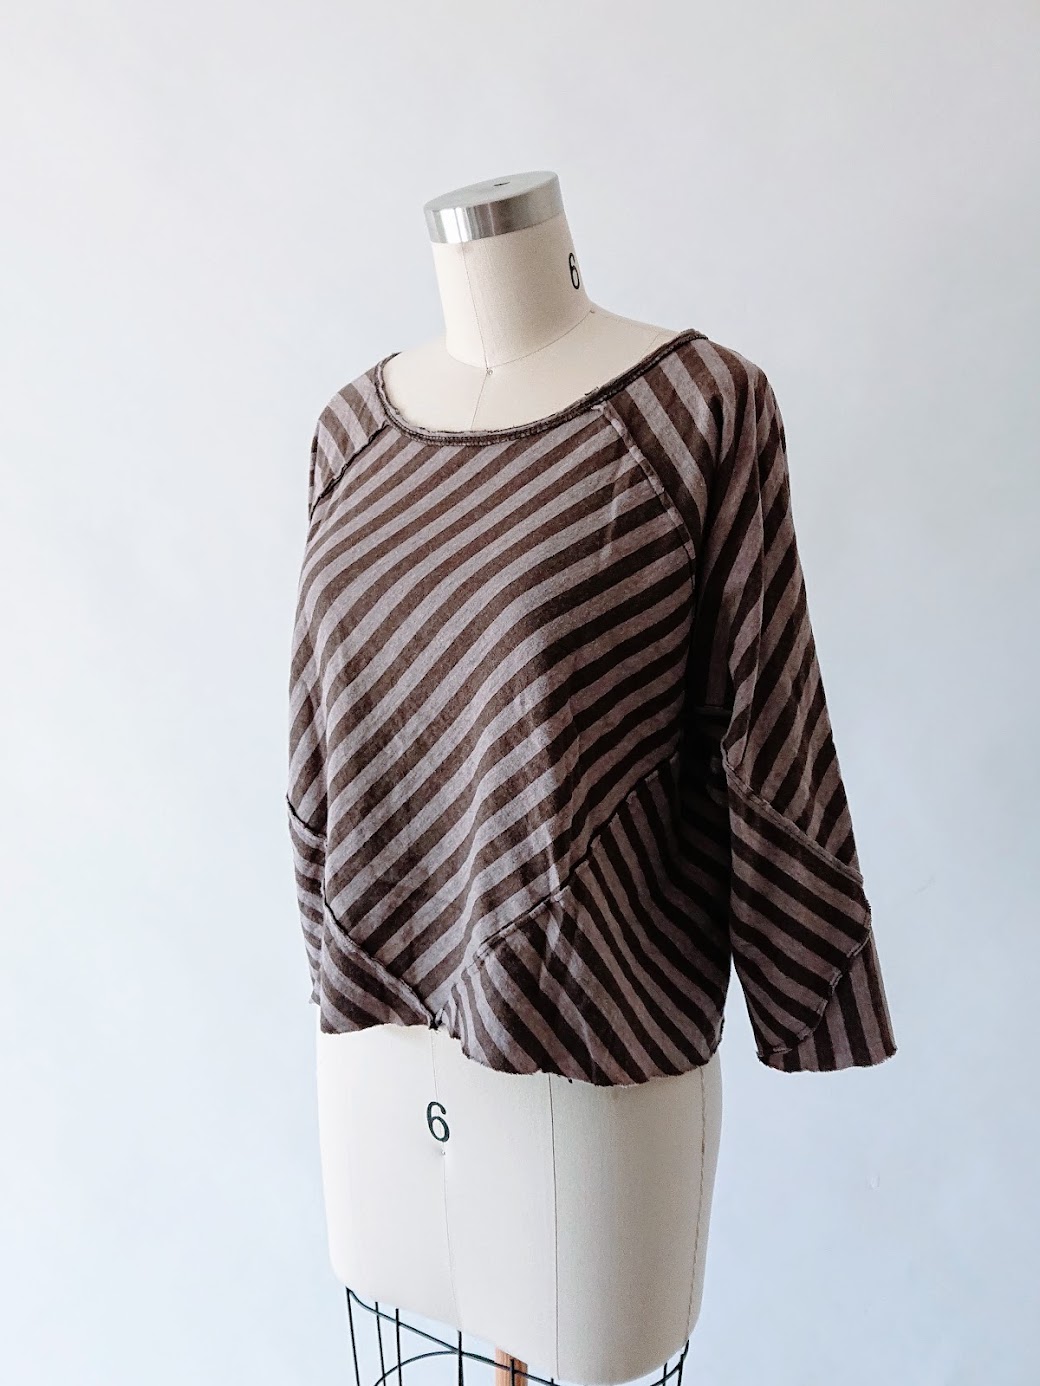
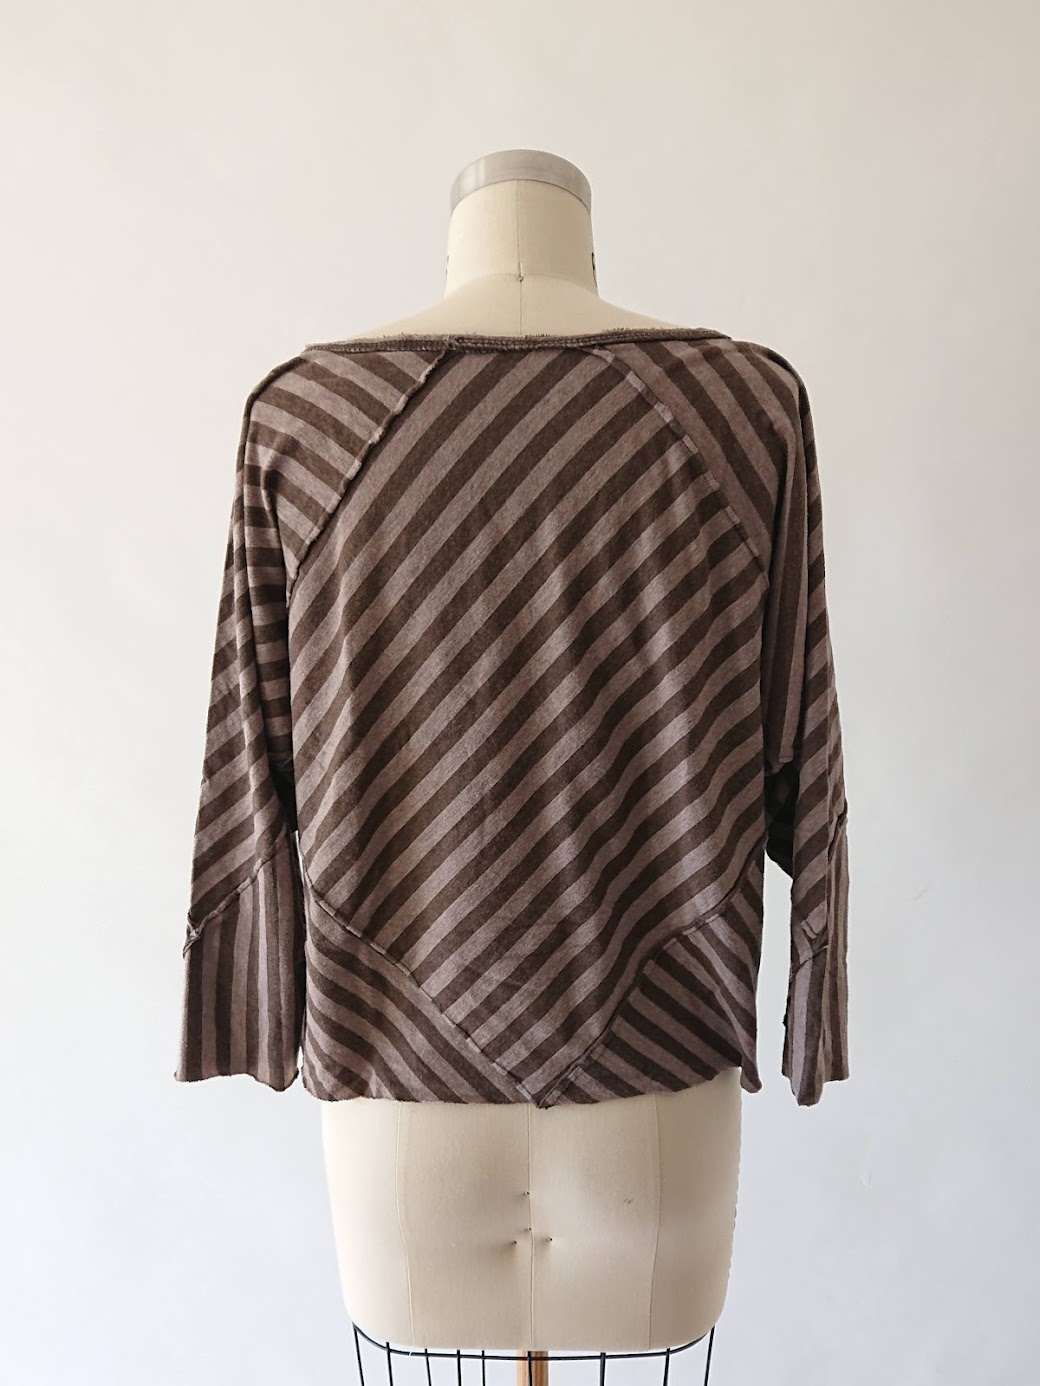
For this second 6-square origami top, I want to create a more polished look. A tiny bit closer fit, and a sportier vibe. Cool enough to be worn outside. The color blocking will require me to do precise sewing, so the great materials can look as good as they can be.
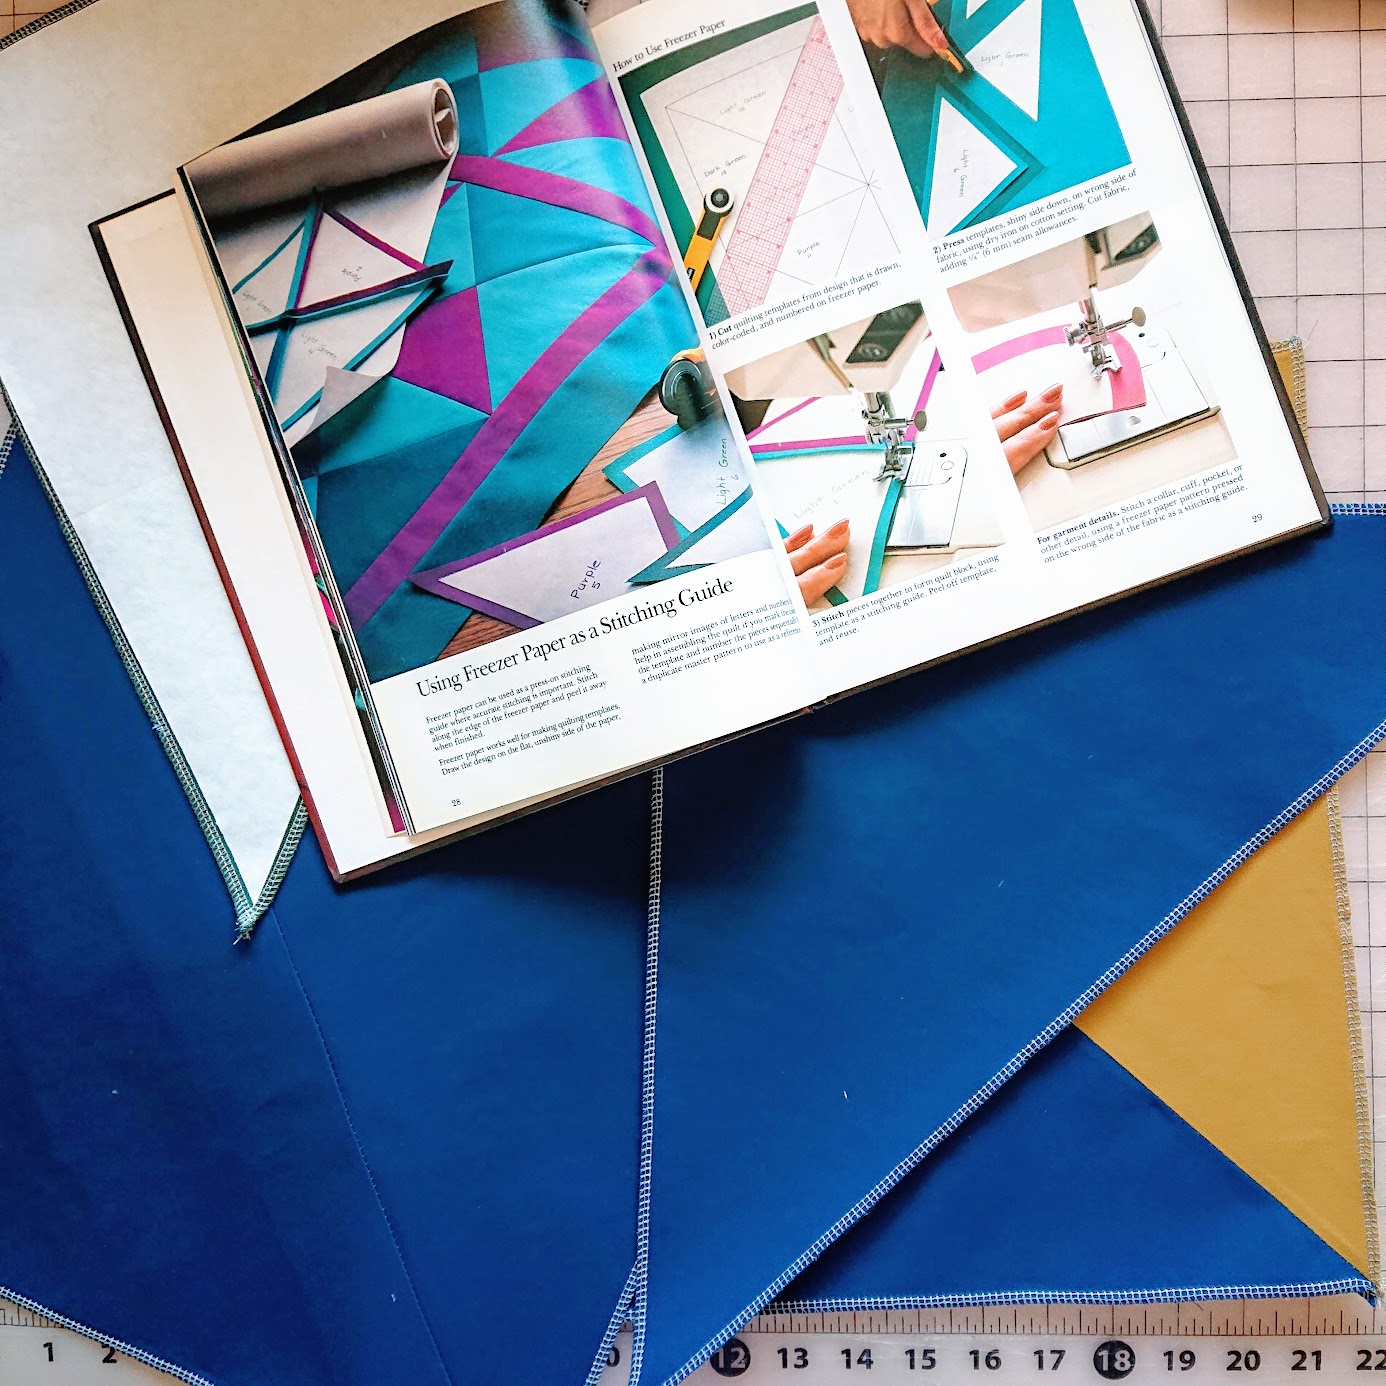
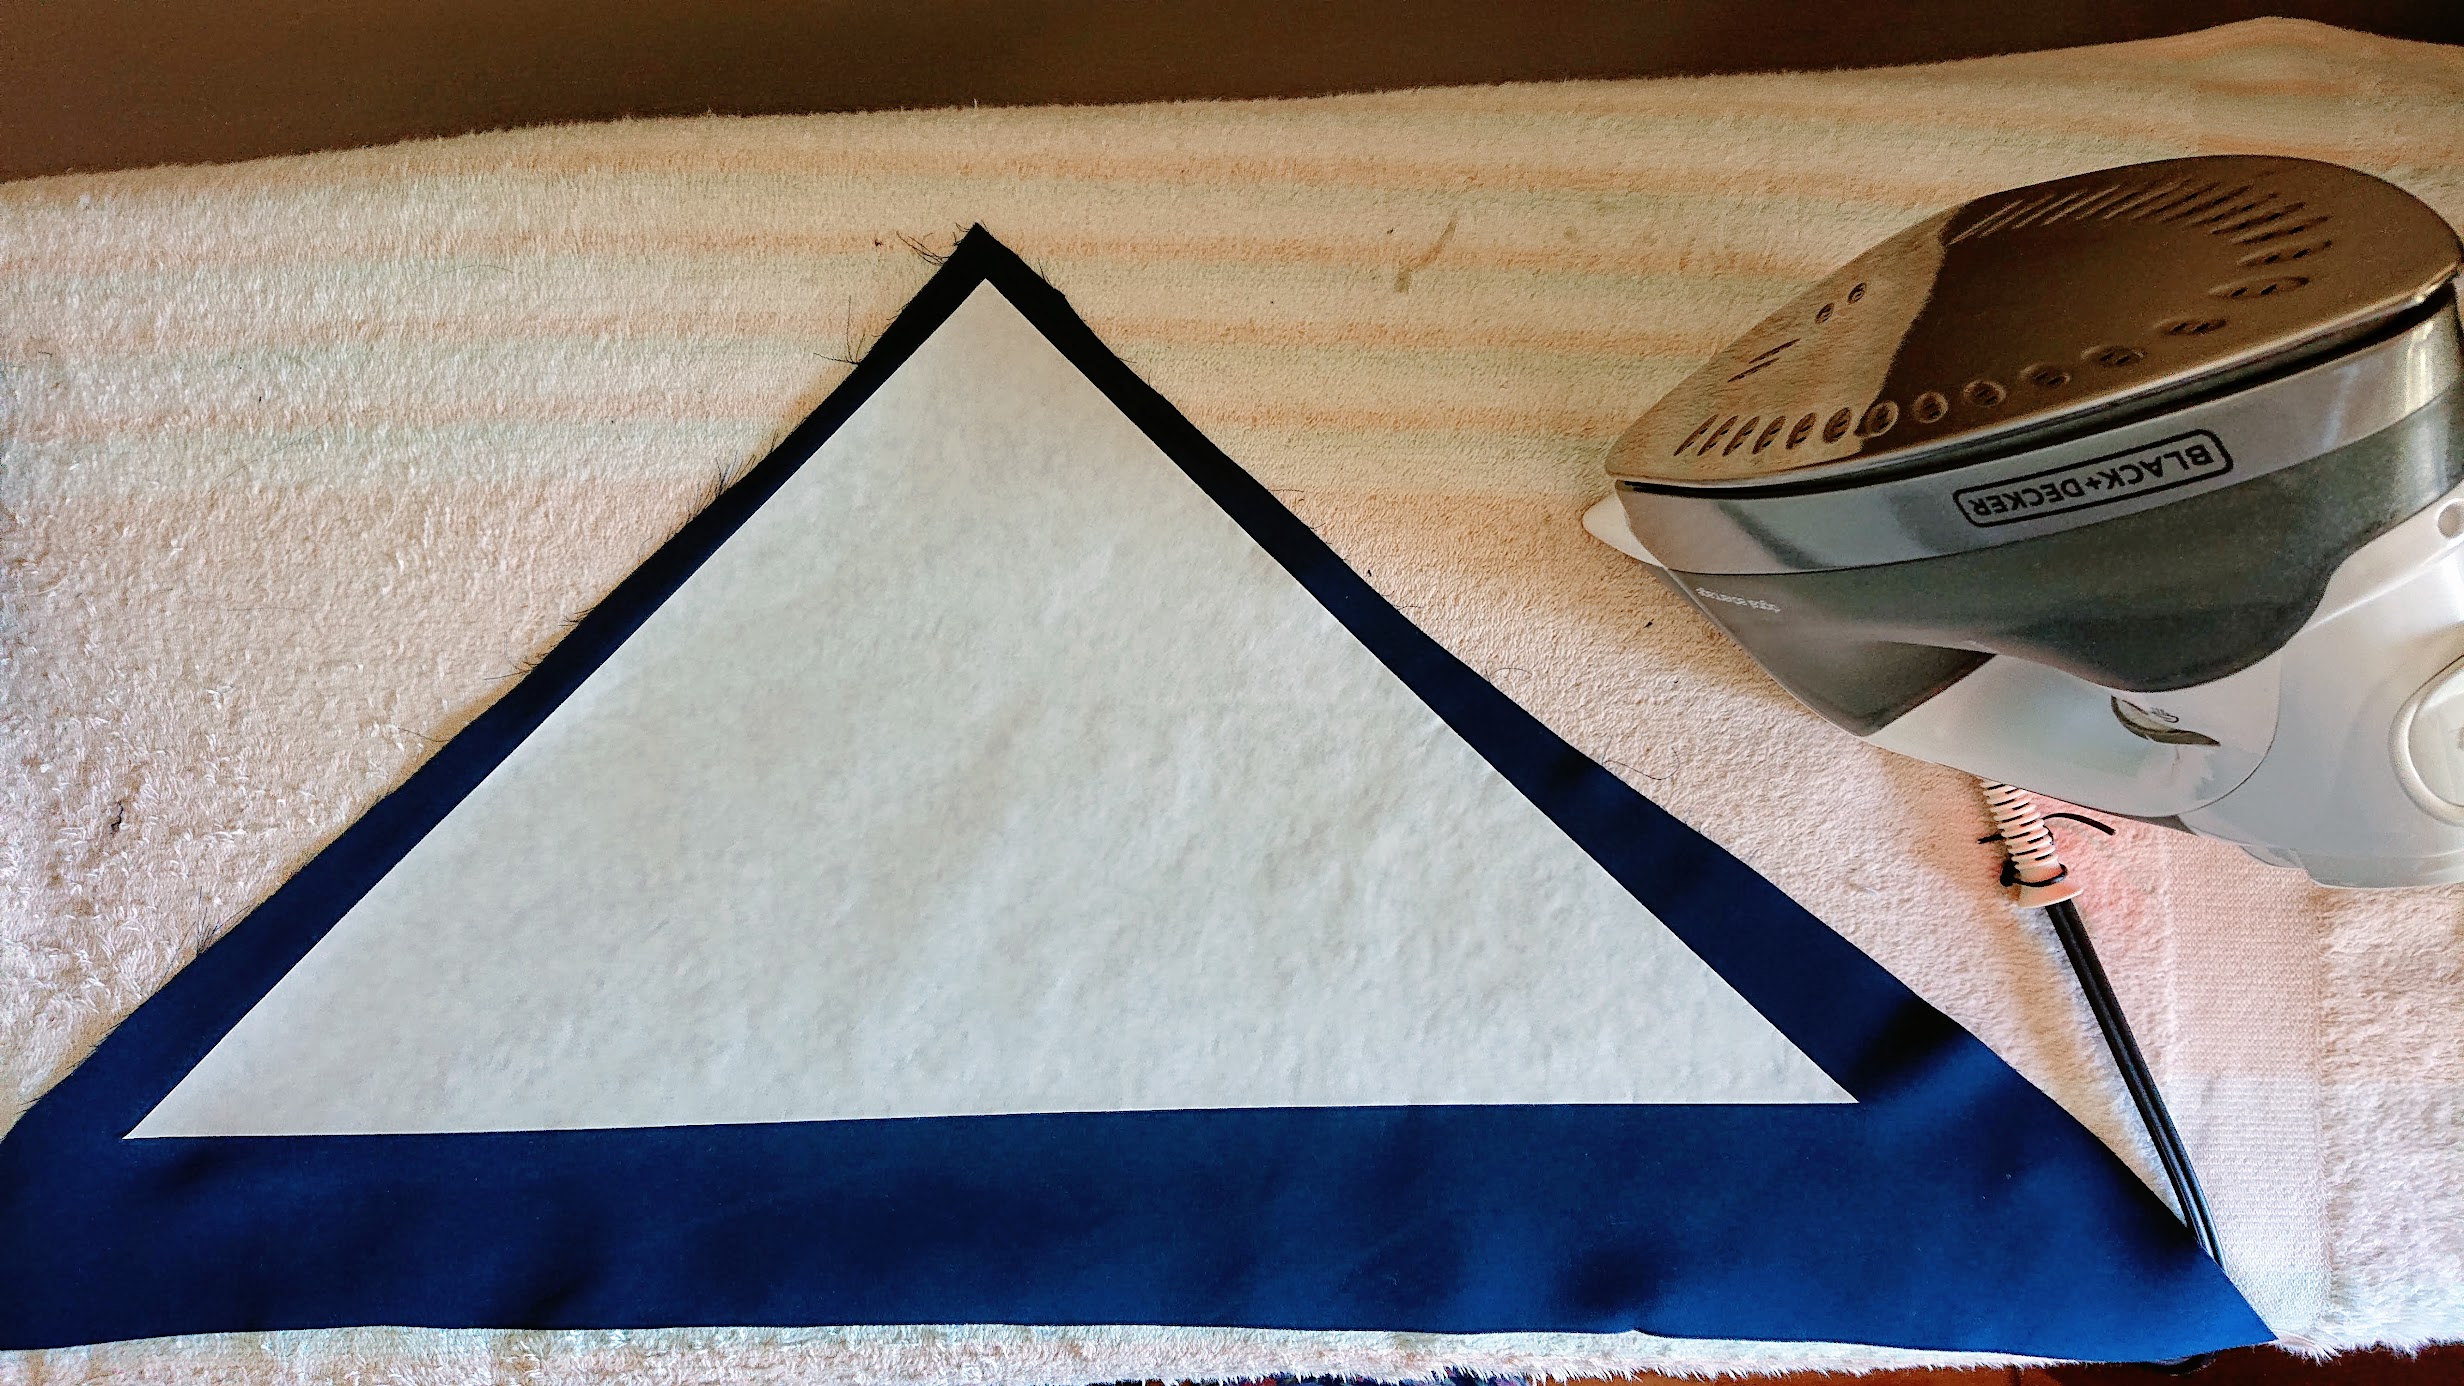
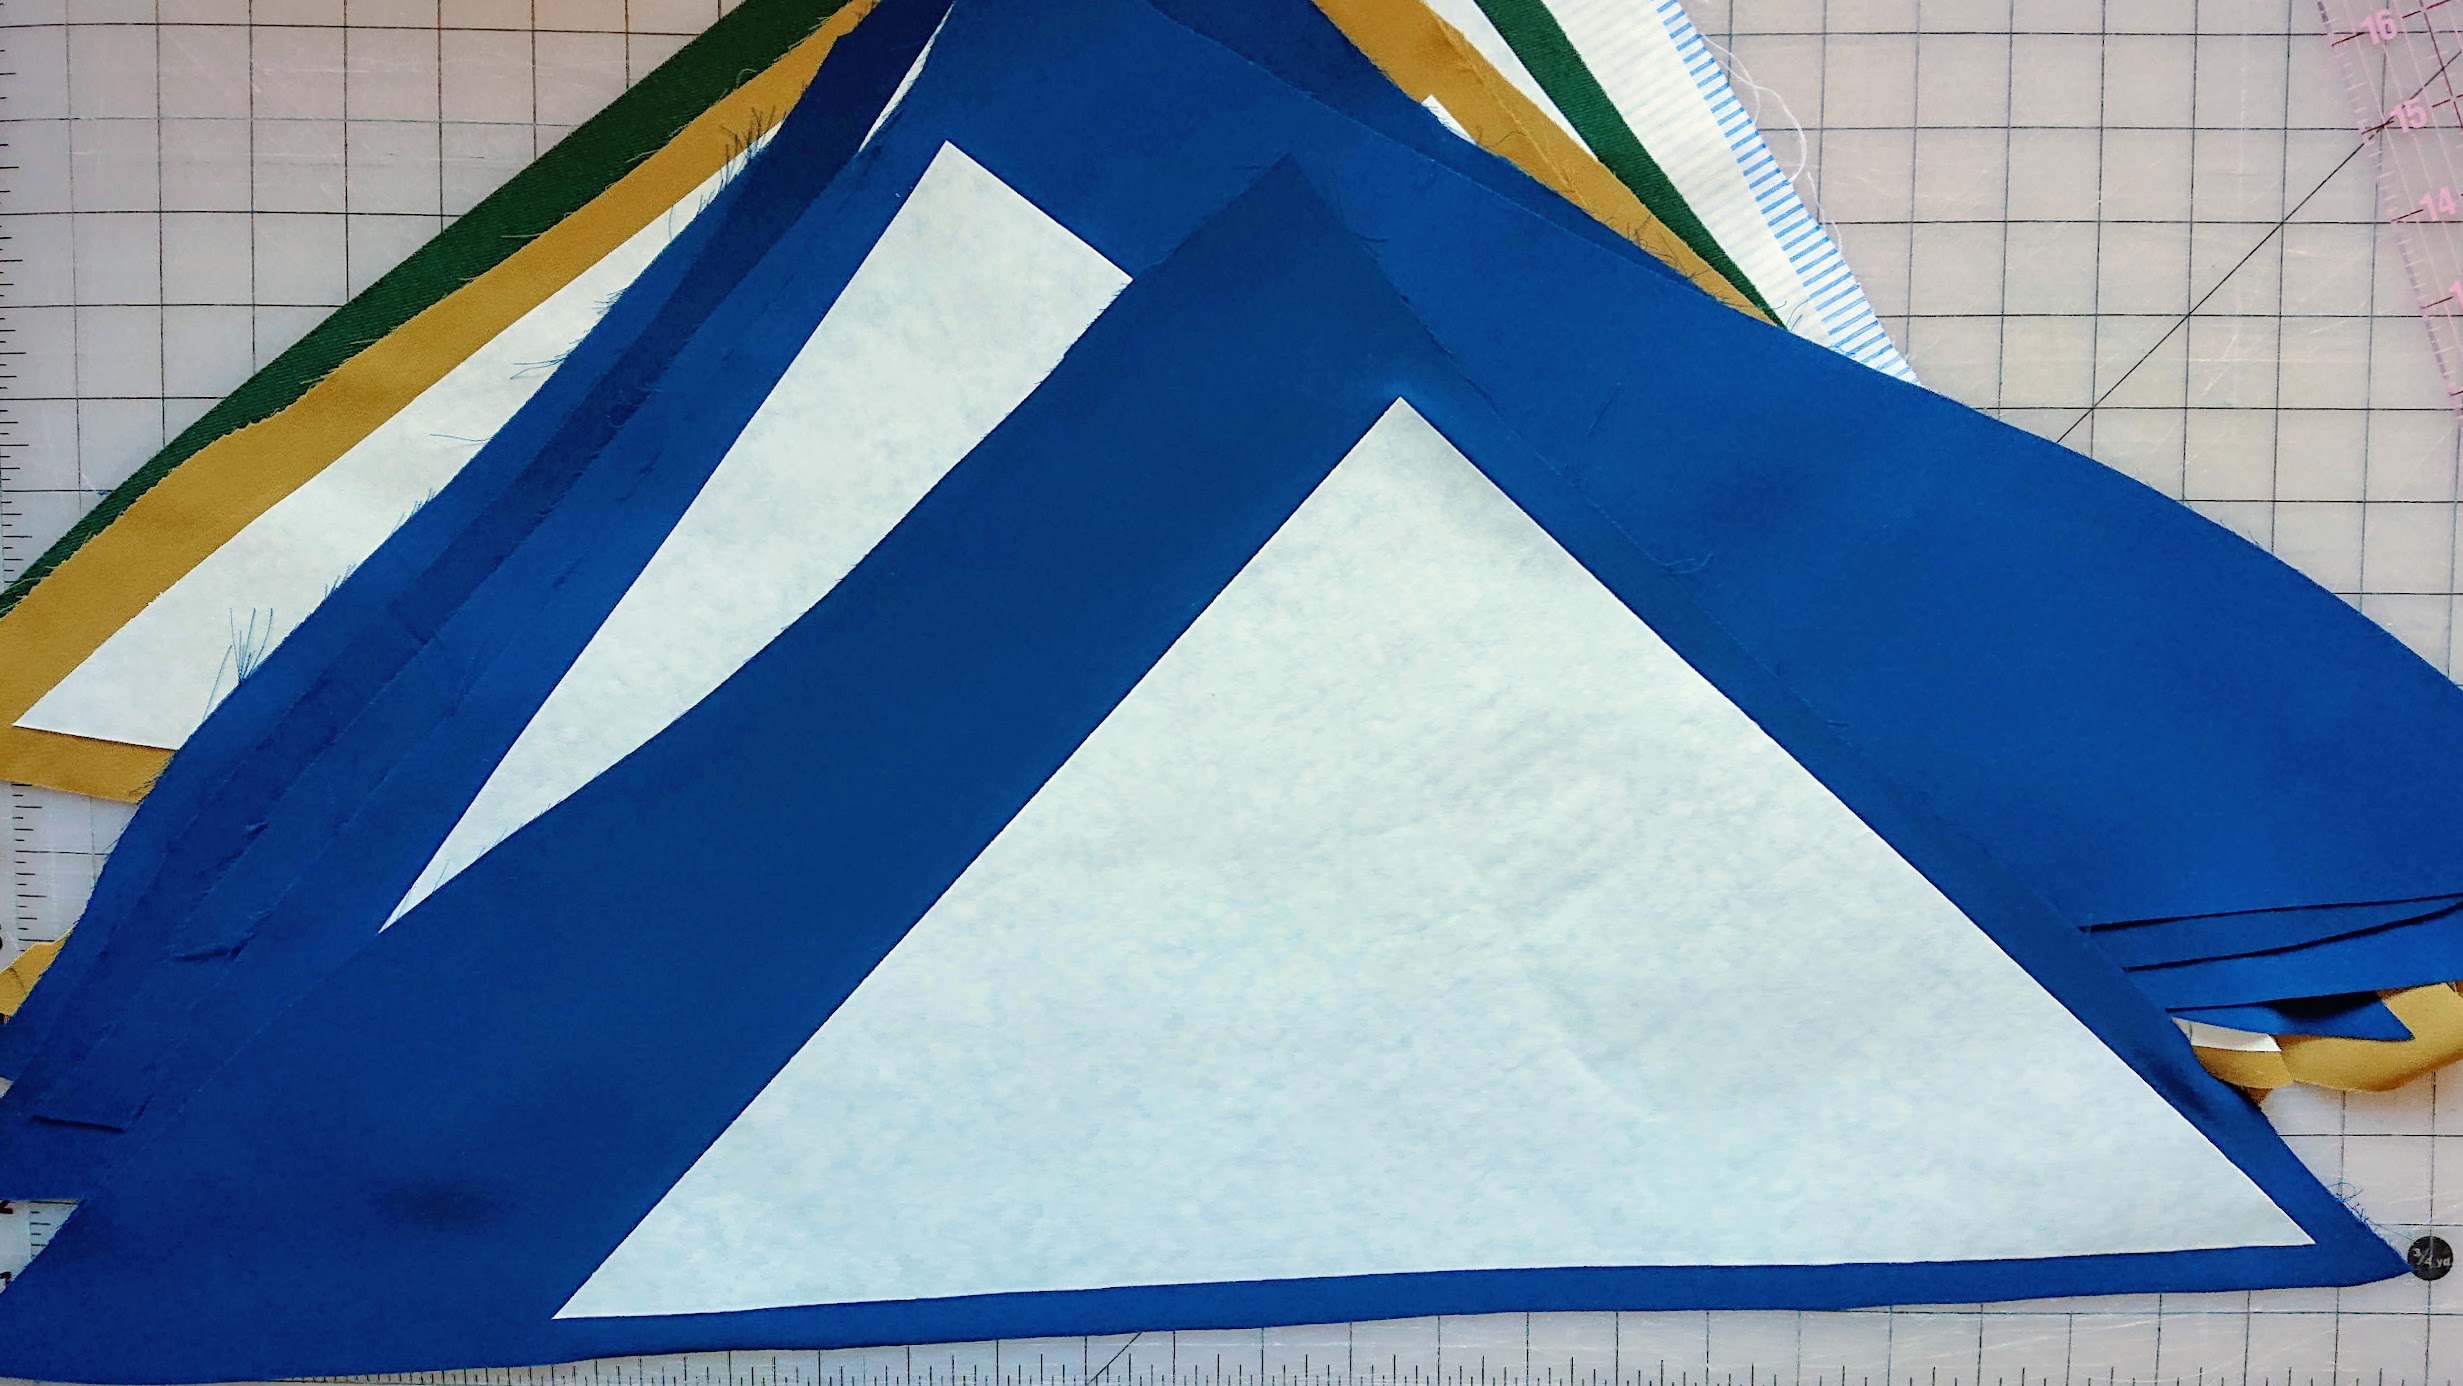
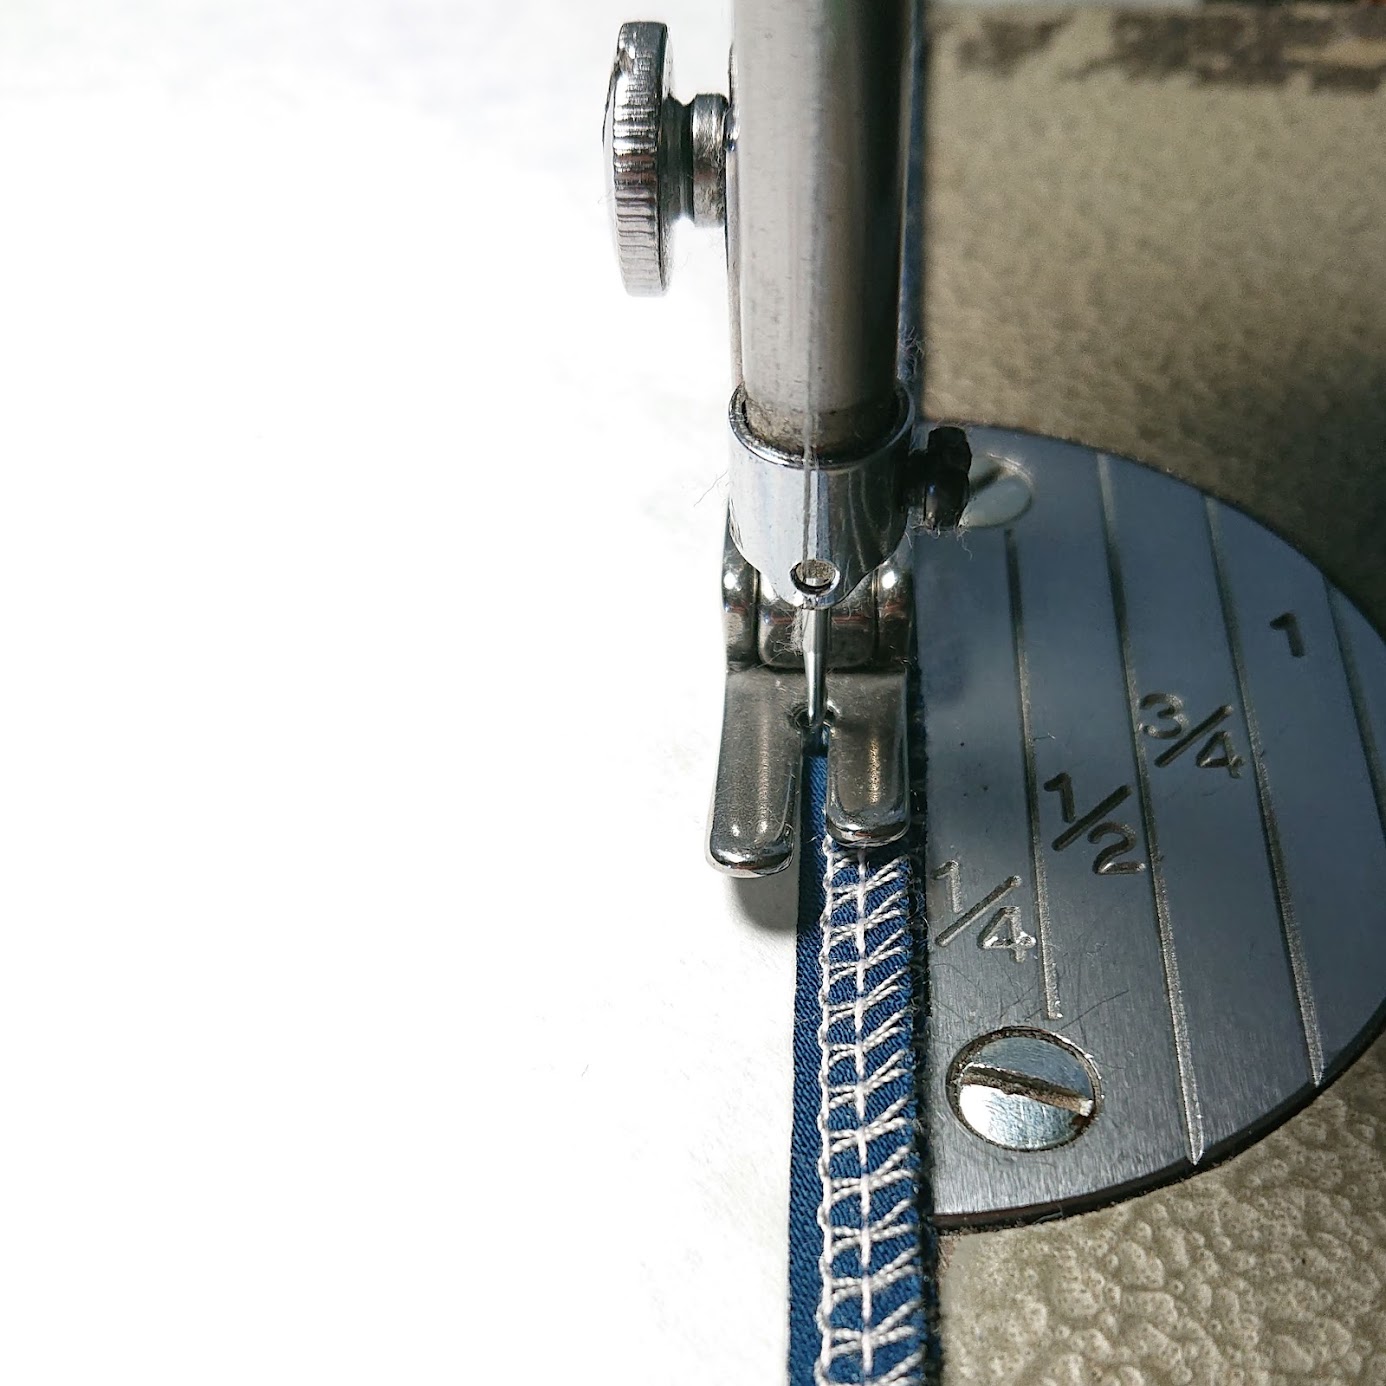
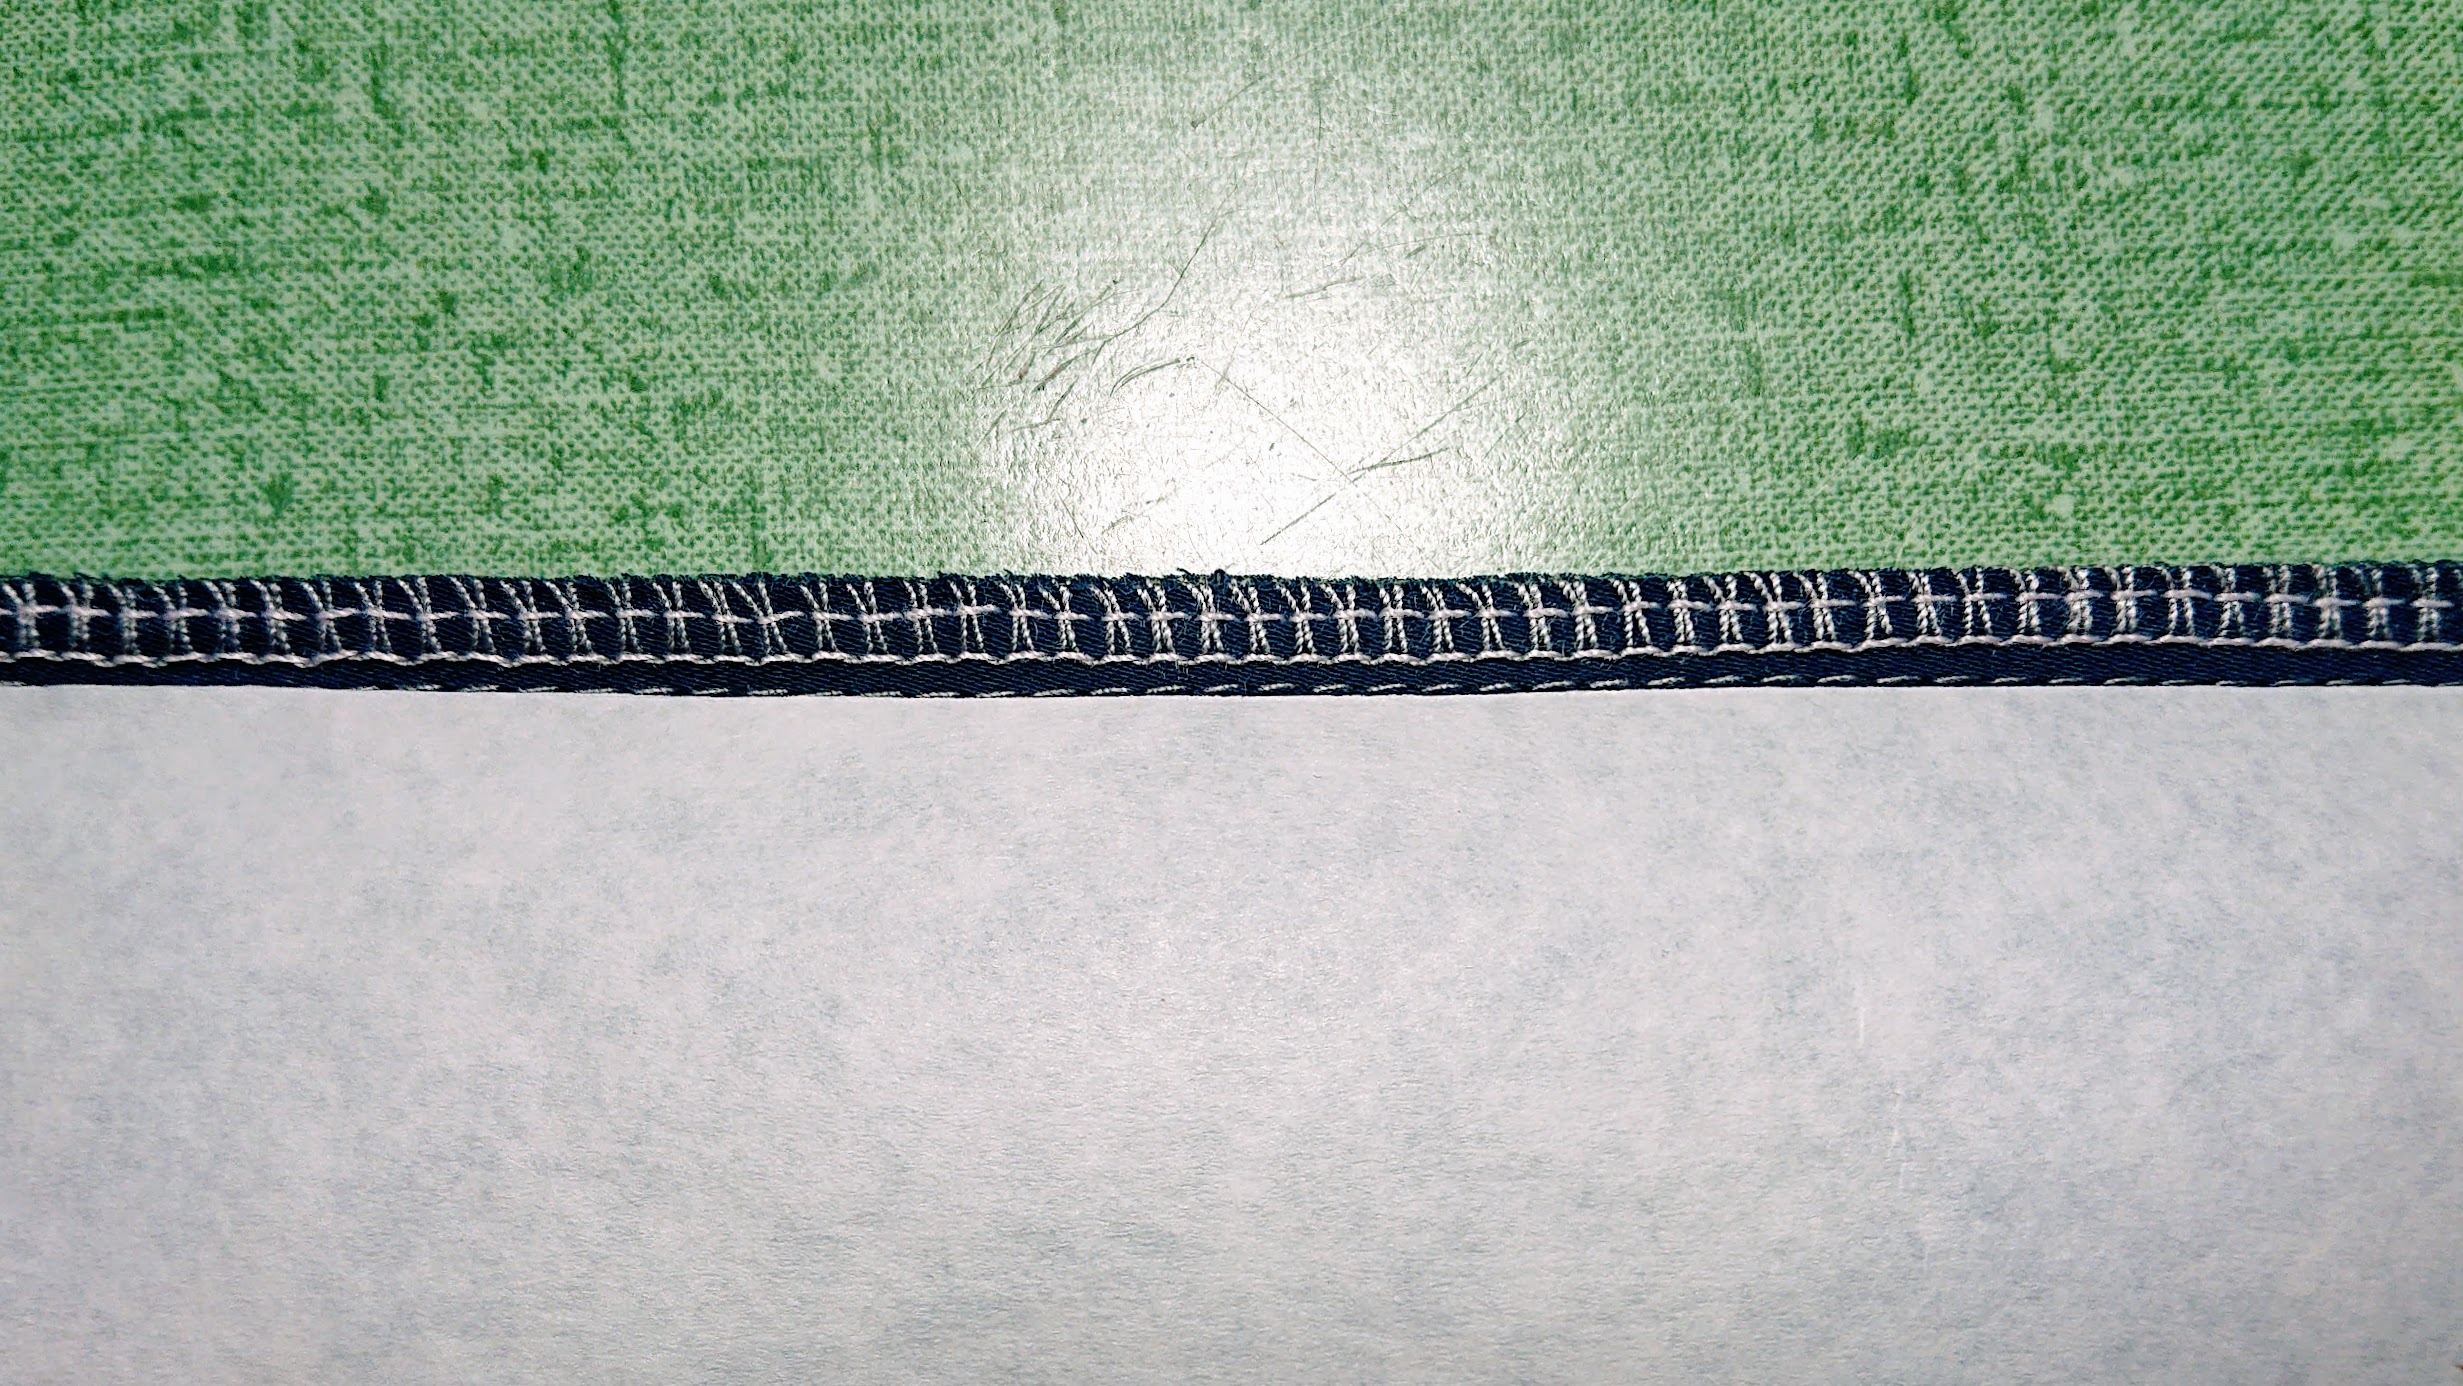
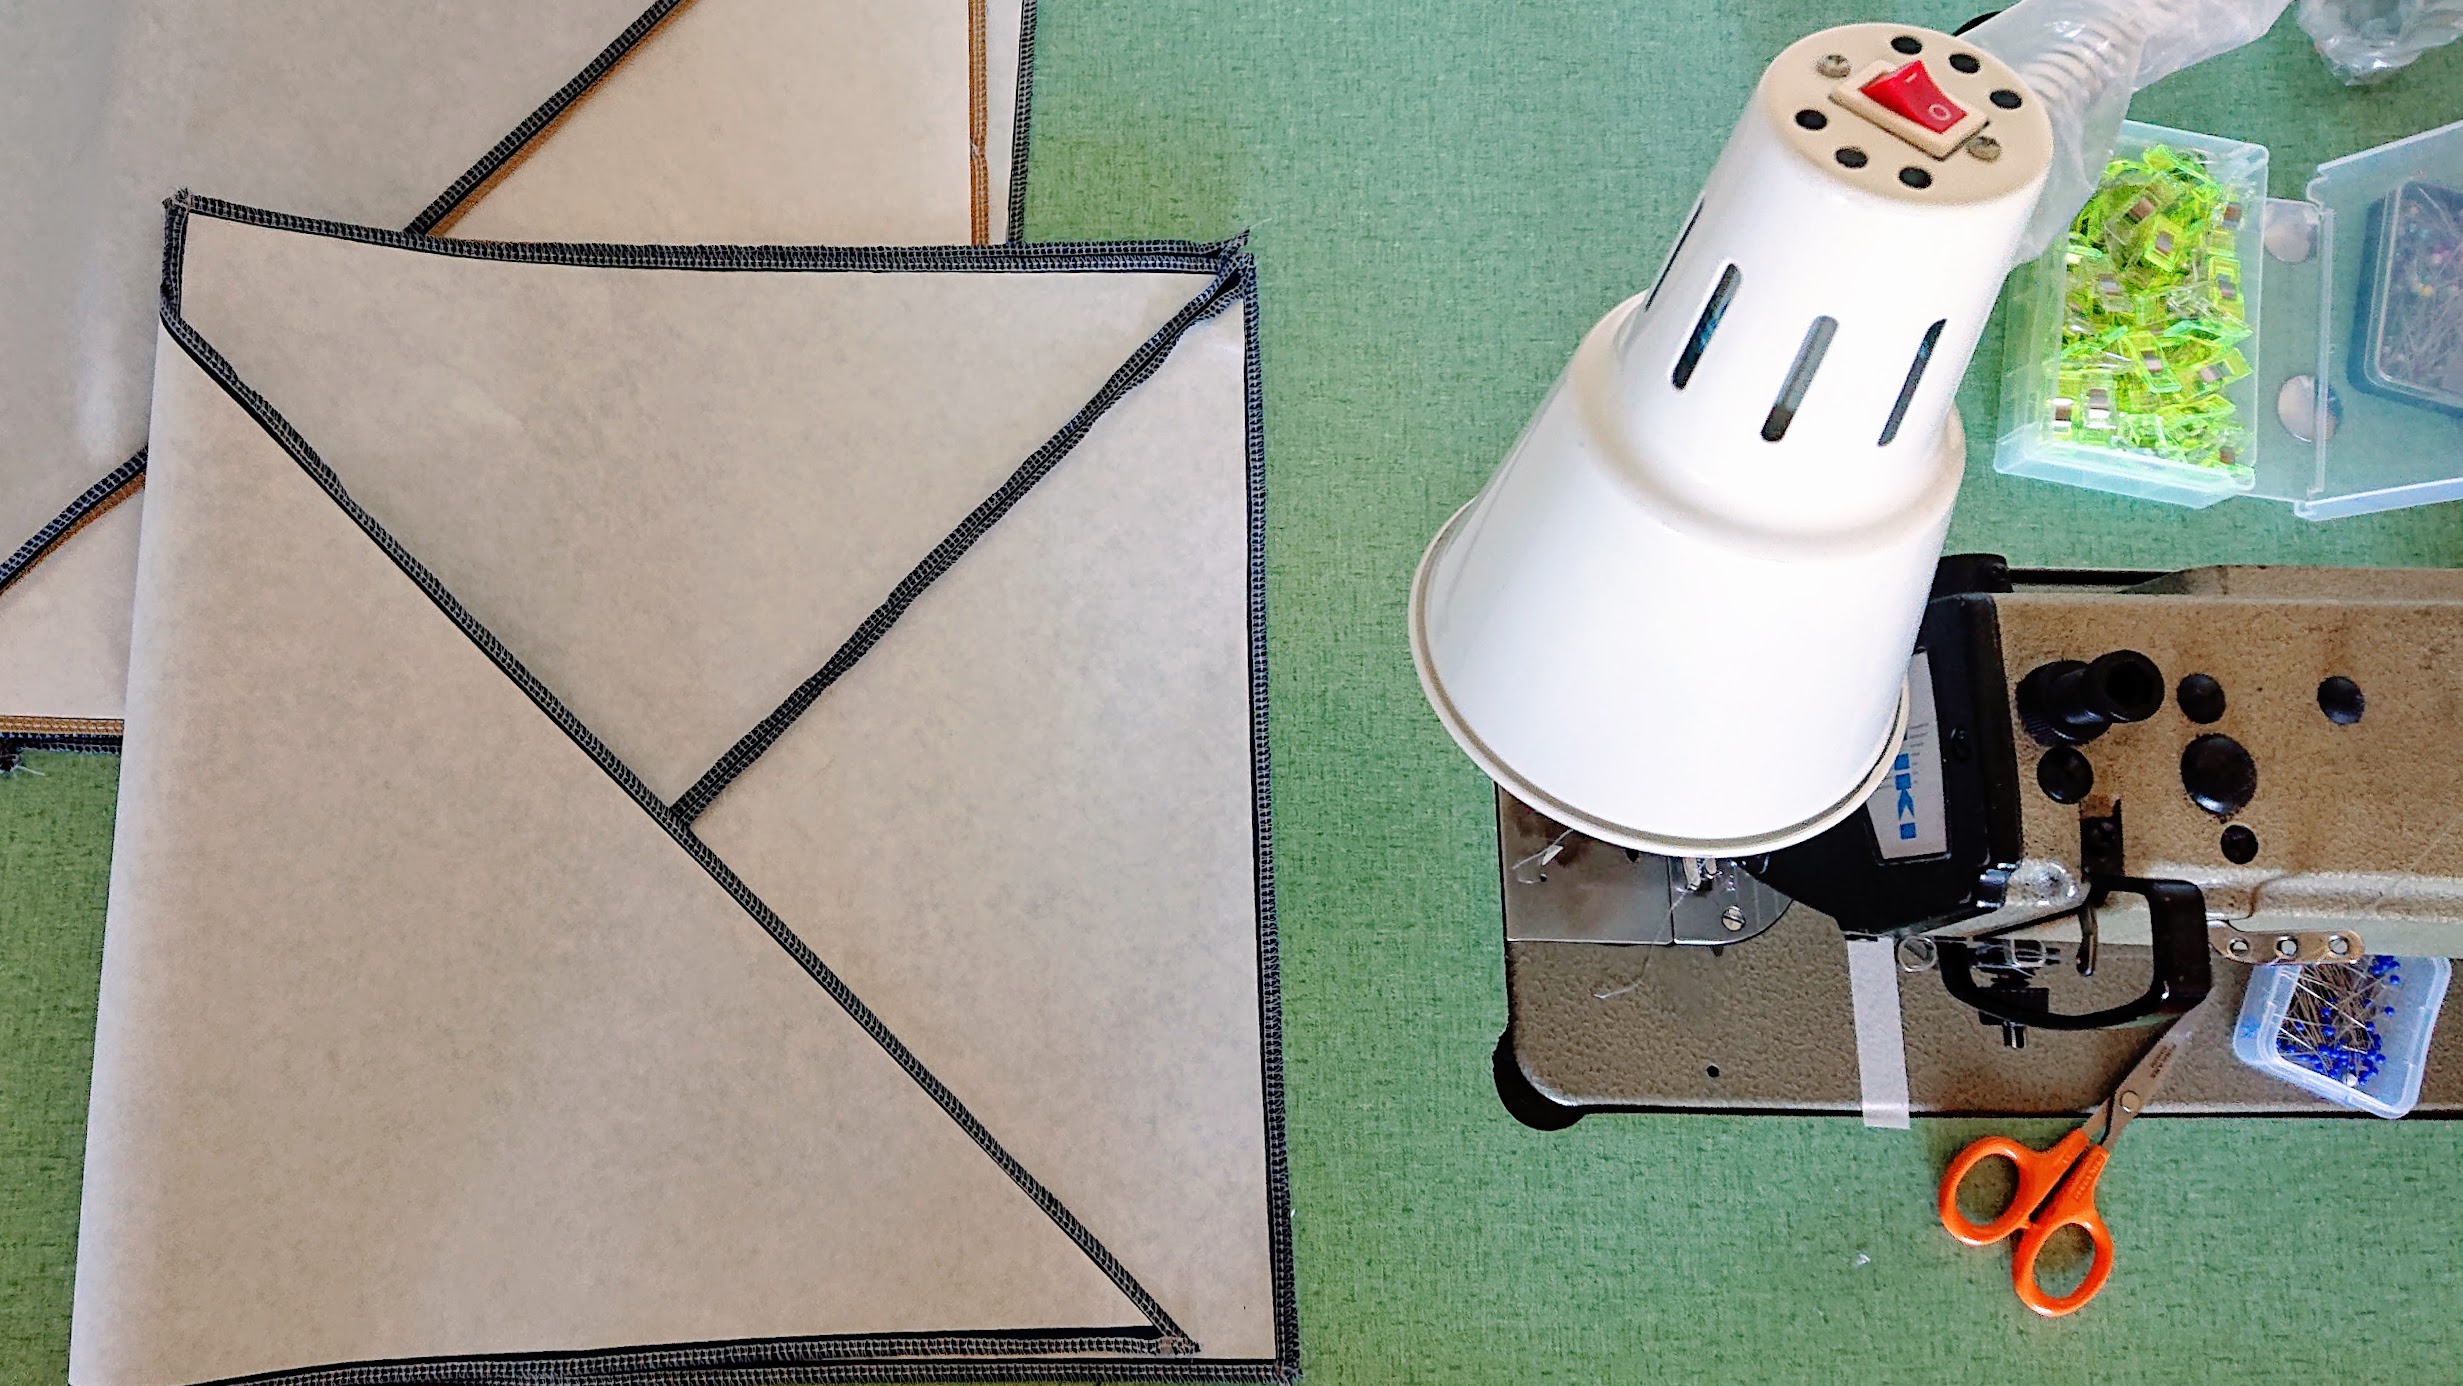
Precise sewing means precise cutting, and that means stabilizing the somewhat slippery knit fabrics. Enter the freezer paper. I draw six squares (this time, one side is 14 inches long) on freezer papers and cut them on the diagonal line. With the shiny side of freezer paper against the wrong side of each triangular fabric remnant, I iron them lightly. Only then I begin cutting the remnants - NOT on the edge of the freezer paper, but a seam allowance away (I use 0.25”) from each edge.
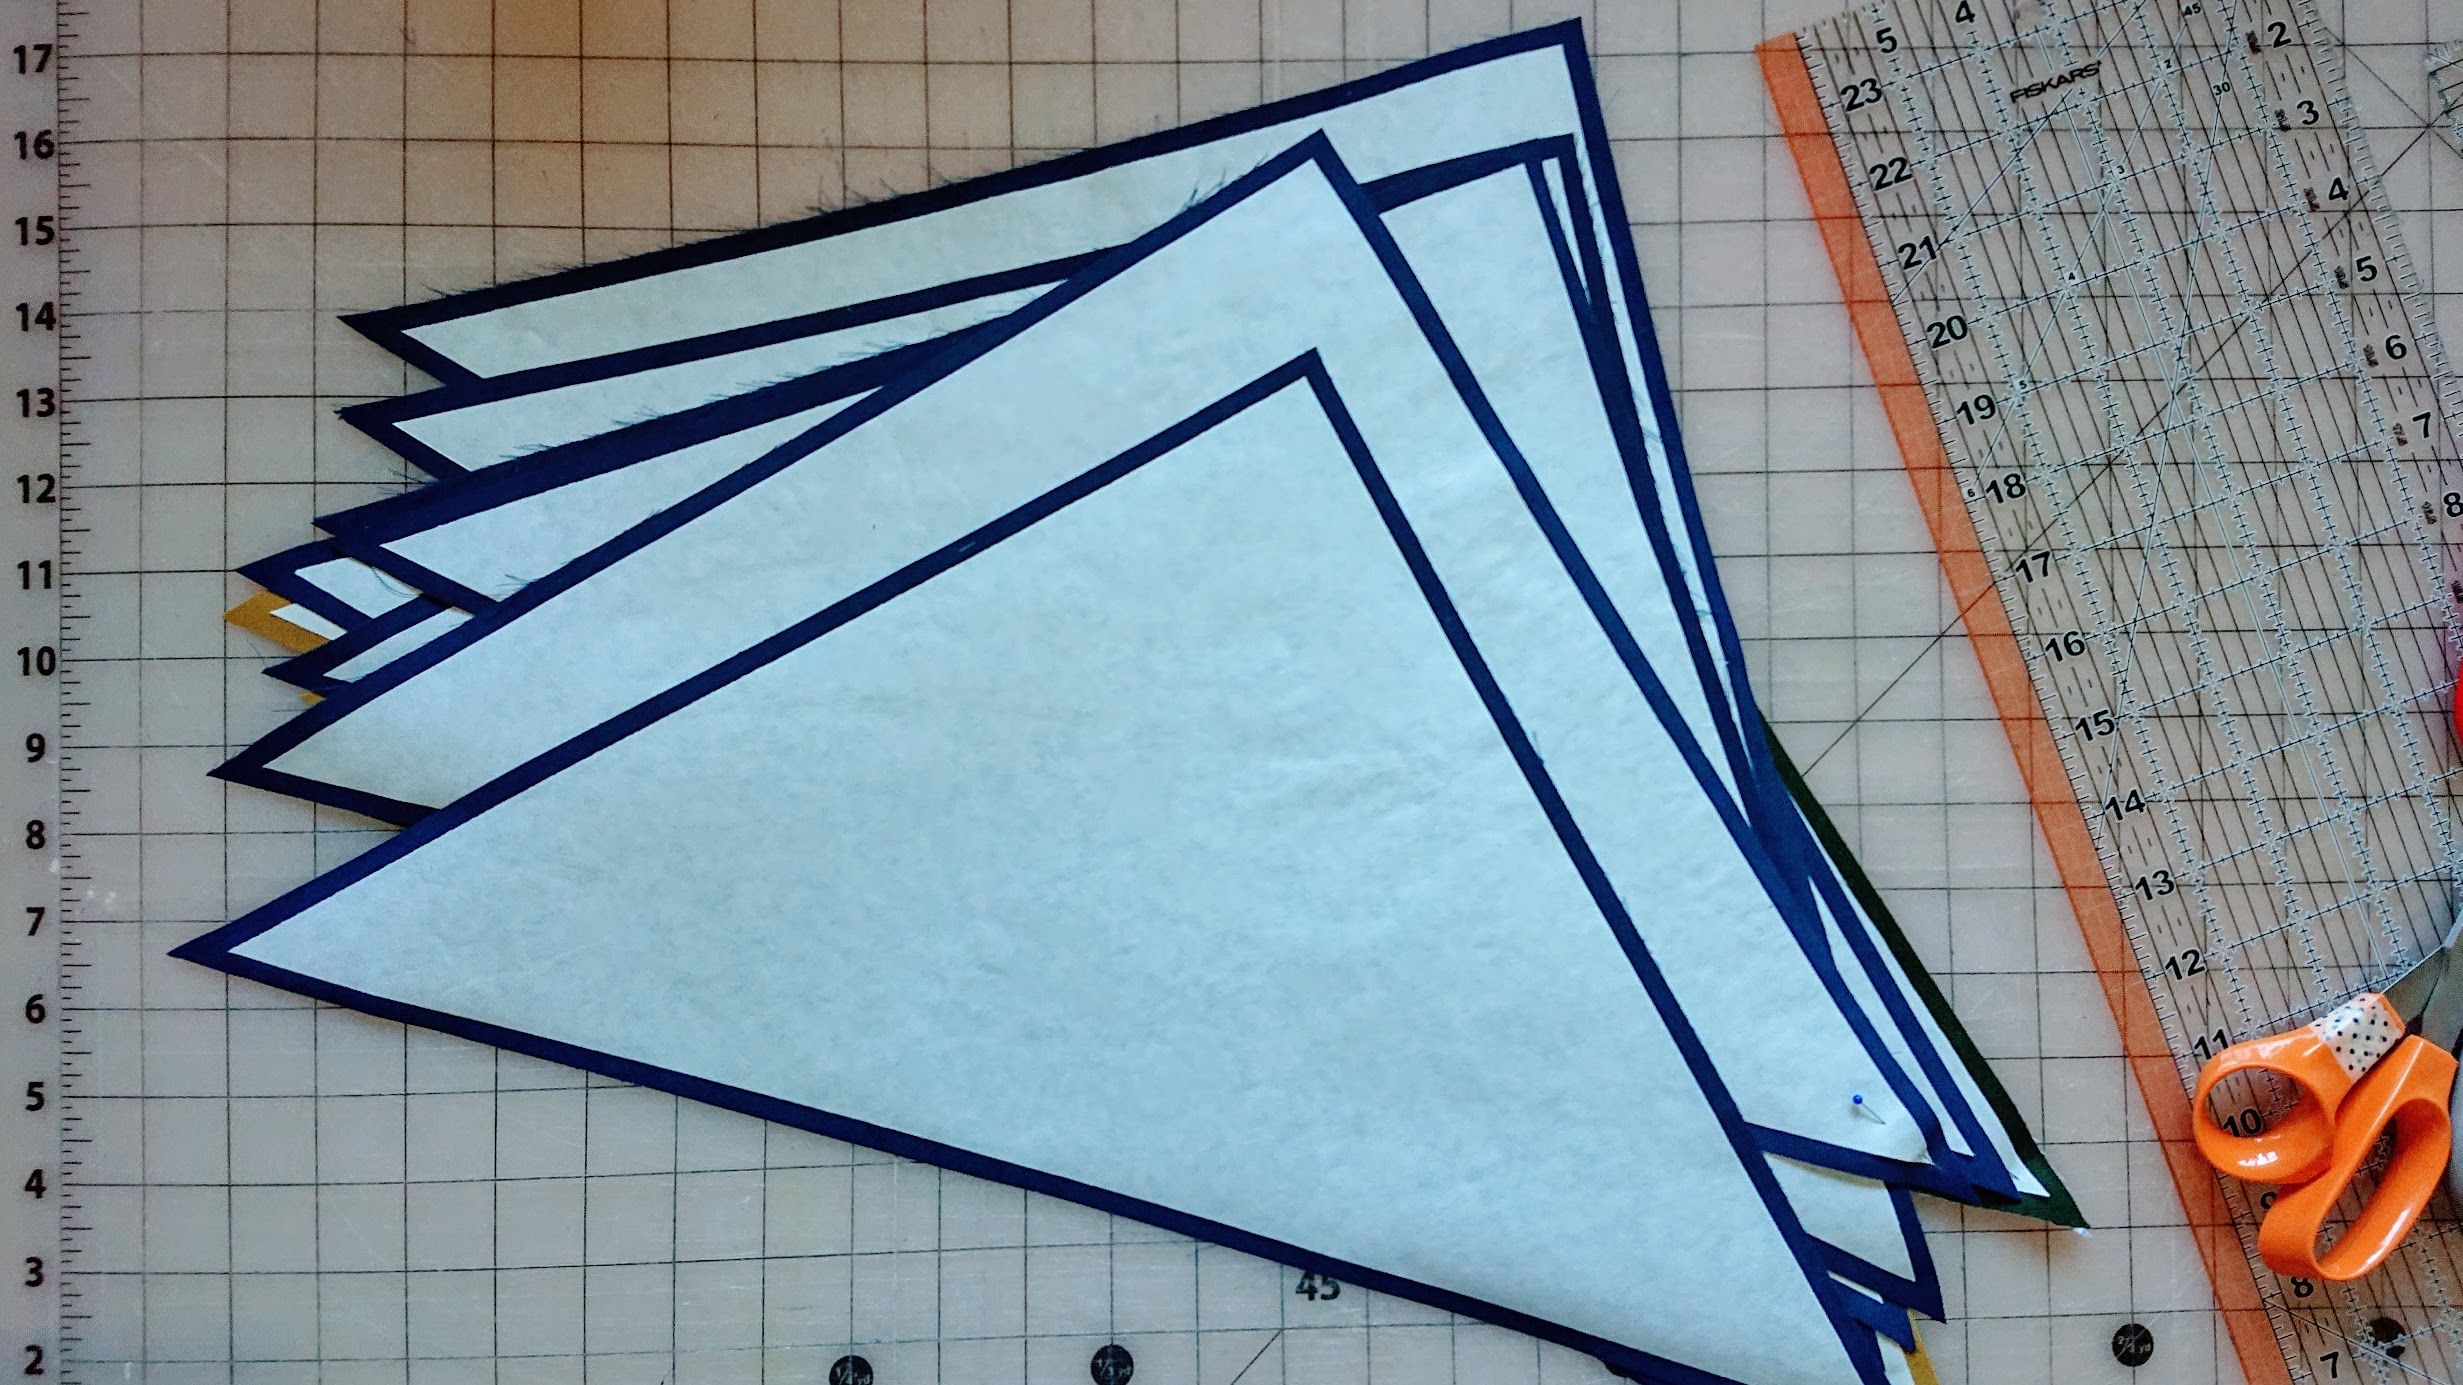
After cutting is done, I lay them flat on the floor to see what kind of configurations I want to have. I settle with this one…for now.
Assembling the triangles
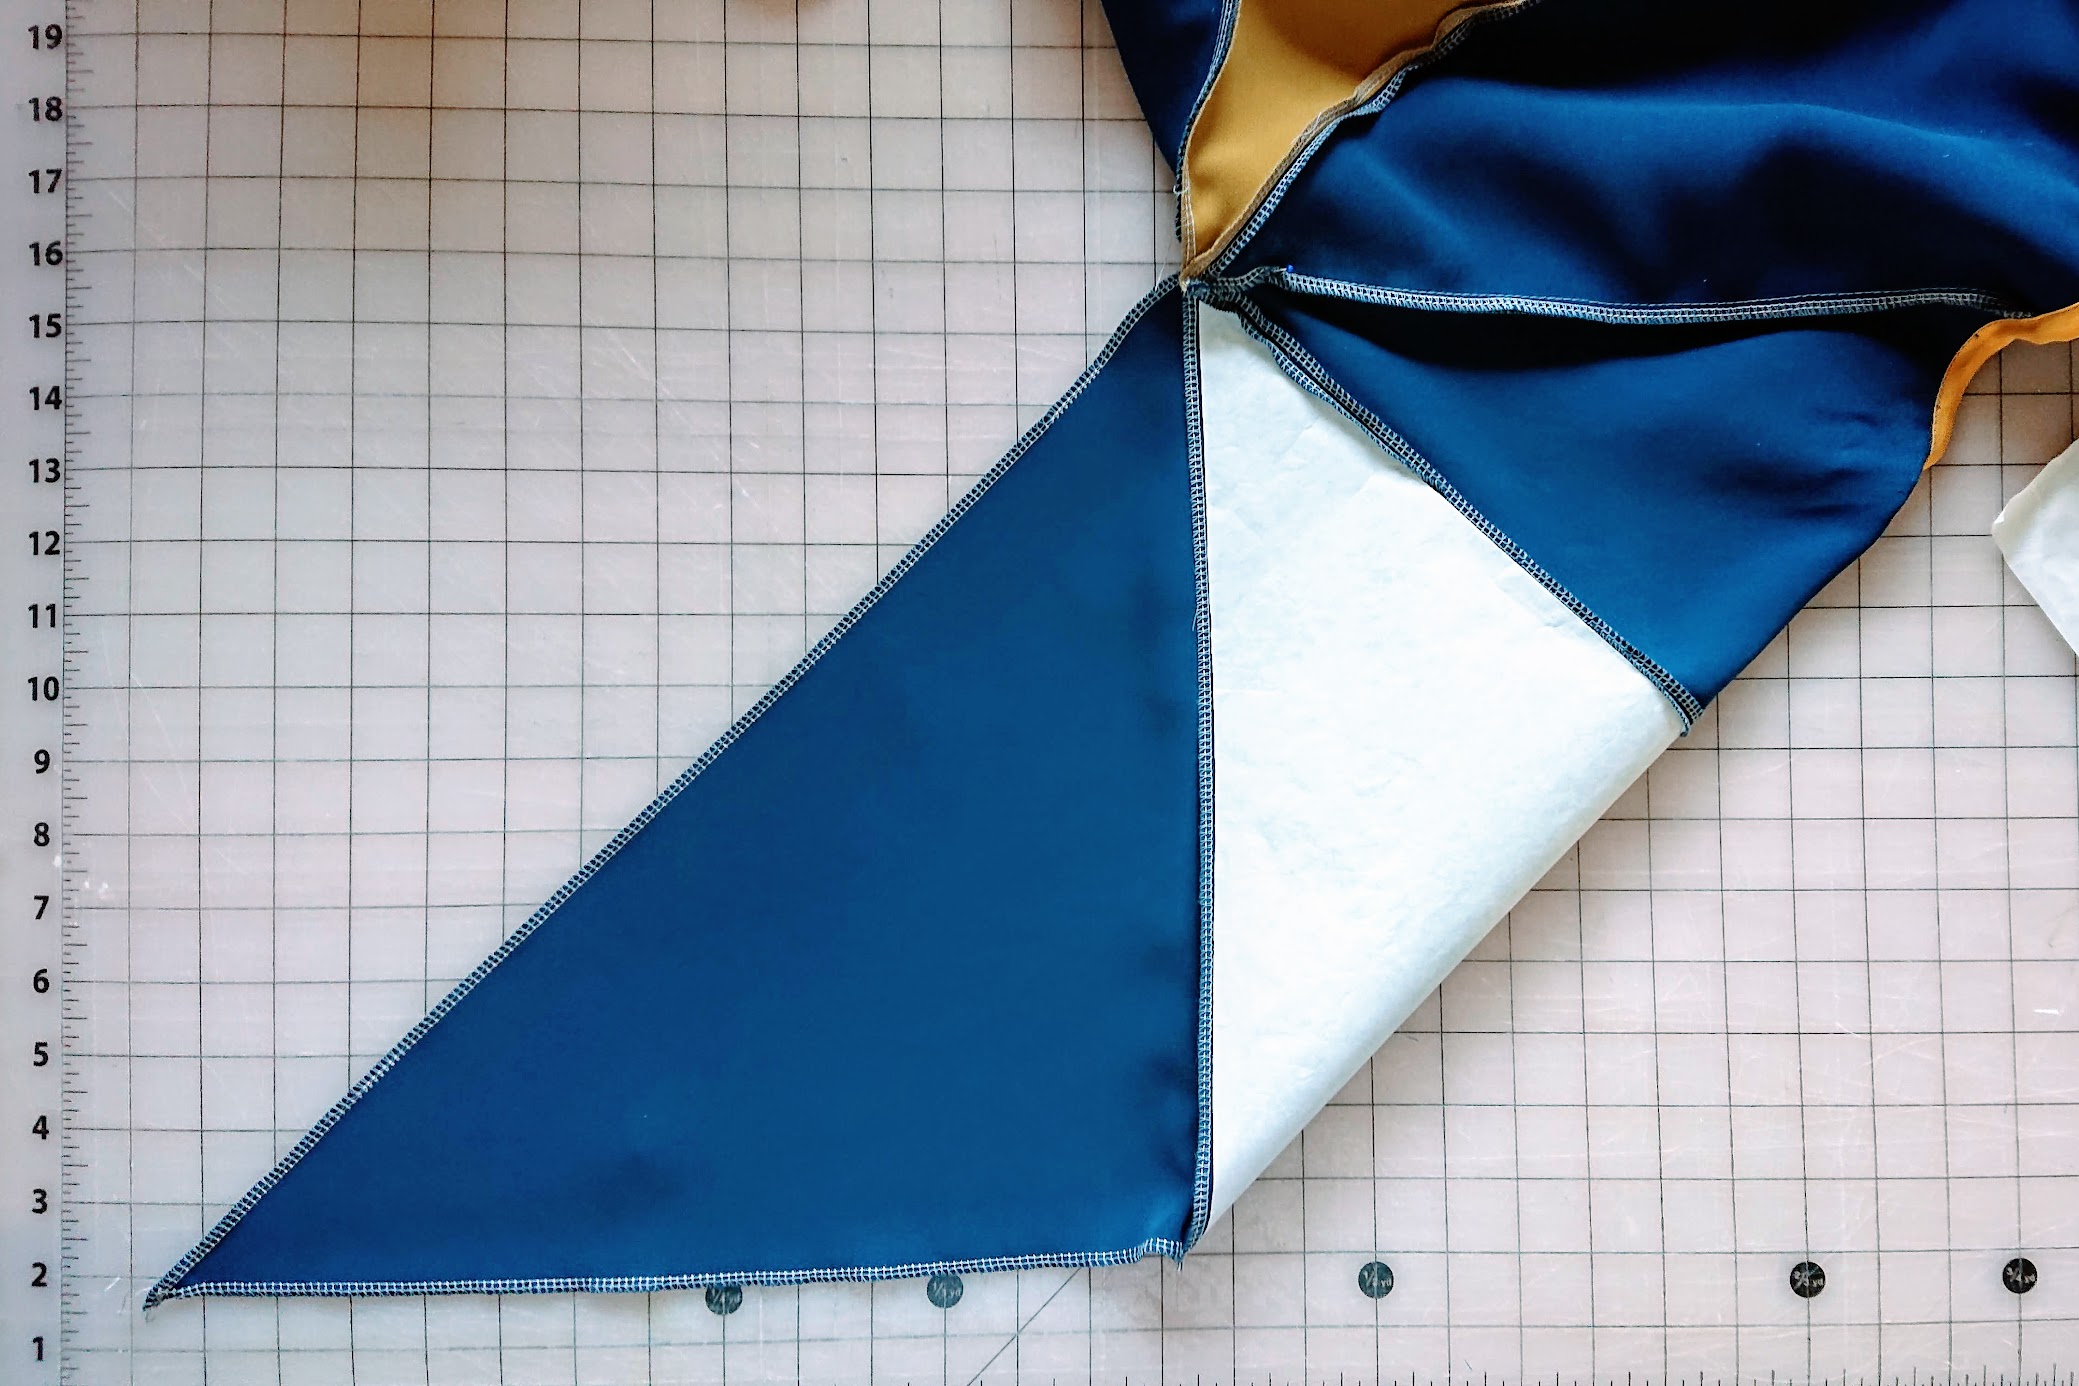
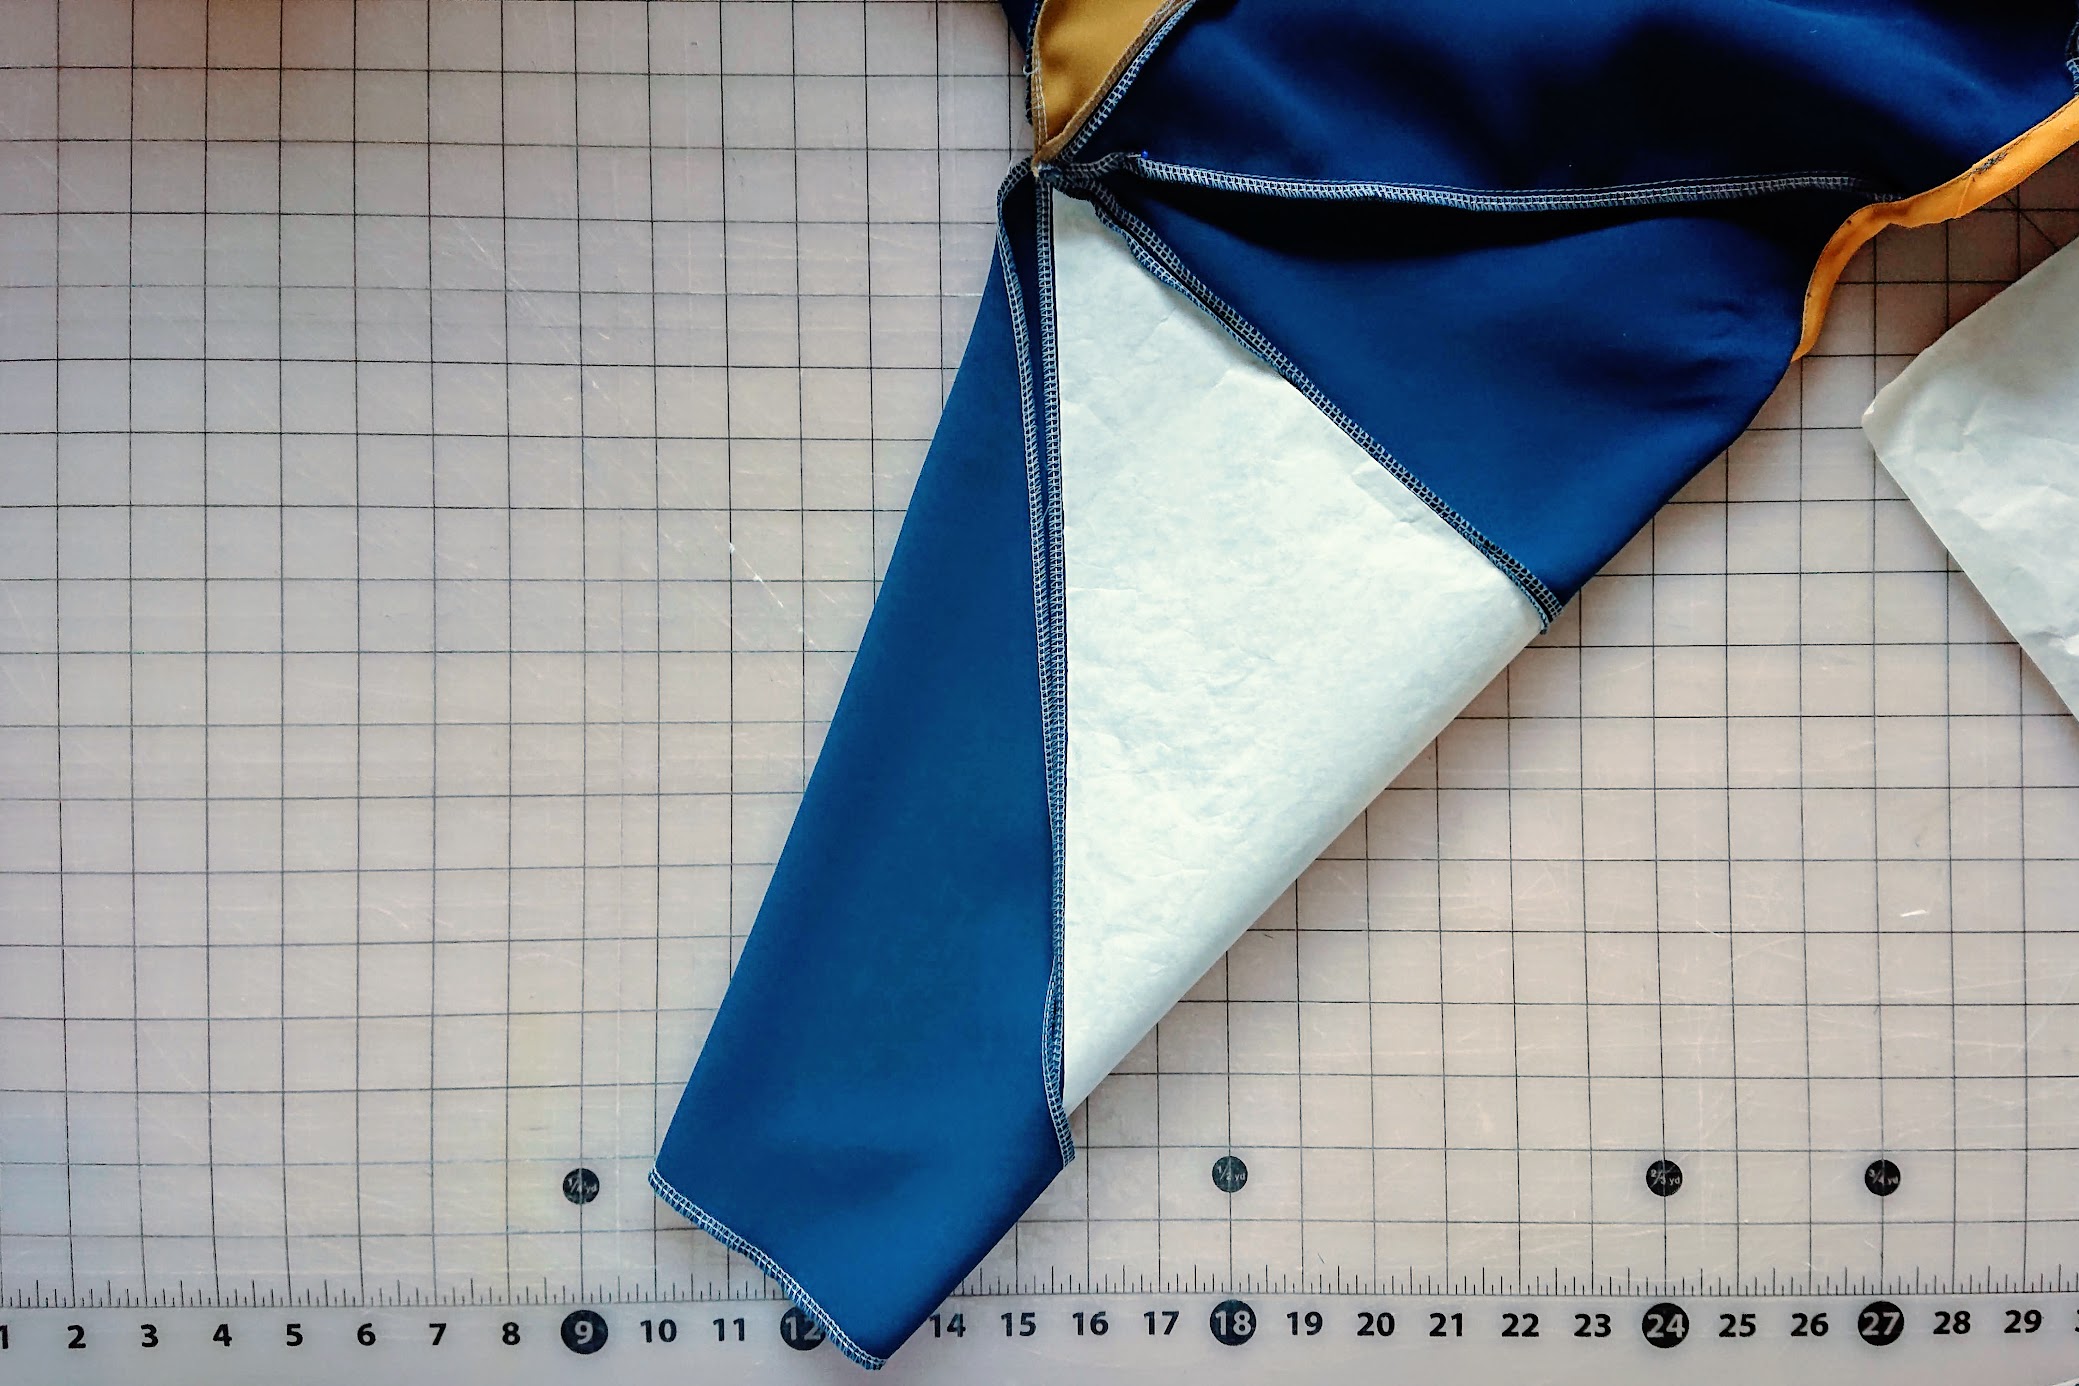
After triangle placements are set, I first overlock each side of triangular pieces before grouping most of them into four squares. The freezer paper is a life saver here, as they provide reliable line guide. I sew right next to the freezer paper… quite a thrilling experience. Precise sewing, right?
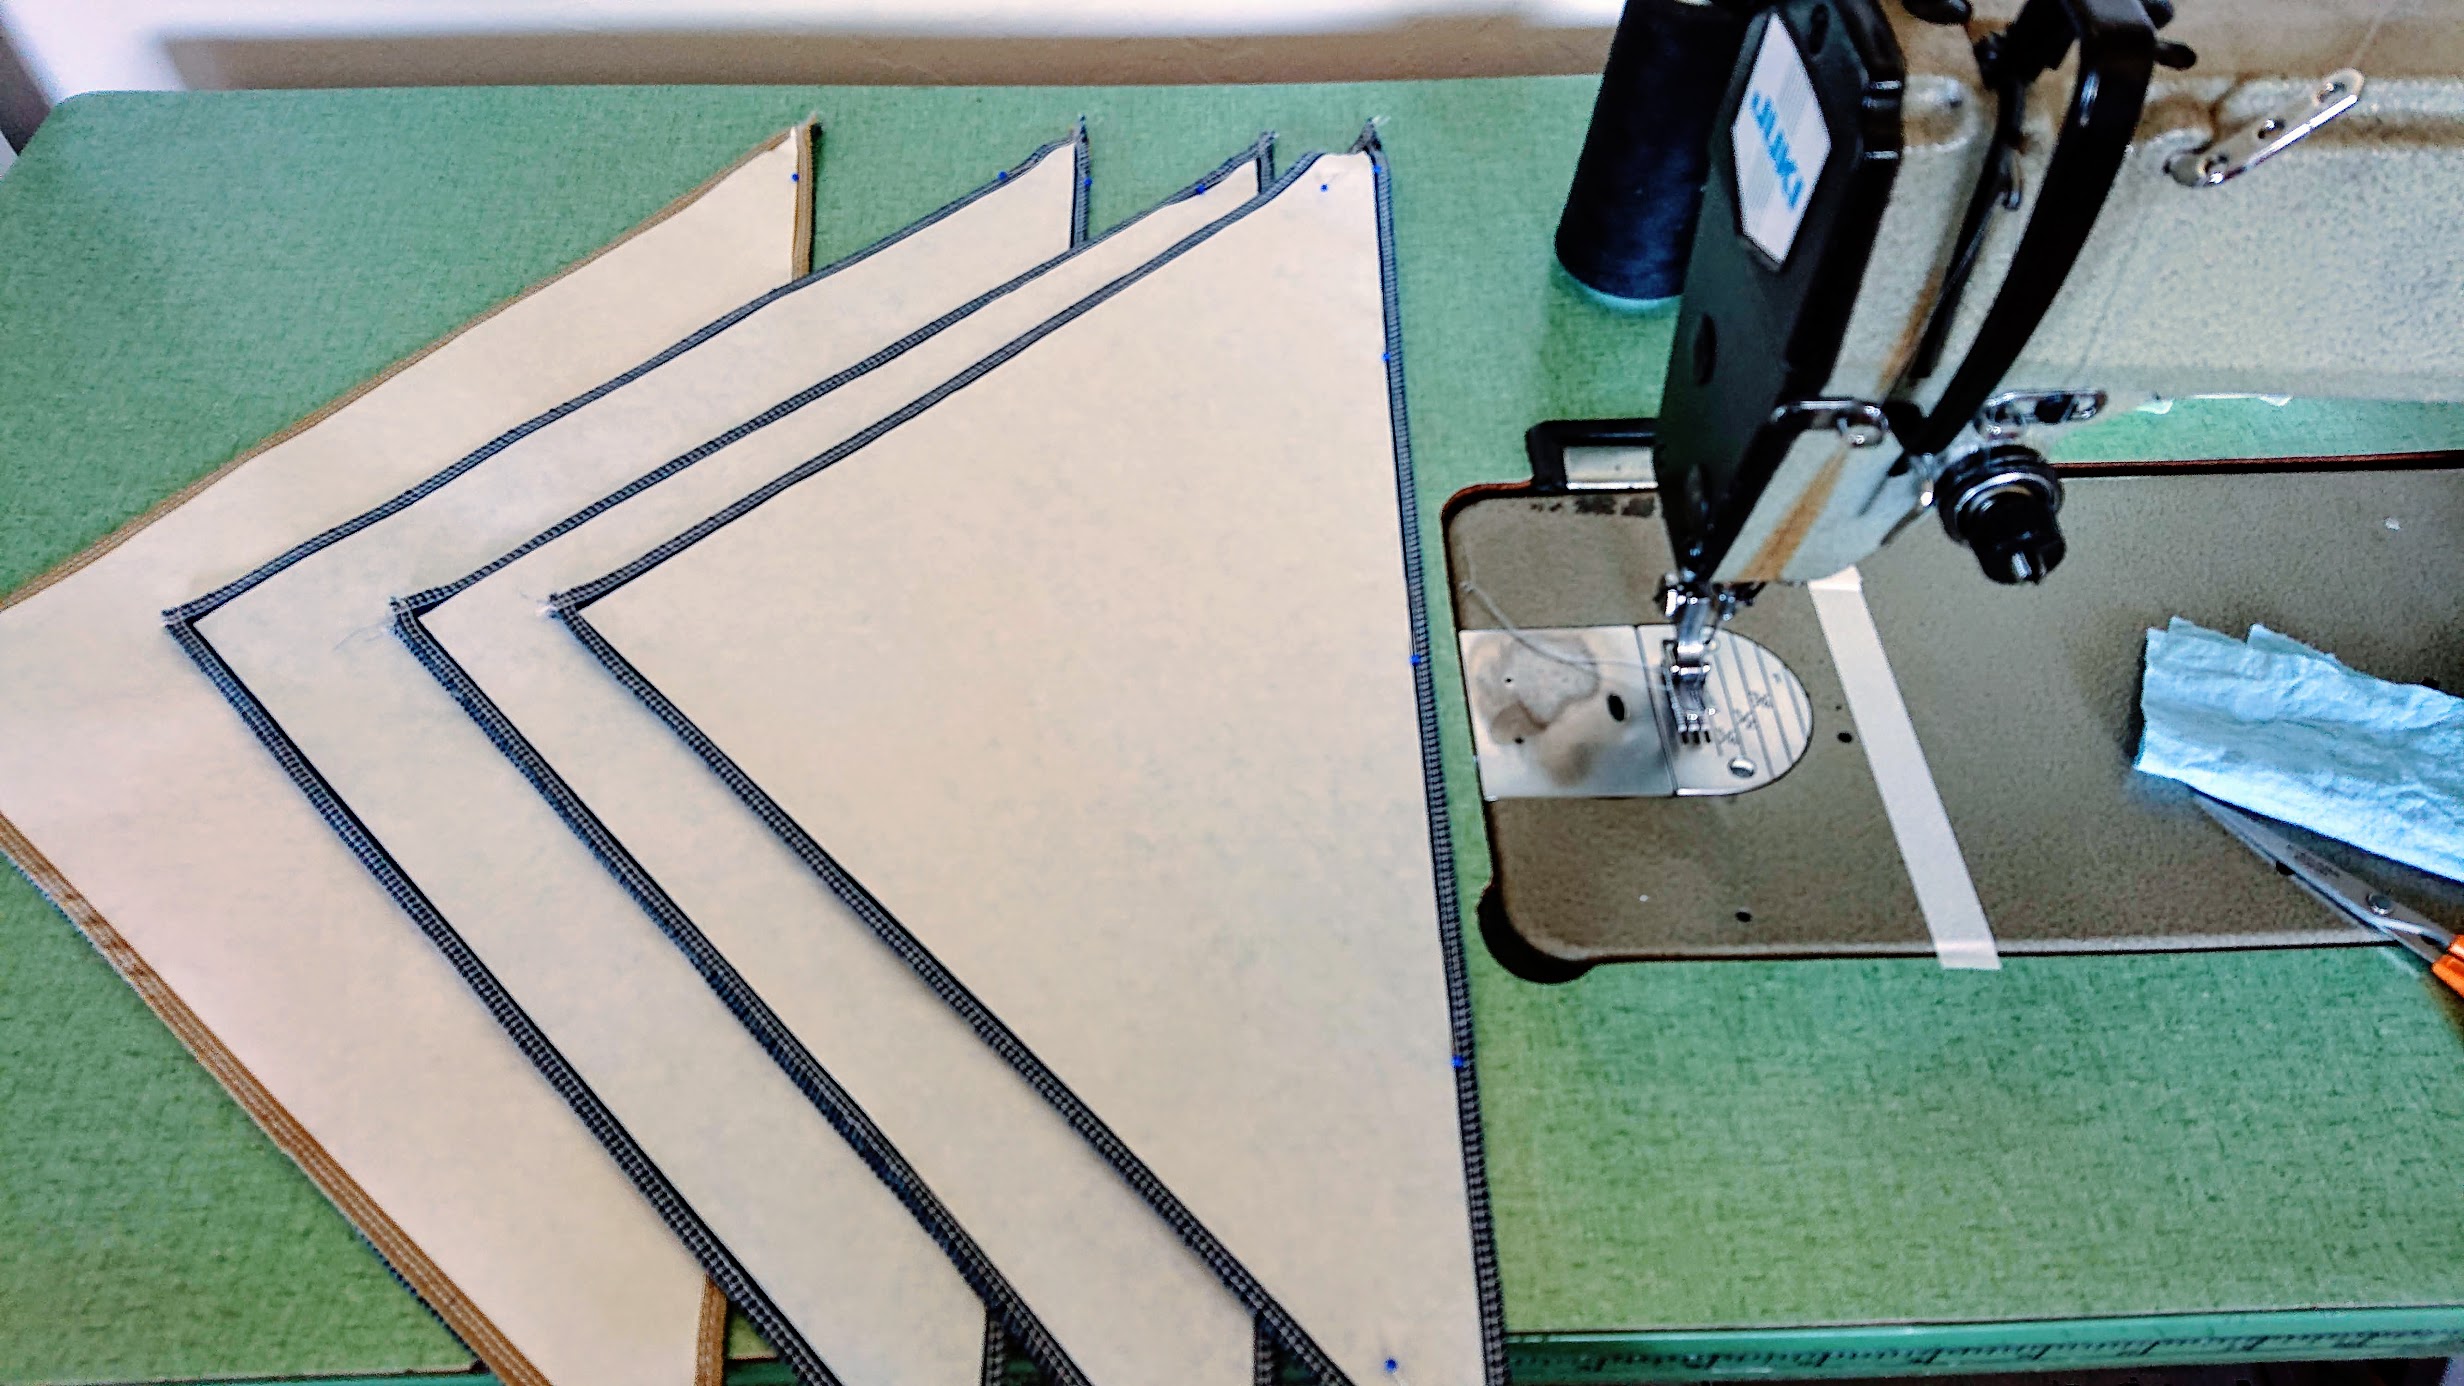
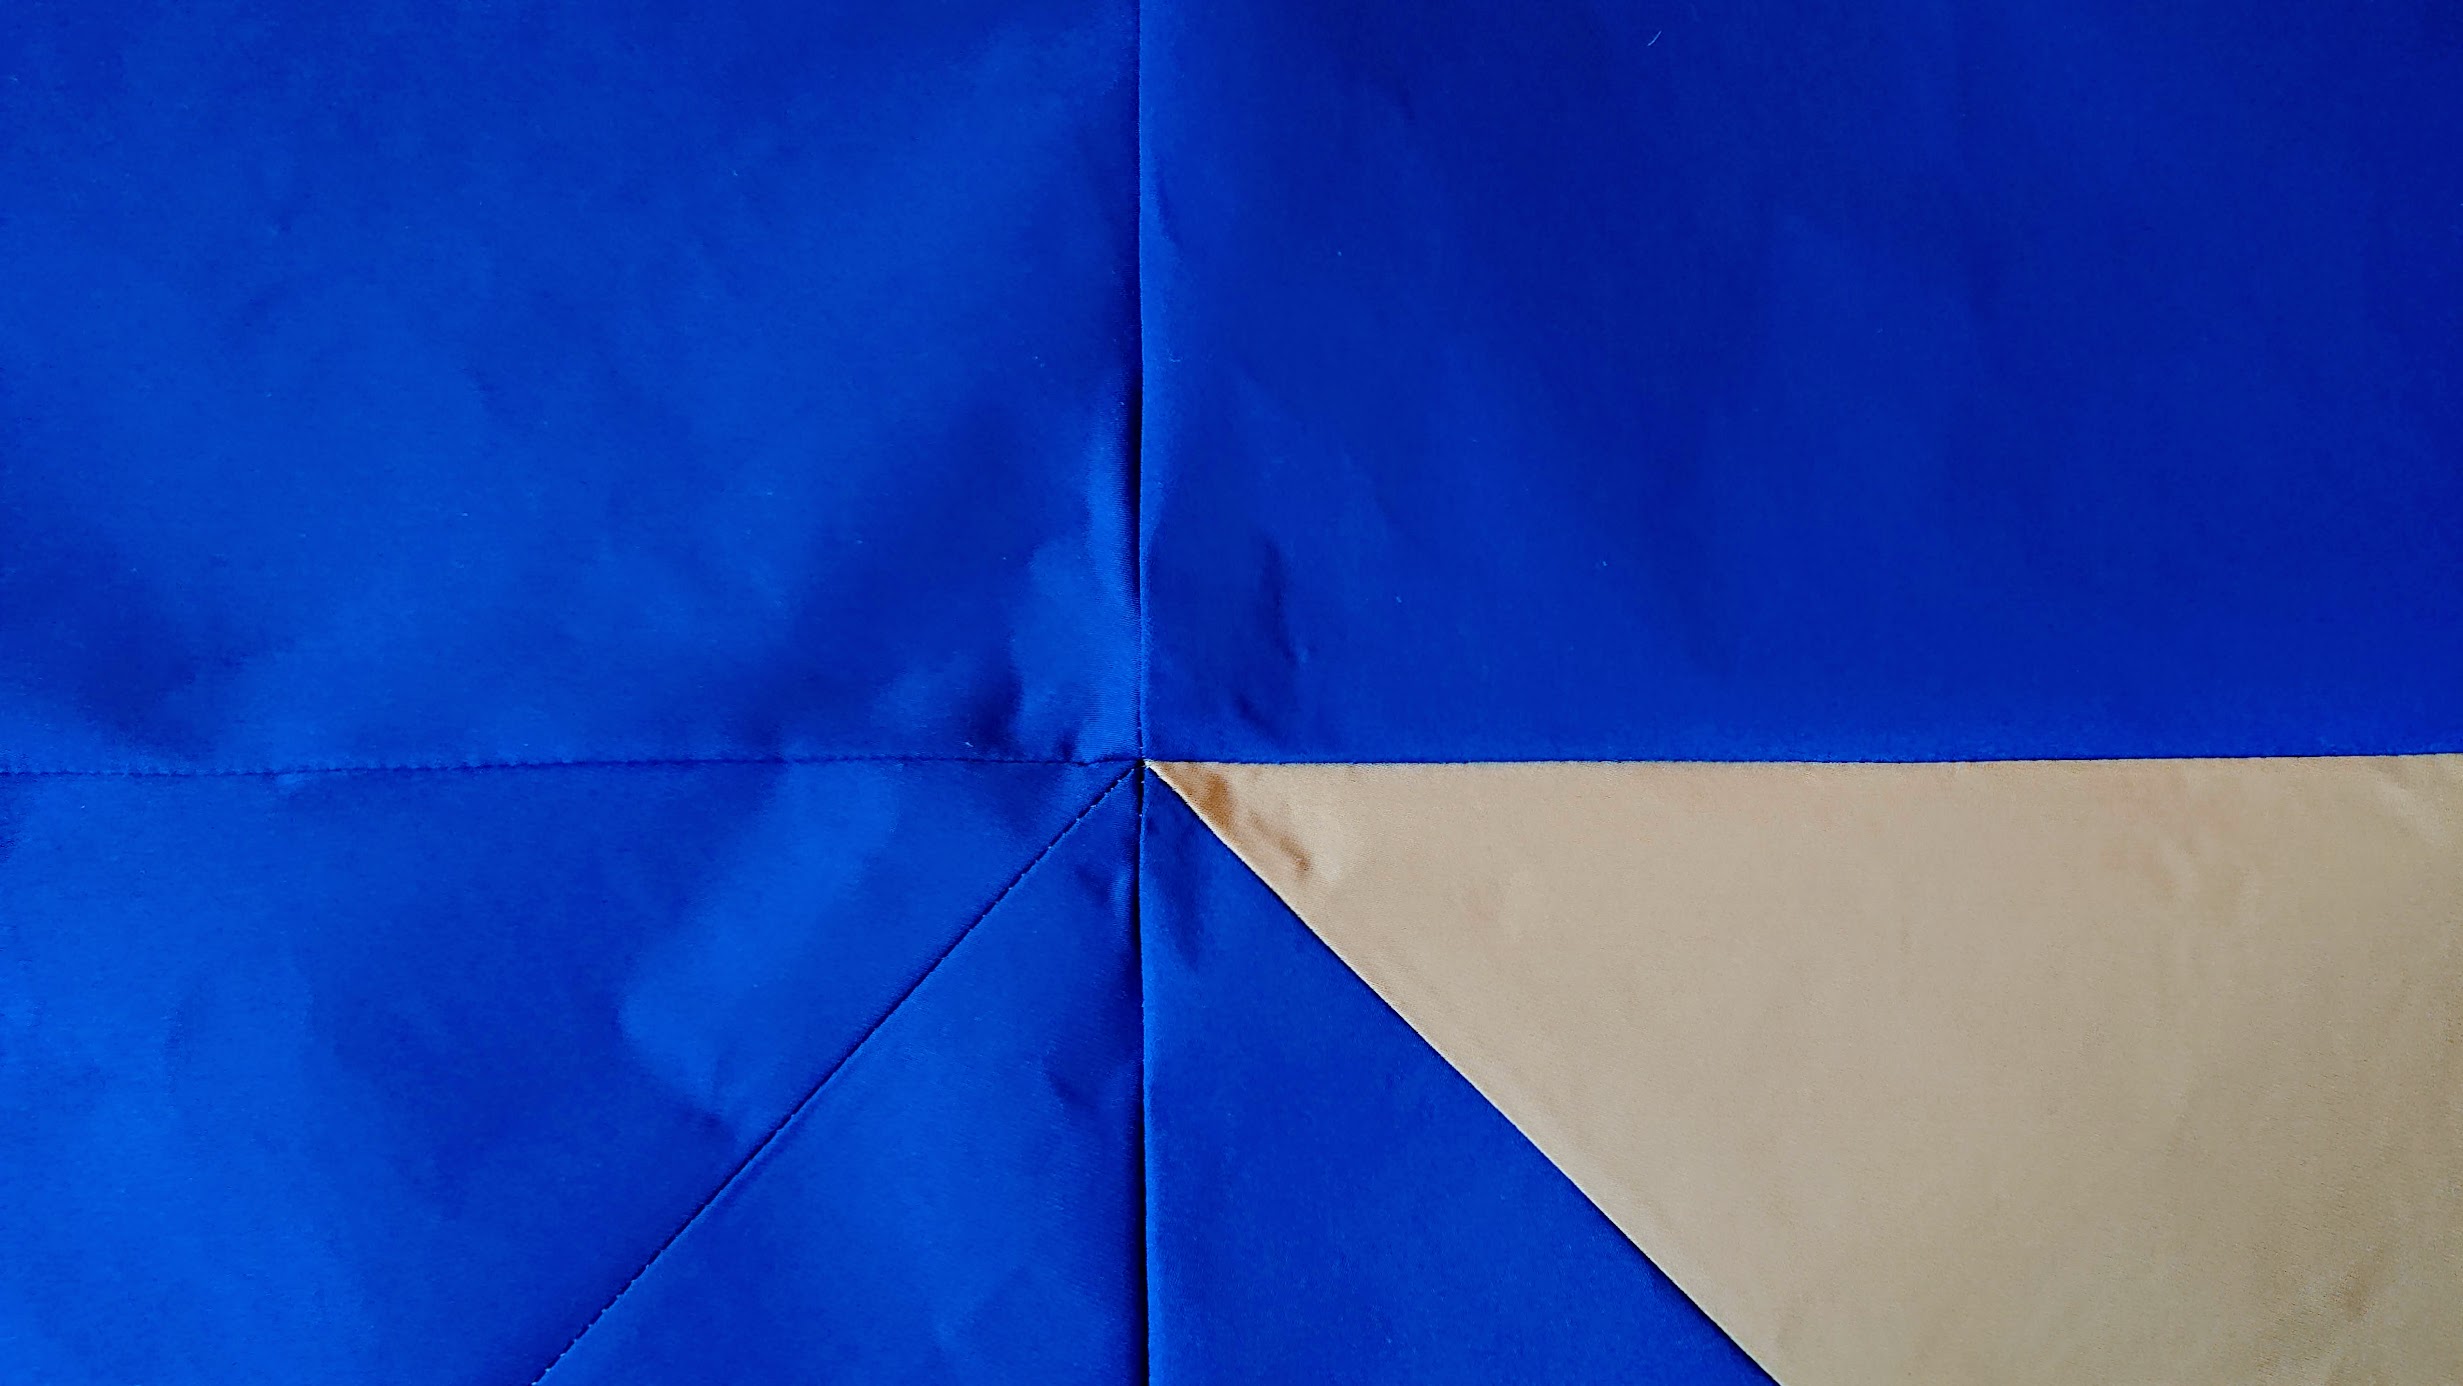
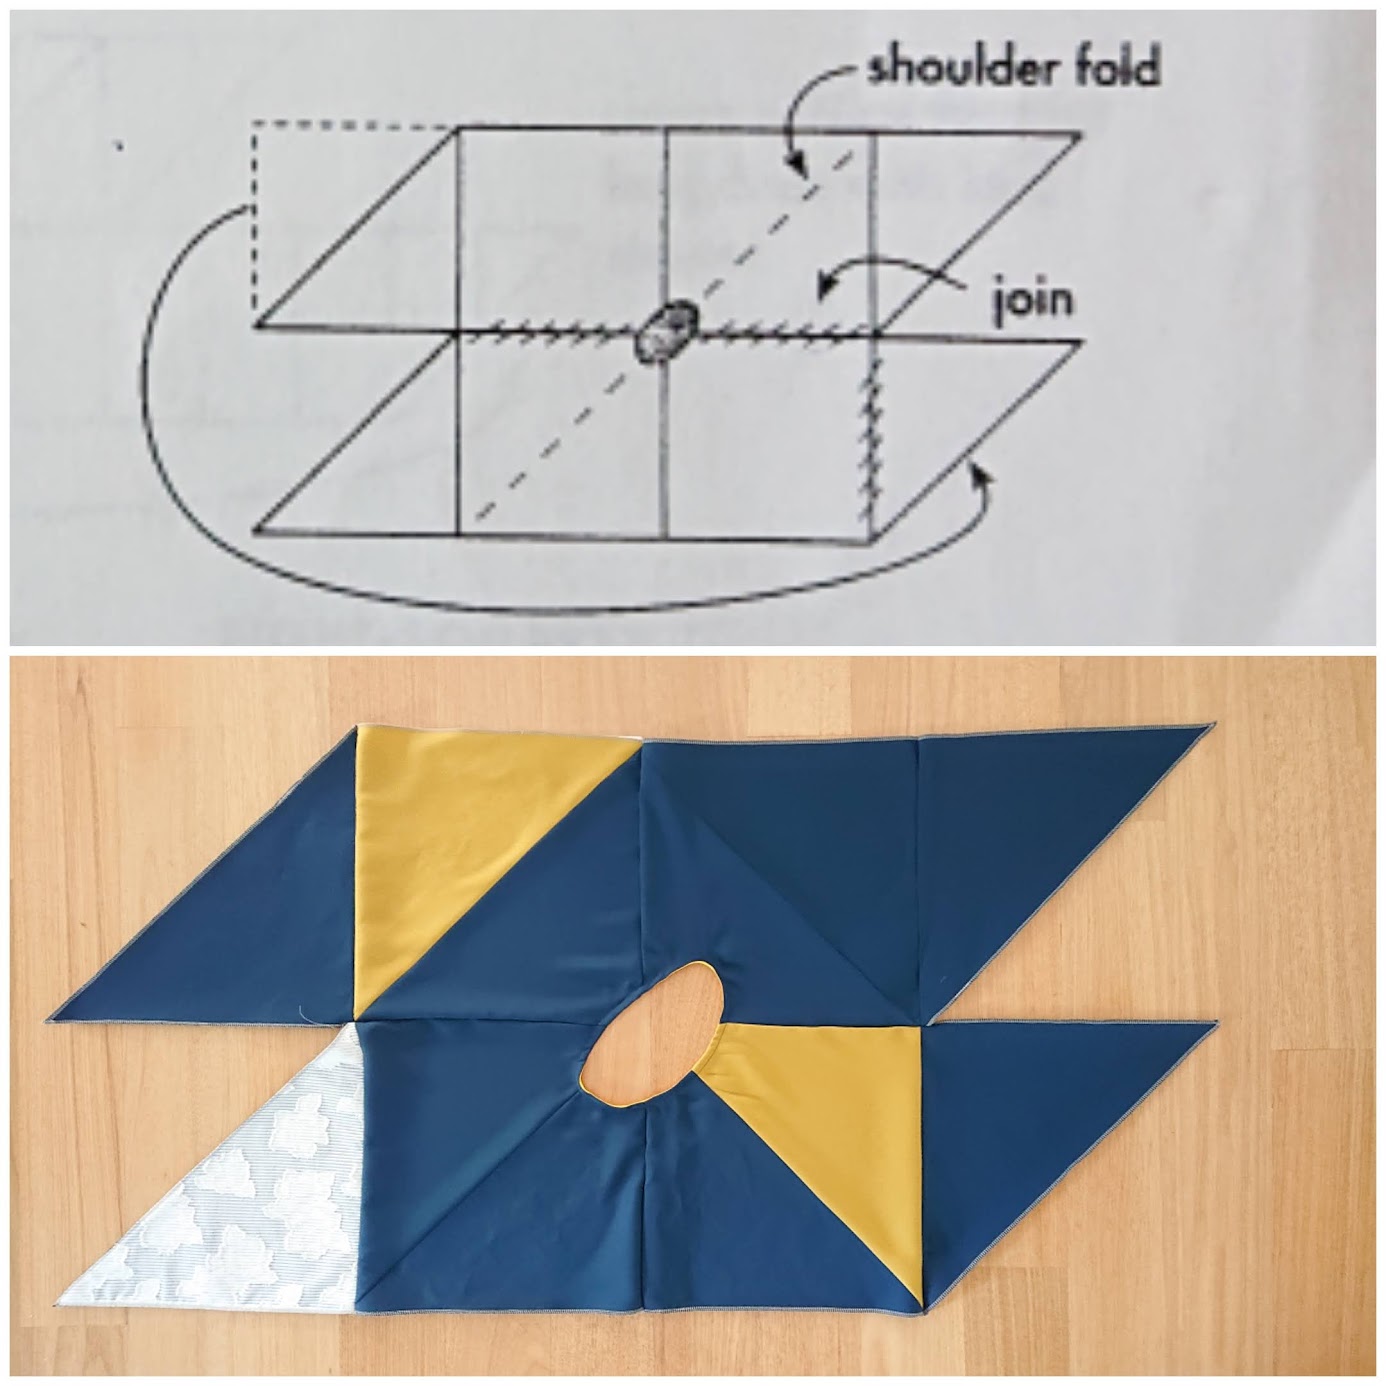
The result doesn’t disappoint. And when it’s time to assemble the two rows of six triangles, I use masking tape to keep the seams open. This is really helpful when there are two or three seam lines are merging into one. I also temporarily hand stitch seam lines to make sure they are lined up perfectly before running it through the sewing machine.
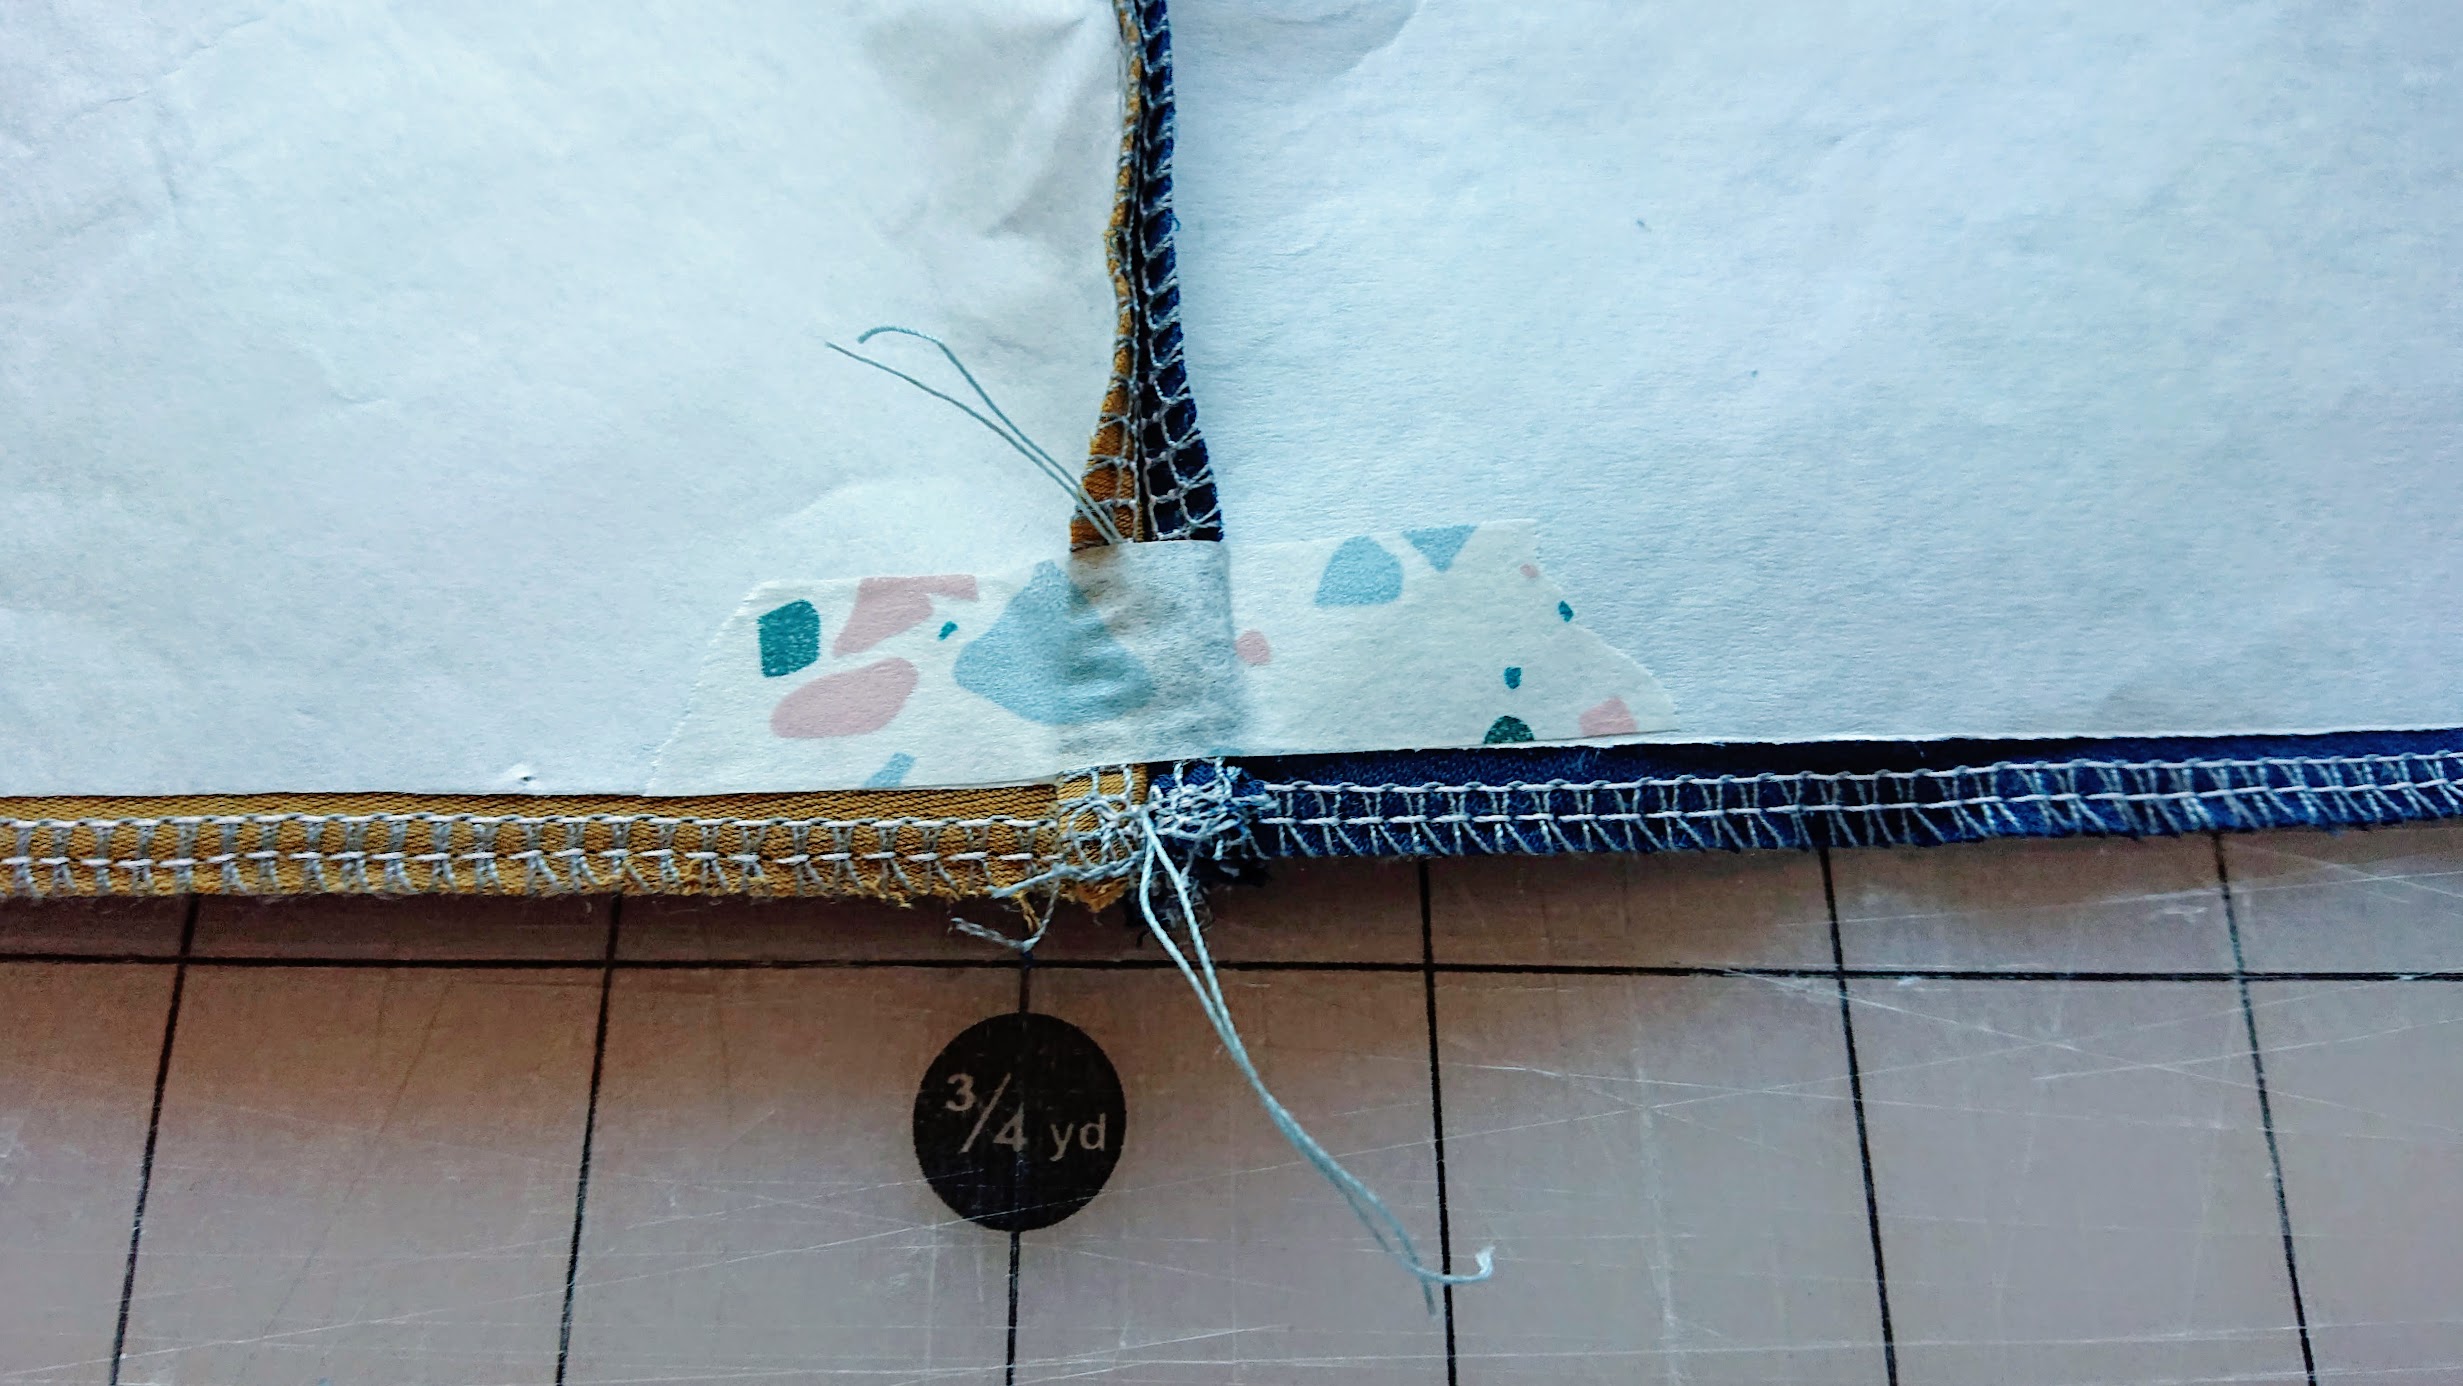
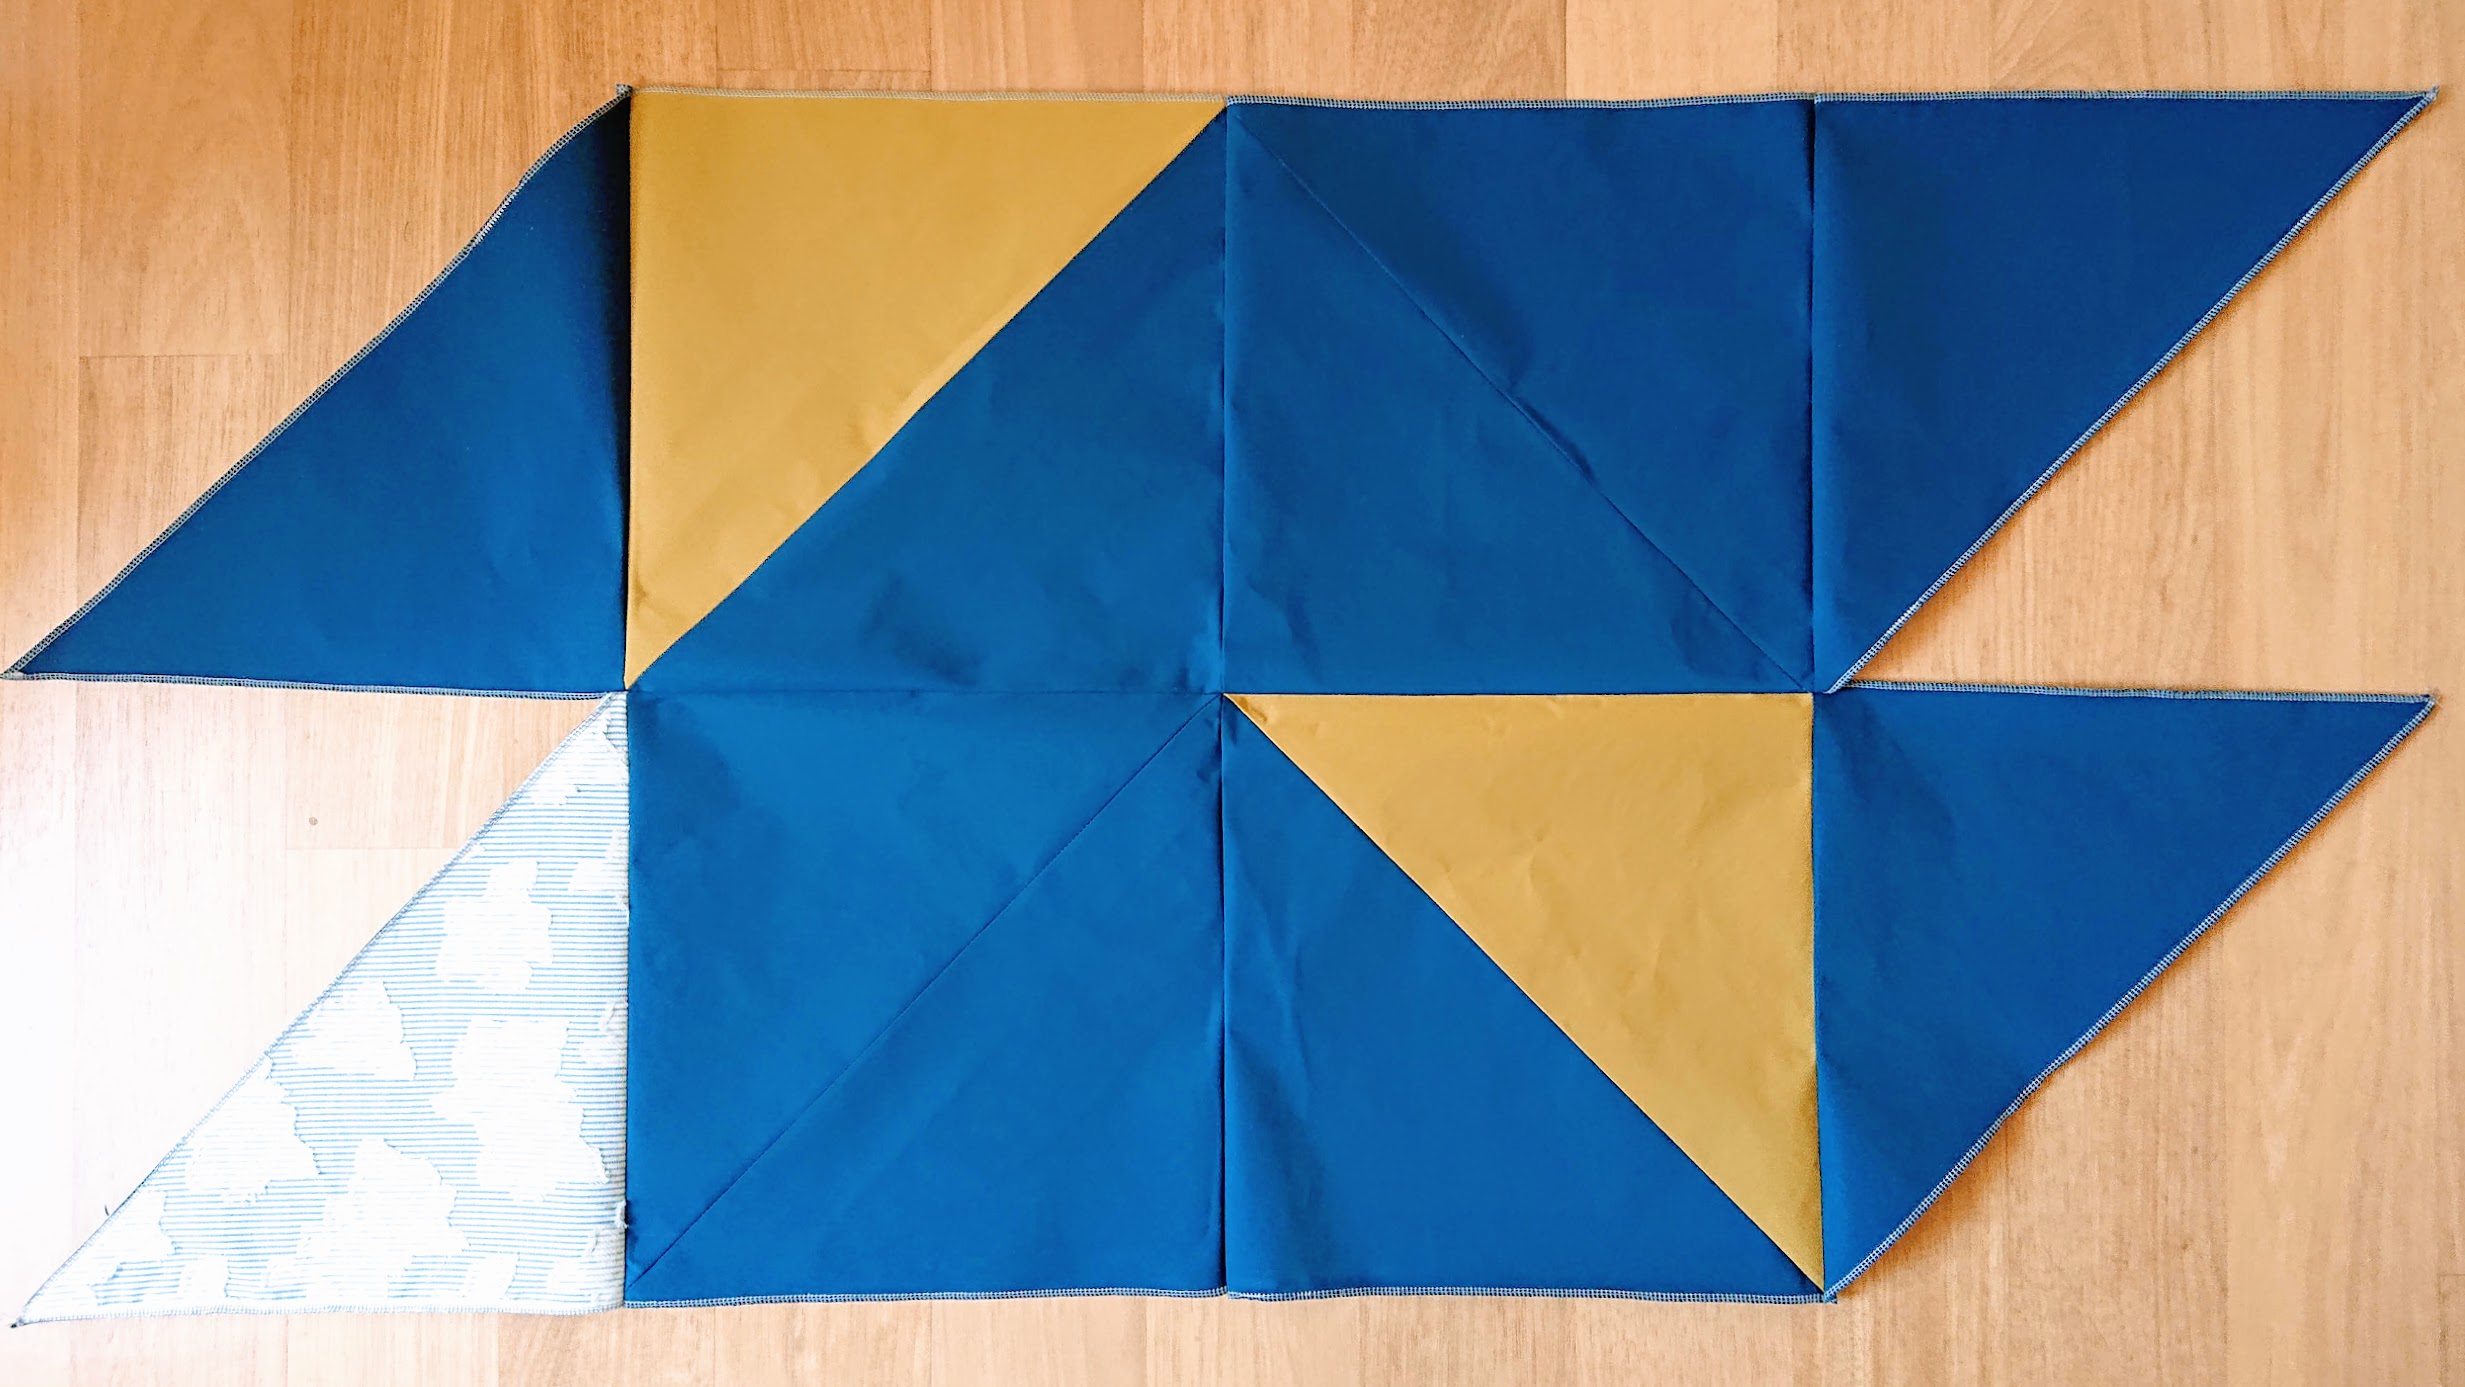
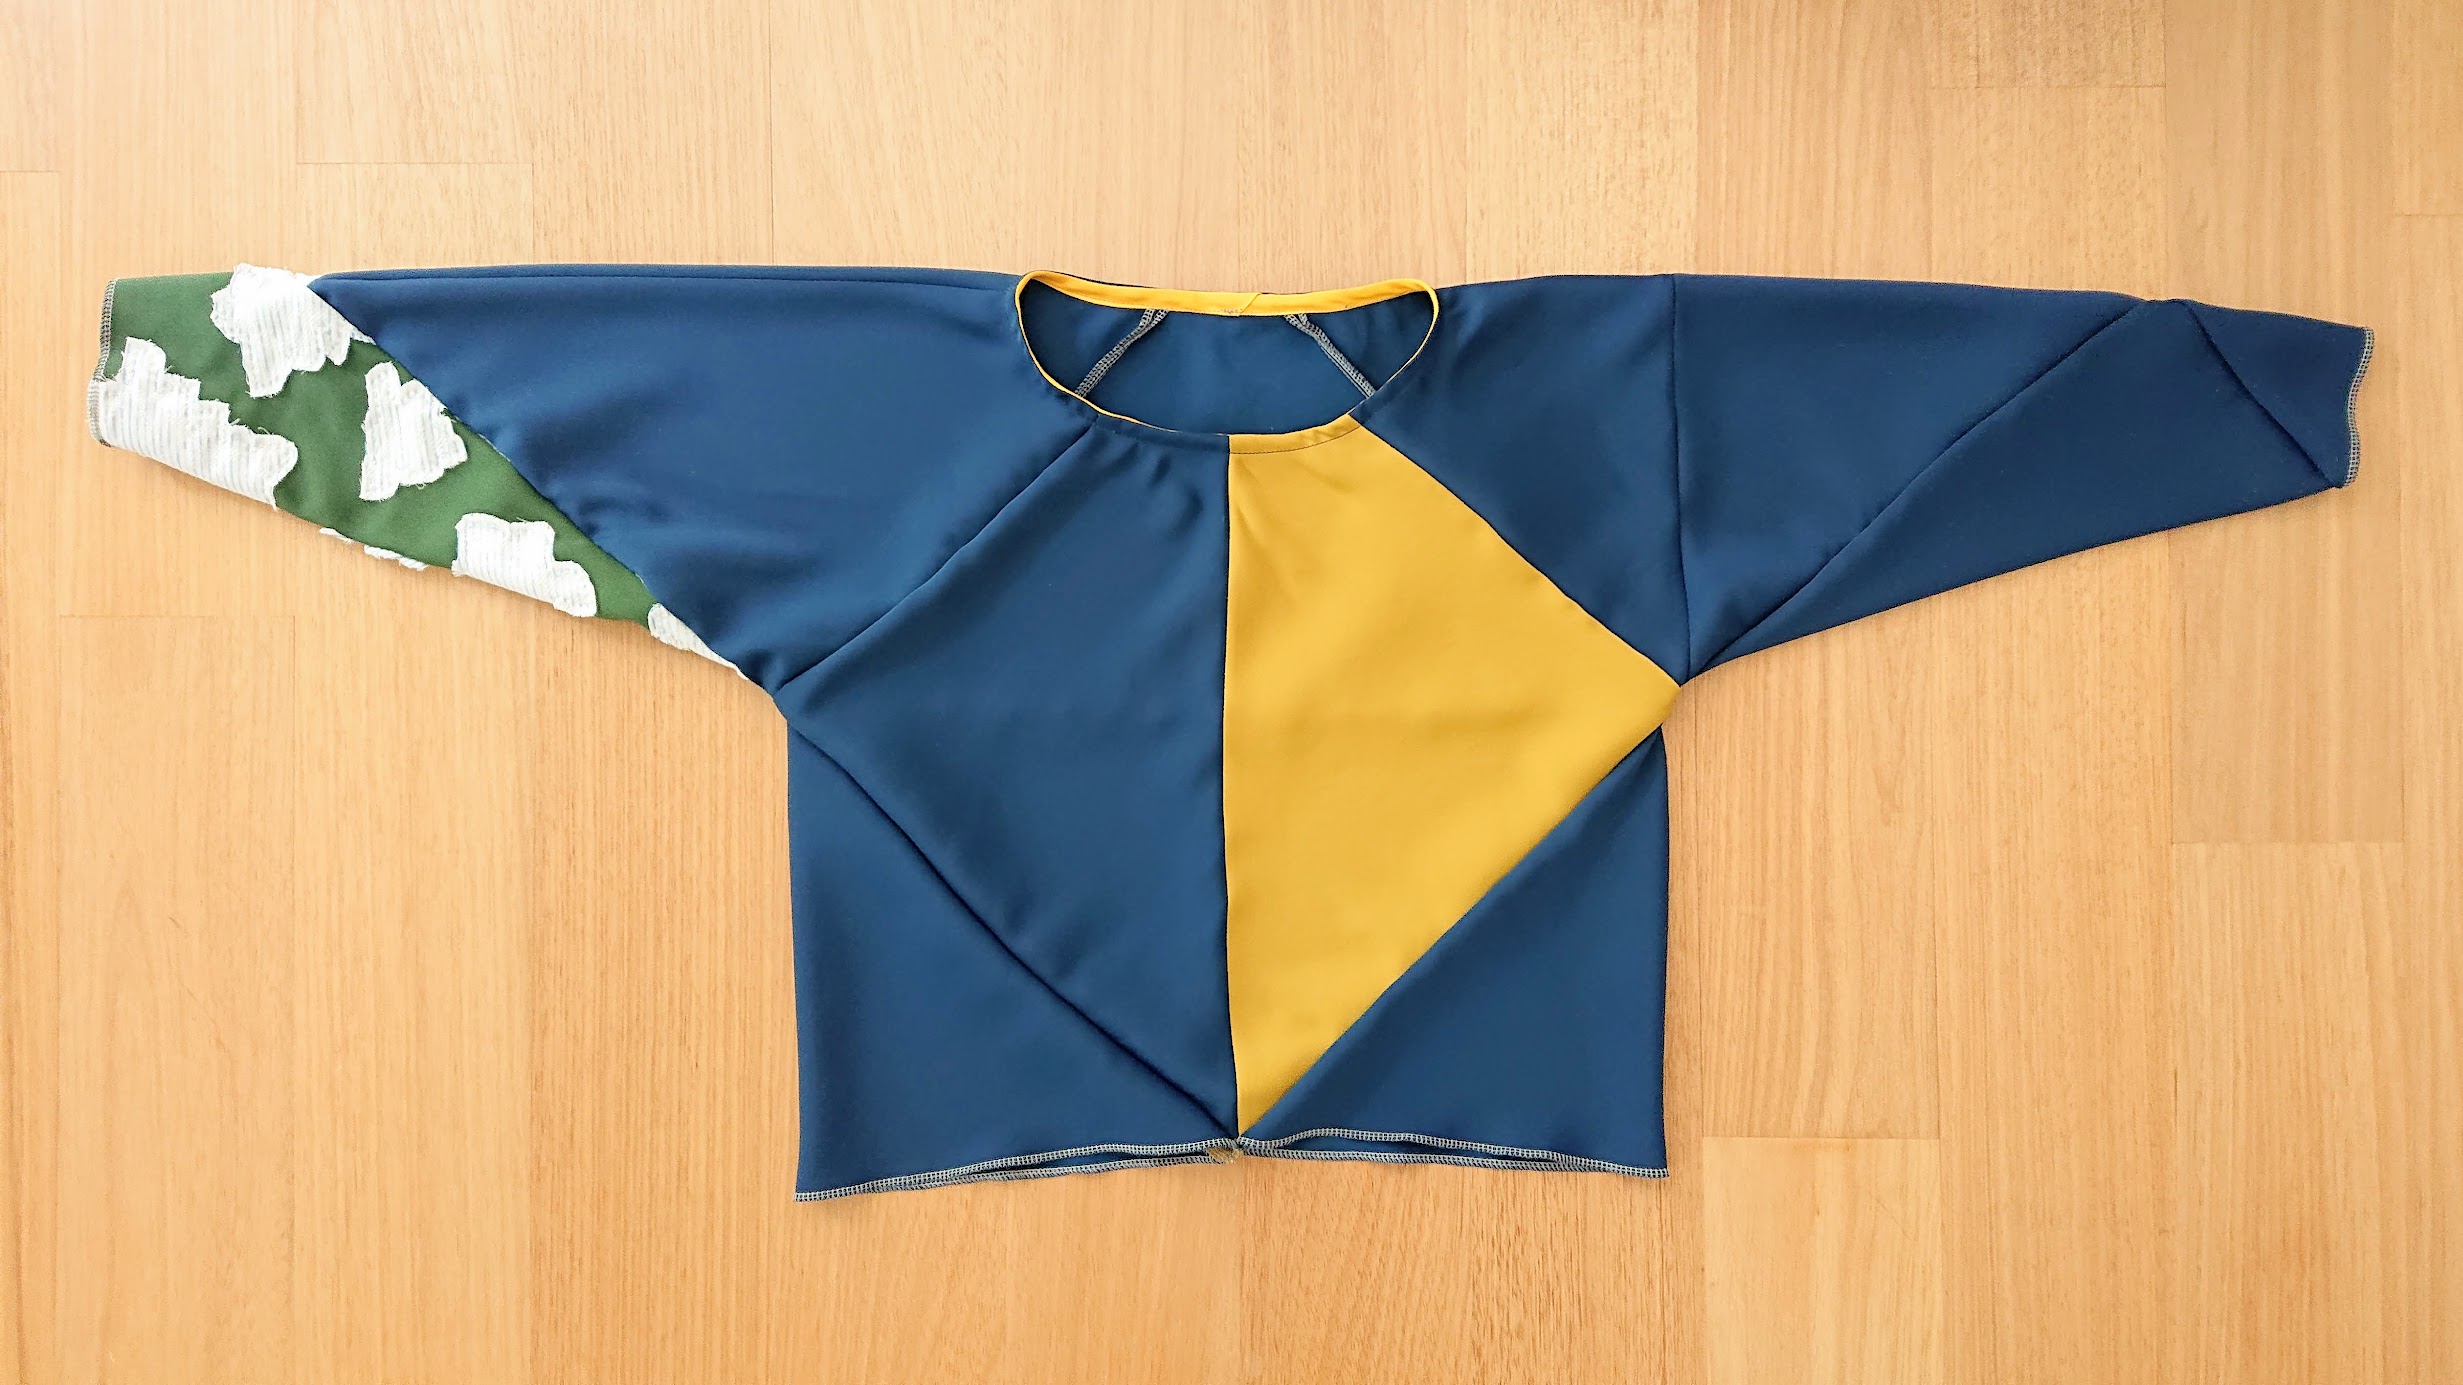
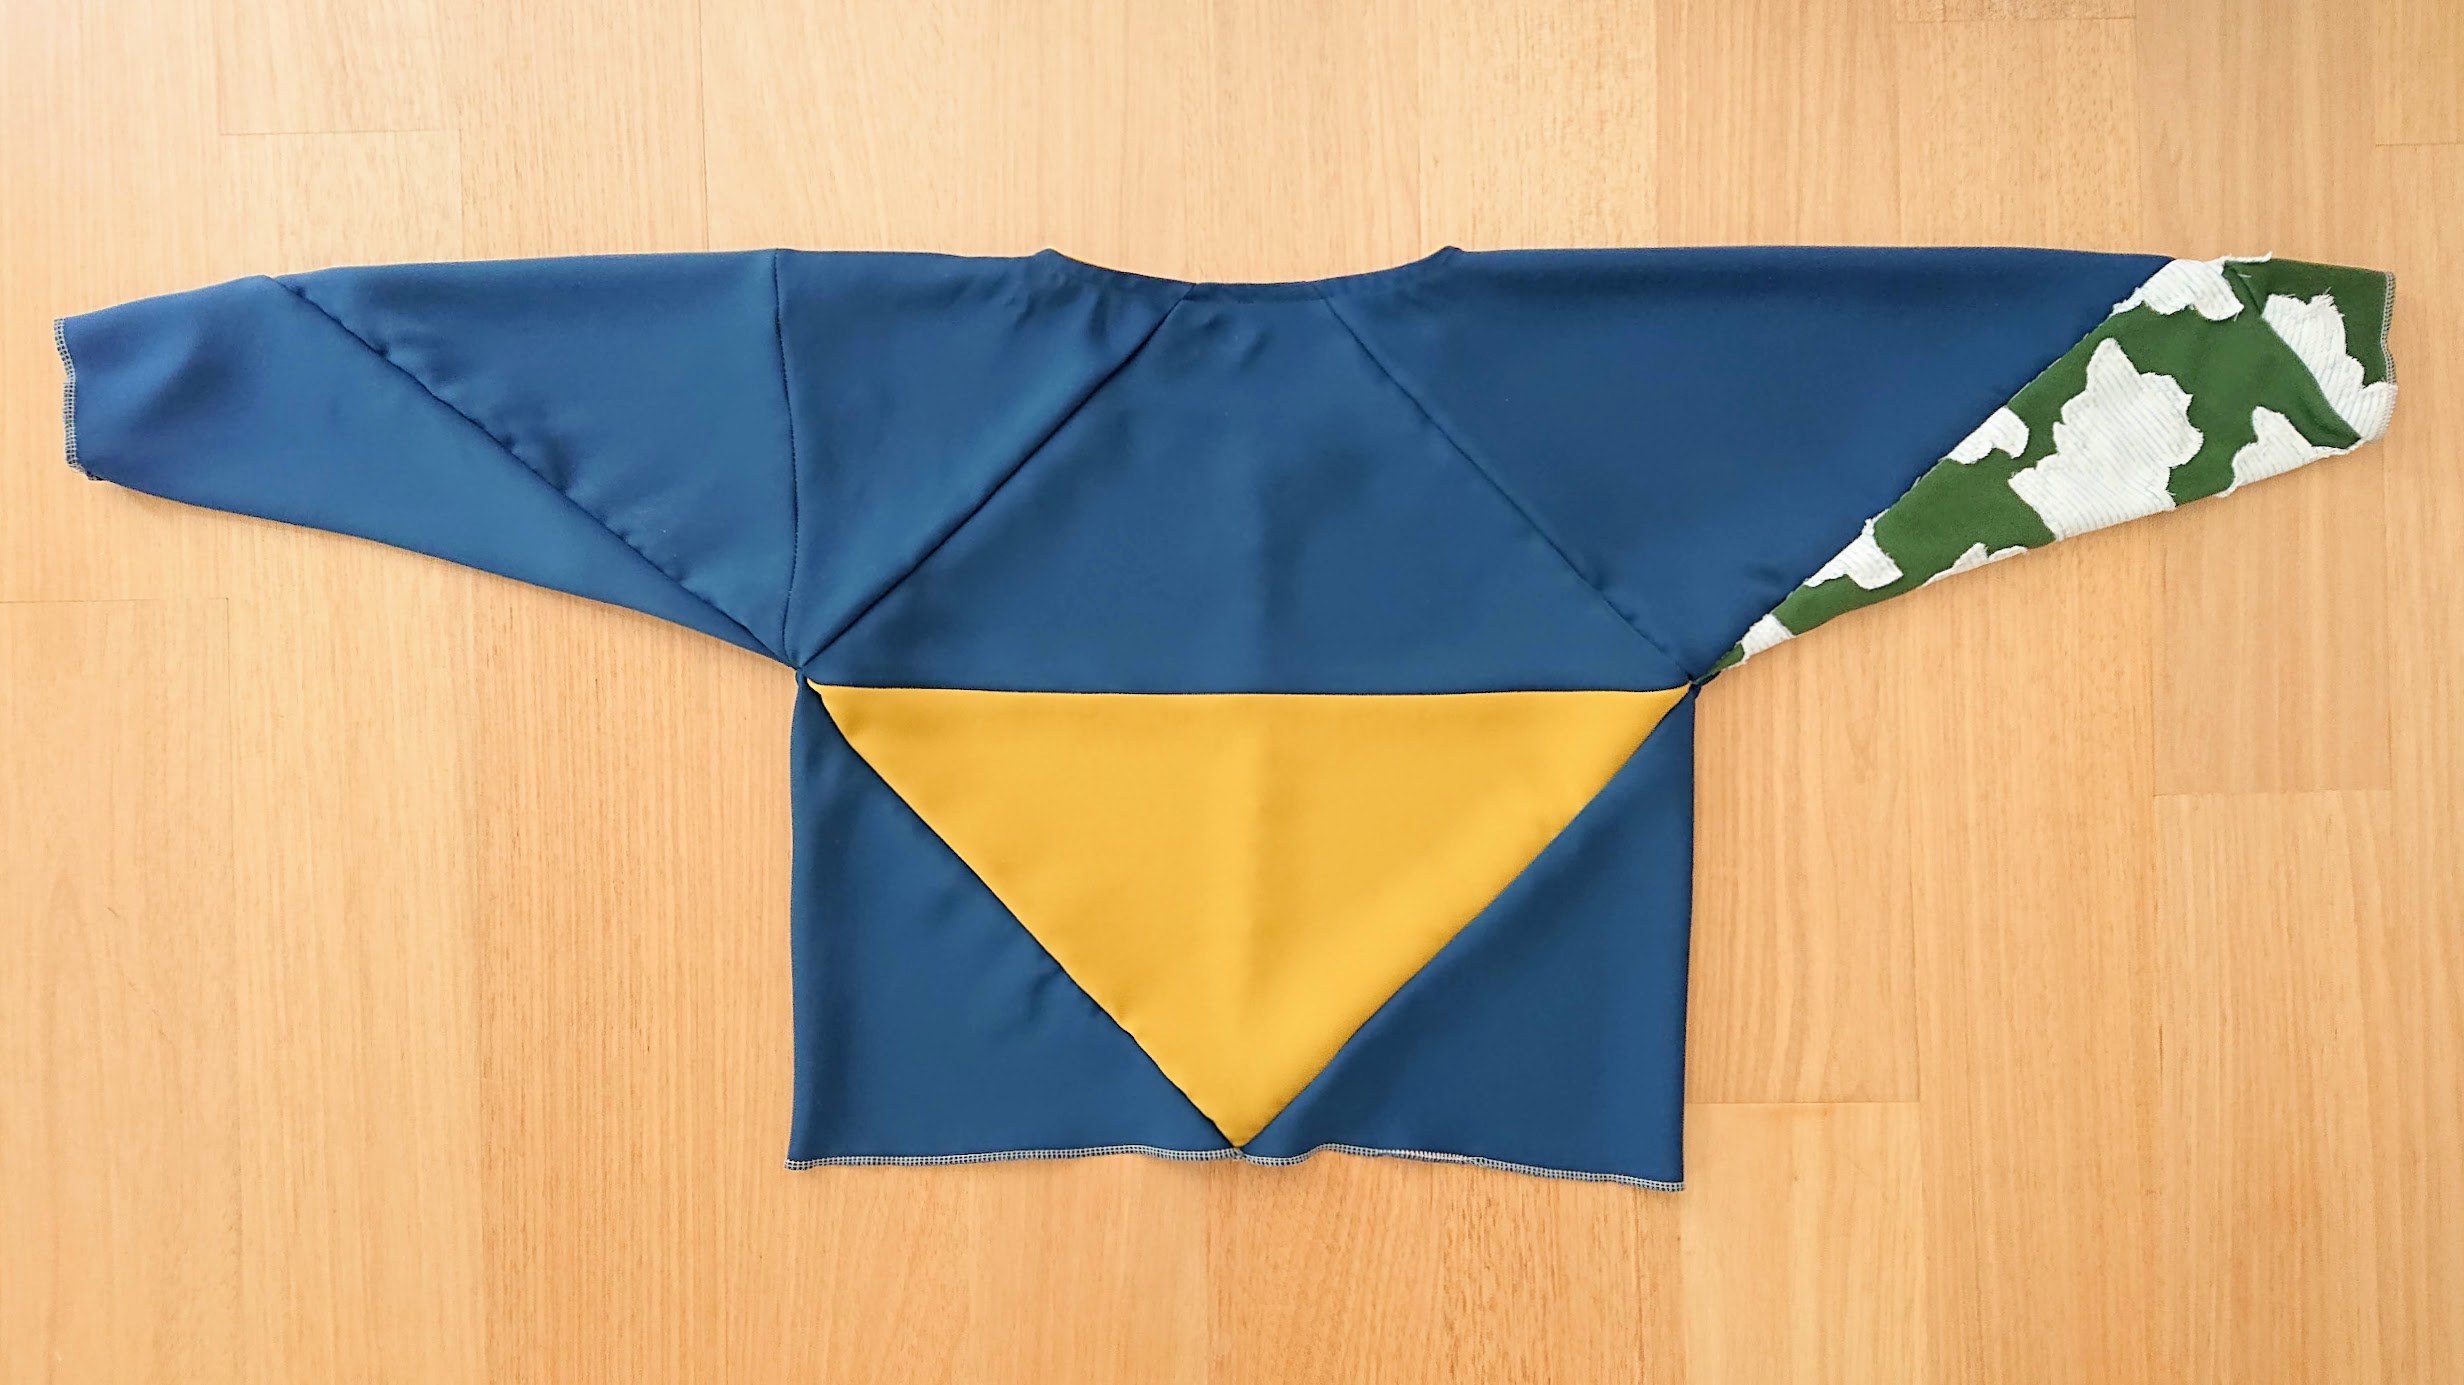
If you notice, the picture above is of a slightly different configuration than the one I made when laying all the triangle pieces on the floor. The change is intentional, as I want to have an extra seam line on the all-blue left arm. You may not see it now, but you will see it soon.
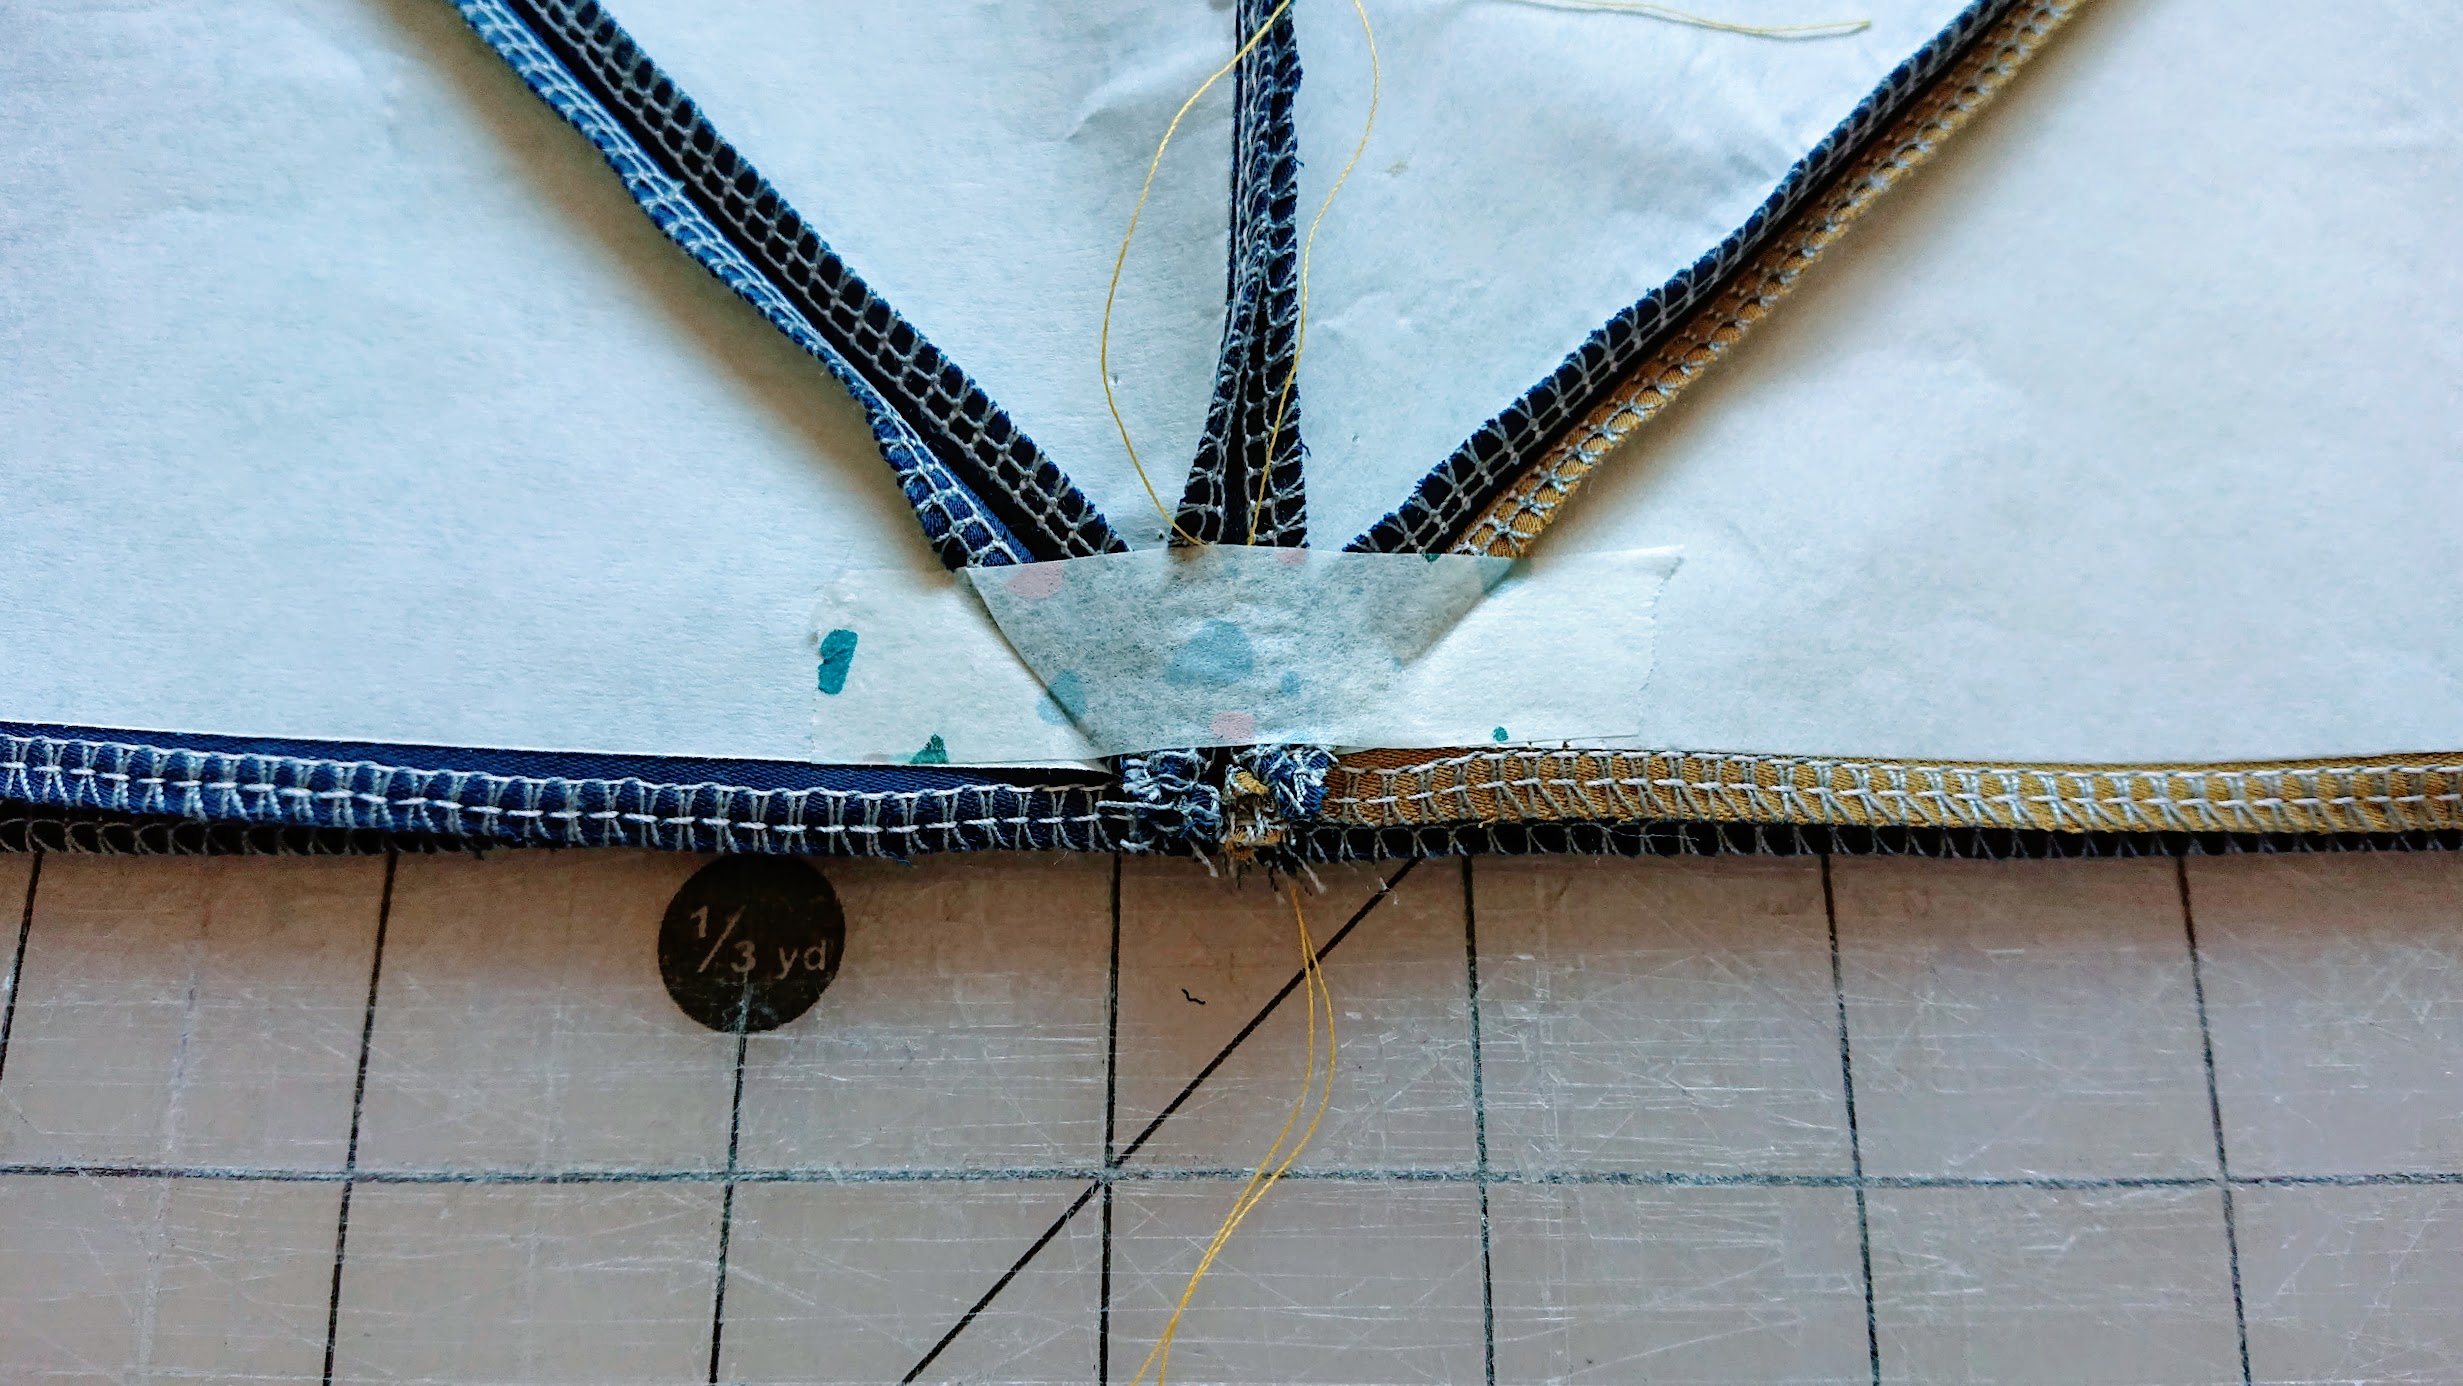
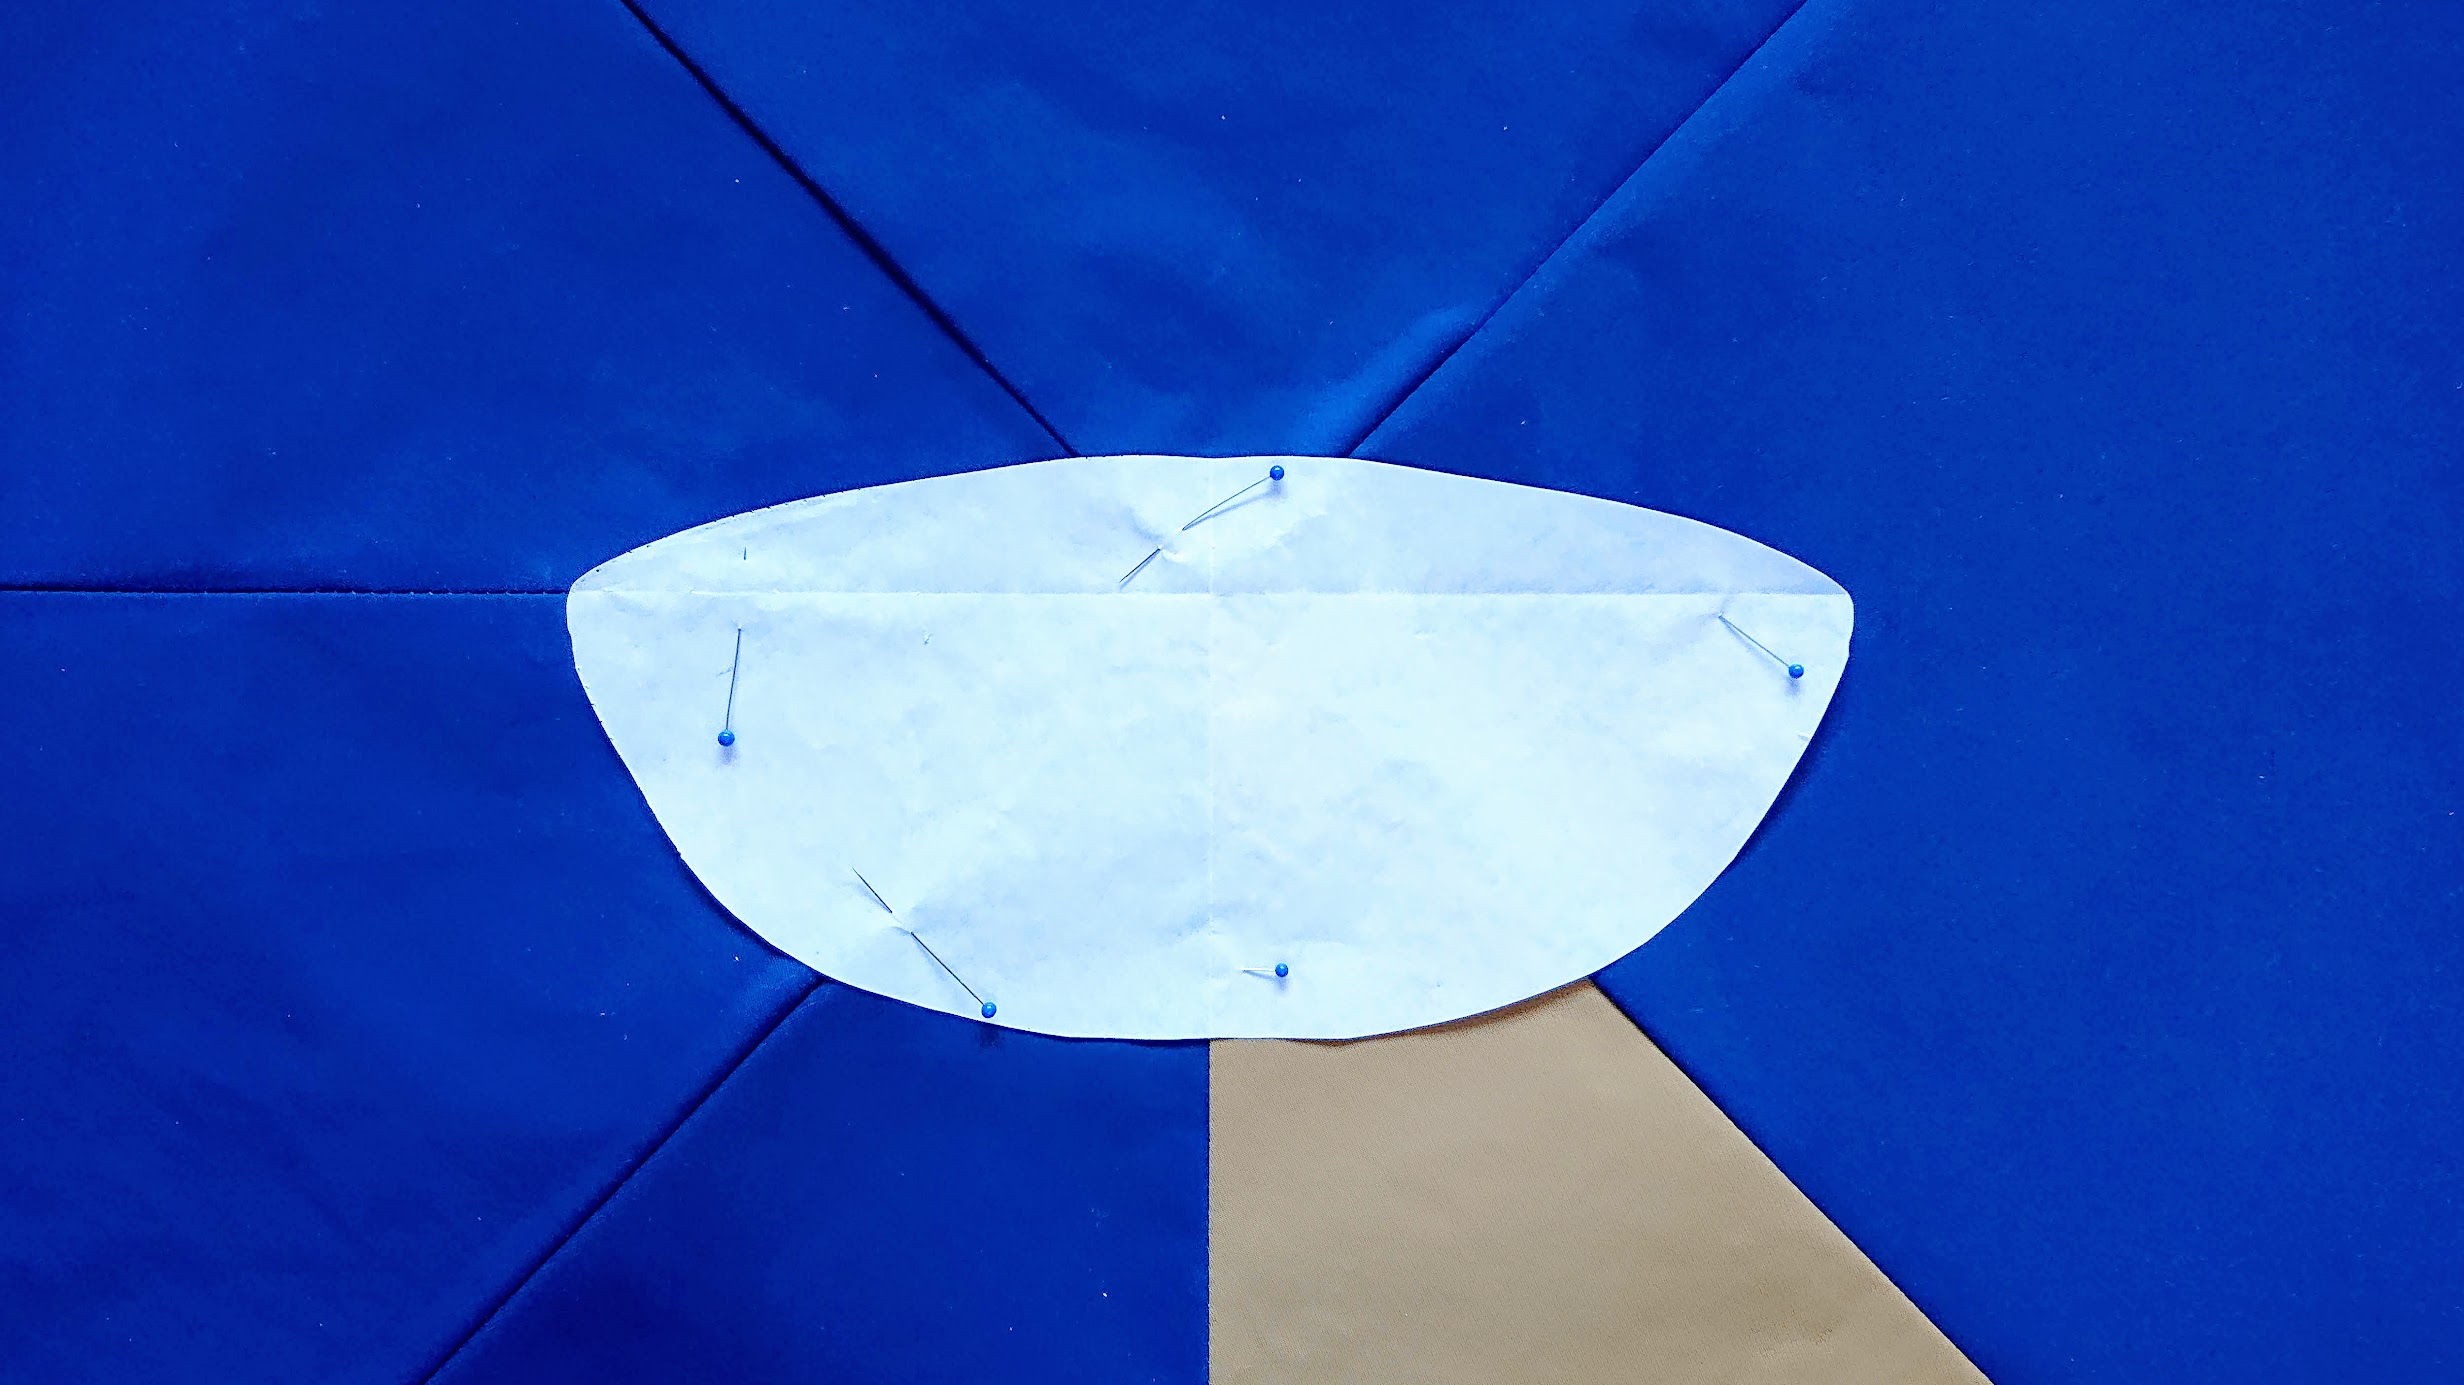
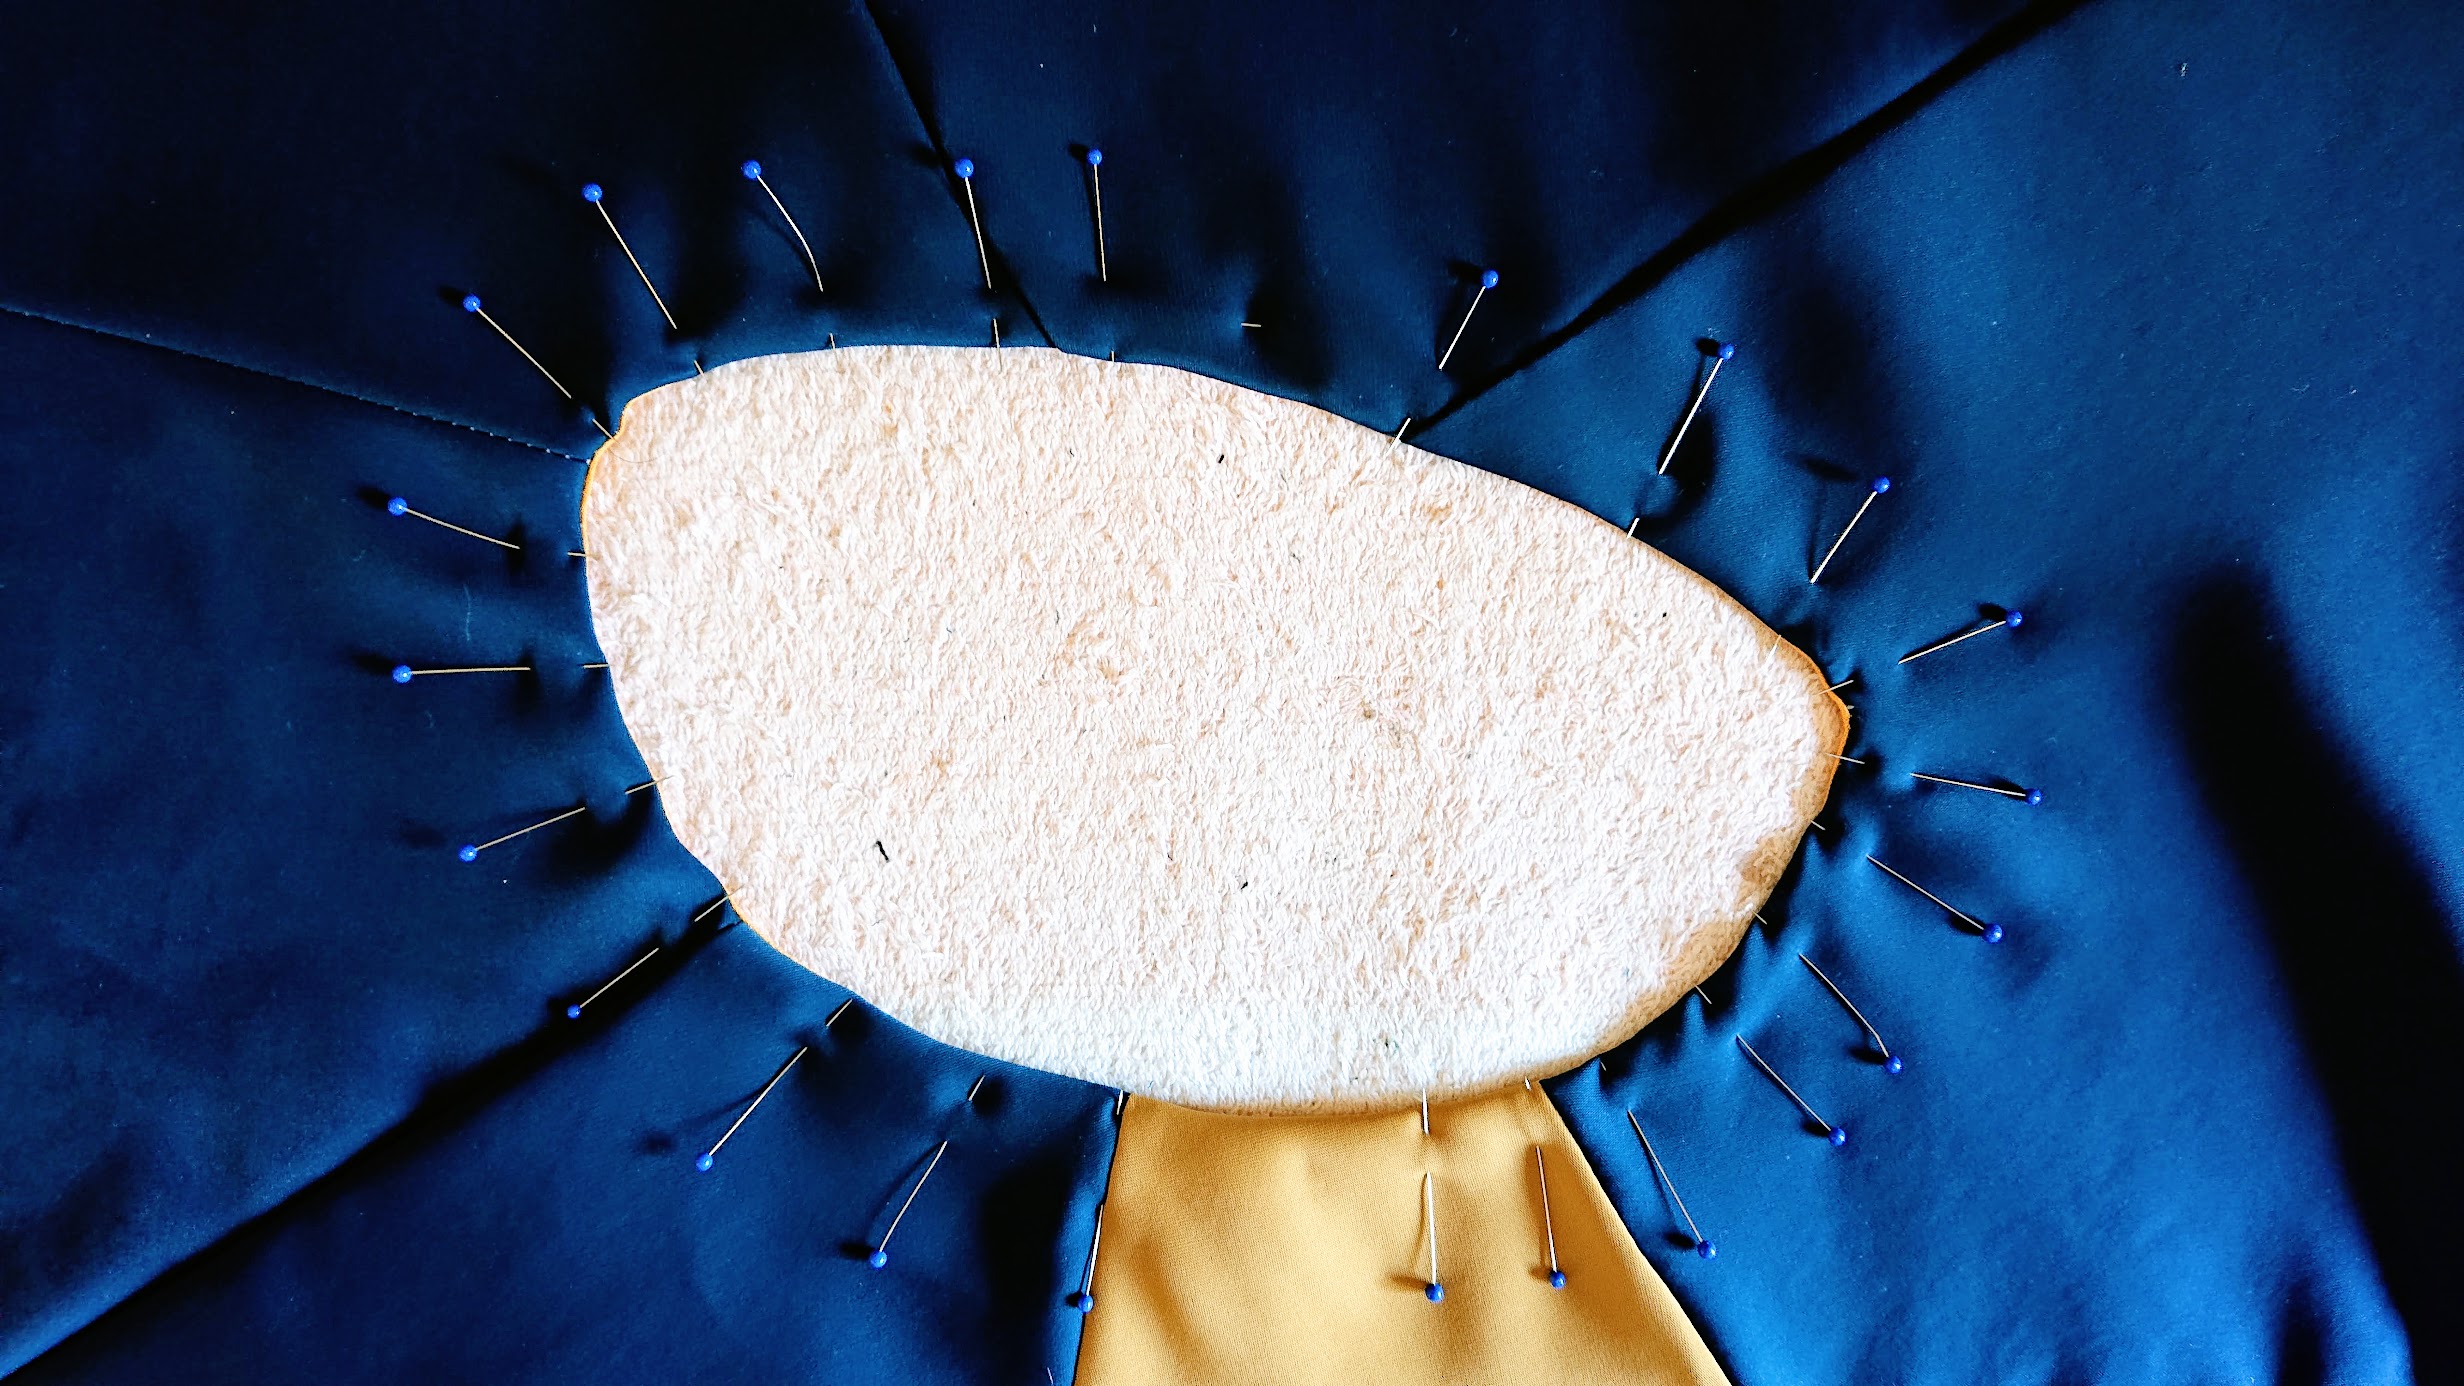
Making the neckline
After pressing the middle section as flat as possible, the neckline paper is then pinned onto the assembled triangles, carefully positioned. Only when I’m perfectly confident about its placement that I cut it out. It’s quite nerve wrecking for sure. All the hard work can be screwed due to a botched neckline.
Finishing the neckline is also quite challenging. Pressing open seam lines with masking tape is great, and the first part of sewing the bias tape goes on smoothly.
The next part, which involves snipping small sections of fabrics along the curve and fold the bias tape onto the wrong side and keeping it flat, requires me to wrestle with the iron and pressing ham. Long story short, they finally cooperate and the neckline is finished neatly after two tries.

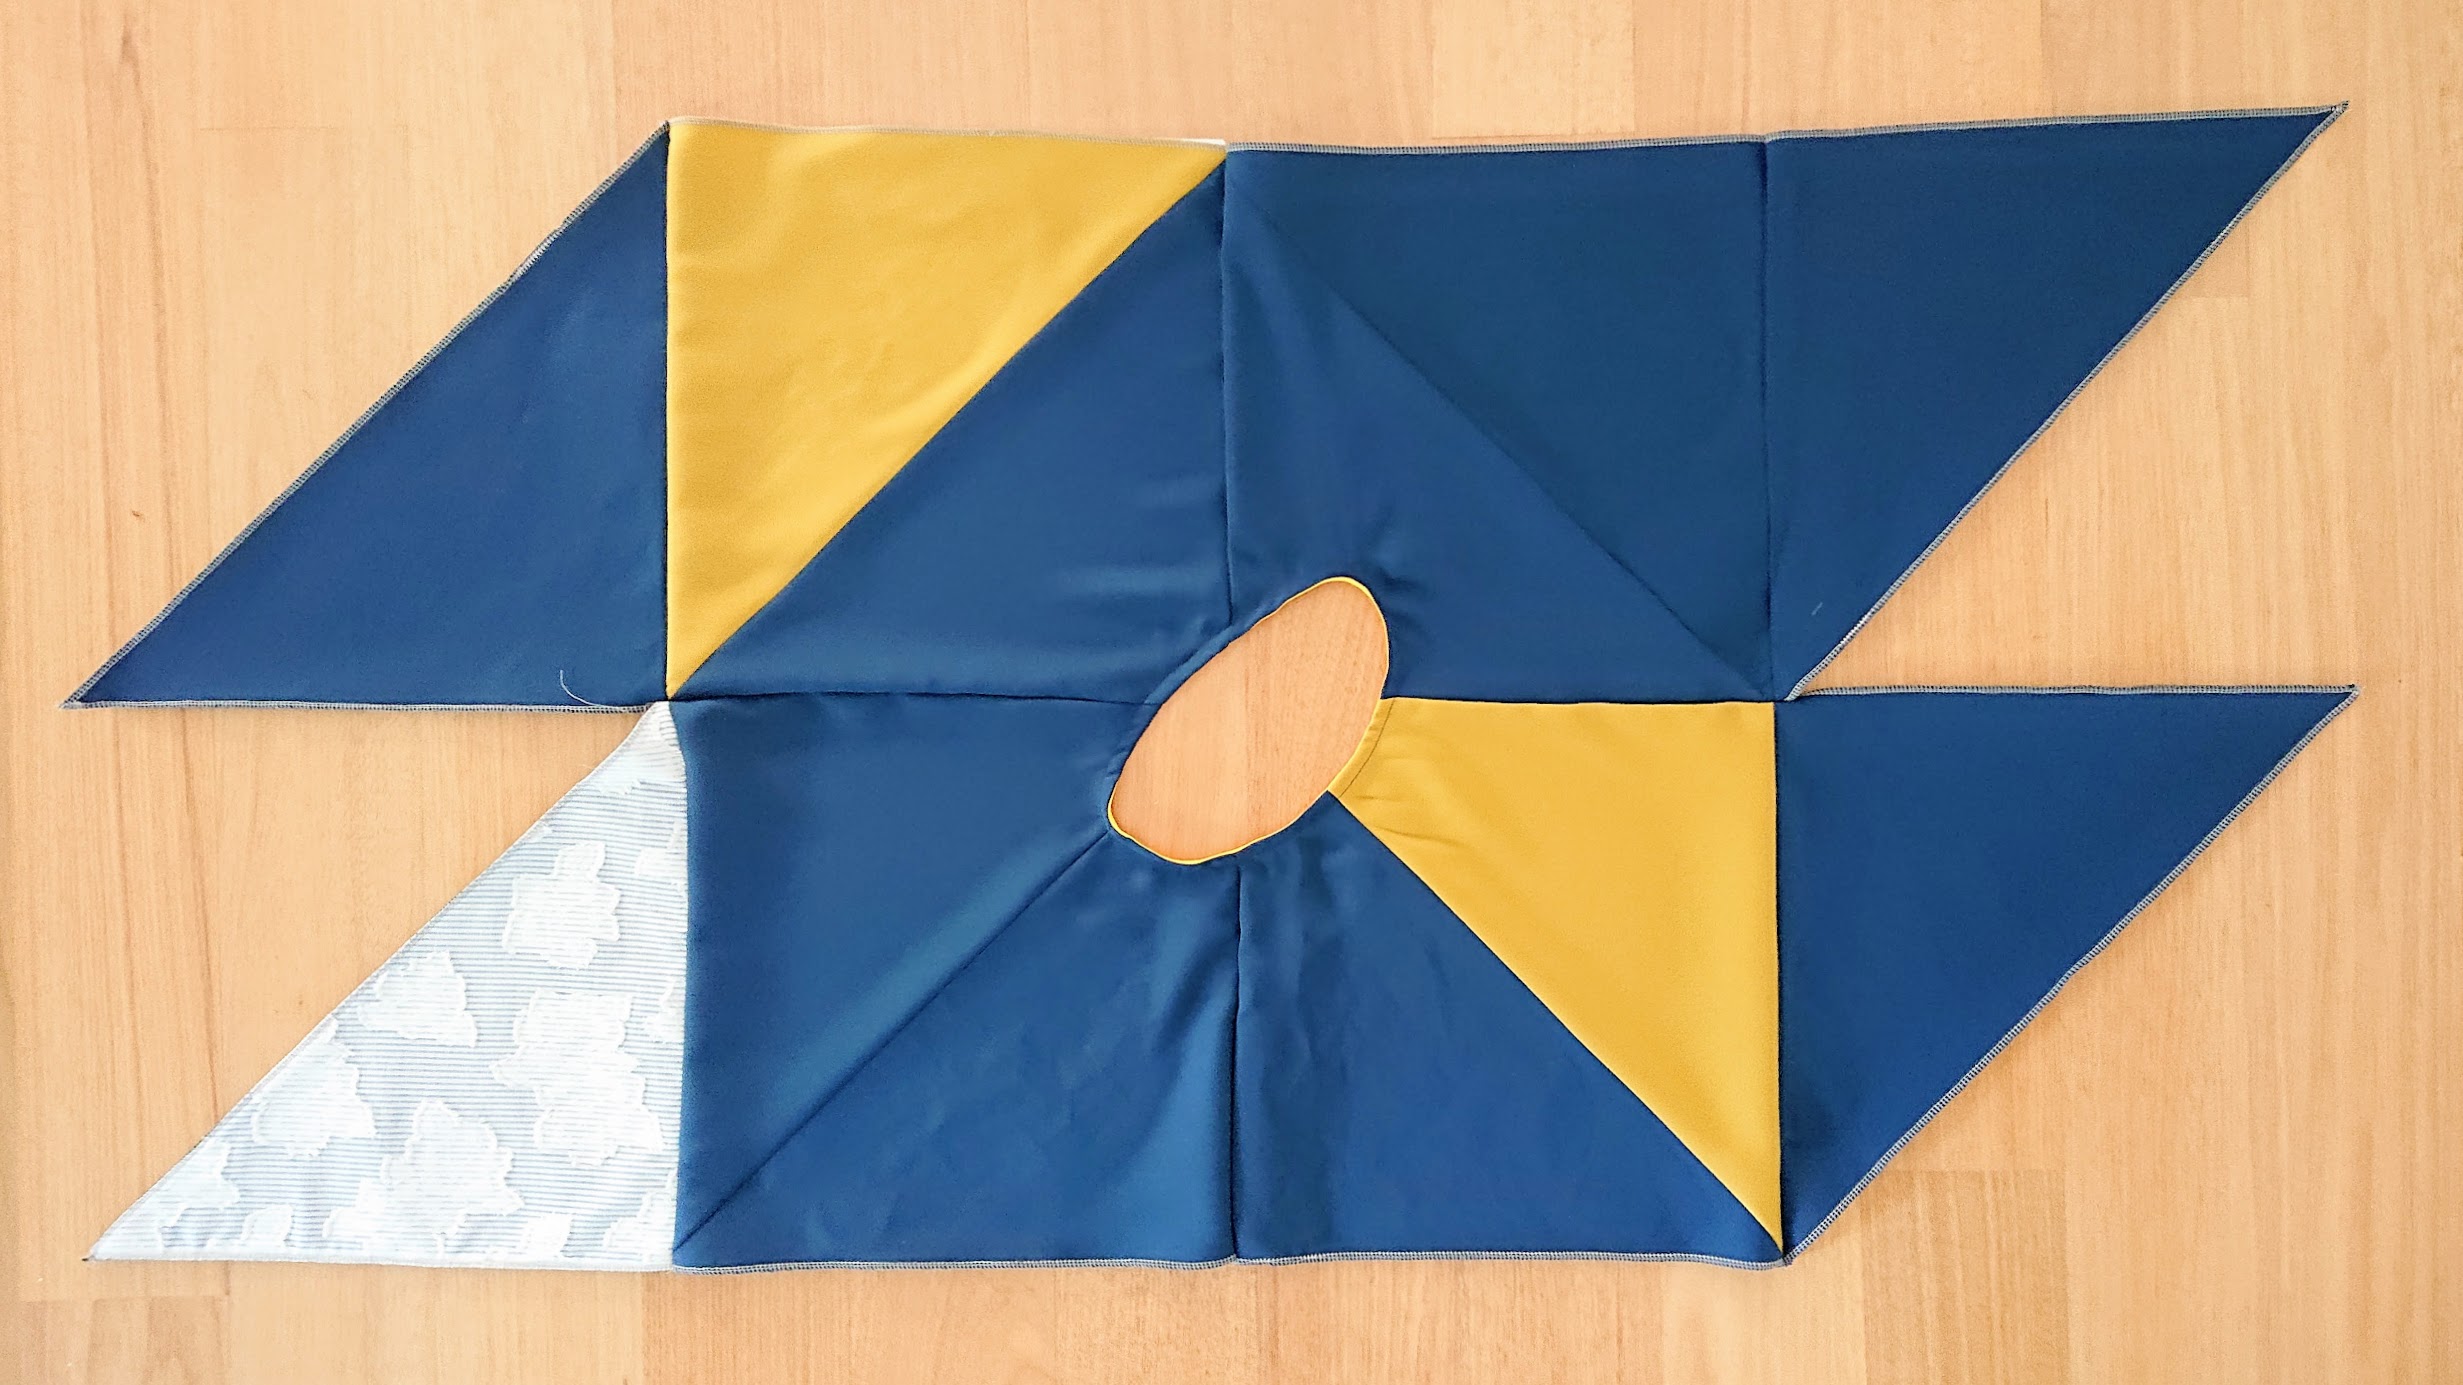
Can you see the top shape emerging? Can you see what I mean with all blue left arm now?
Finishing the sides and arms
Now that the neckline is in place, it’s time to finish the sides. Same method, I just have to make sure each triangle is sewed onto the right one. After the sides are done, this is what it looks like inside out.
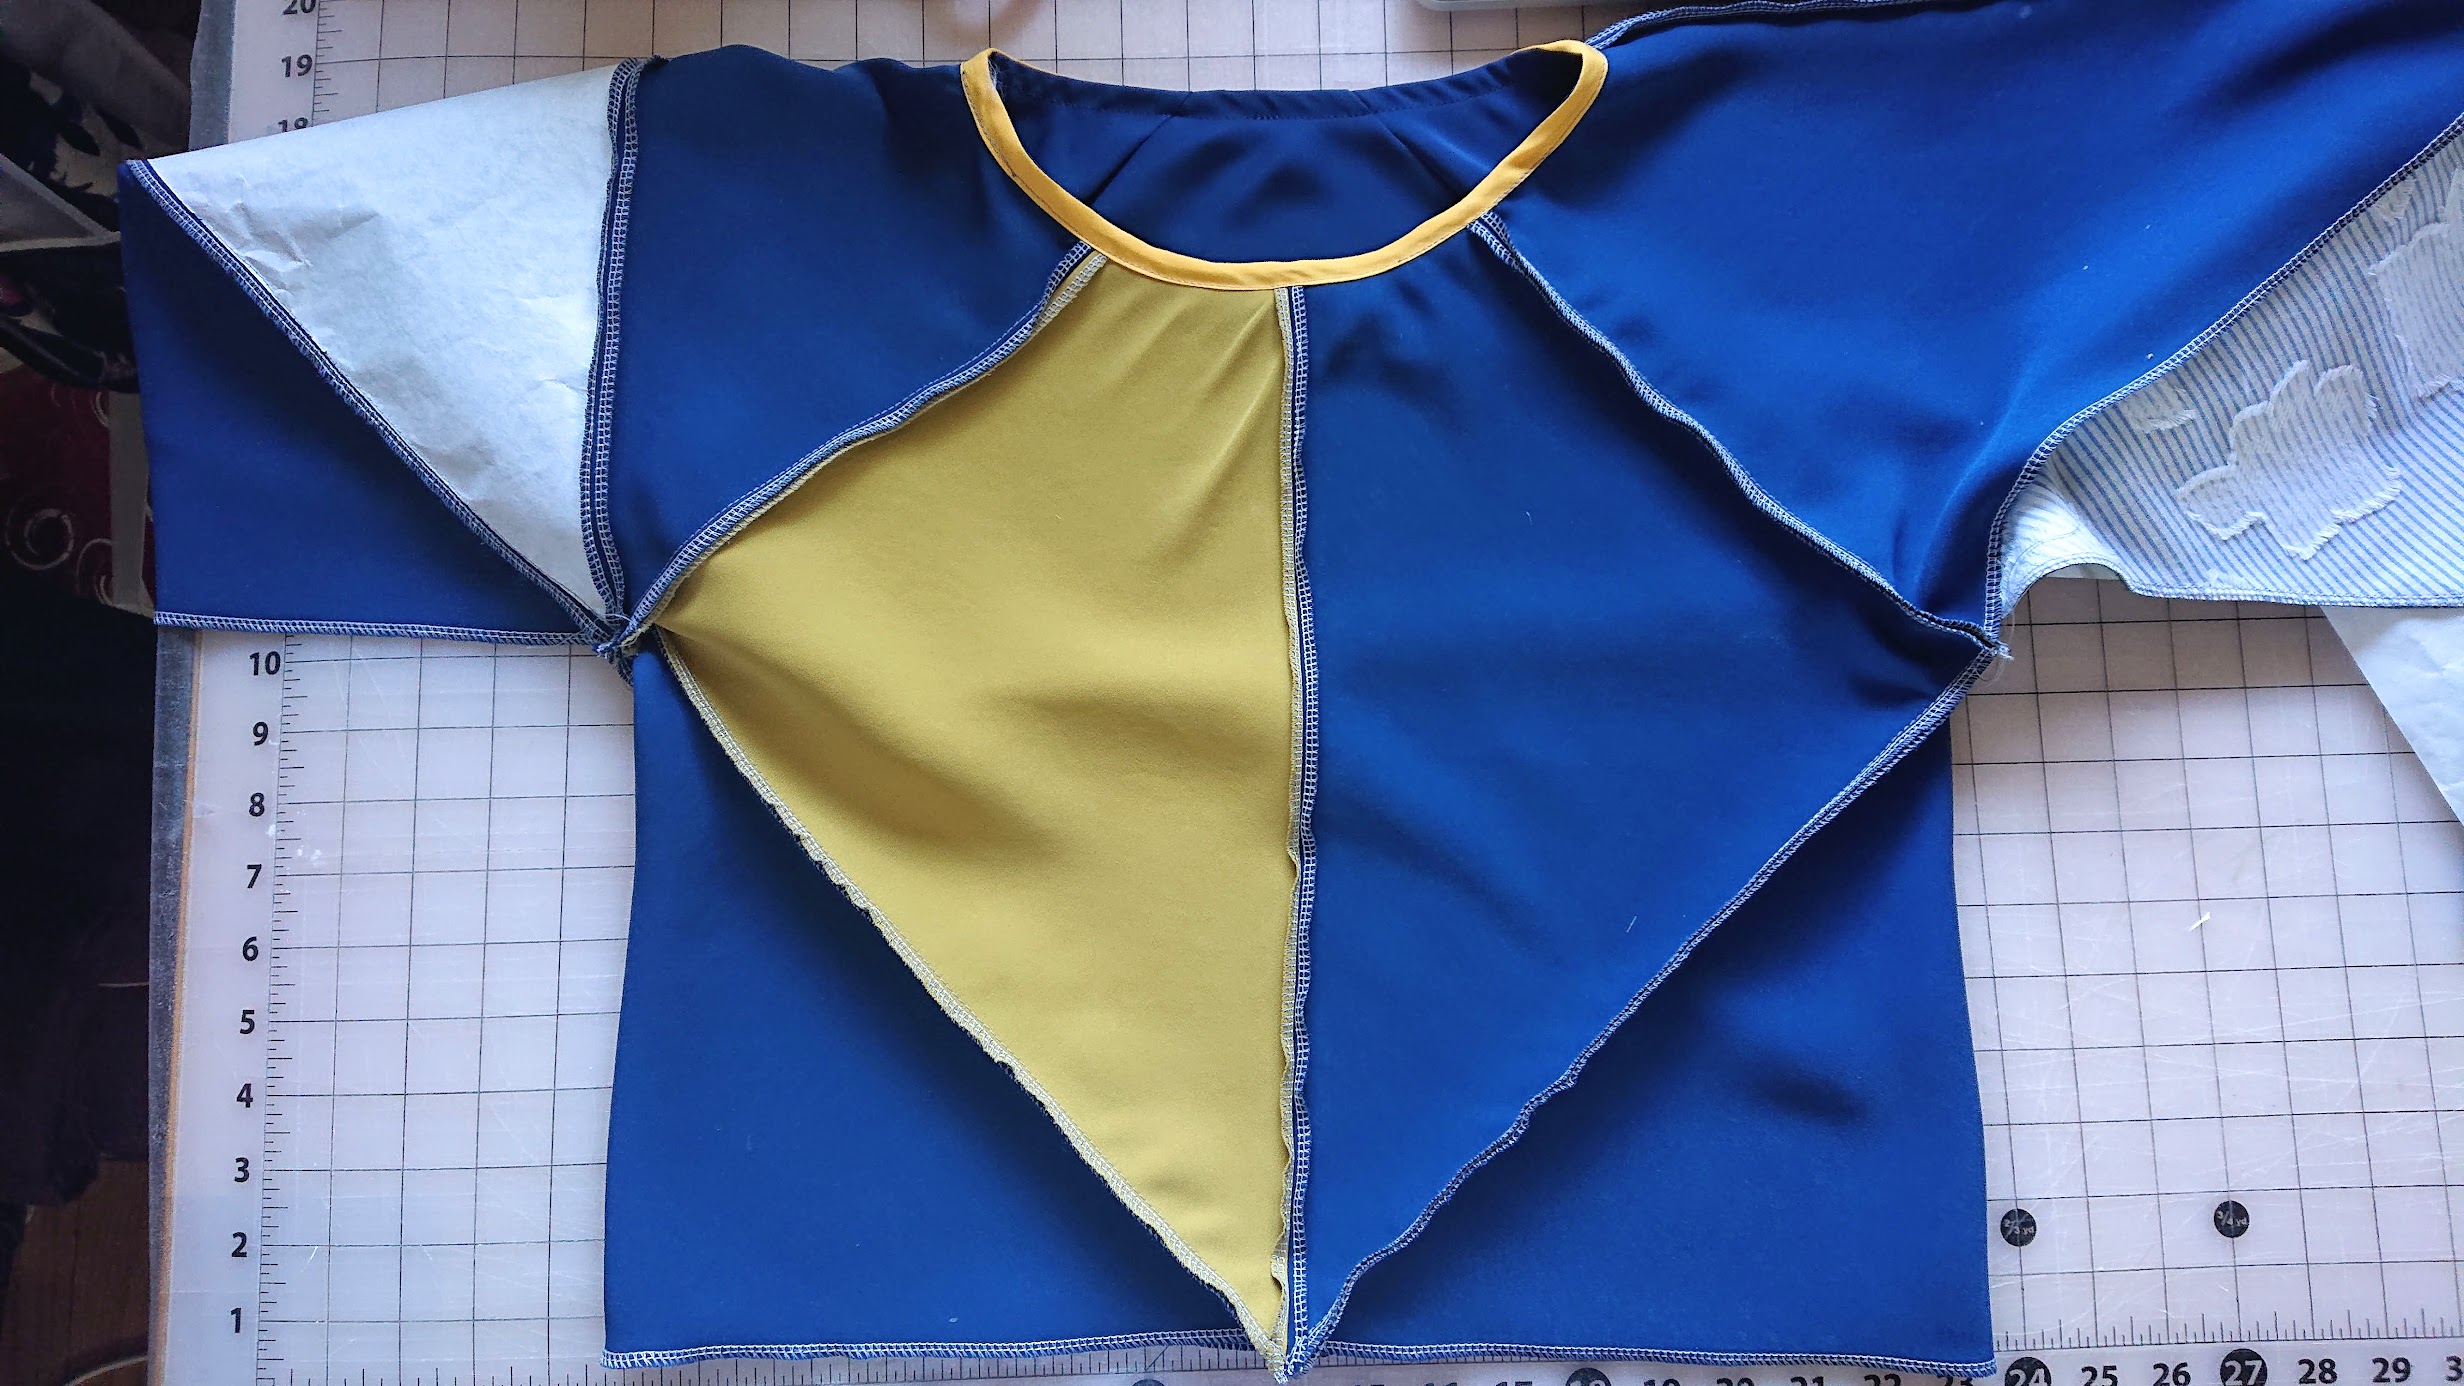
The arms are basically made from each triangle wrapping into itself. Maybe this visual will help. The first two pics are for the left arm, the latter two are for the right arm (which has woven facing and green knit lining).
At this point, I deal with quite a few merged seam line points, so there is a little bit of hand stitching required to close the ends neatly. That said, sewing the left arm goes on smoothly. The right arm, however, has a different story.
This top’s sleeves are meant to finish a few inches past the elbows, wrapping my forearm in a close fit. The left arm fits just fine. But the right arm doesn’t fit after I sew it shut the first time. Two reasons:
- my right forearm’s circumference is one inch bigger than my left.
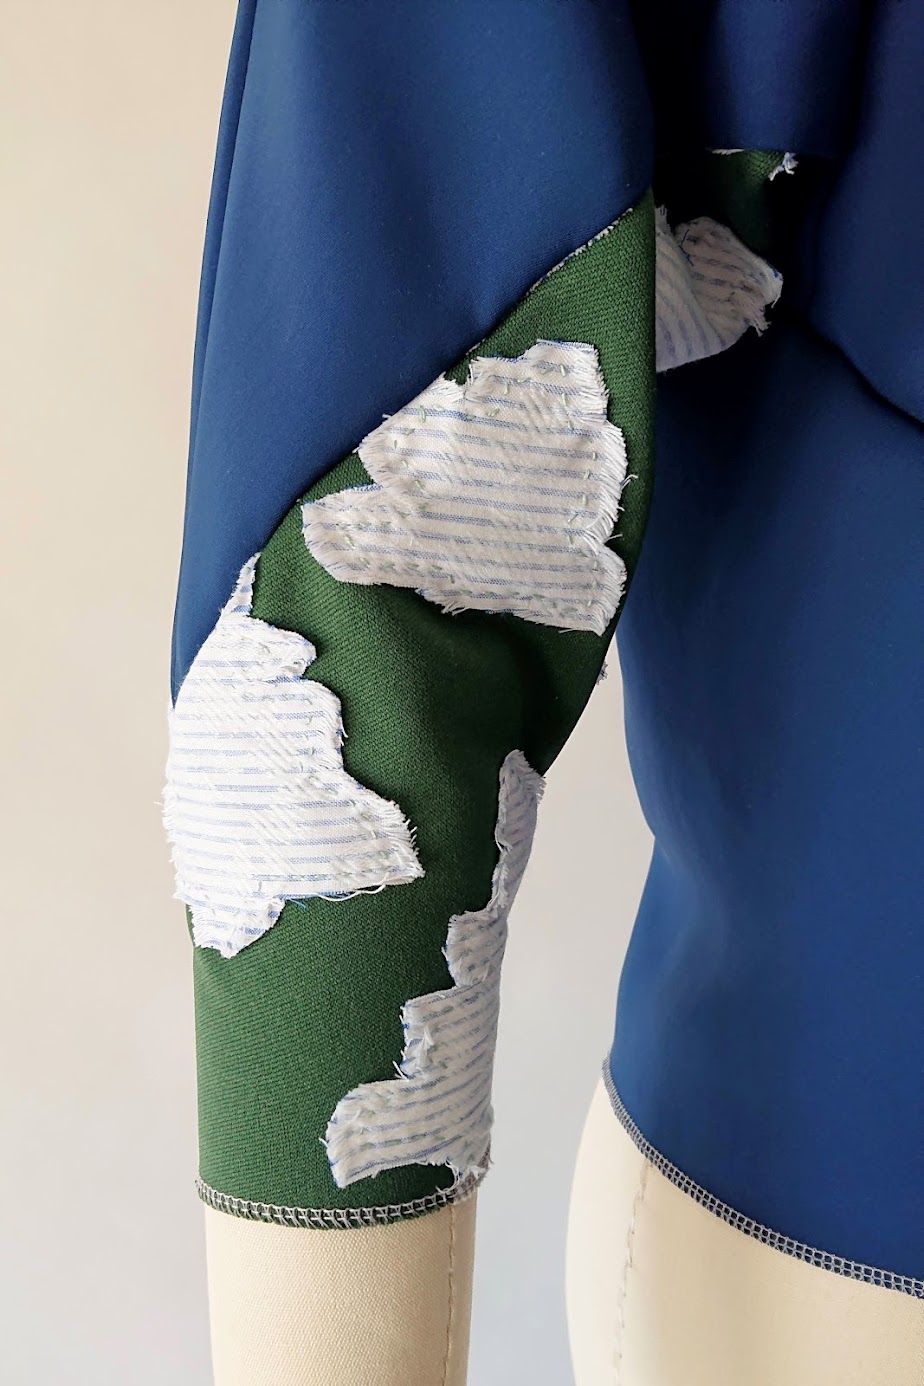
- the right sleeve’s facing is a woven fabric, which doesn’t have any give / stretch.
No problem, let’s fix that! I decide to keep the cloud shaped motifs by doing backstitched hand embroidery around them. After that, I cut out the rest of the woven fabrics, including the overlocked edges to “unlock” the forest green knit’s stretch.
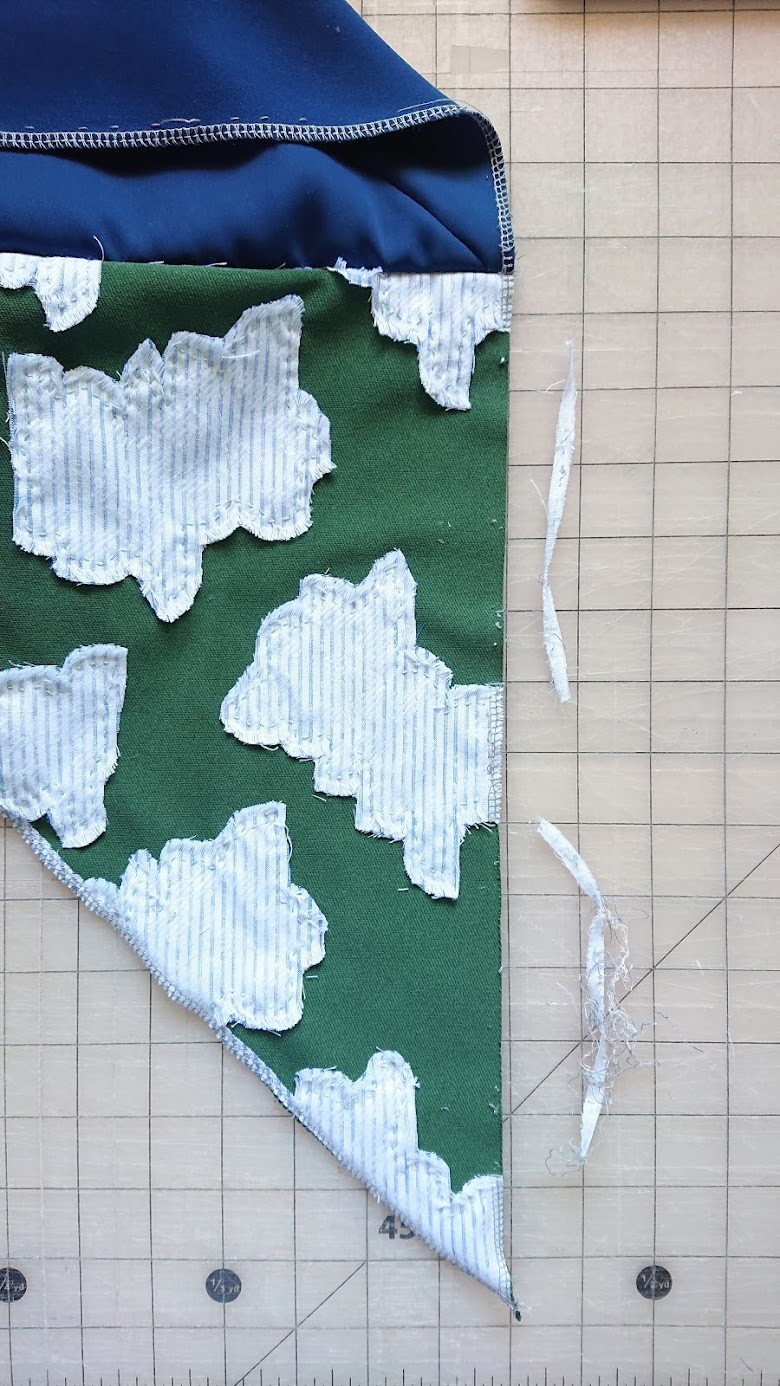
Now I can finish the right arm! Here’s what it looks laying flat after it’s all done.
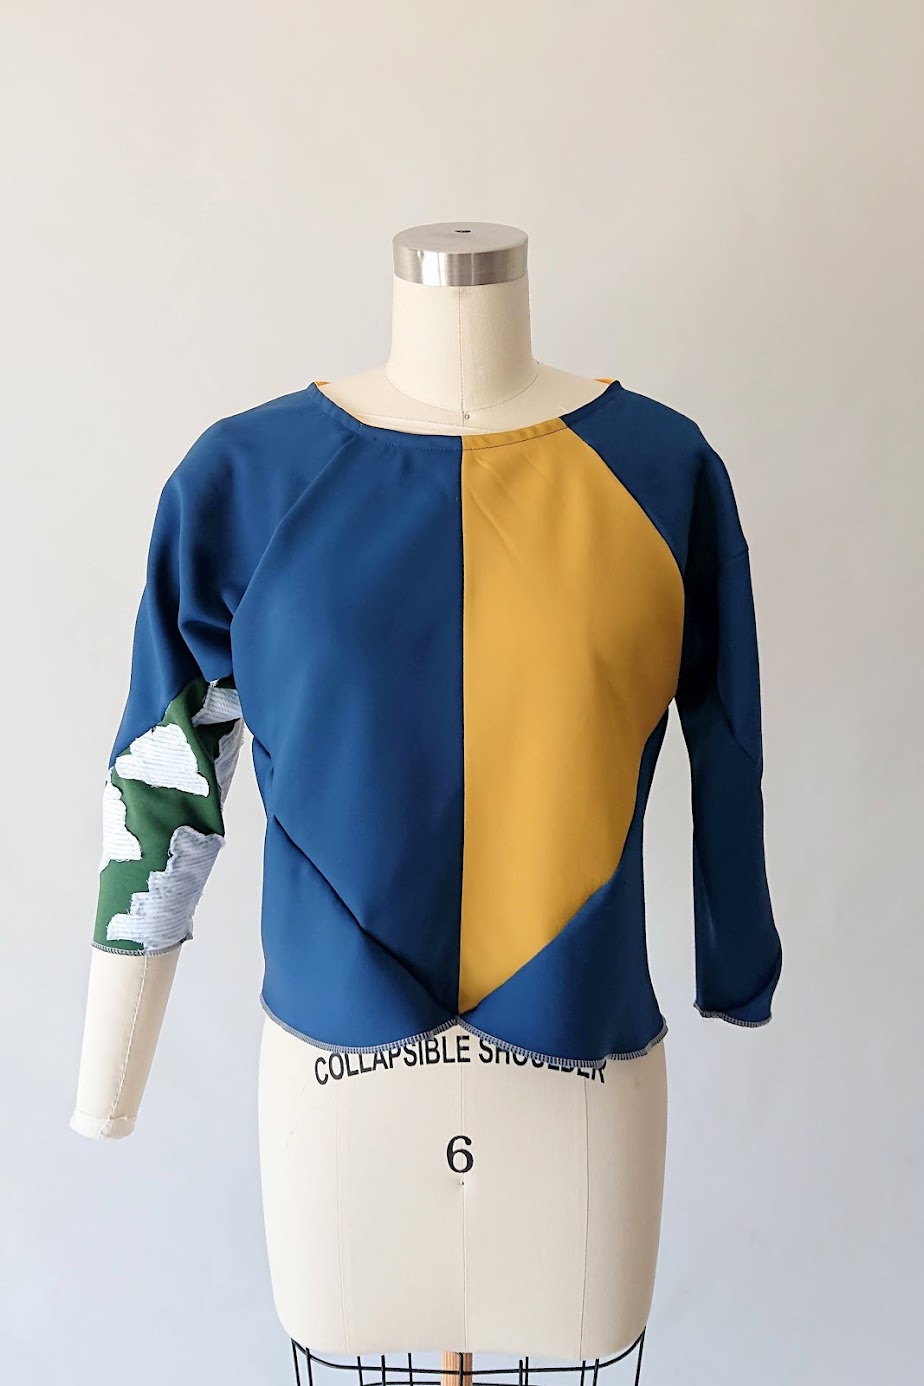
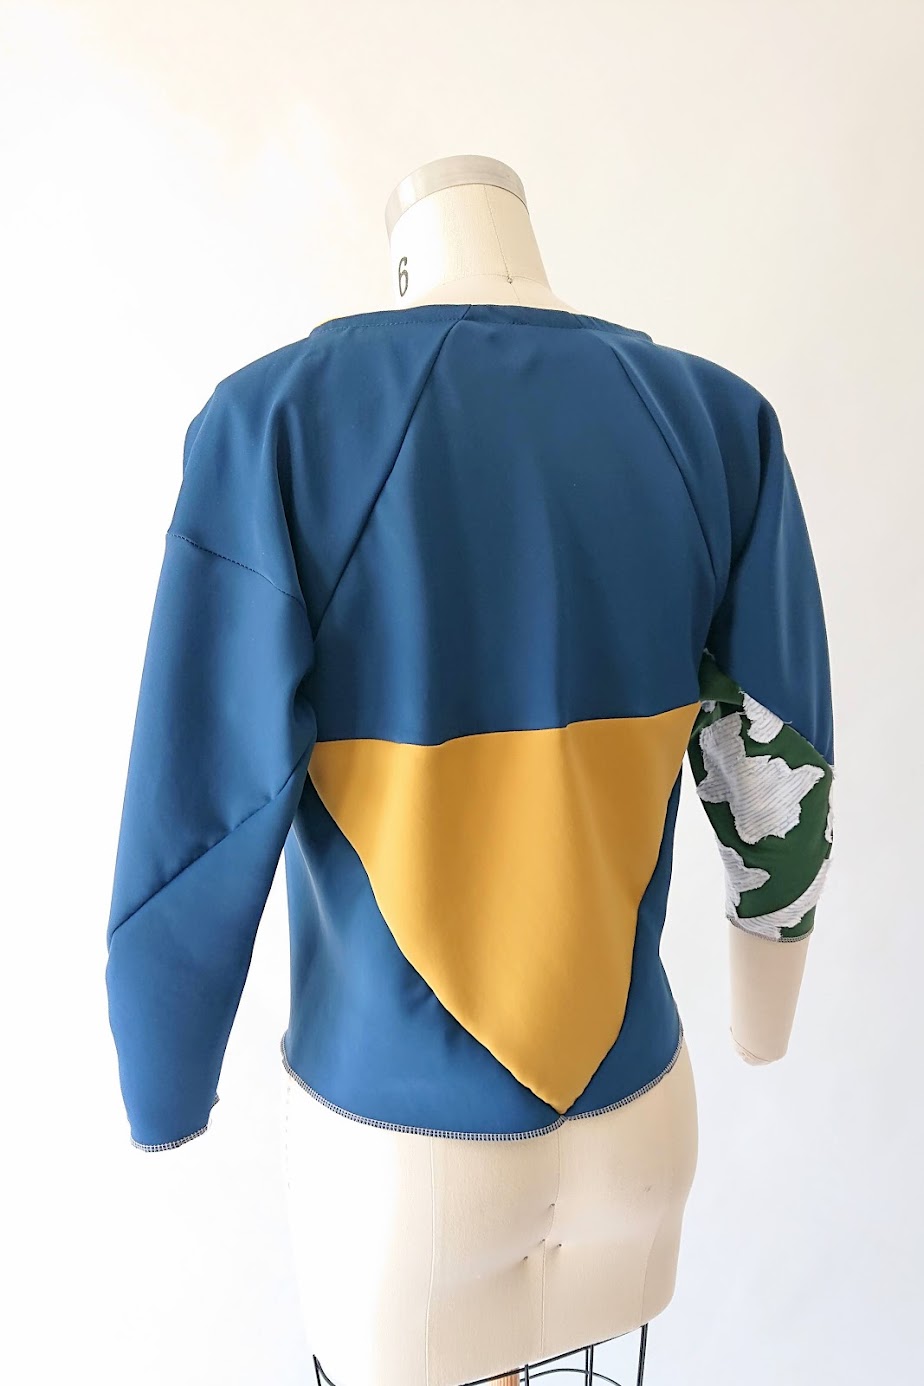
Result: 6-Square Origami Top
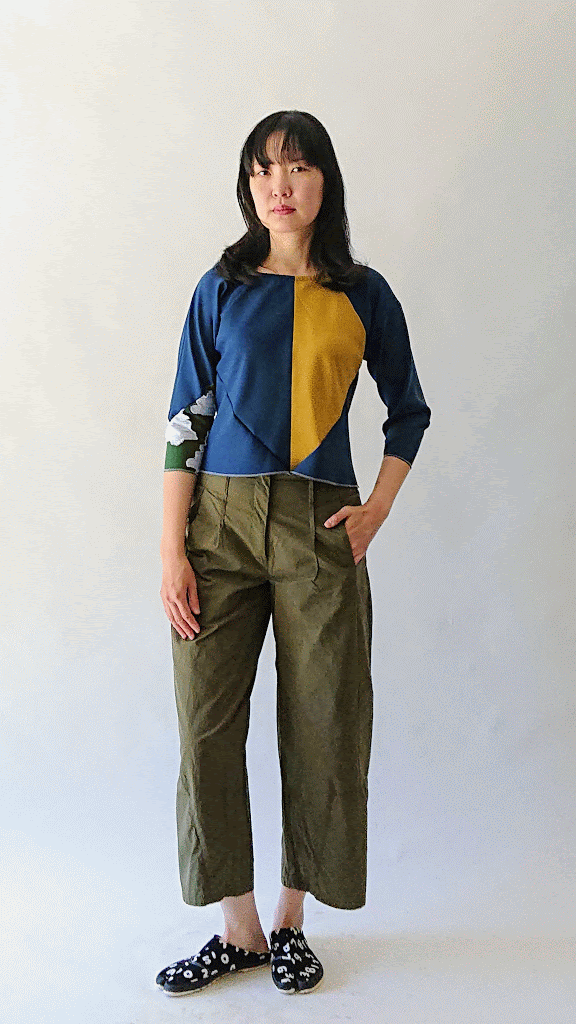
Putting the finished top on the dress form allows me to zoom into the details; seam lines merging, contrasting blue and yellows, extra seam line on the left sleeve, right arm’s appliqué finishes. I’m really happy, the top looks great and cleanly done!

And since this 6-square origami top is made with purplemaroon remnants, it’s only fitting that I wear it with my favorite purplemaroon pants. The shoes are from Sou Sou.
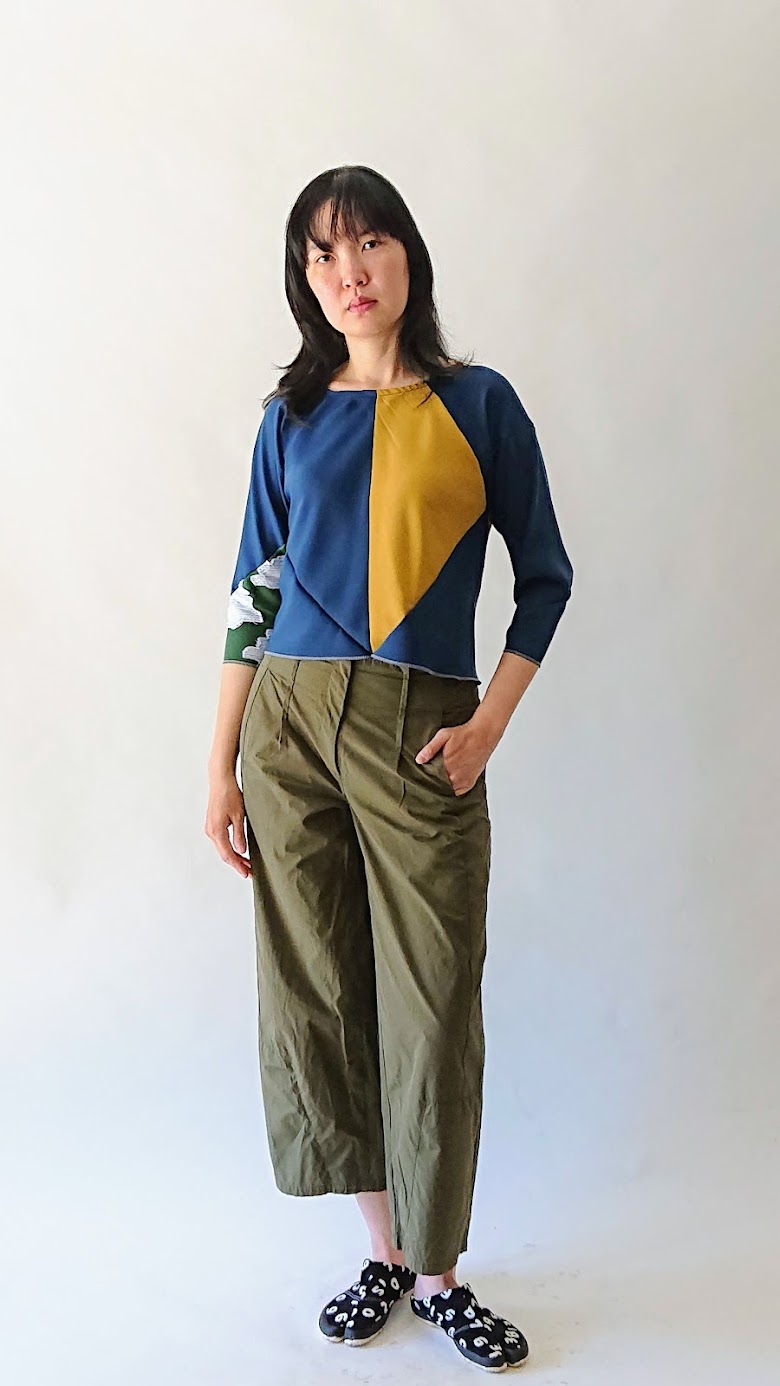
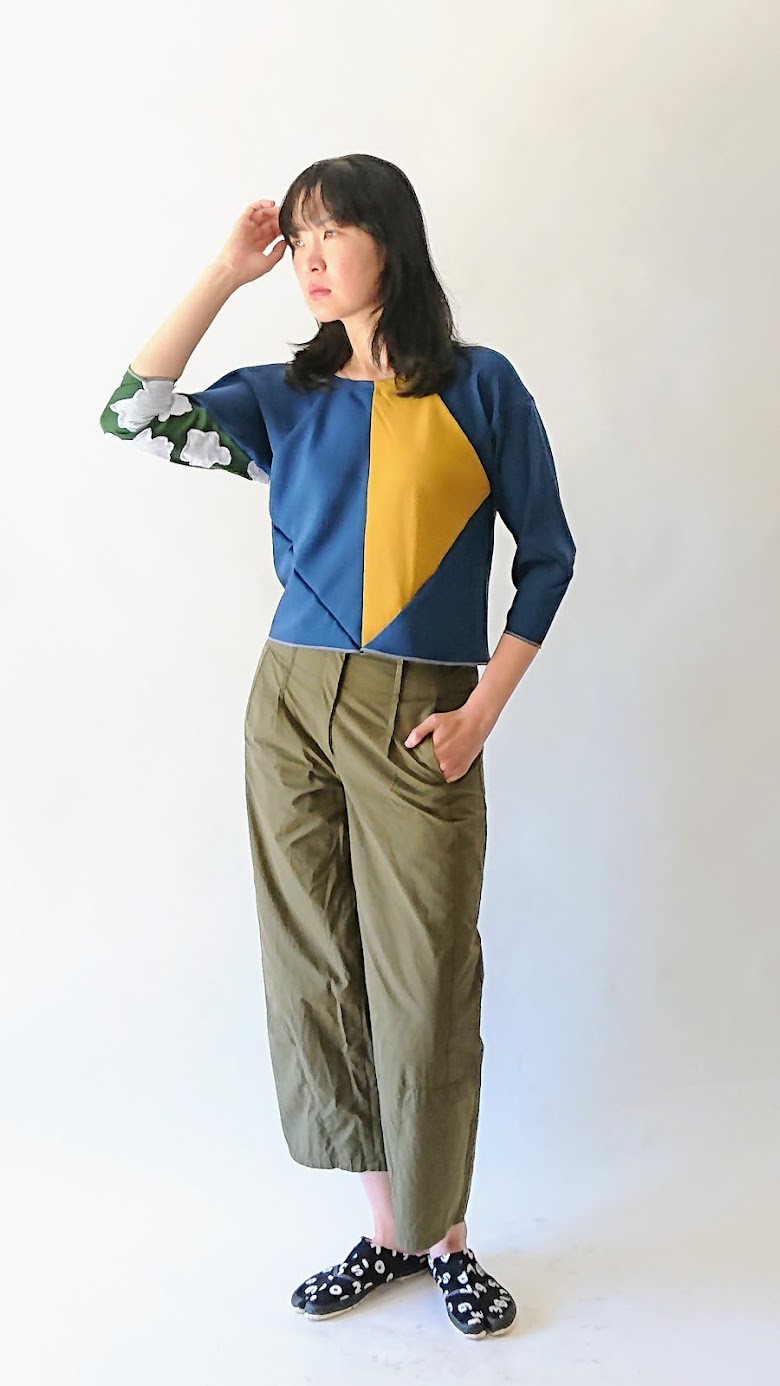
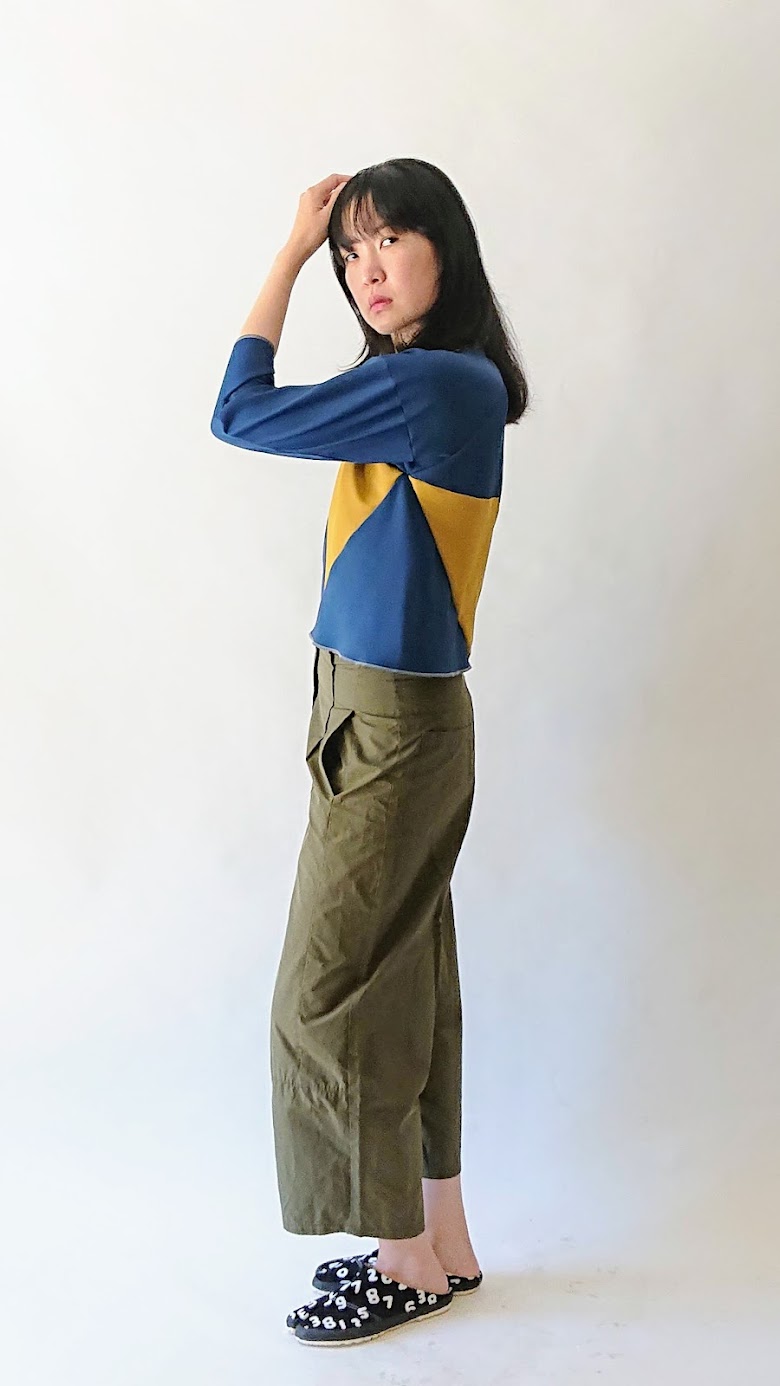
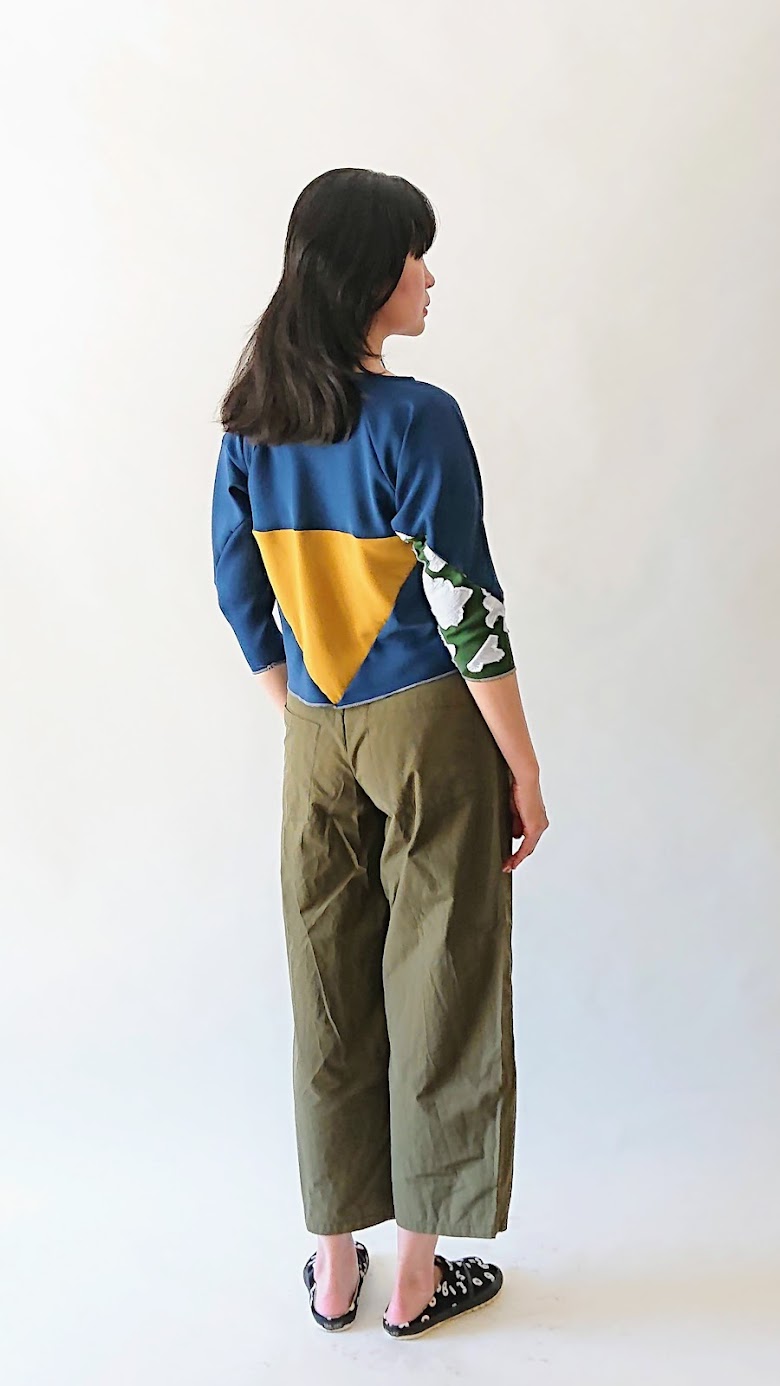
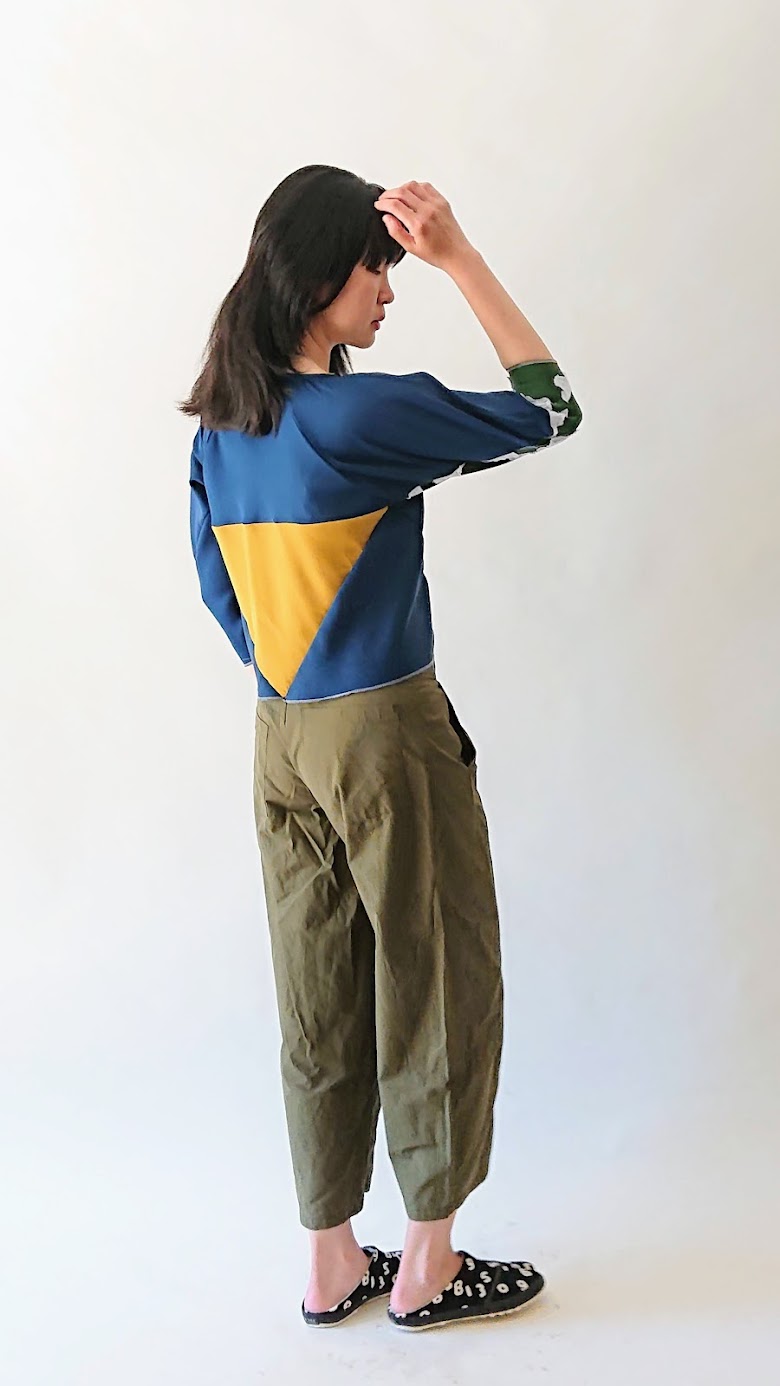
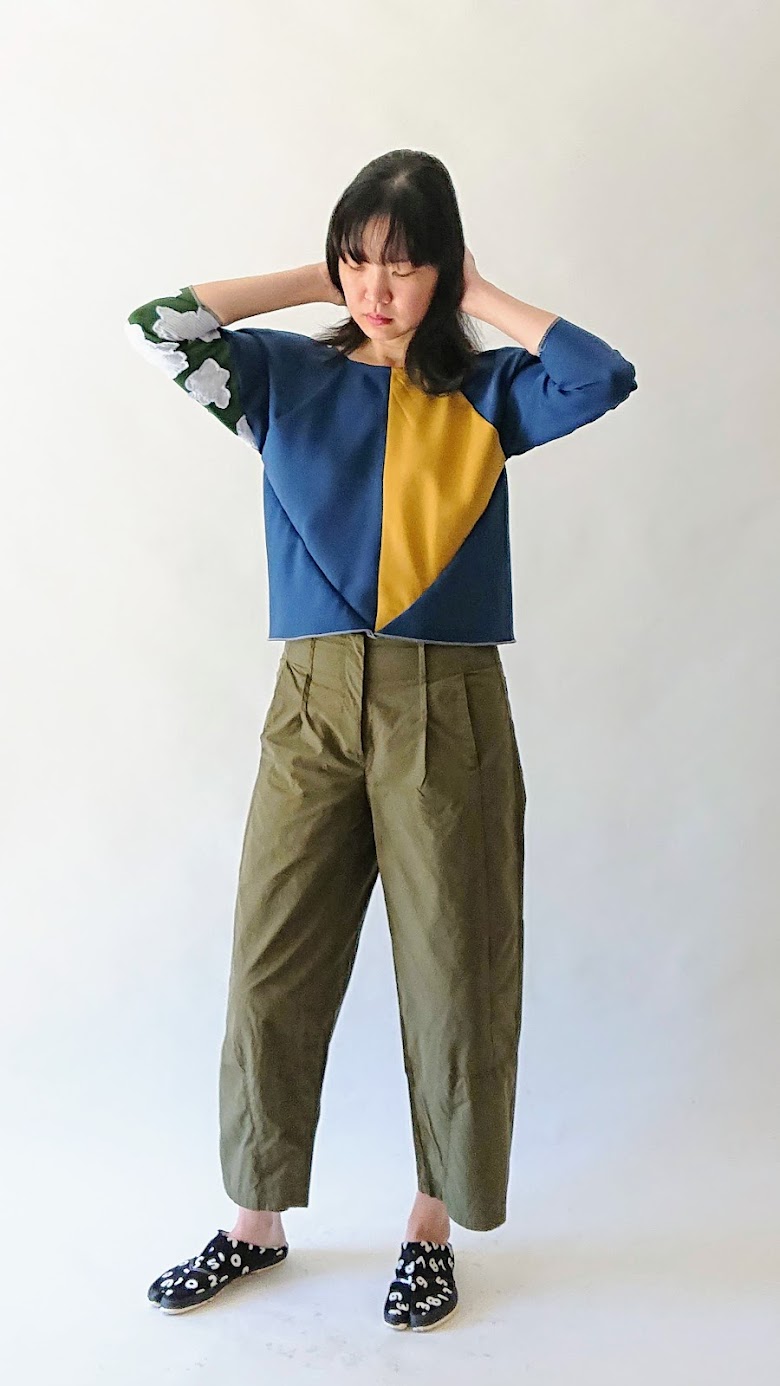
And there you go! The sporty version of the 2nd 6-square origami top, which has a completely different vibe than the casual 1st top. This top is very versatile and you can creatively express whatever you want.
If the squares are your canvas and building blocks, what are you going to paint on them? Let me know (tag me on Instagram, Facebook, or Twitter) when you make one, I’d love to see your point of view.
Thanks for reading; until next time,
Musank
Disclaimer: I may earn a small commission for my endorsement, recommendation, testimonial, and/or link to any products or services from this website. Thank you for your support!
Never Miss a Post
Enter your email below to receive the latest Fafafoom Studio post in your inbox.
Browse more posts
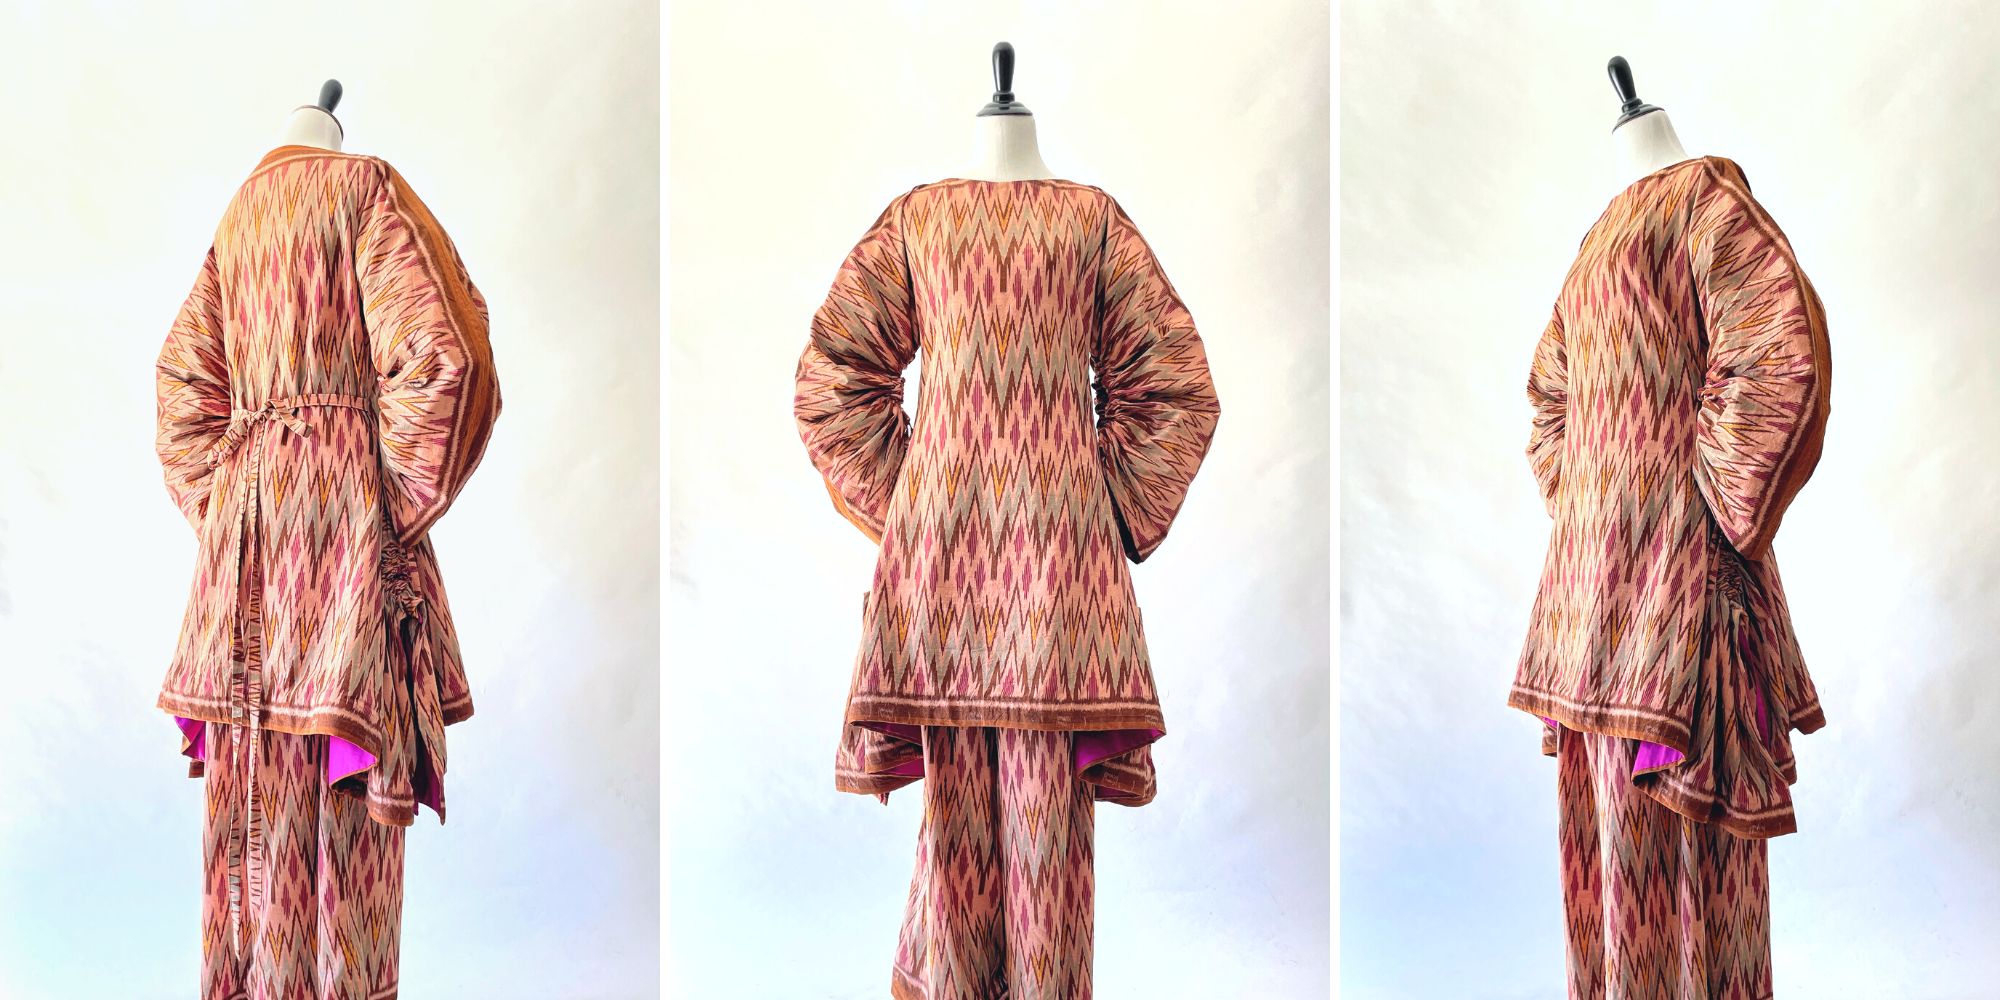
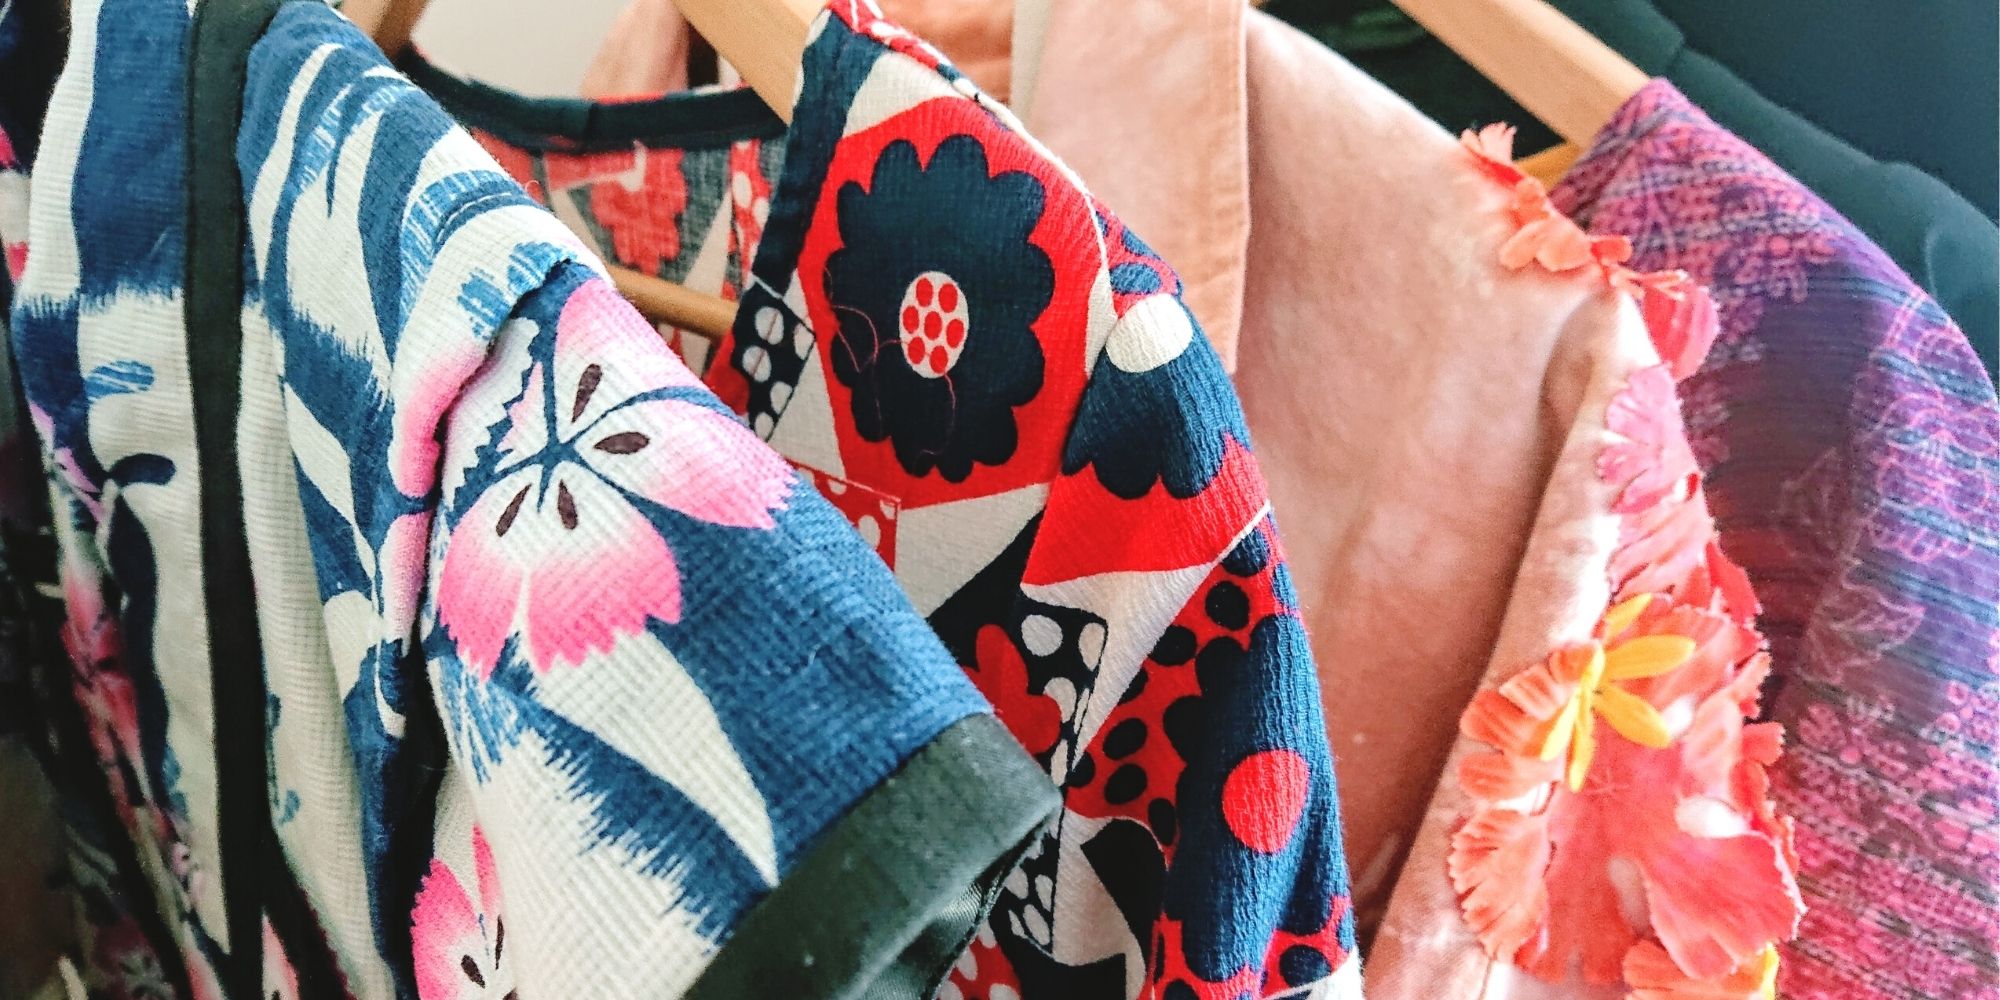
Interpreting Kebaya, Making a Modern Ethnic Ensemble
Modern Ethnic outfit is my interpretation of kebaya dressing. They are made using vintage ikat textile and inspired by several free minimal-waste patterns. Only on fafafoom.com.
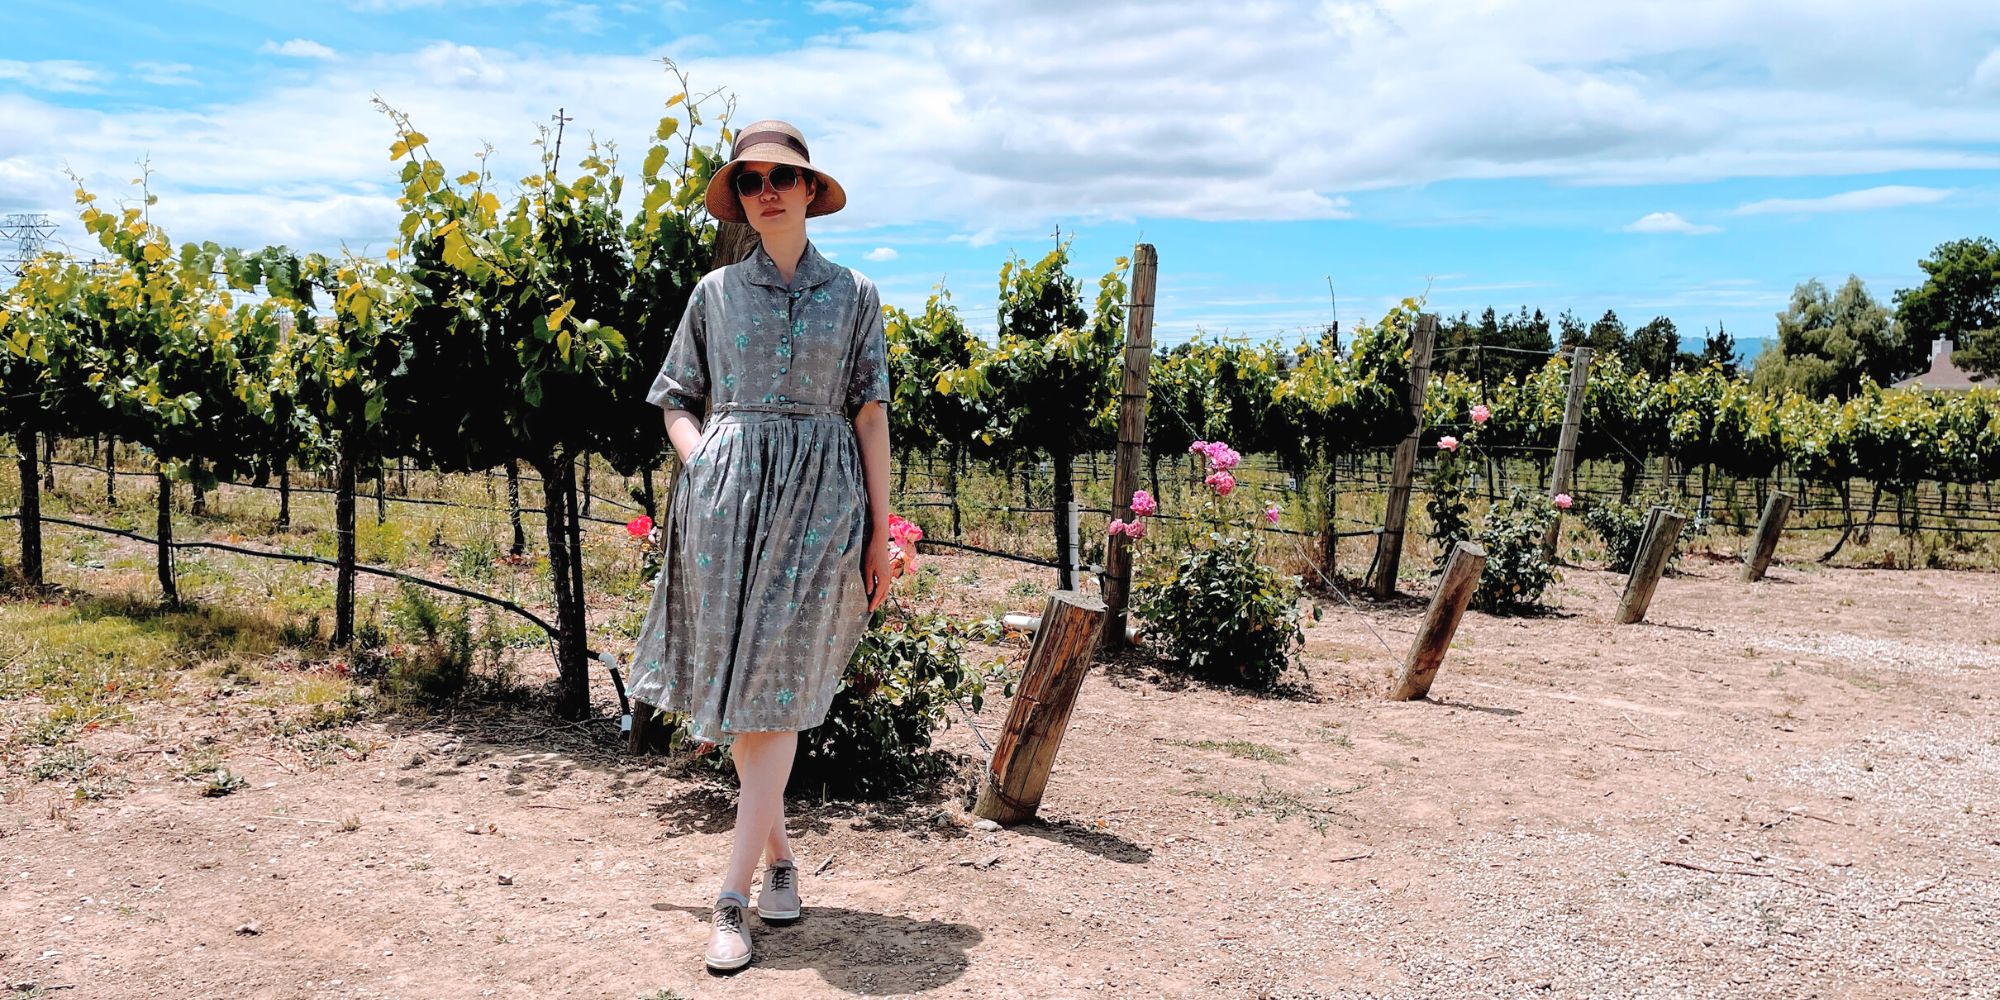
Restoring a 1950s Atomic Age Dress
Restoring and repairing a beautiful 1950s Dress for my summer 2022 wardrobe. Smart alterations include lining and inseam pockets. Only on fafafoom.com.
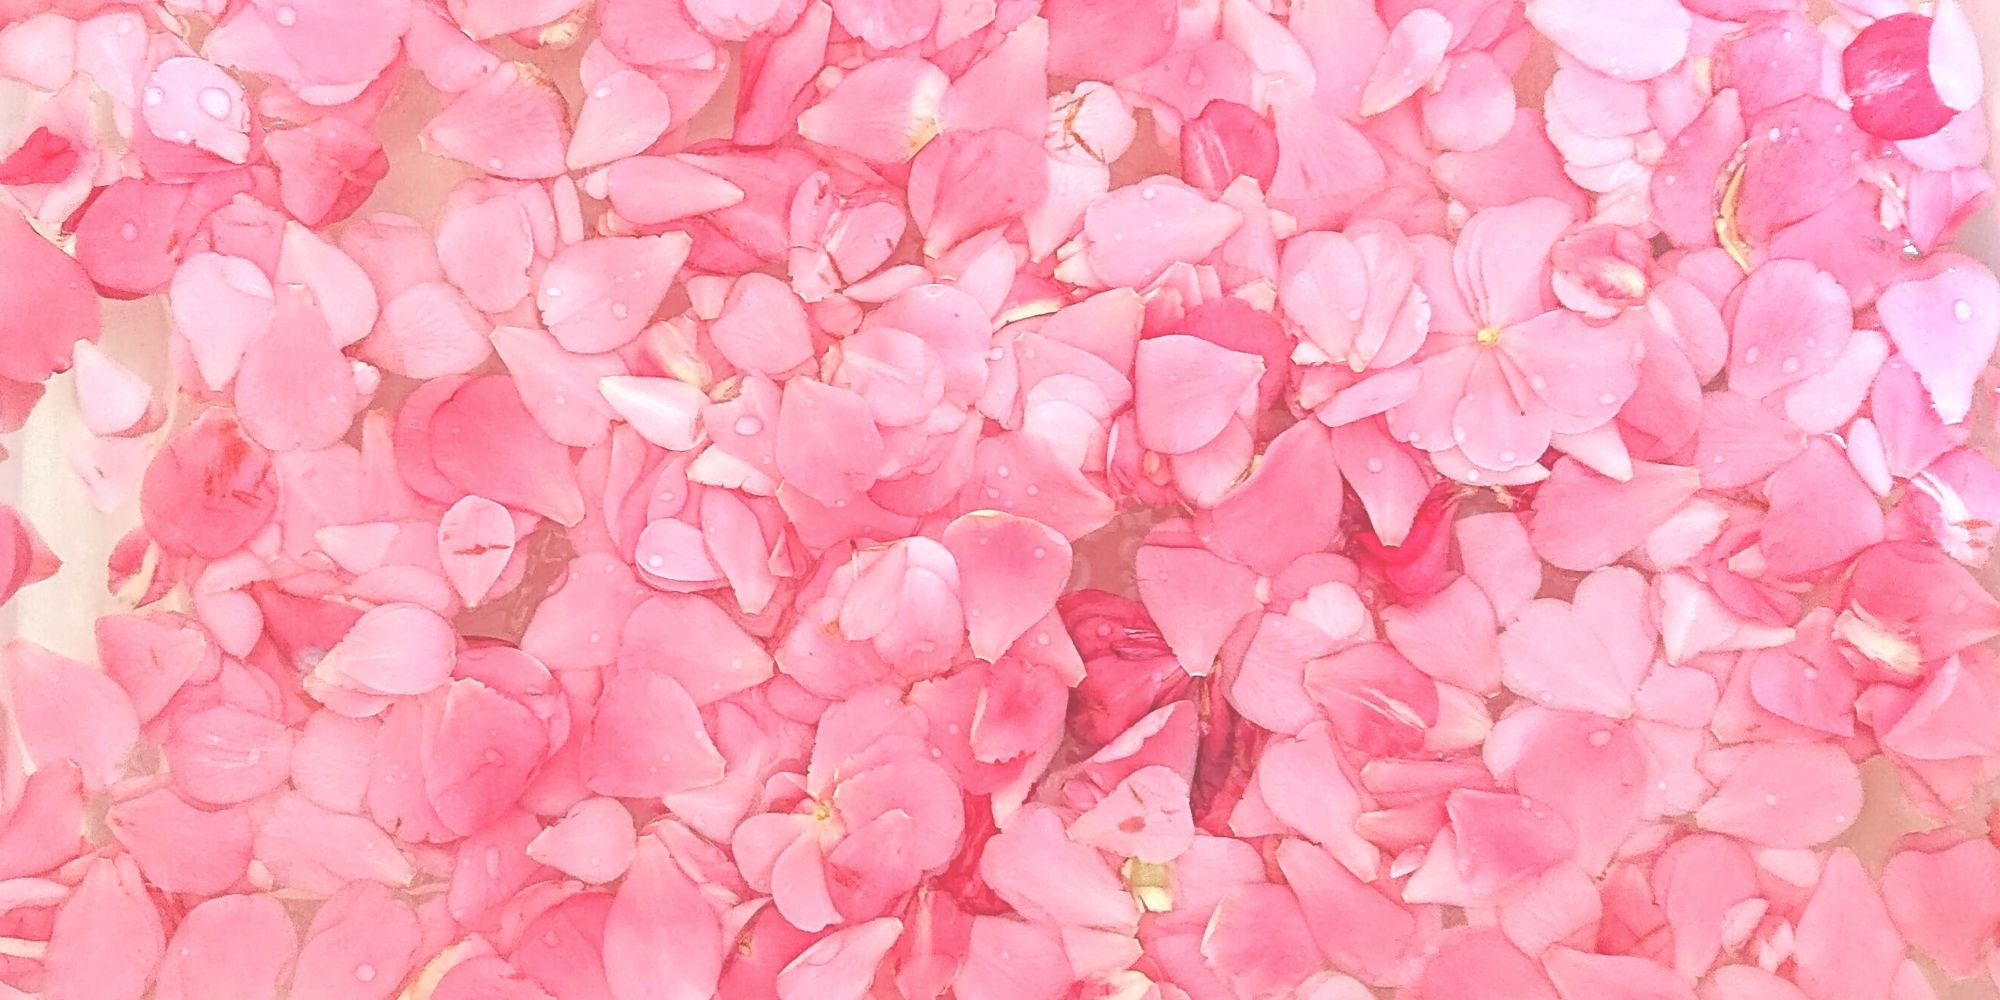
Pink Delight! Natural Dyeing with Camellia Flowers
My next experiment is dyeing with camellia flowers. Amongst all natural dyeing projects I have done so far, this is my favorite. Check out the pink delights! From fafafoom.com.
5 Slow Fashion Tips for a More Sustainable Wardrobe
Five slow fashion tips to help you transform your sustainable wardrobe for a cleaner, greener future. A guest feature from Reese Jones for Fafafoom.com.
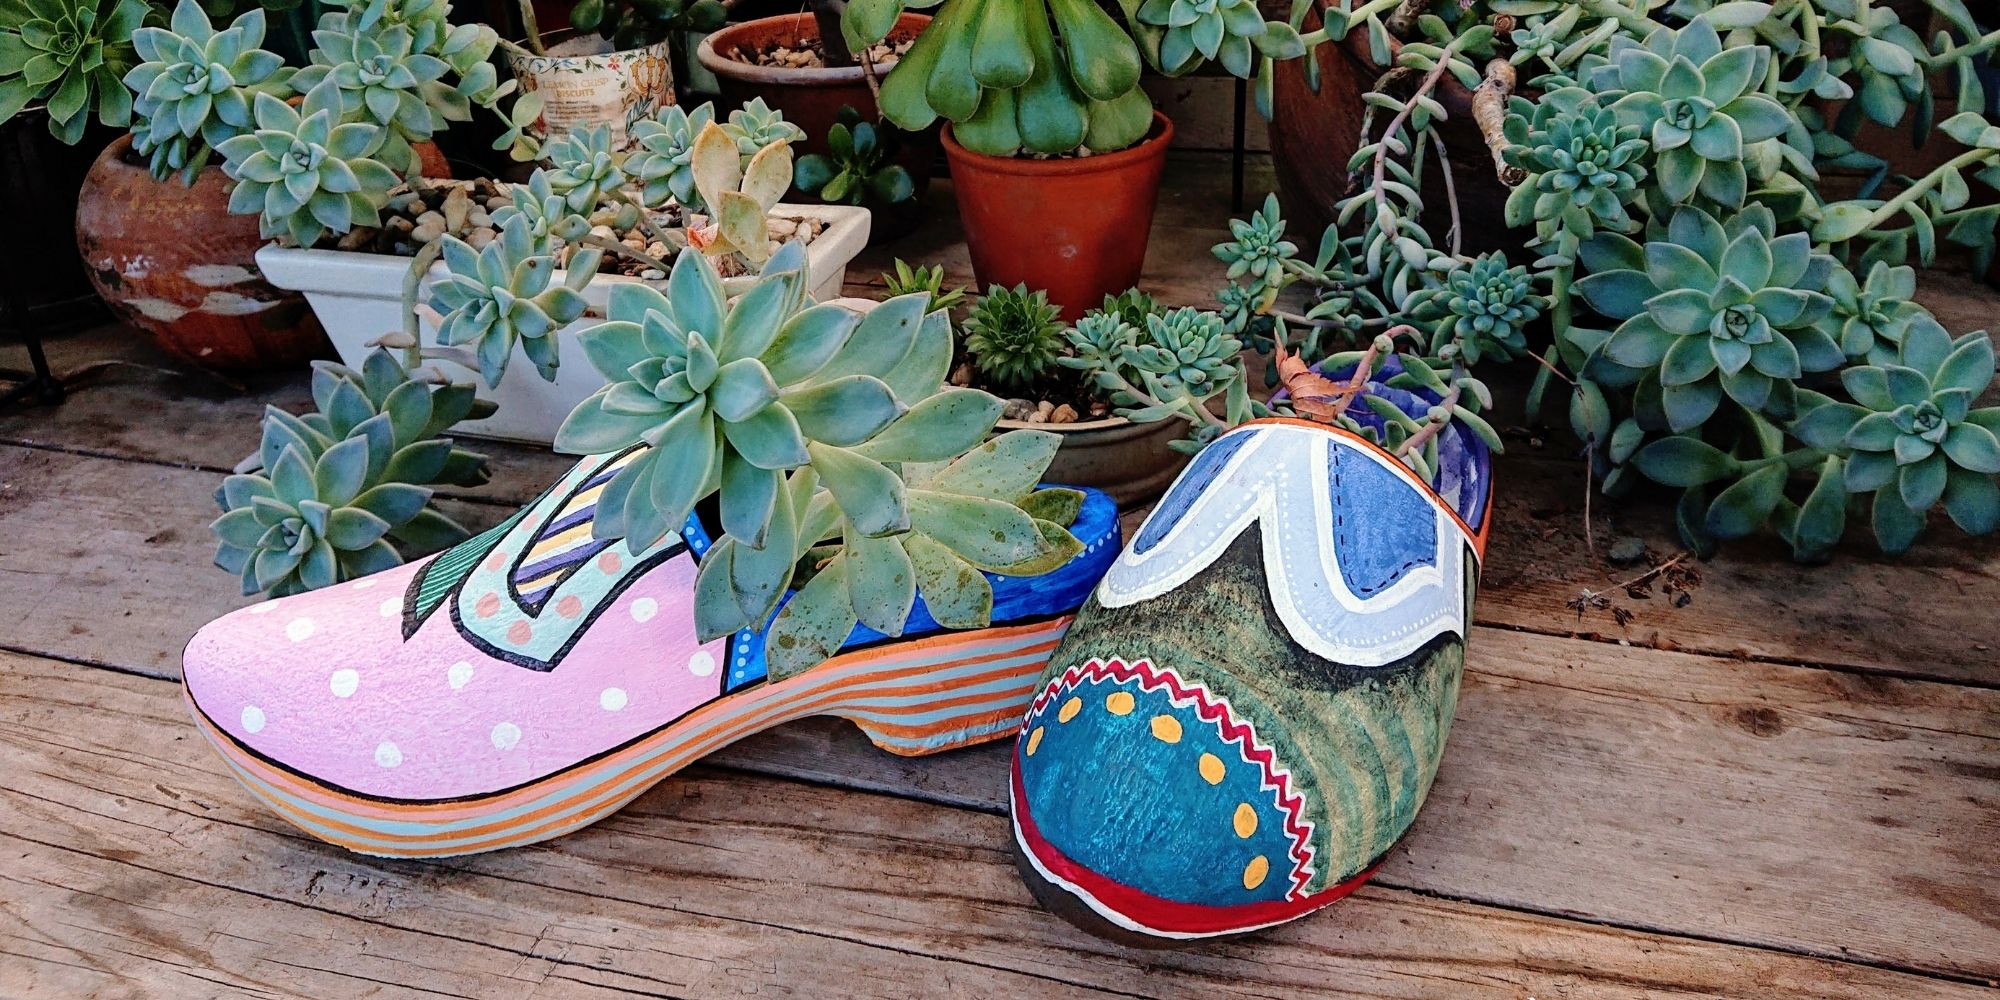
Upcycling and Repairing Ideas for Garden Decor
The garden has become a special place, especially during Covid-19 pandemic. During shelter-in-place period, I made garden decors by upcycling locally sourced items.
Natural Dyeing with Japanese Maple Leaves: Notes from a First-timer
Notes from my first natural dyeing experiment with Japanese maple leaves in fall season. Three batches of dyeing using fallen leaves sourced from two different trees in the garden. So much to learn and enjoy afterwards.