
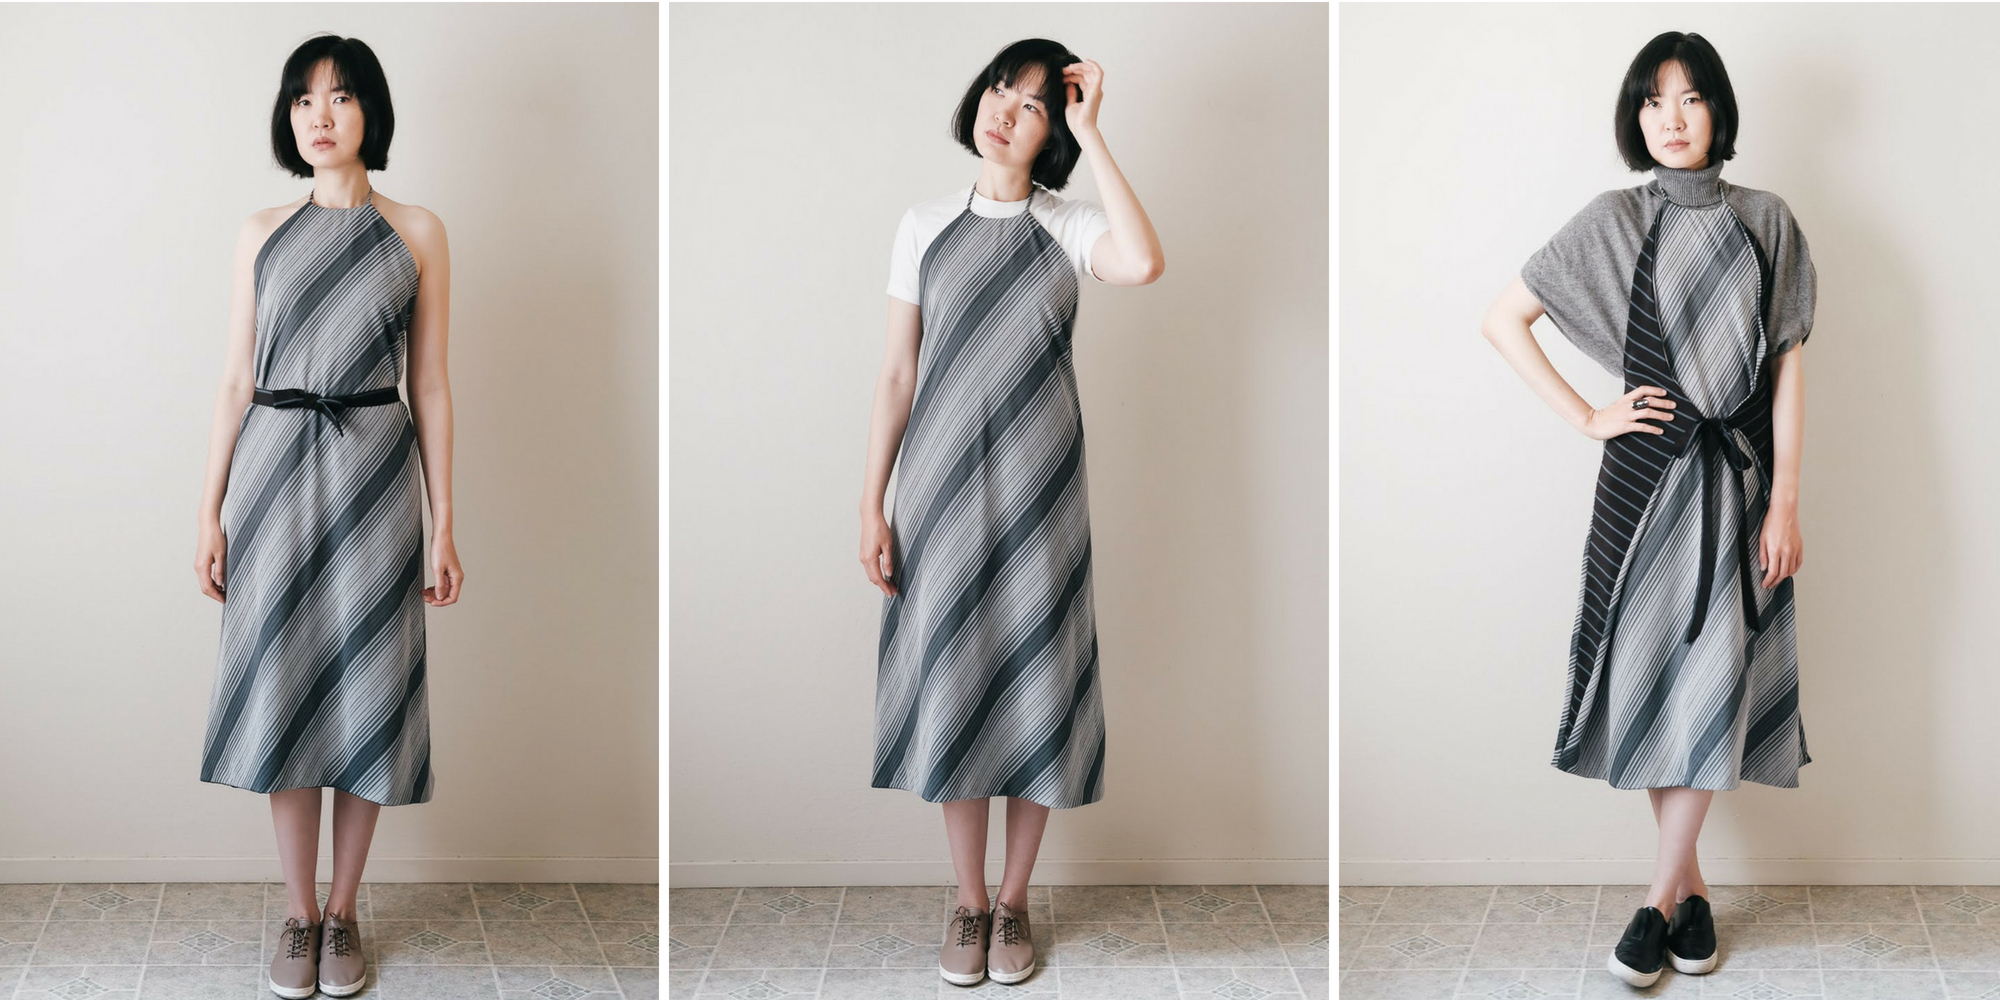
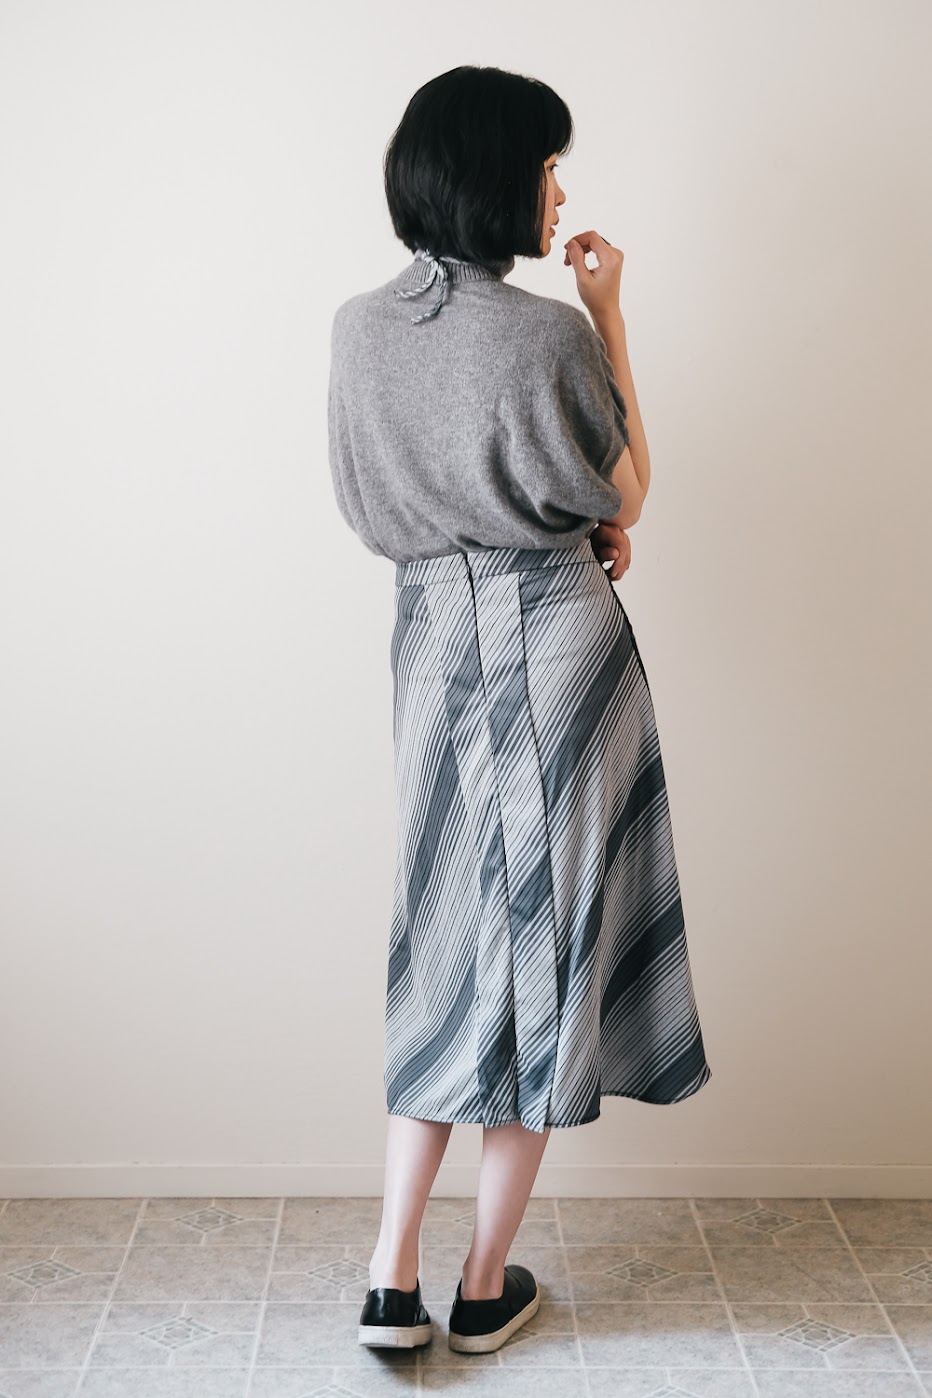
This three-way apron dress is made with a diagonal striped knit fabric and striped lining that also doubles as accent. It’s versatile and easy to wear in all seasons.
I’m not quite sure where my inspiration for creating this apron dress came from. Did it come from my Japanese sewing magazines, which feature several aprons? Or was it from reading manga comics with cafe / bakery setting?
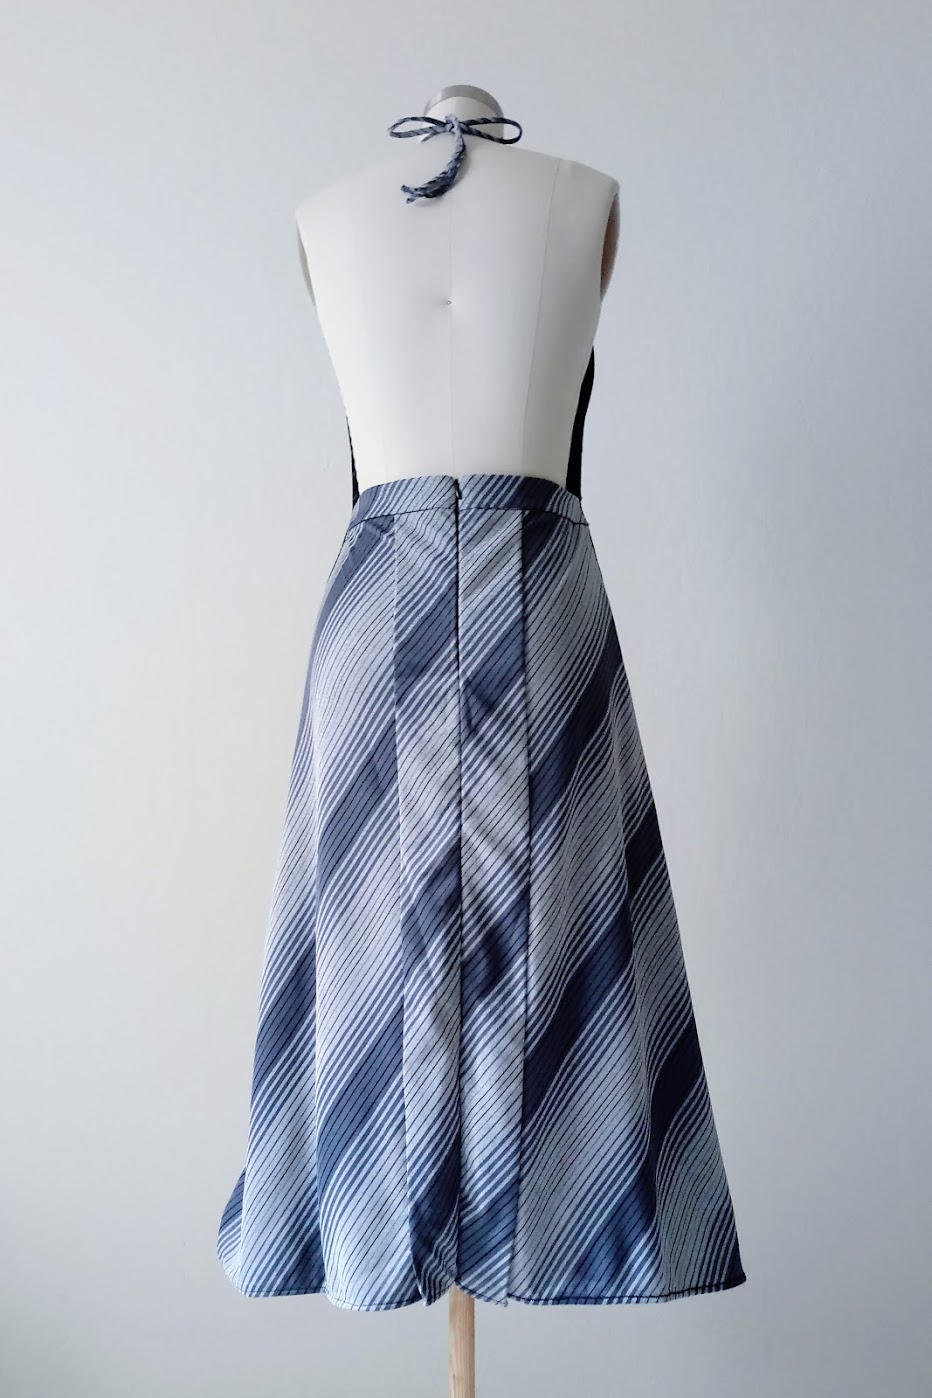
Whichever it was, I accept that at one moment in time, I want to be “barista chic” even though I neither drink coffee nor like to bake or cook. So I decided to make this dress; an apron on the front and a back half of an A-line skirt on the back.
Subscribe to my newsletter

Preparations:
Creating the concept of this apron dress was quick. I was bed ridden, sick from cold when I sketched this dress. It’s essentially a “apron at the front, half-skirt at the back” kind of look.
Next, I started creating the patterns, and that’s when I decided to add two extra panels to give a subtle pretty lift to the back view. Here’s what my three-way apron dress pattern concept looks like.

Materials
For this project, I used the following list of main materials:
- a mid-weight printed synthetic knit fabric* for the shell / face
- a piece of microfiber remnant for lining
- black 7” invisible zipper
- nylon cords for neck ties
- fusible weft interfacing (it’s the BEST!) for lining and waist ties reinforcement
- Sewing machine (mine is Brother CS6000i model)
- ball point needle (I used Schmetz Ball Point Jersey Machine Needles, Size 80/12)
*This fabric is a leftover from one of my very first DIY projects, a simple halter top design on one of Tomoko Nakamichi’s Pattern Magic book series. The diagonal stripes lend themselves really nicely once the garment was done, but I did not know that when I started.
While the initial concept is straightforward, the main challenge was to line the skirt back panels to the apron lining. After cutting my fabrics, I realized that I need an interfacing to give my lining fabric more structure.
This is so the lining fabric is able to hold the back skirt panels’ weight. For this purpose, I used the iron-on weft interfacing. Since I started using this lining, I rarely use any other types – it’s lightweight, strong, and doesn’t make the fabric stiff. I LOVE it.
Process Overview:
Creating this apron dress took me anywhere between 15 minutes to several hours a day, intermittently done over a few months. Unfortunately, there’s not much photo documentation since I was very “in the zone” often, especially once I started assembling the pieces together.
Regardless, it was a delightful progress that went like this:
1. First, I created a toile (with muslin fabric) to make sure the patterns have accurate measurements. The biggest adjustments I made was for the waist, so thank goodness I did not to skip this step. Once the measurements are adjusted, I transferred the patterns to the actual fabrics.

2. Once the pattern pieces are cut, I sew the extra rectangular panel to each back skirt panel.
3. I ironed the weft interfacing to the waist band pieces before attaching each of them to the back skirt panels. I also marked the invisible zipper placement on the center back of the panels for insertion later.
4. Next, I prepared the apron lining by ironing the weft interfacing to the wrong side of the microfiber fabric.

5. Then I sew the skirt back pieces to each side of the apron lining. I did it with the pattern paper still attached to the apron lining. This was the most nerve wrecking part of the whole process.

6. Once the lining and skirt pieces were attached, I took a step back to create the spaghetti straps for the neckline. I made several quick samples and decided that the 3/8” (1 cm) diameter one (middle one on the photo below) was best.

7. Oh, I also applied the interfacing to the rest of the microfiber pieces and created the waist ties.
8. With right side together, I sandwiched the spaghetti straps and waist ties between the apron shell and lining. I also made sure the skirt panels are tucked in before I pinned the edges, leaving 8-inch opening at the bottom.
9. Once I was satisfied with the pinning, I sew the edges slowly and carefully, especially around the straps and waist ties.
10. Turning the dress inside out, I checked the measurements and overall symmetry. That includes the placement of straps and waist ties. I fixed several things here and there with hand sewing.
11. Once everything looked good, I closed the opening at the bottom of the apron dress by hand stitching. Then I attached the invisible zipper and finished sewing the skirt half of the apron dress.
12. After trying on the dress, I noticed the extra rectangular panels on the center back skirts fell rather awkwardly. So I did blind hem stitching to make the panels flushed flat against the skirt.
And that’s it, the apron dress is finished!!!


Result: DIY Three-Way Apron Dress
Once again, I apologize for the lack of in-progress photos. Nevertheless, after everything’s said and done, I absolutely love the finished garment!
Wearing it with the waist ties knotted on the back felt understatedly modern and sleek, thanks to the elegant midi length. I usually wear it with a T-shirt underneath for a more casual feel.


I also made the waist ties long enough to be knotted on the front. When worn like this, it exudes a chicer mood, and I can wear the apron dress as is.


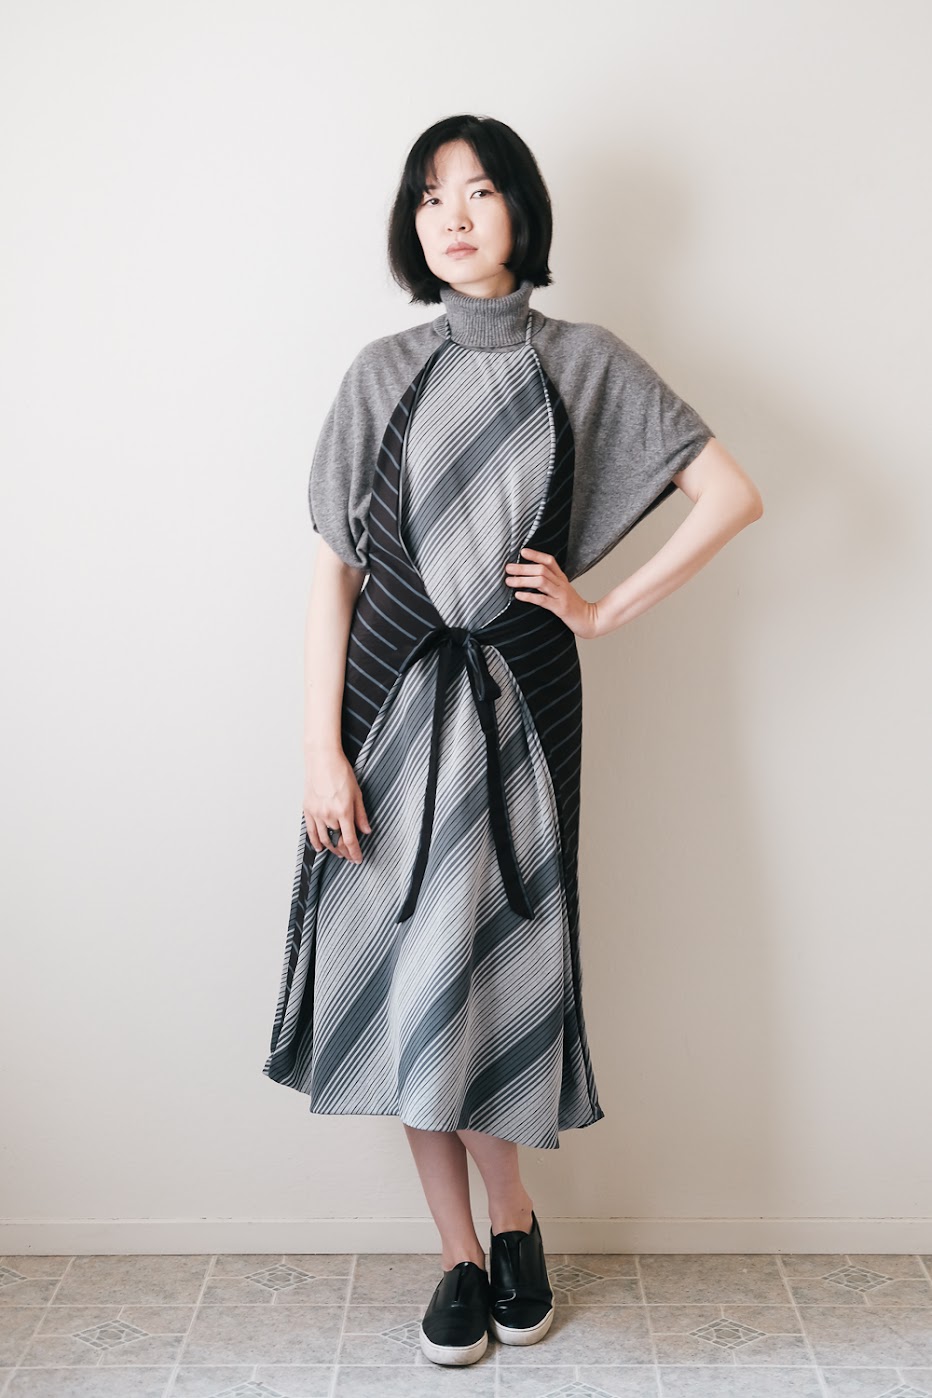
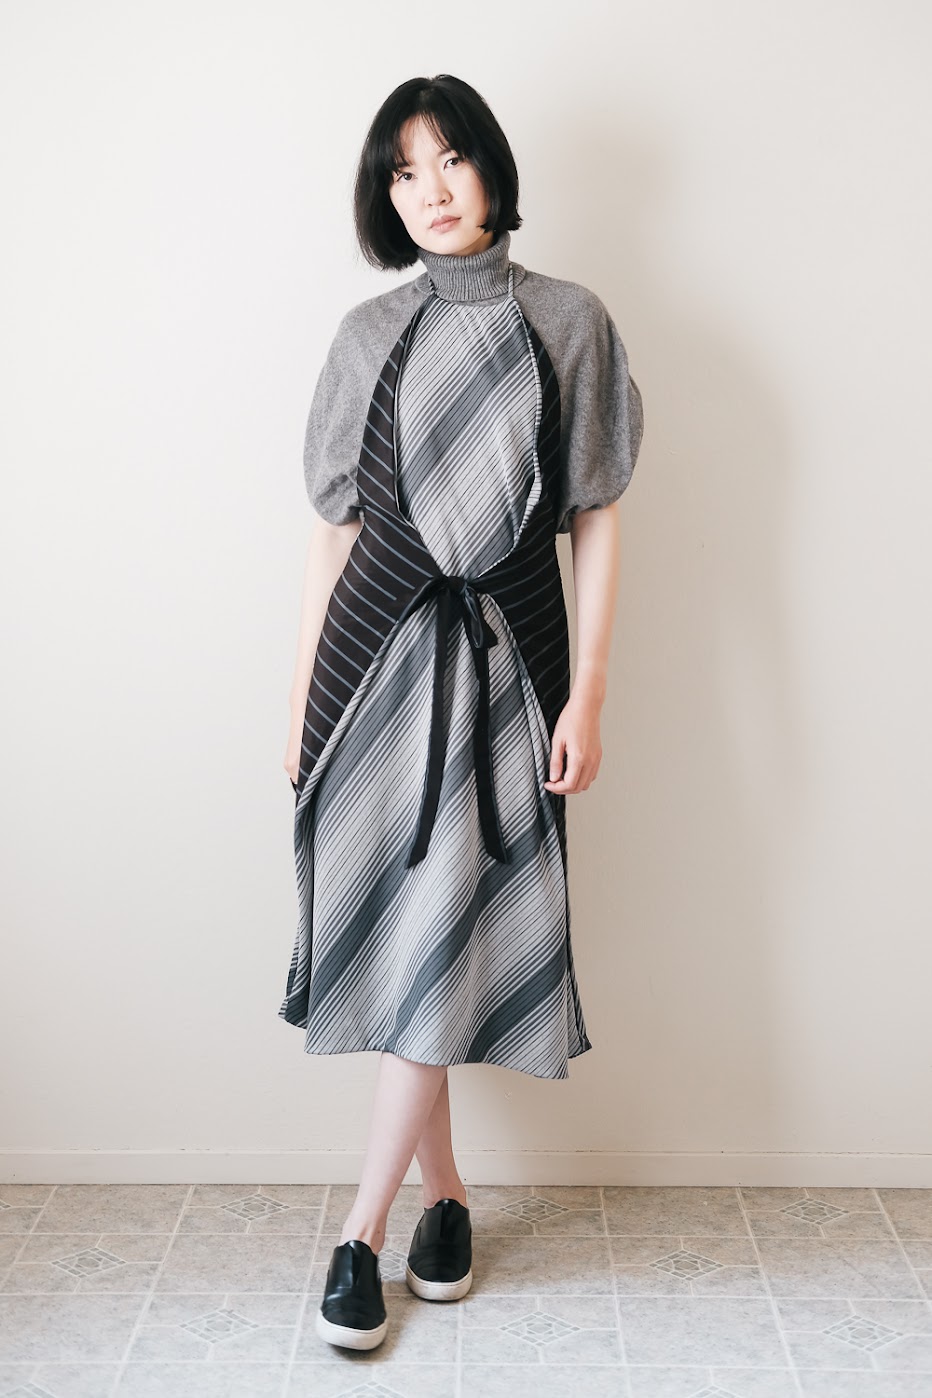
During fall or winter, I like wearing a turtleneck top underneath it. I can choose to either leave the waist ties hanging on the sides or bring the whole apron “wings” to the front. Doing this exposes the microfiber lining fabric, and the whole look feels very edgy!


So… what do you think about this three-way apron dress? Would you wear something like this?
Thanks for reading; until next time,
Musank
Disclaimer: I may earn a small commission for my endorsement, recommendation, testimonial, and/or link to any products or services from this website. Thank you for your support!
Never Miss a Post
Enter your email below to receive the latest Fafafoom Studio post in your inbox.
Browse more posts
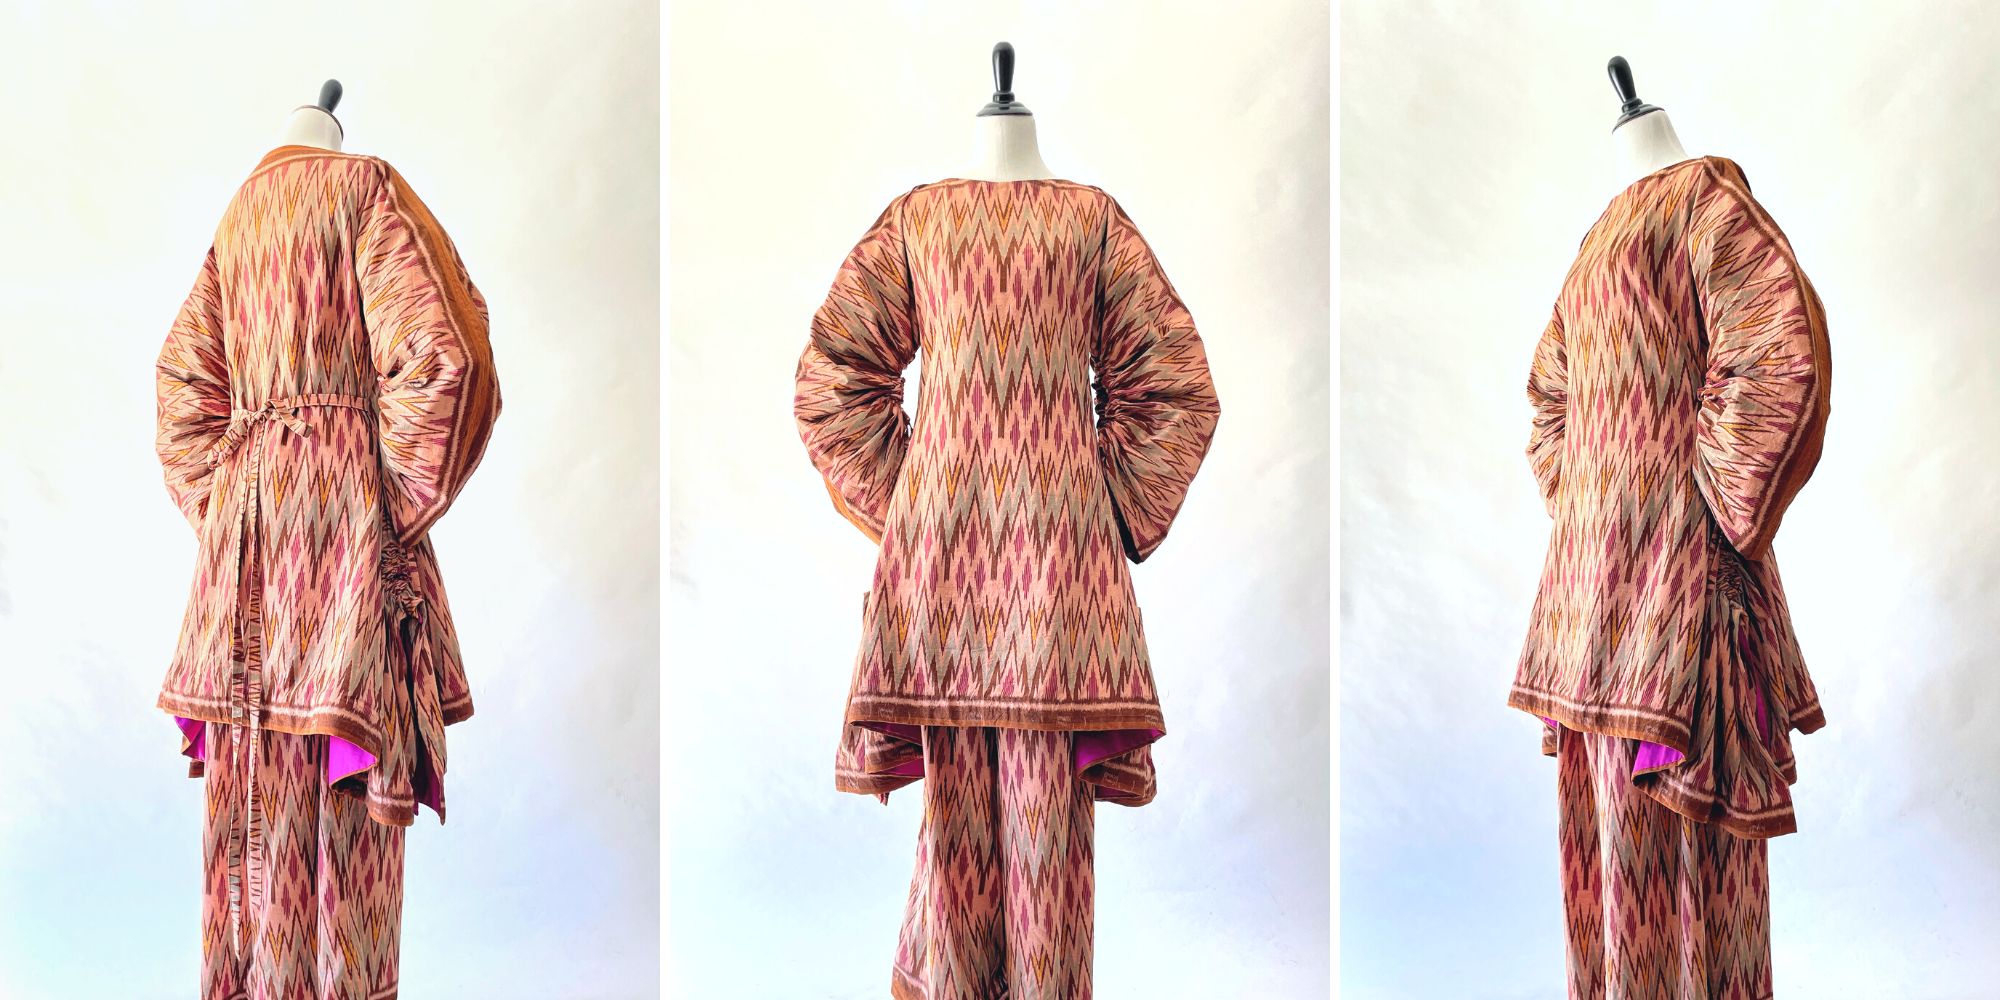
Interpreting Kebaya, Making a Modern Ethnic Ensemble
Modern Ethnic outfit is my interpretation of kebaya dressing. They are made using vintage ikat textile and inspired by several free minimal-waste patterns. Only on fafafoom.com.
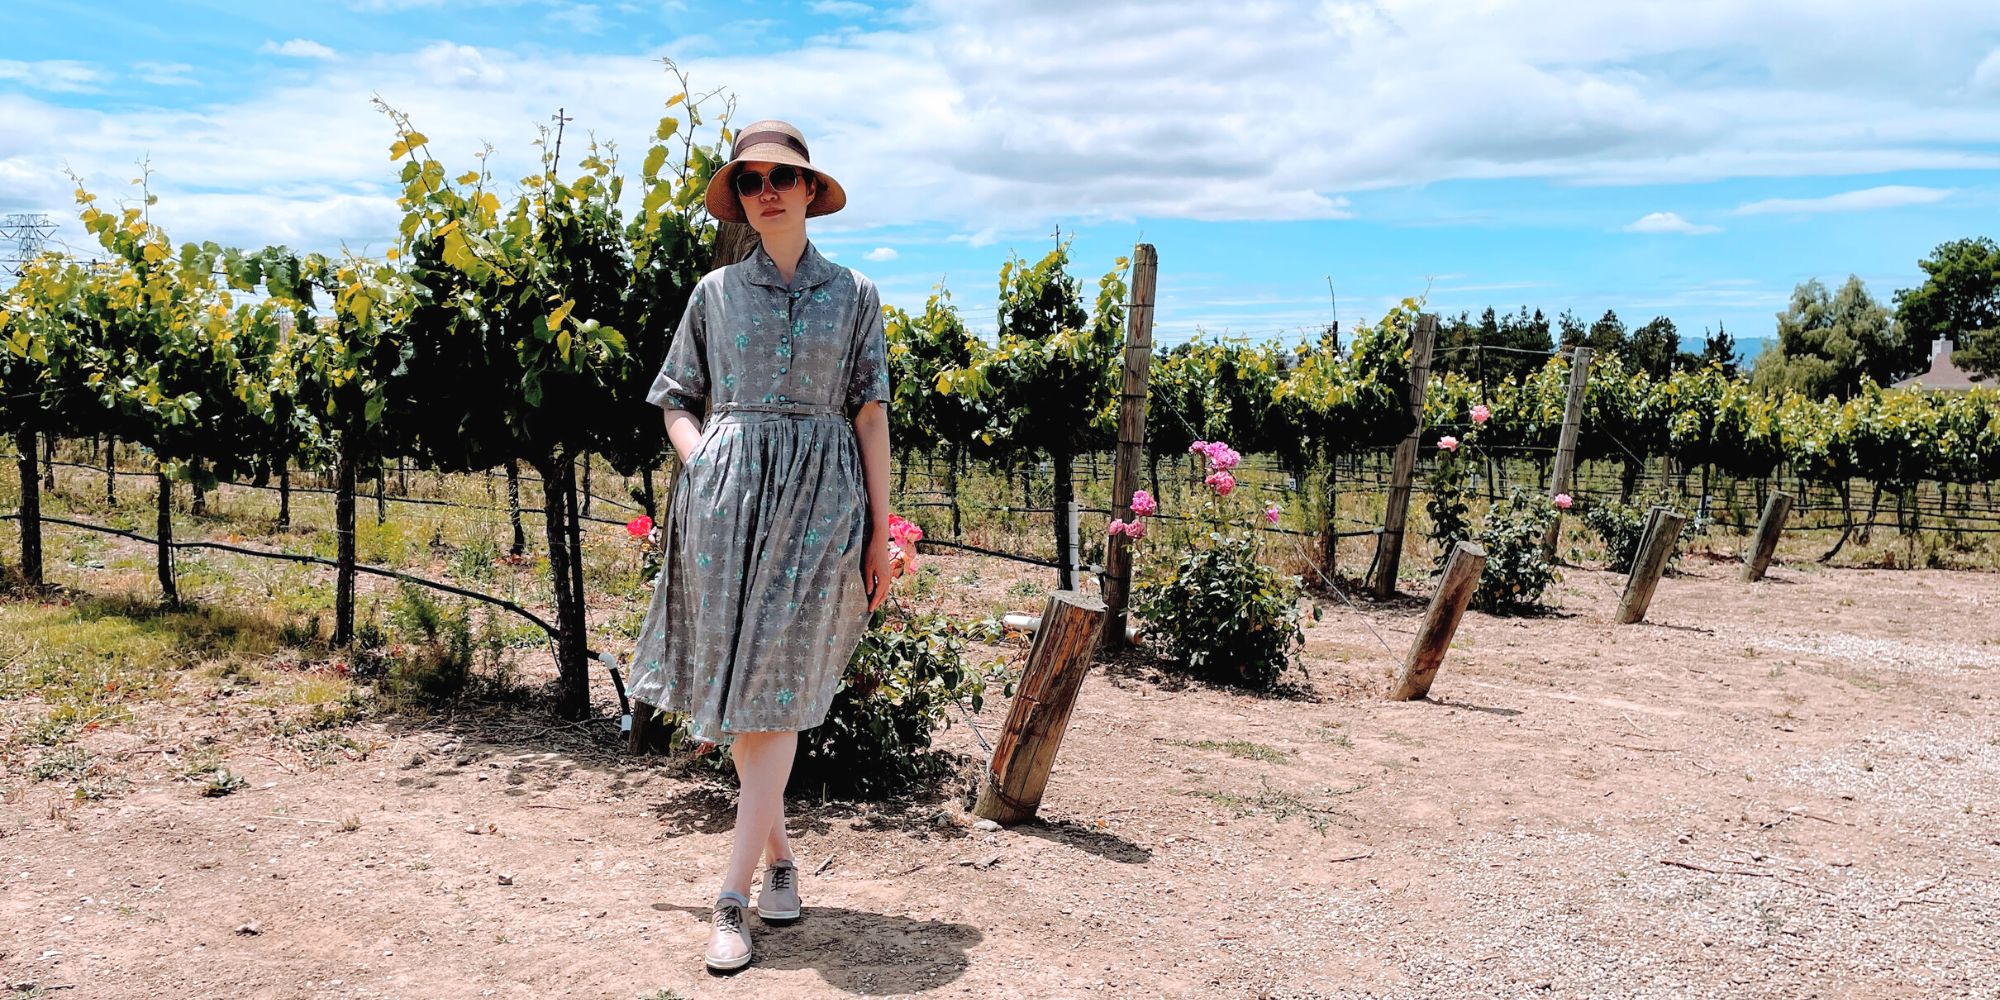
Restoring a 1950s Atomic Age Dress
Restoring and repairing a beautiful 1950s Dress for my summer 2022 wardrobe. Smart alterations include lining and inseam pockets. Only on fafafoom.com.

Pink Delight! Natural Dyeing with Camellia Flowers
My next experiment is dyeing with camellia flowers. Amongst all natural dyeing projects I have done so far, this is my favorite. Check out the pink delights! From fafafoom.com.
5 Slow Fashion Tips for a More Sustainable Wardrobe
Five slow fashion tips to help you transform your sustainable wardrobe for a cleaner, greener future. A guest feature from Reese Jones for Fafafoom.com.
Upcycling and Repairing Ideas for Garden Decor
The garden has become a special place, especially during Covid-19 pandemic. During shelter-in-place period, I made garden decors by upcycling locally sourced items.

Natural Dyeing with Japanese Maple Leaves: Notes from a First-timer
Notes from my first natural dyeing experiment with Japanese maple leaves in fall season. Three batches of dyeing using fallen leaves sourced from two different trees in the garden. So much to learn and enjoy afterwards.