
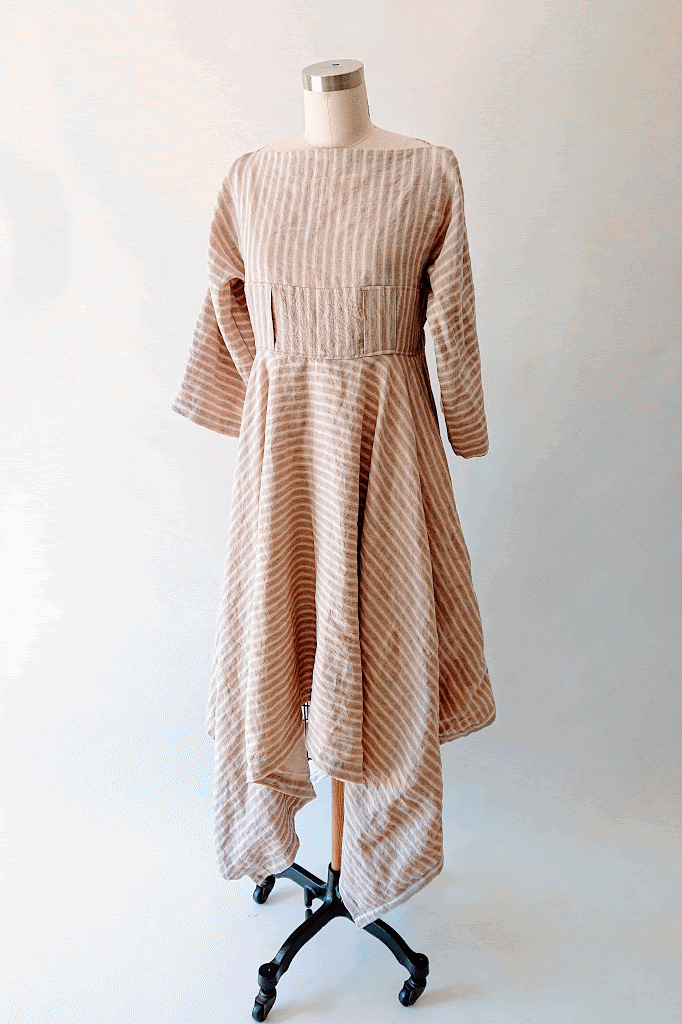
Household linens upcycling project inspired by an “Instant Dress” how-to from Family Circle 1977 magazine cutout. Two panels of rescued linen curtains were naturally dyed and transformed into a dress with T-shaped bodice and handkerchief skirt.
A few months ago, I was once again invited by Portia Lawrie of Makery to be part of #Refashioners2020. (You might remember my Refashioners 2018 participation: the couture-inspired bubblegum cage dress.) The challenge this time is to upcycle household linens. It was the perfect timing to work with several linen curtain panels I rescued from a friend last year. While I initially intended to use them as is, plans changed and they had been stored in my fabric stash until now.
Long story short, in light of recent events and our growing collective awareness of Black Live Matters context, Refashioners 2020 is canceled. That said, we as creative makers all around the world can continue to make a difference in our respective communities with our talents, especially during this uncertain times. From making handmade face masks and scrub caps to healthcare workers and local community to providing more custom solutions to people in need, we are creative change makers.
My linen upcycle results in a handkerchief dress that can be worn in multiple ways. I dedicate this dress to my local Castro Valley, California community members – generous, kind, and always ready to extend a helping hand. I’m very grateful to be part of this community, thank you for being amazing!
Let’s get to the details of this upcycling project, shall we?
Subscribe to my newsletter

Inspiration + Design
I got these 1977 Family Circle magazine clippings from an estate / yard sale I went to several years ago, and I have been waiting for the right timing to put my spin on it. I love the simple rectangular pattern pieces, they feel both classic and modern.
I was prepared to make this dress as-is, but I feel that it will only emphasize my rather straight figure. So why not make the bottom part more flowing, plus incorporating some pockets if possible?
Here are my sketches as I slowly fine tuned the dress concept. Throughout the process, I examined the linen curtains to looked for certain features to showcase, like the hidden tabs along the top.
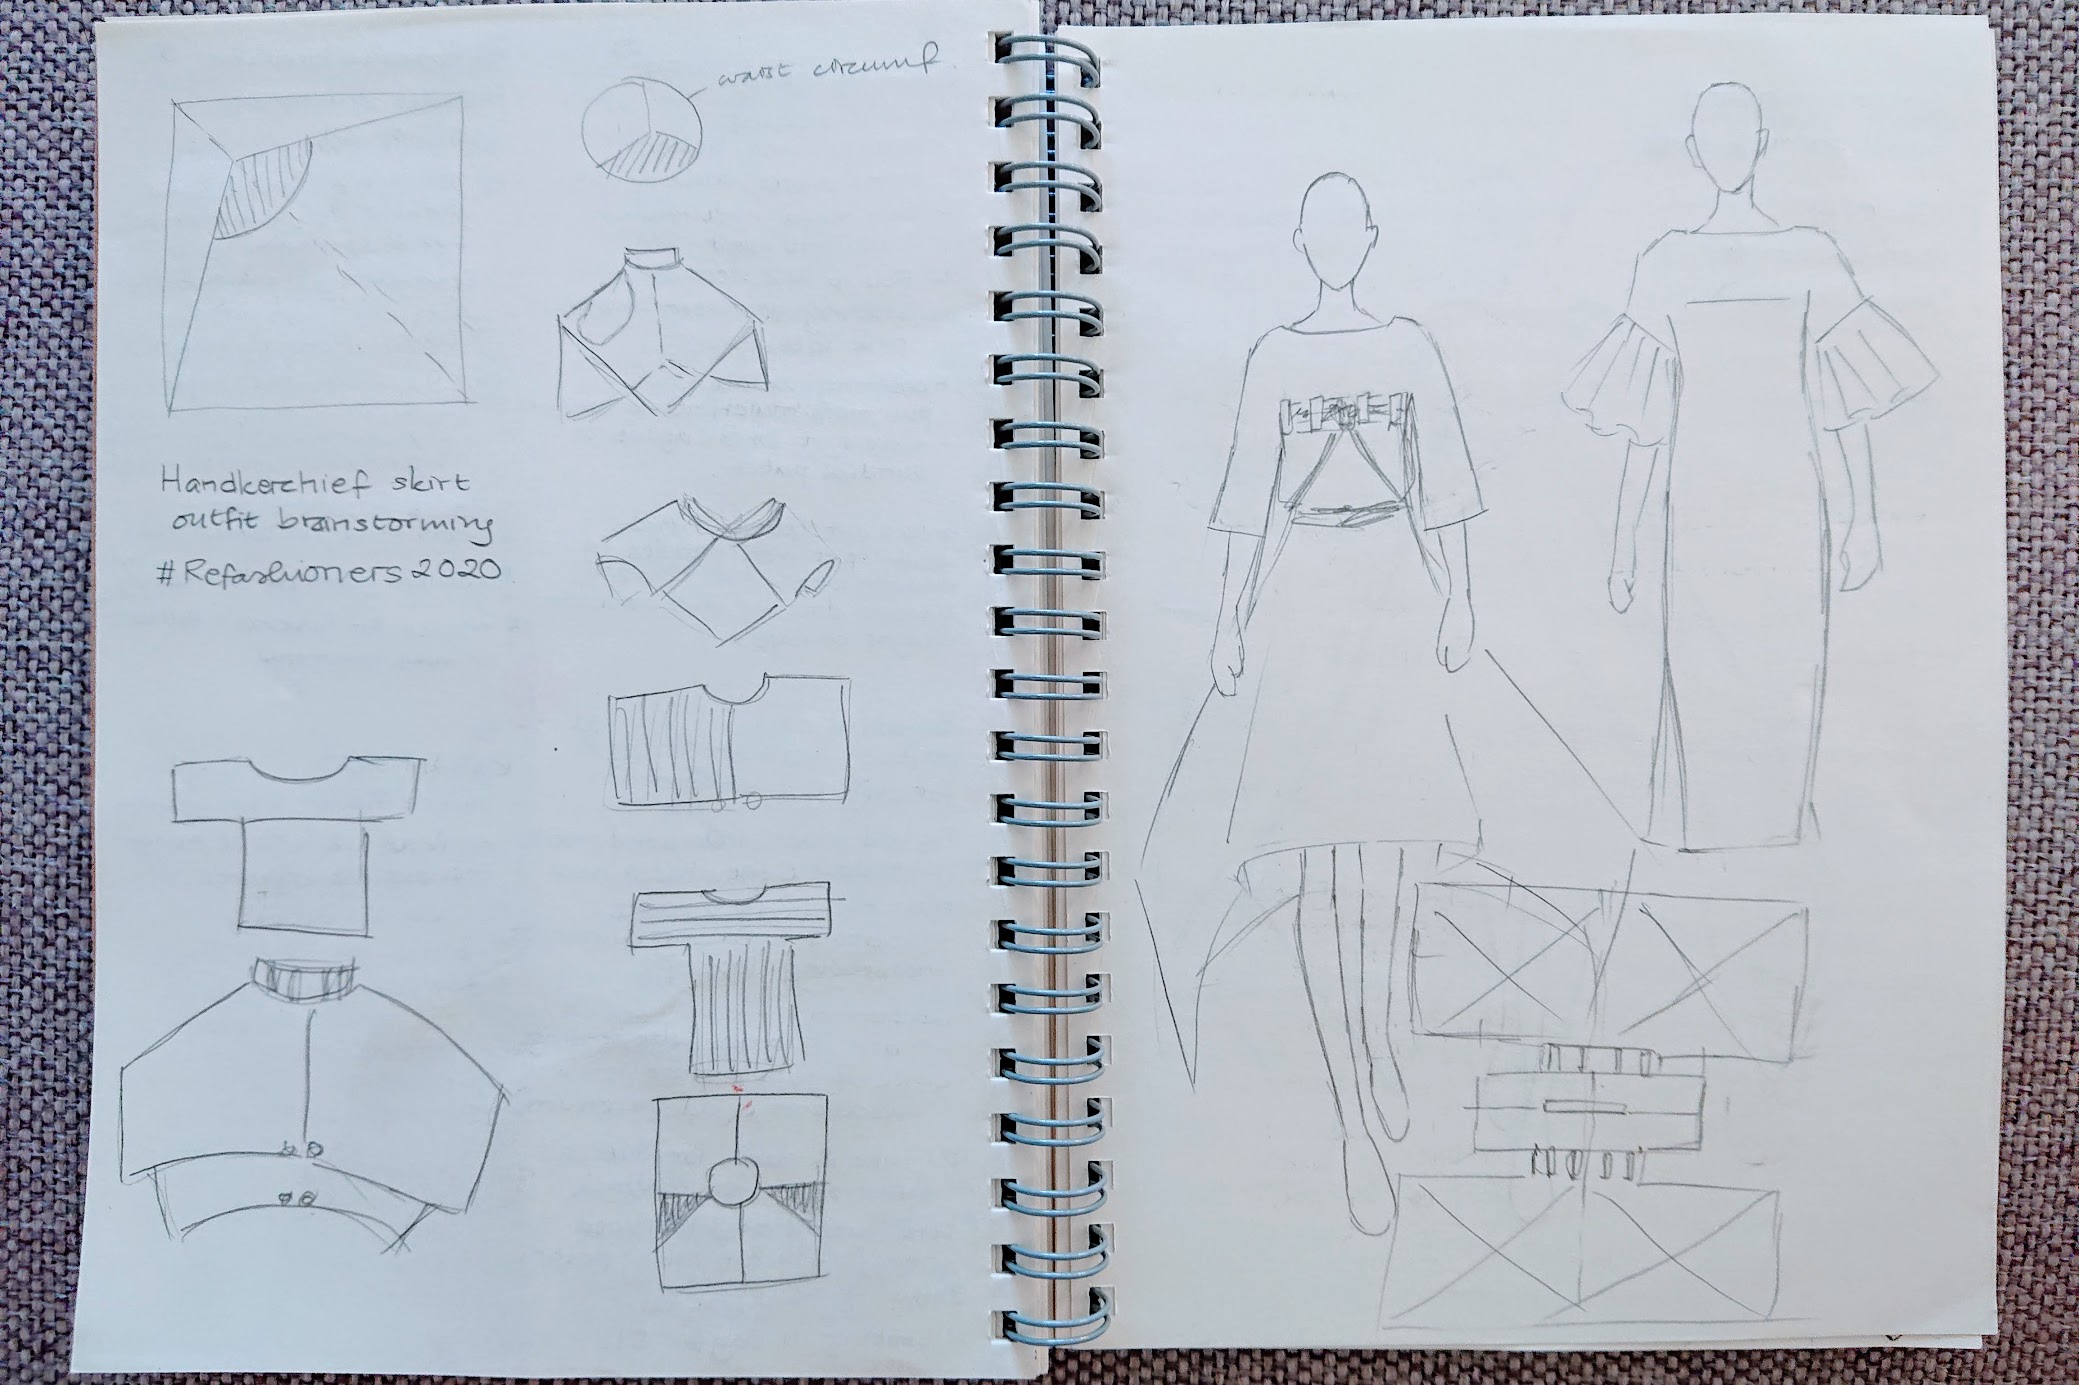
I decided to feature the hidden tabs on the front as an empire waistline construction, and large rectangular patterns with circular opening. They are respectively inspired by Korean hanbok’s empire waist style and Issey Miyake’s handkerchief hem style.

As the sketch came into focus, it’s time to make a partial prototype for the bodice. Straight out of the Family Circle magazine cut out, I wanted to see if there are constraints / alterations to make.
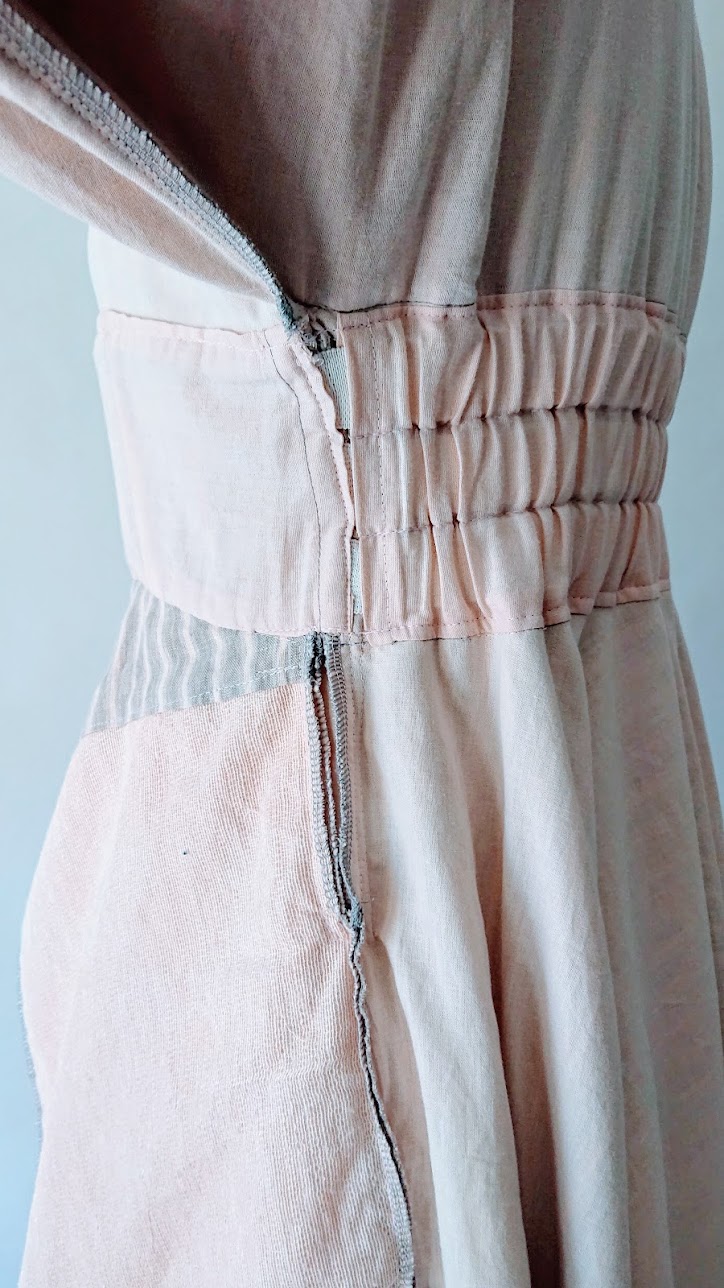
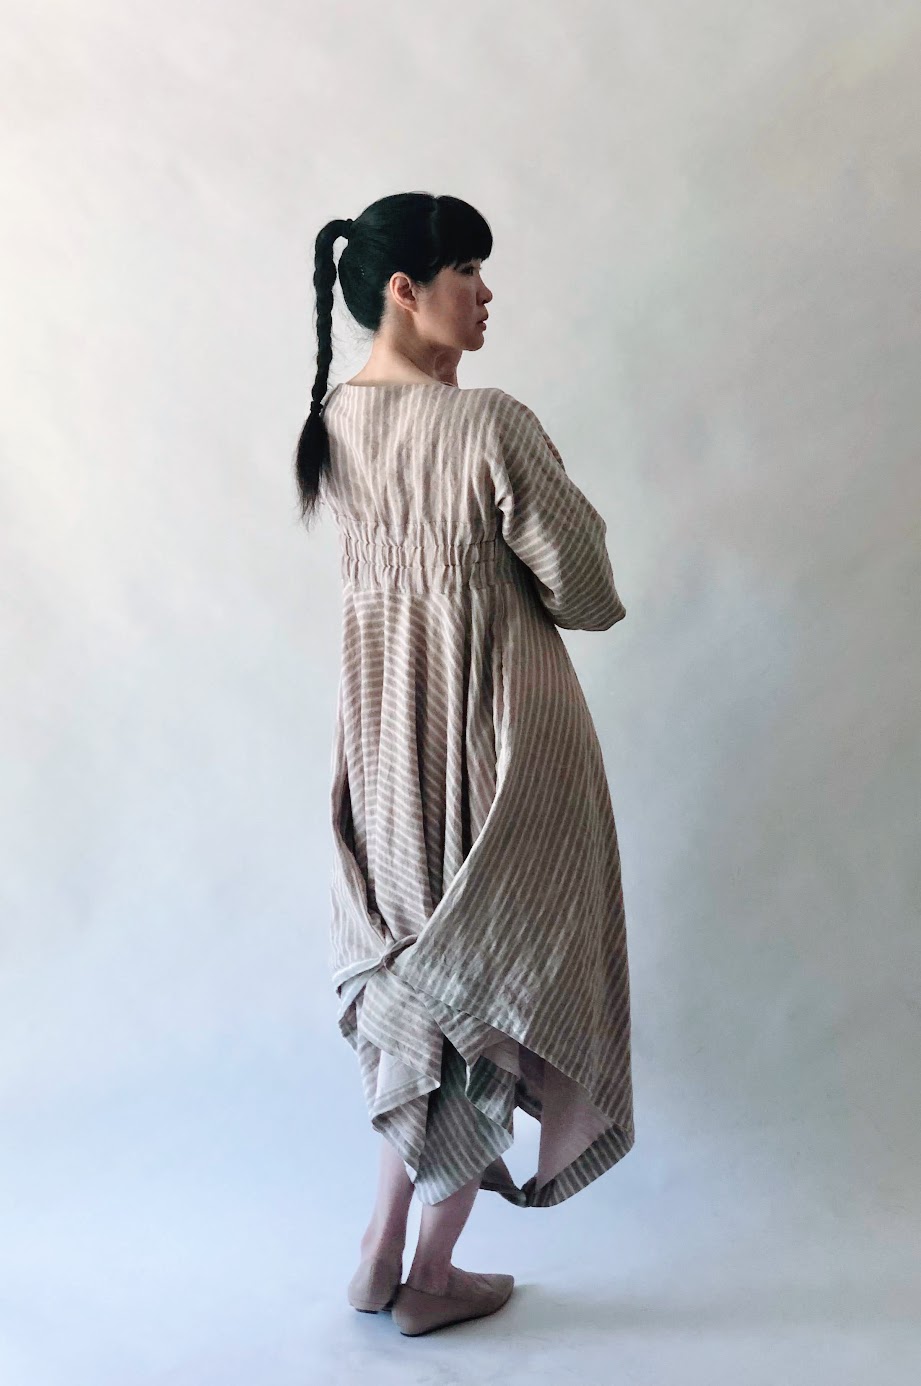
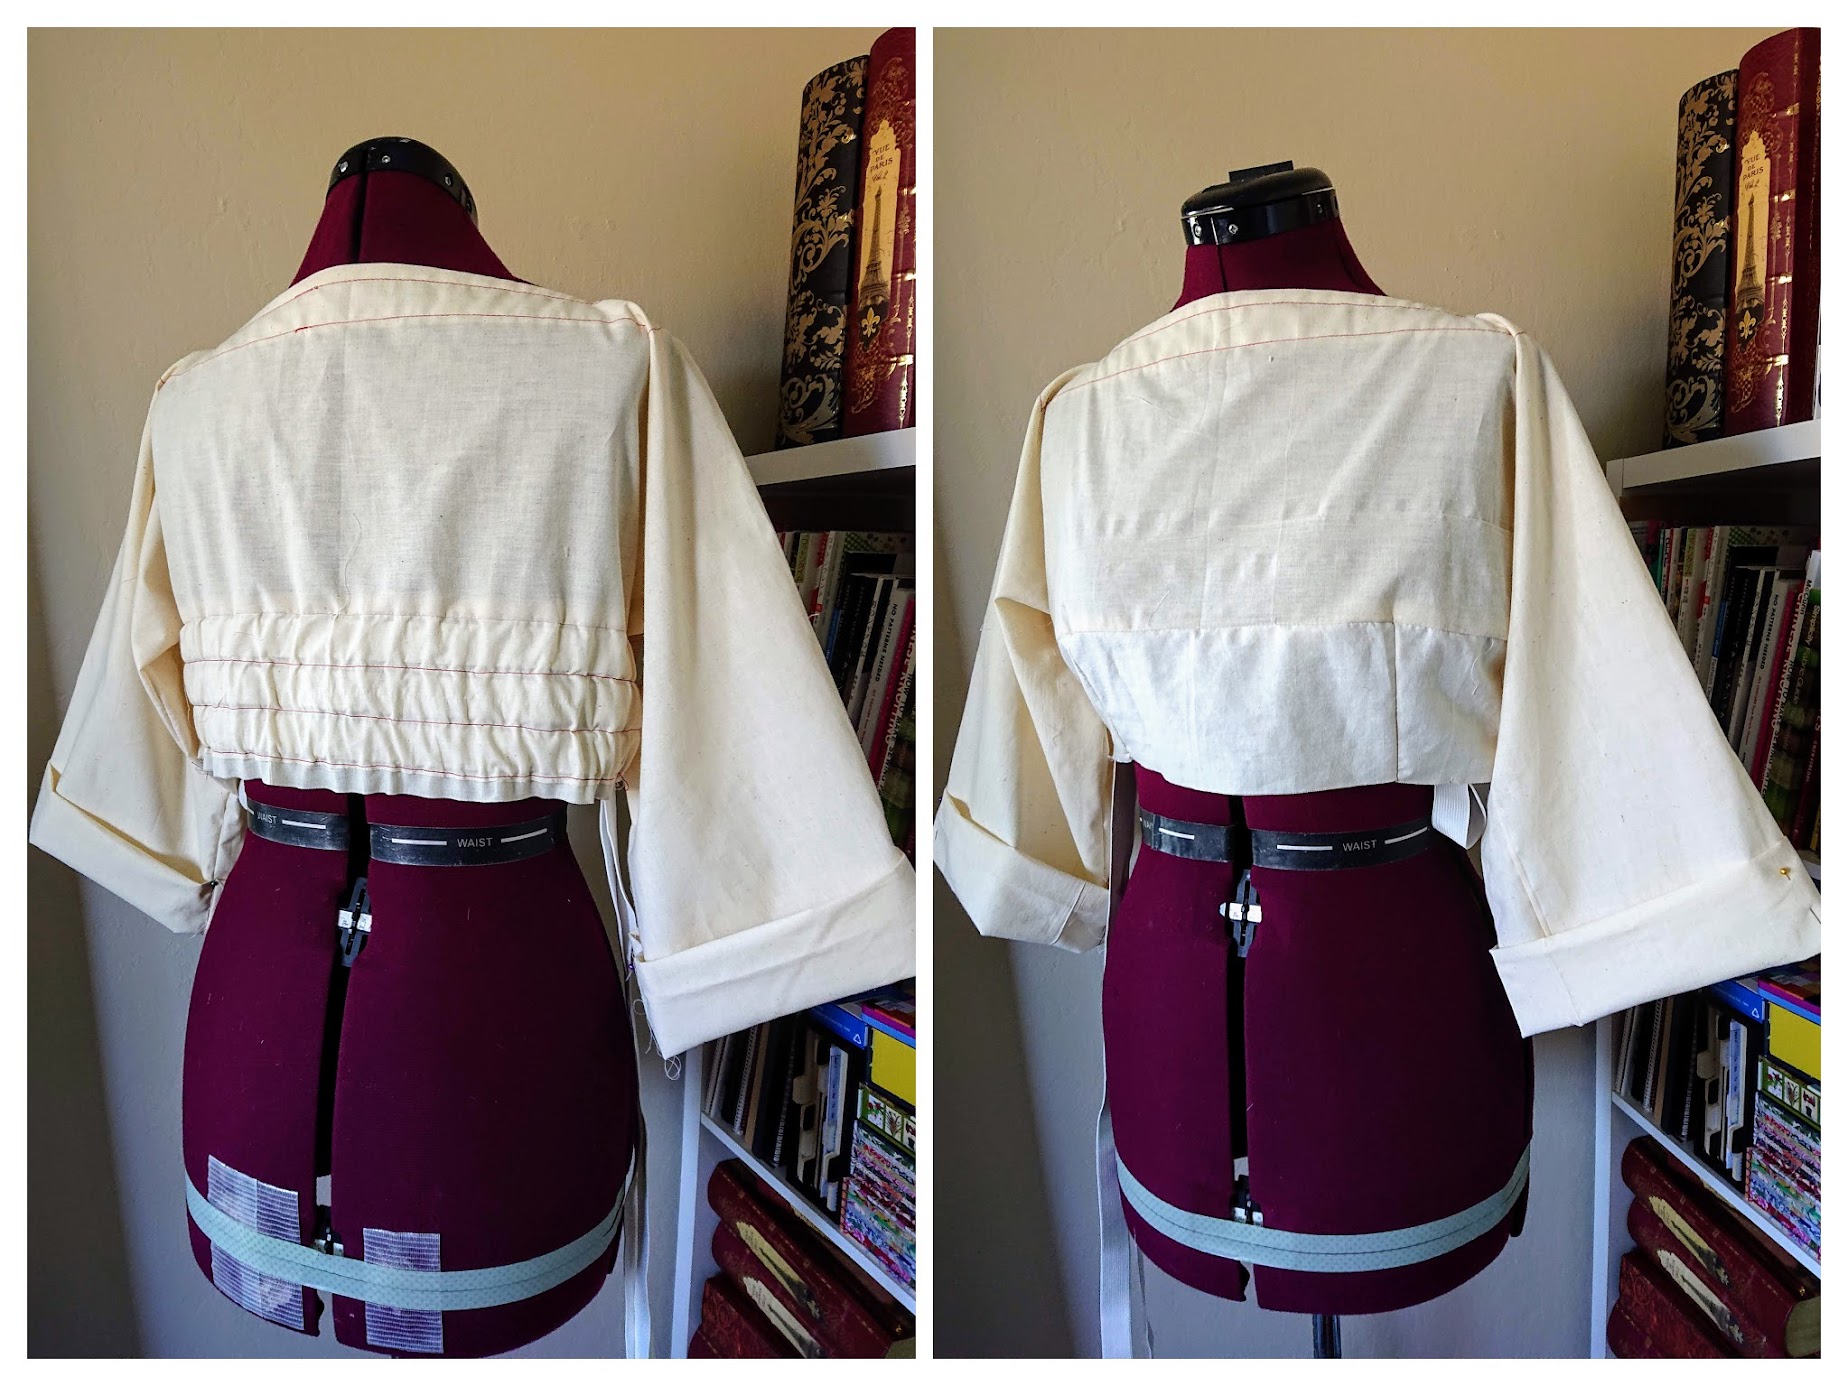 Sure enough, the constraints and alterations were set. The sleeve length is shortened 5 in. from each side and two simple darts are added on the front. Three casings of elastics are also added on the back to create a flatter, closer fit with some textural details.
The final design and measurements I went with are detailed below.
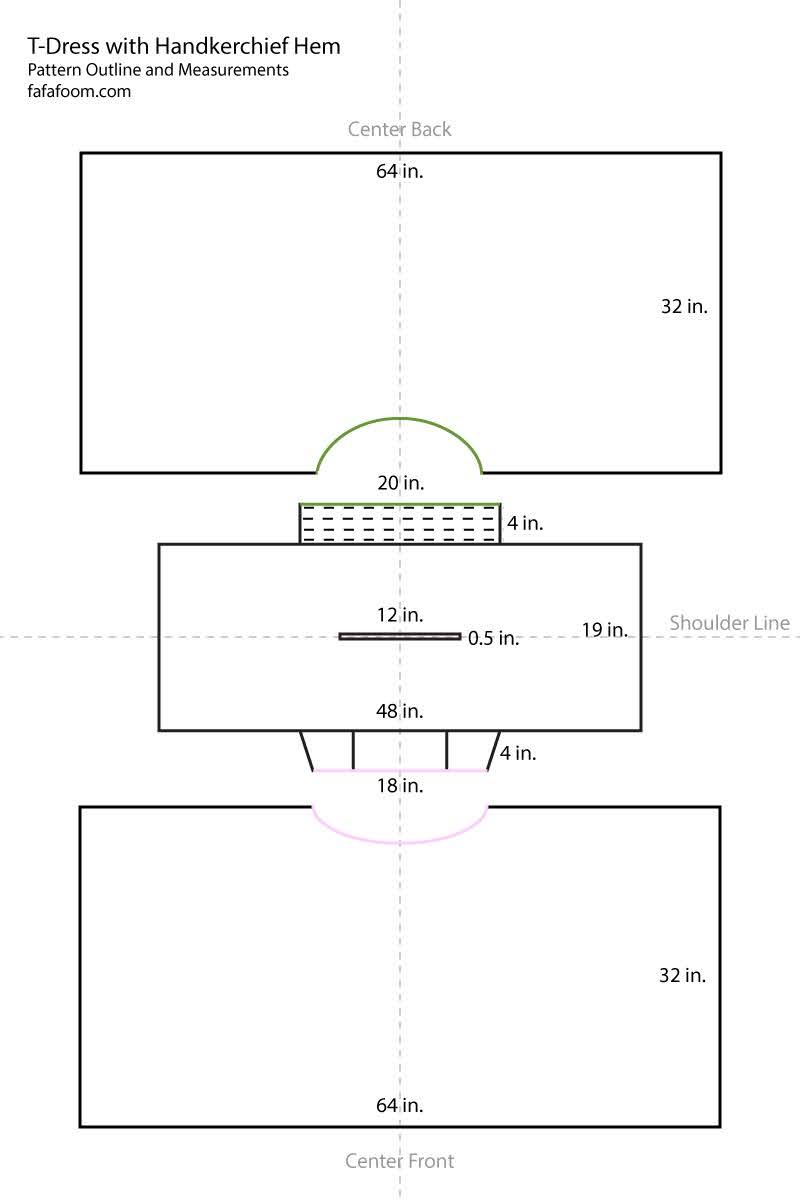
Additional notes:
- The dart on the front is 1″ each, taken 5″ from the center.
- Elastic casings at the back is 1.25″ wide.
- Circle radius for front waist opening is 5.75″, back waist is 6.375″.
- Seam allowance is 0.5″ that later got trimmed down to 0.25″once the fit is finalized.
- Pocket additions are not included in the outline.

Family Circle 1977 magazine cutout about “Instant Dress”

Details of how to make an Instant Dress
Materials + Tools
Materials:
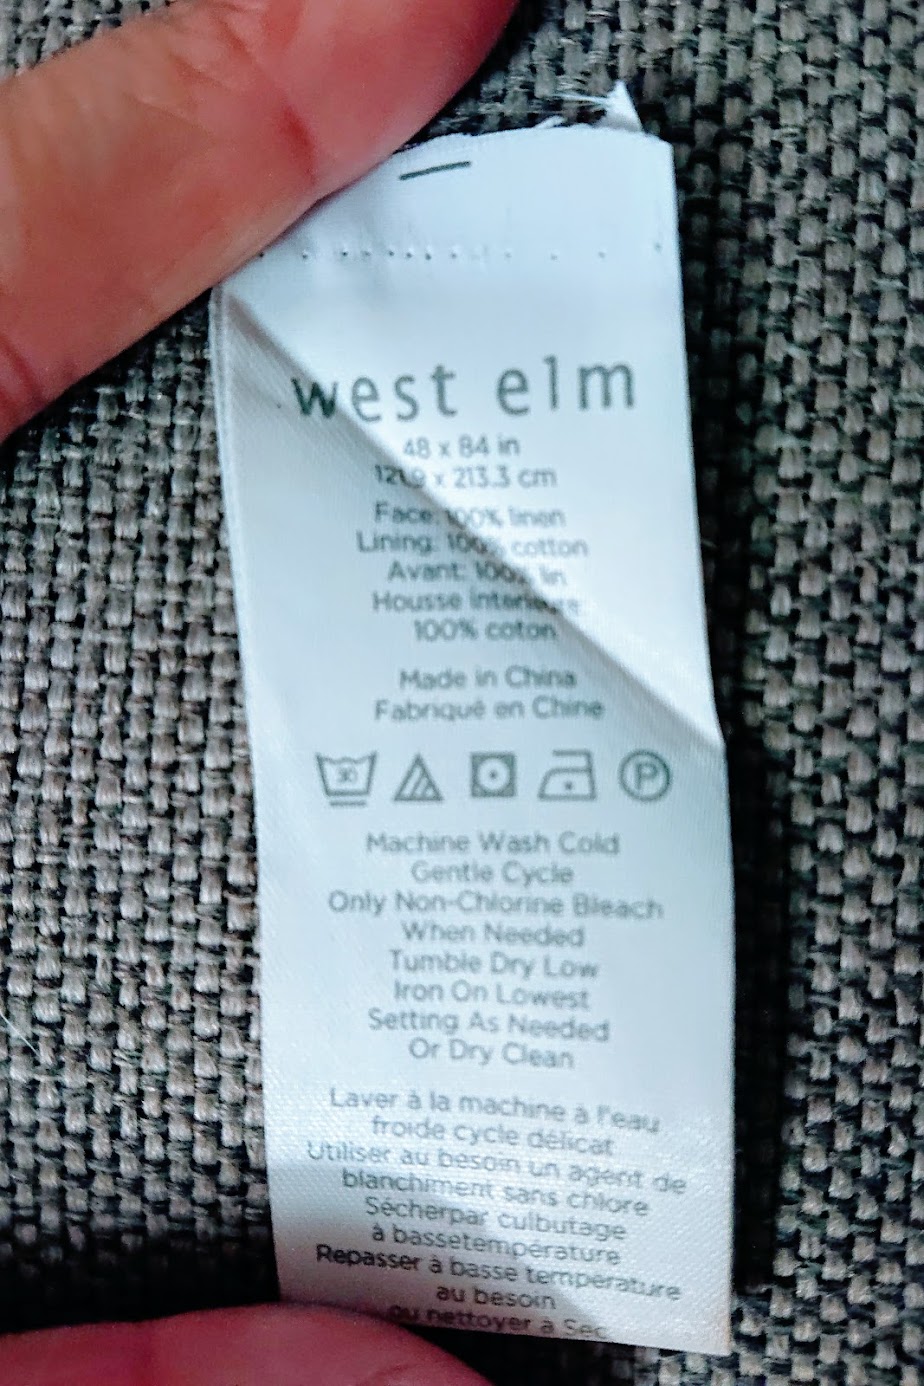
- Two pieces of rescued linen curtain with cotton lining from West Elm are the star of this upcycle. They measured 48″ x 84″ roughly, but they had some minor irregular stretches due to its pre-owned nature.
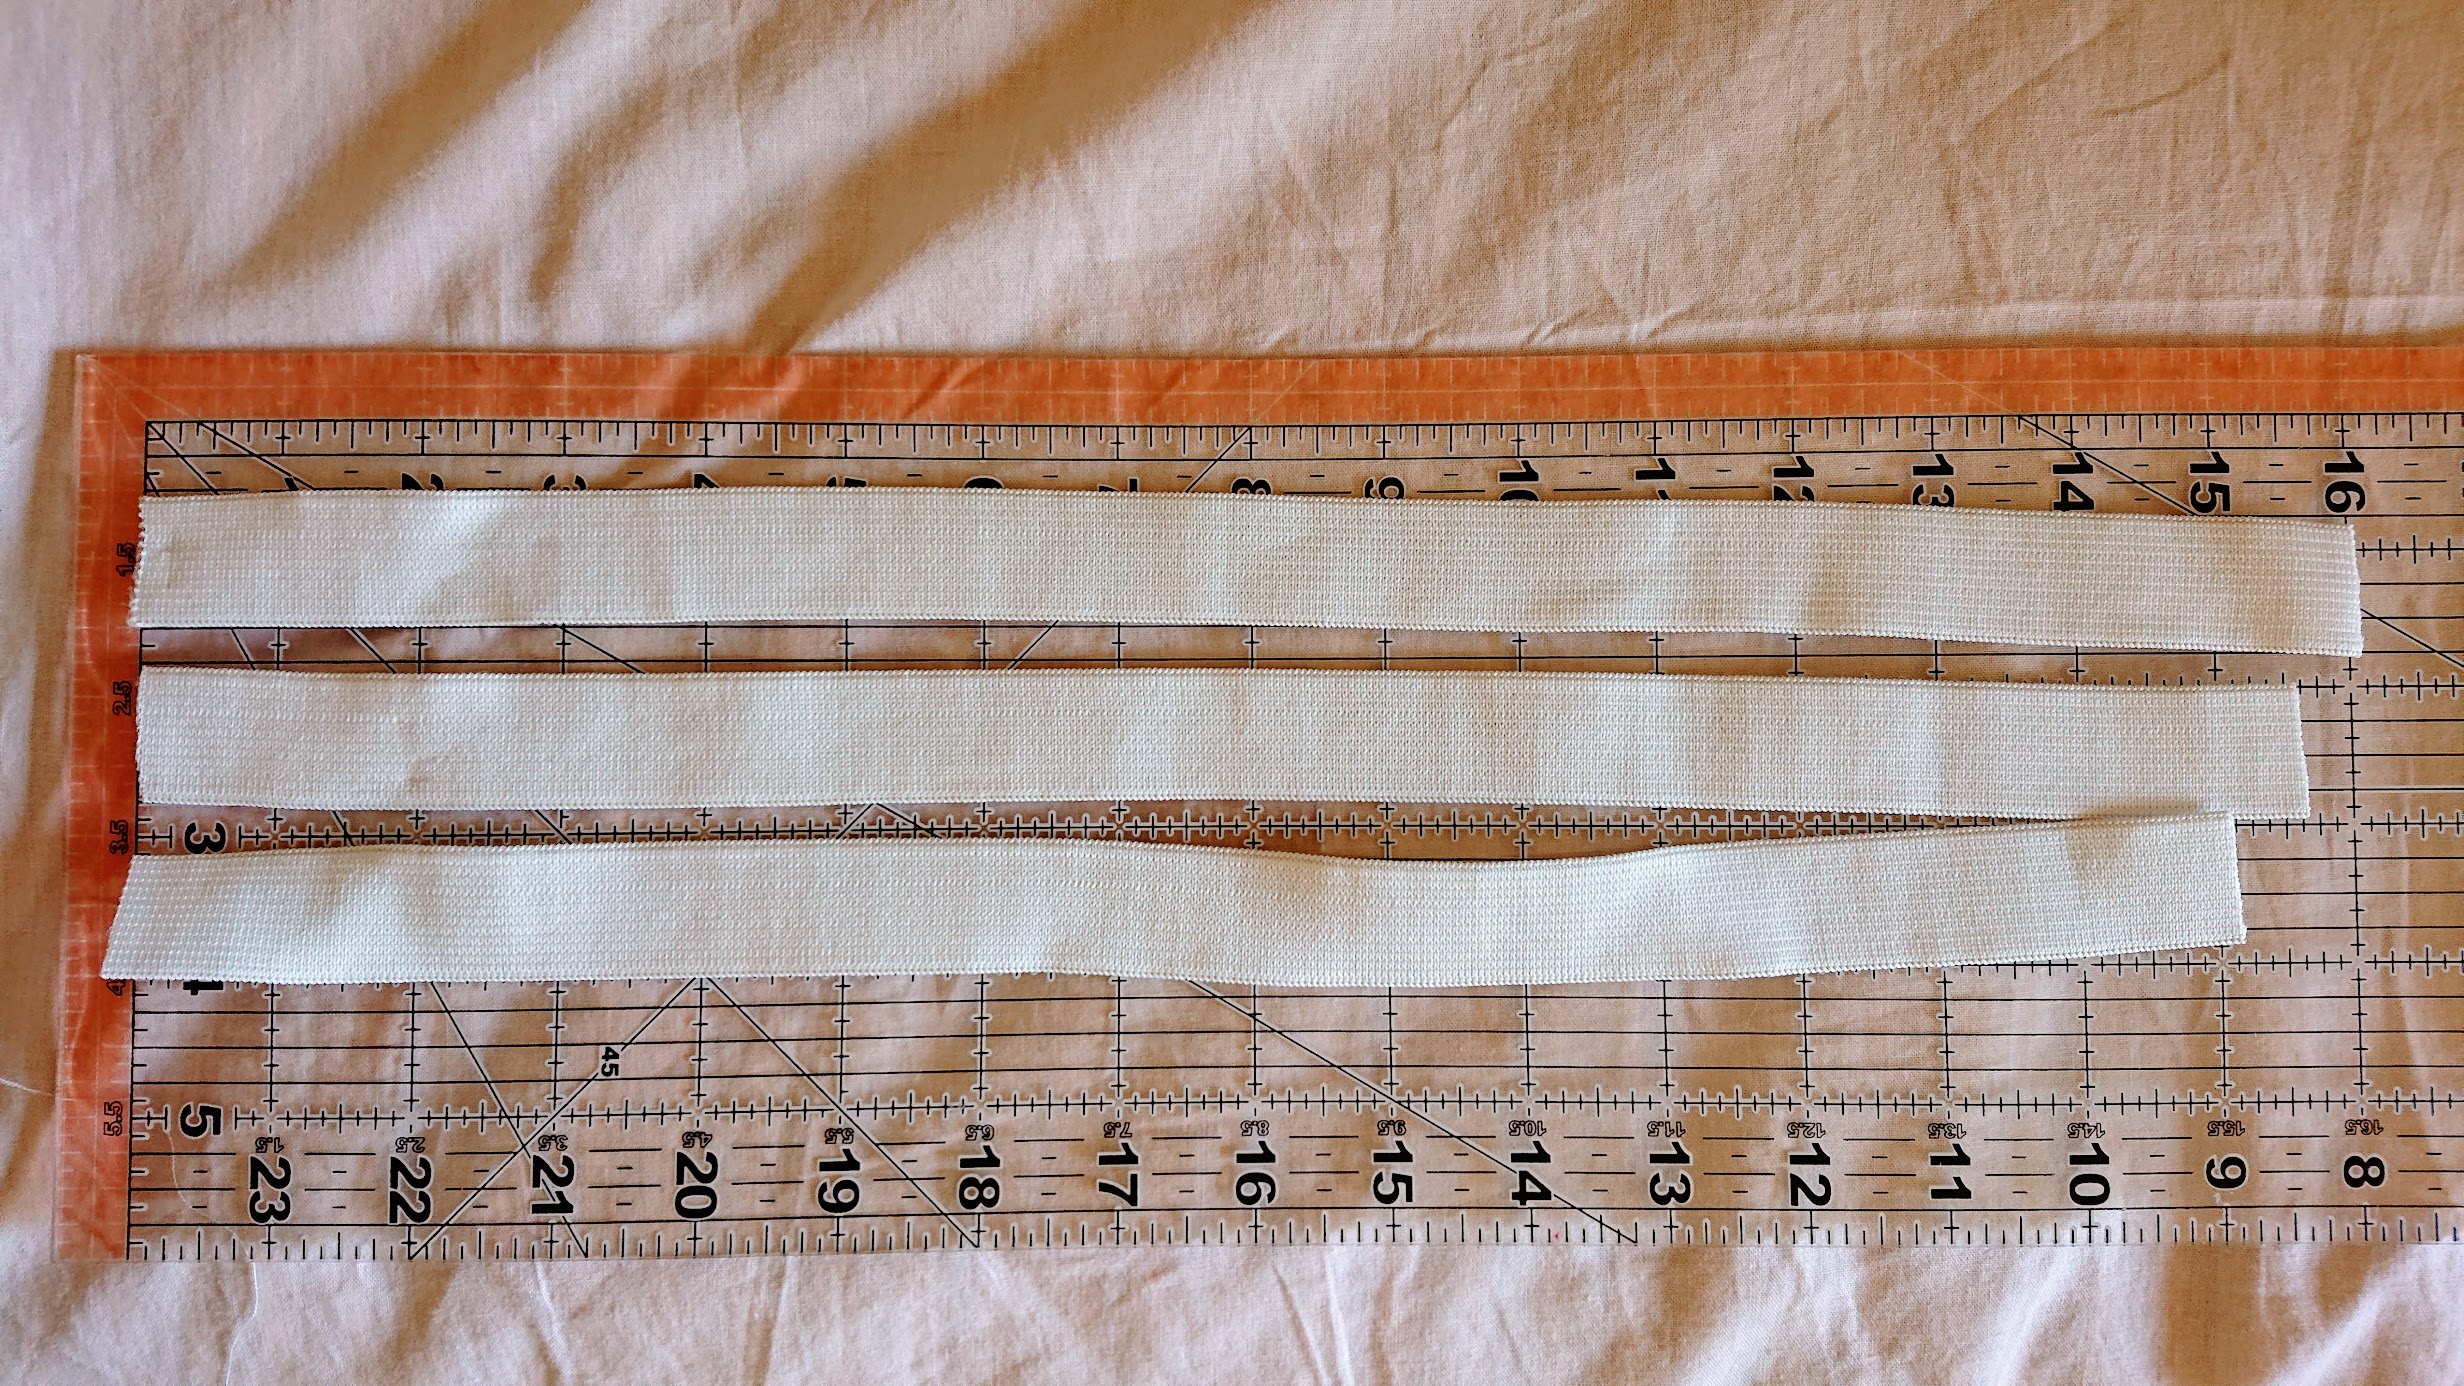
- One yard and a half of rescued 1″ wide elastics to insert in the back waist
- Weft interfacing for the front waist and pockets
- One yard of iron-on double-sided adhesive tape.
- Four pair of snap-on metal buttons
Tools:
My good friend Brother CS6000i sewing machine died a month before I started this project, so I used my industrial workhorse Juki DDL 5550 for sewing and Brother 1034DX for serging. Nothing fancy for needles and threads or sewing notions.
Process Overview
1. Dyeing the curtain pieces
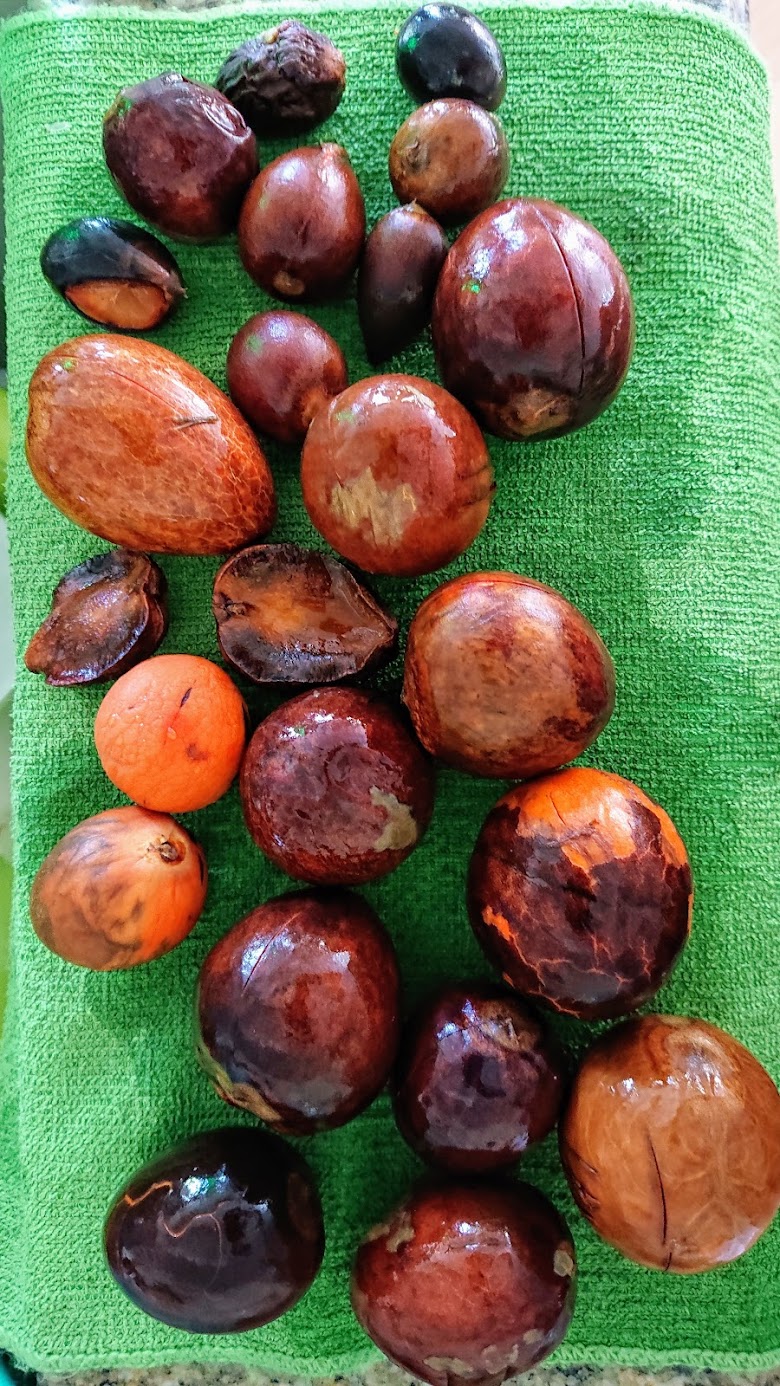
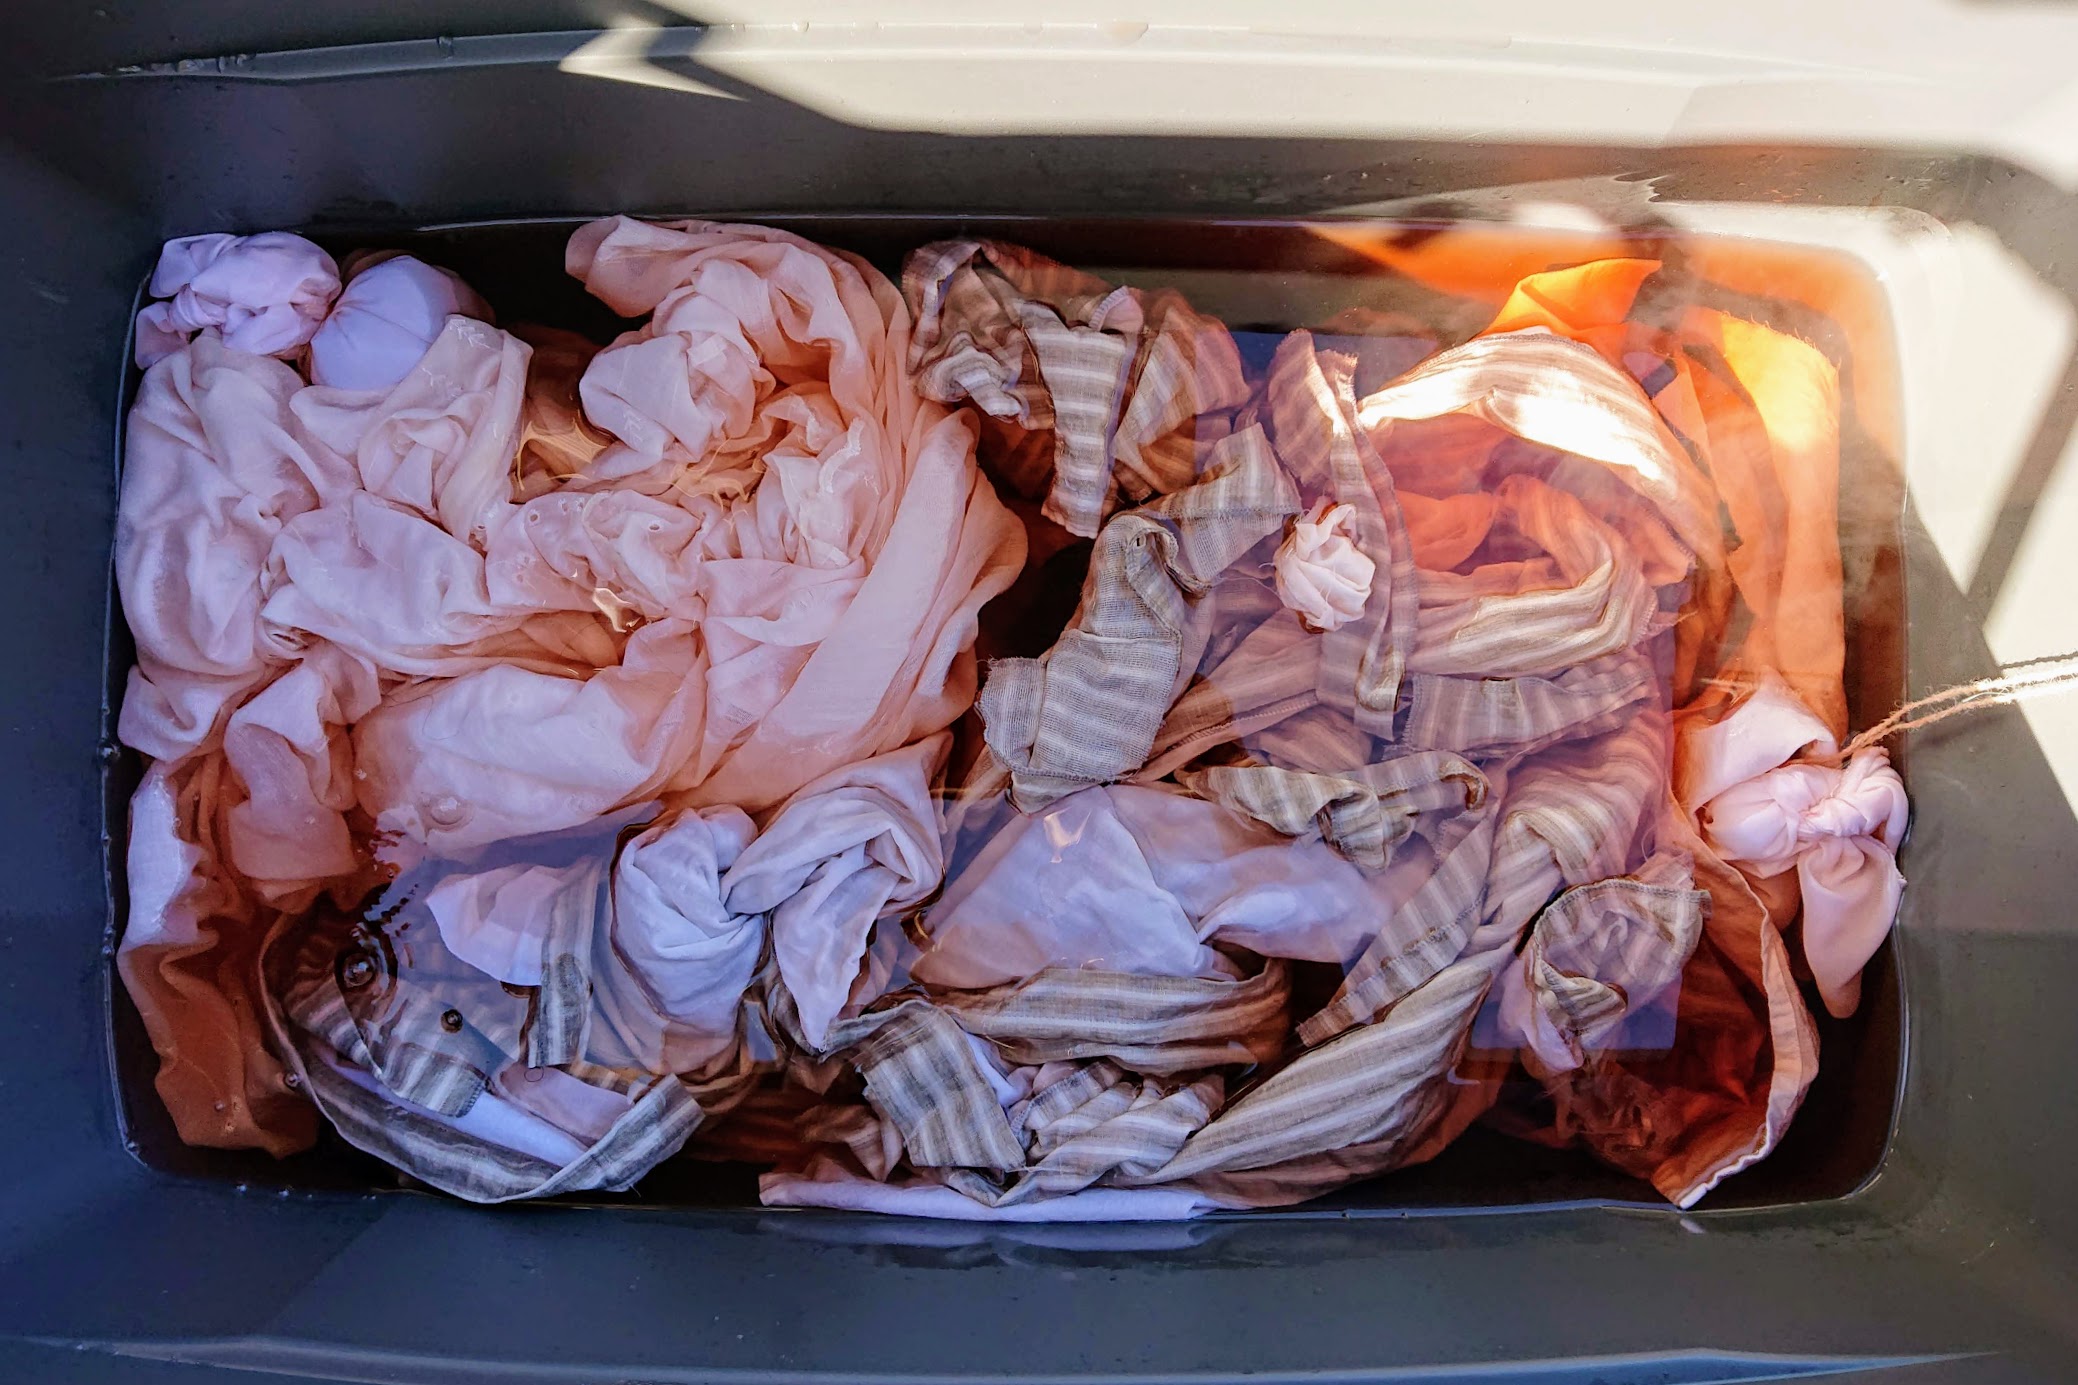
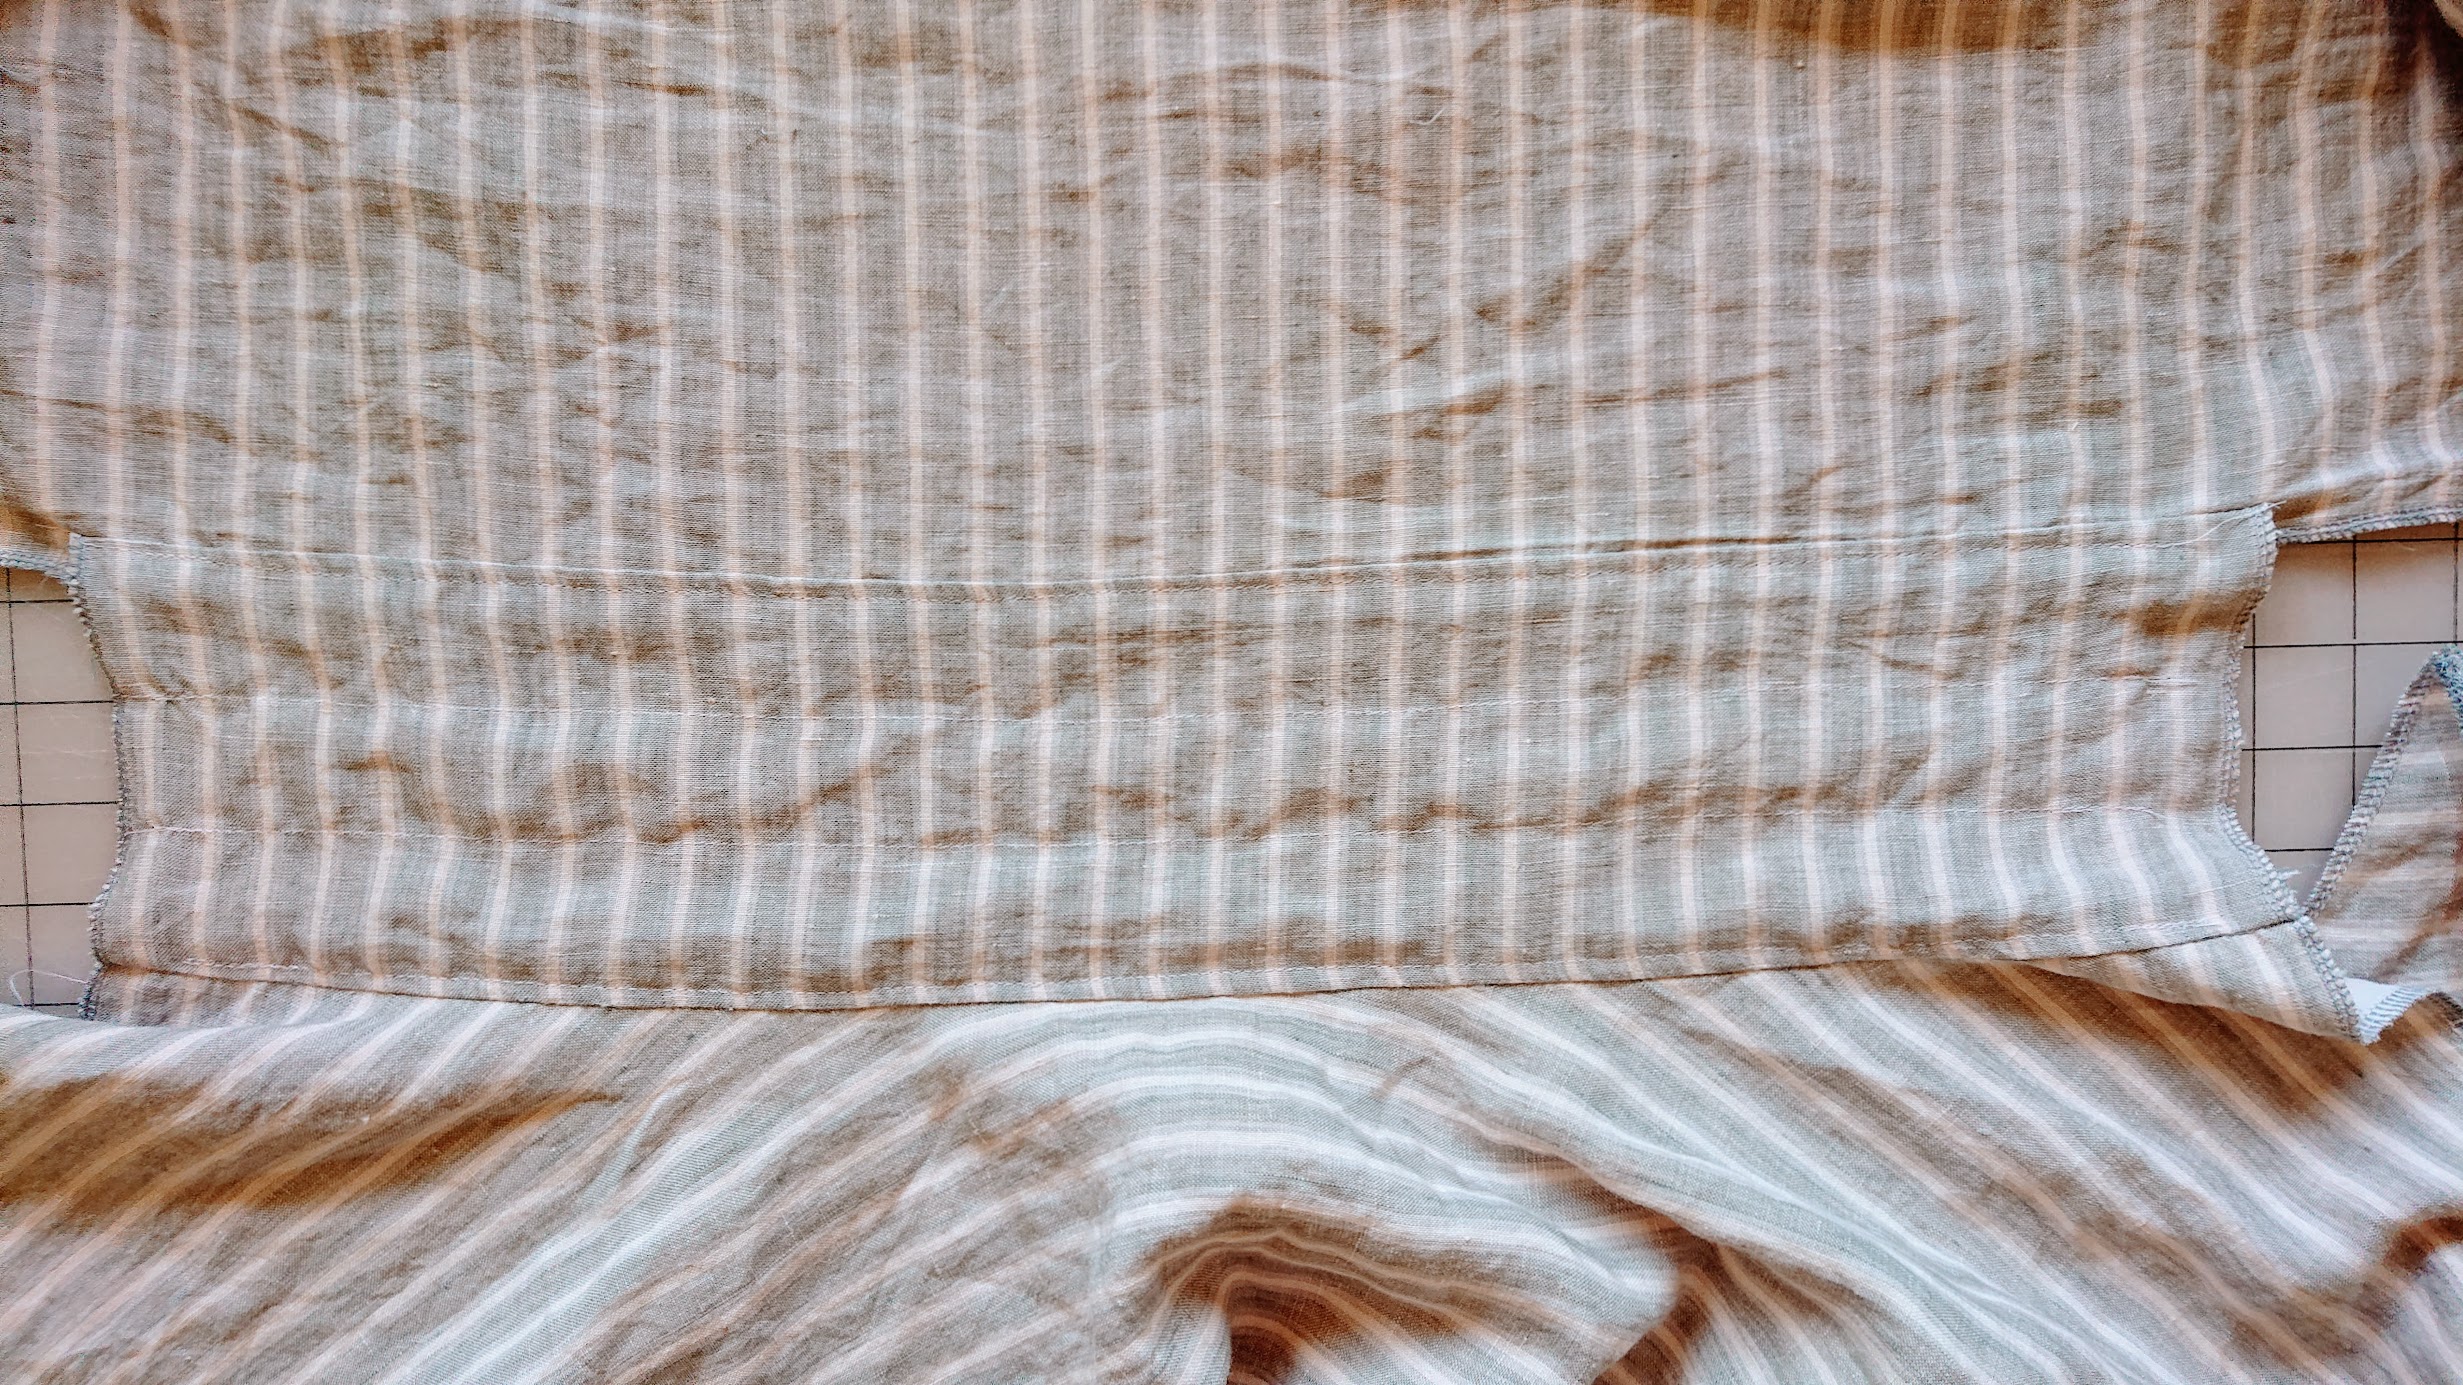
After I finished cutting and serging the curtain into pattern pieces, it’s time to dye them. The linen curtains were colored nicely already – heathered gray stripes on off white base, but I wanted to “blur” the stripes a little bit, make them even gentler. Reading about natural dyeing using avocado pits made me very curious, so I started asking the local community for them. Within a week, I got 23 avocado pits to use from 6 neighbors!
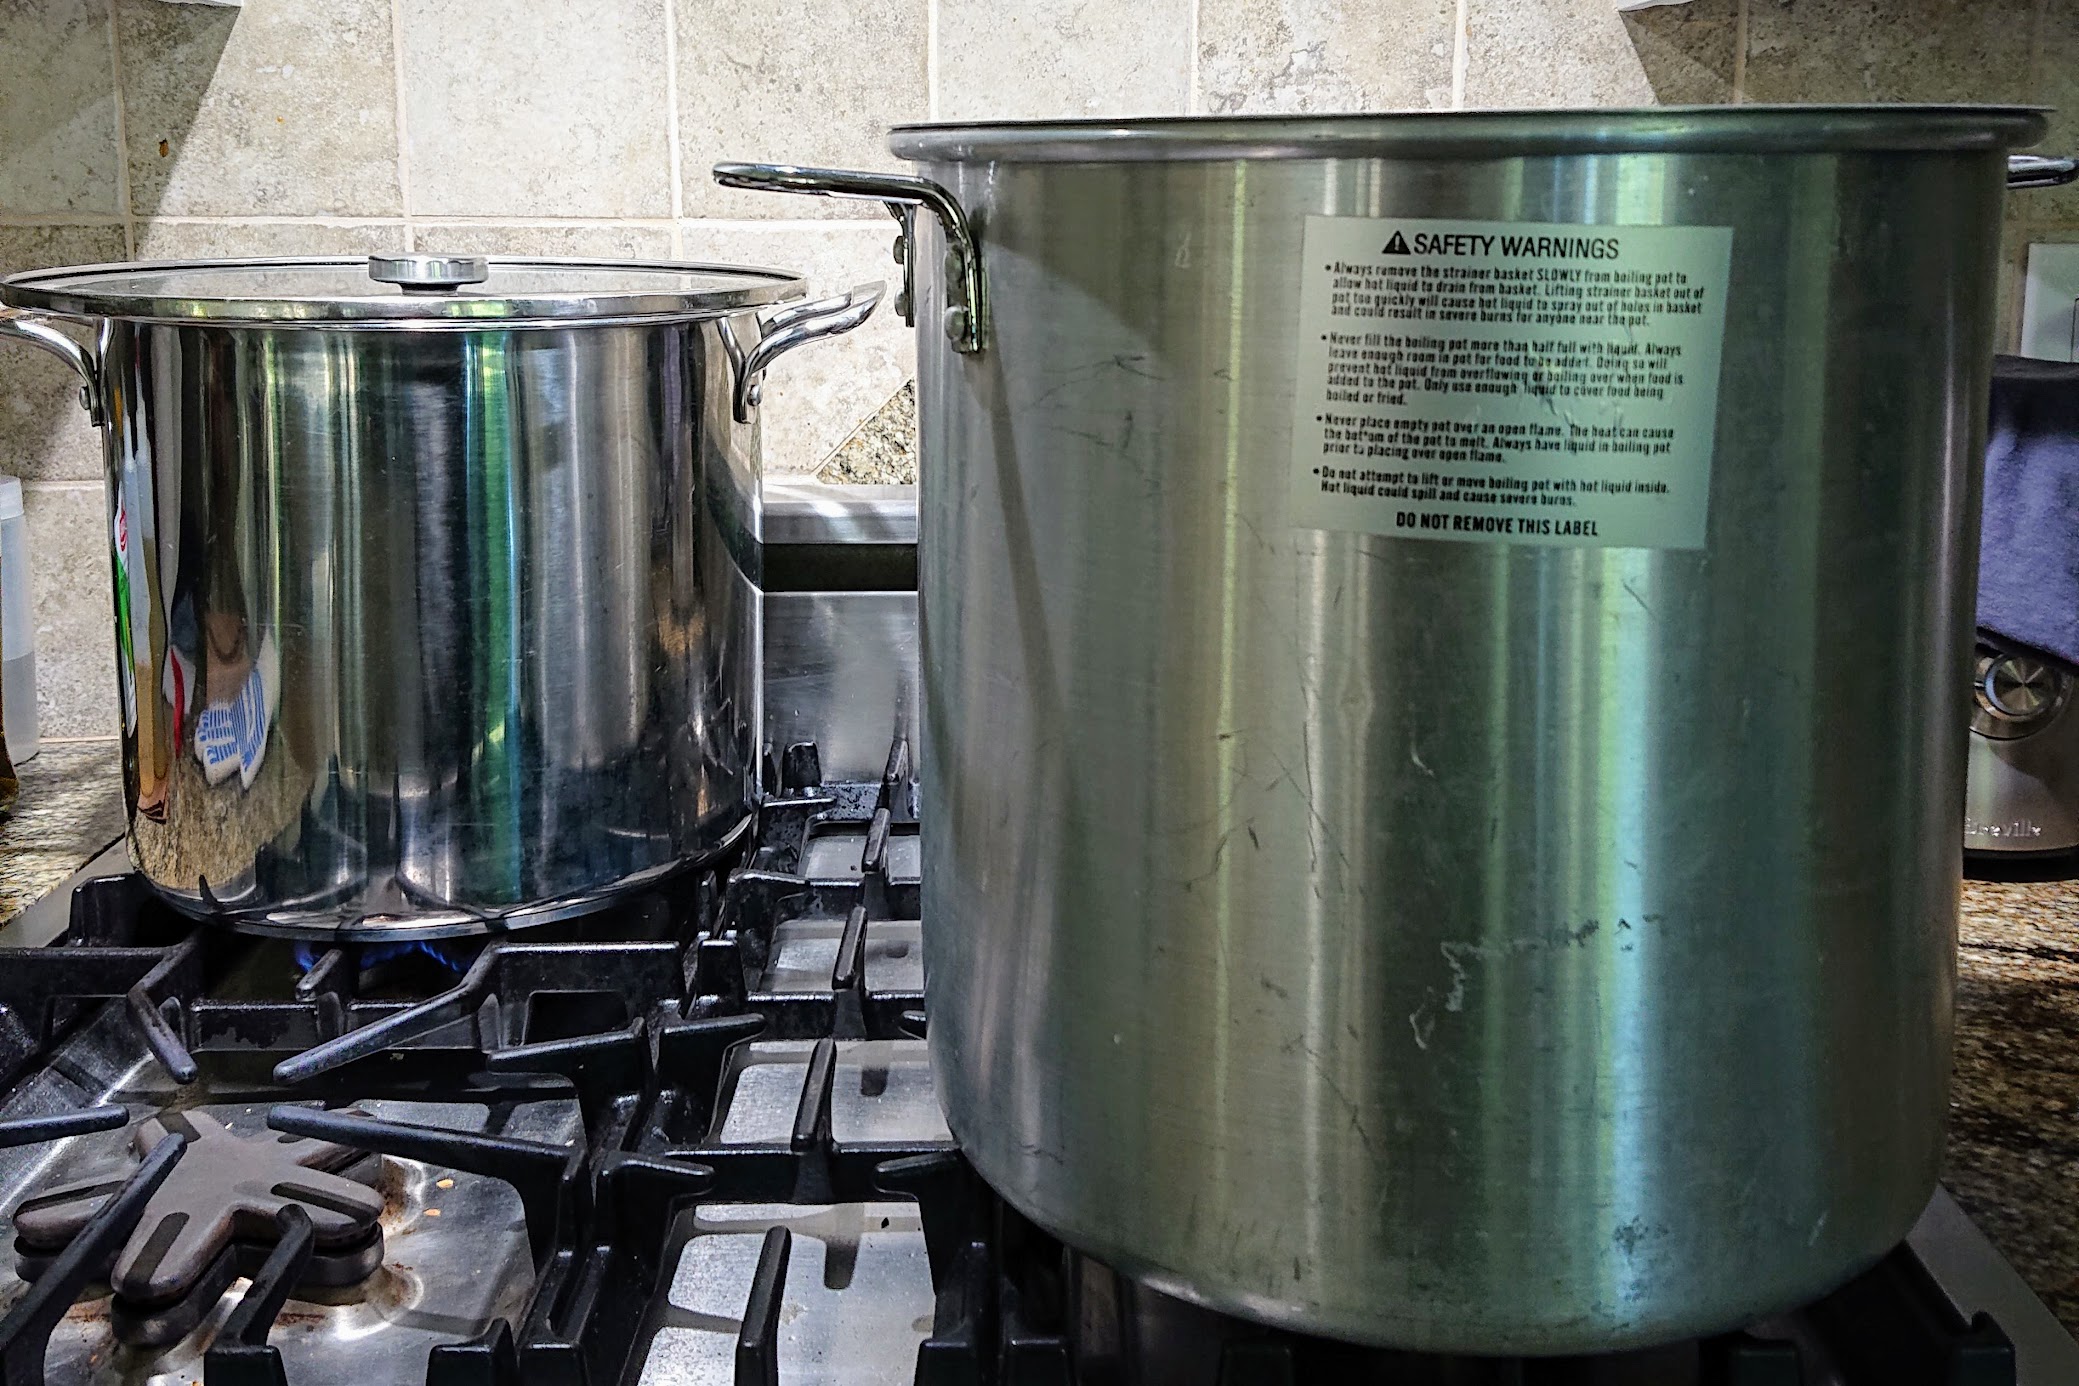
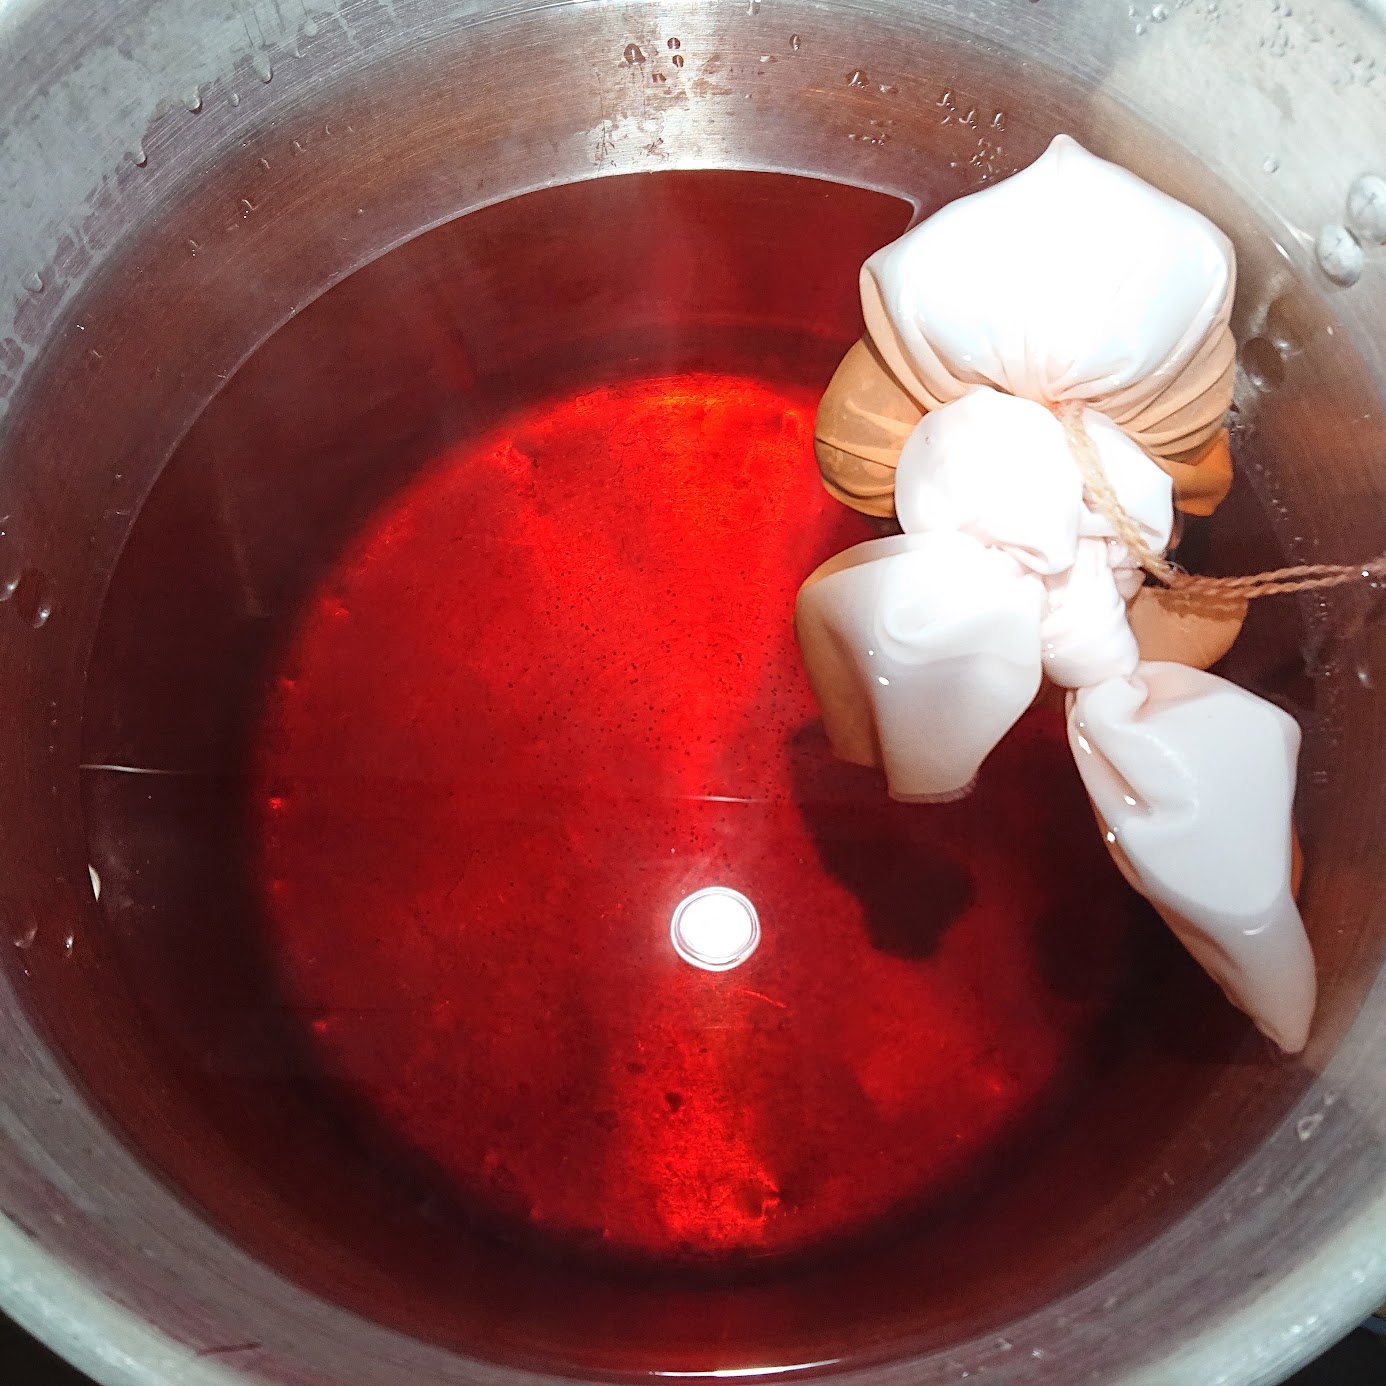
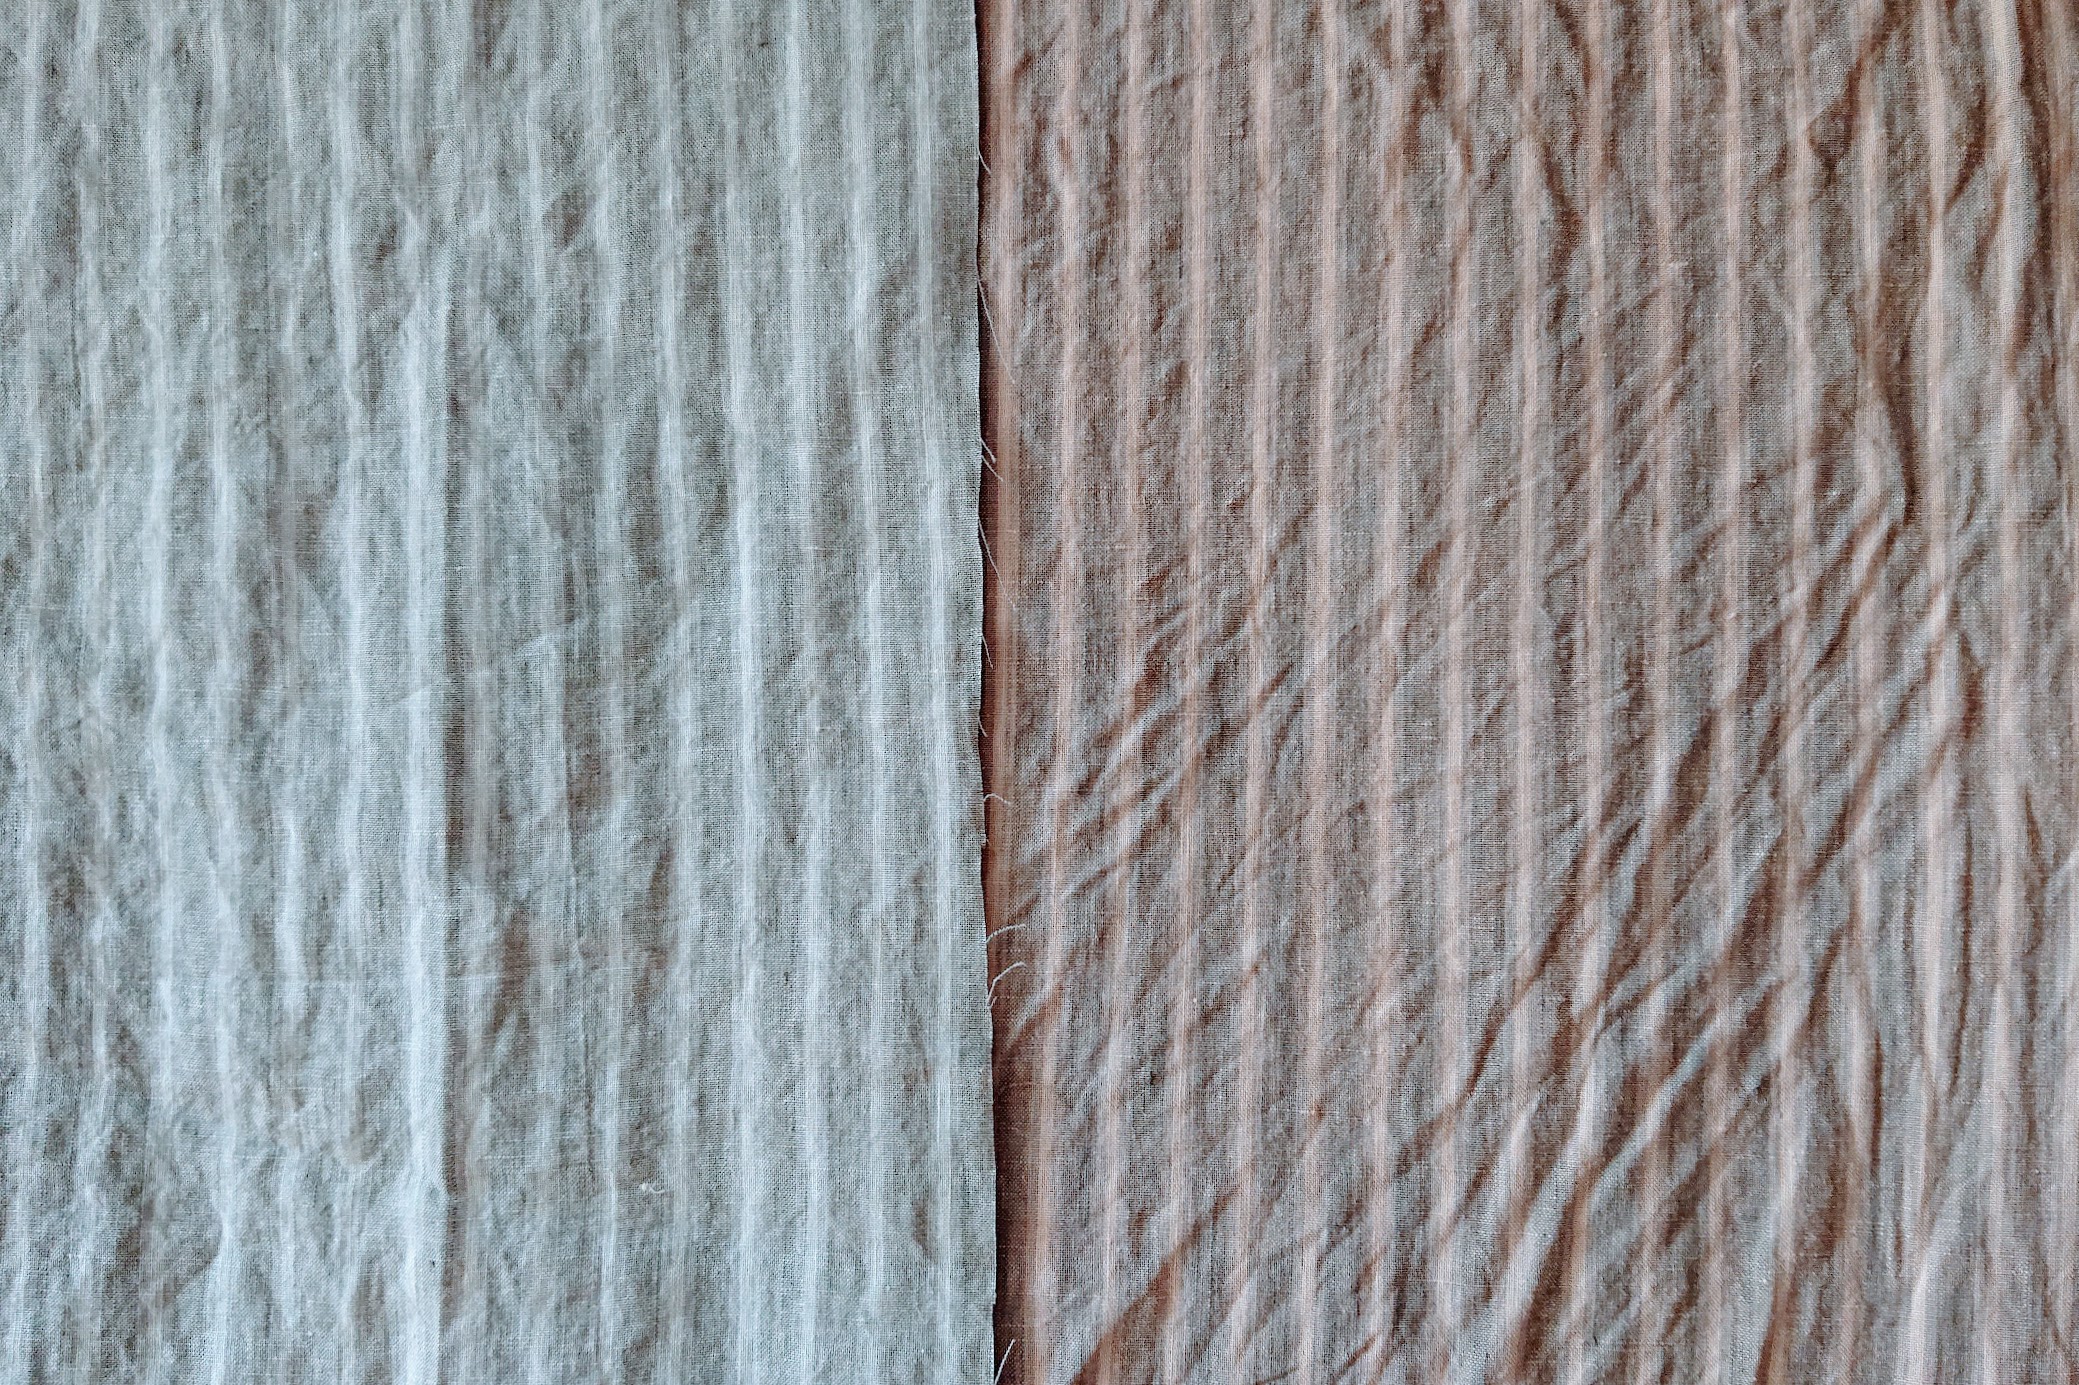
The natural dyeing process was a little tedious yet worth it. The avocado dye bath smells great for a couple of days, and it keeps working even after I take them away from the stove. Since my fabric pieces were large, I had to make the dye bath separately and poured them in a large Sterilite plastic container where the fabrics were in. I kept the fabrics for about 17 hours before I rinsed and dried them. The pinkish fabric result is gorgeous and it’s just what I’m looking for. The stripes are still there with much less definition. SUCCESS!

2. Making the top (neckline and sleeves)
There are three main parts of this dress: the top which takes care of neckline opening and sleeves, the waistline, and the rectangular skirt. The top is the one sampled directly from the Instant Dress pattern, and it’s quite straightforward.
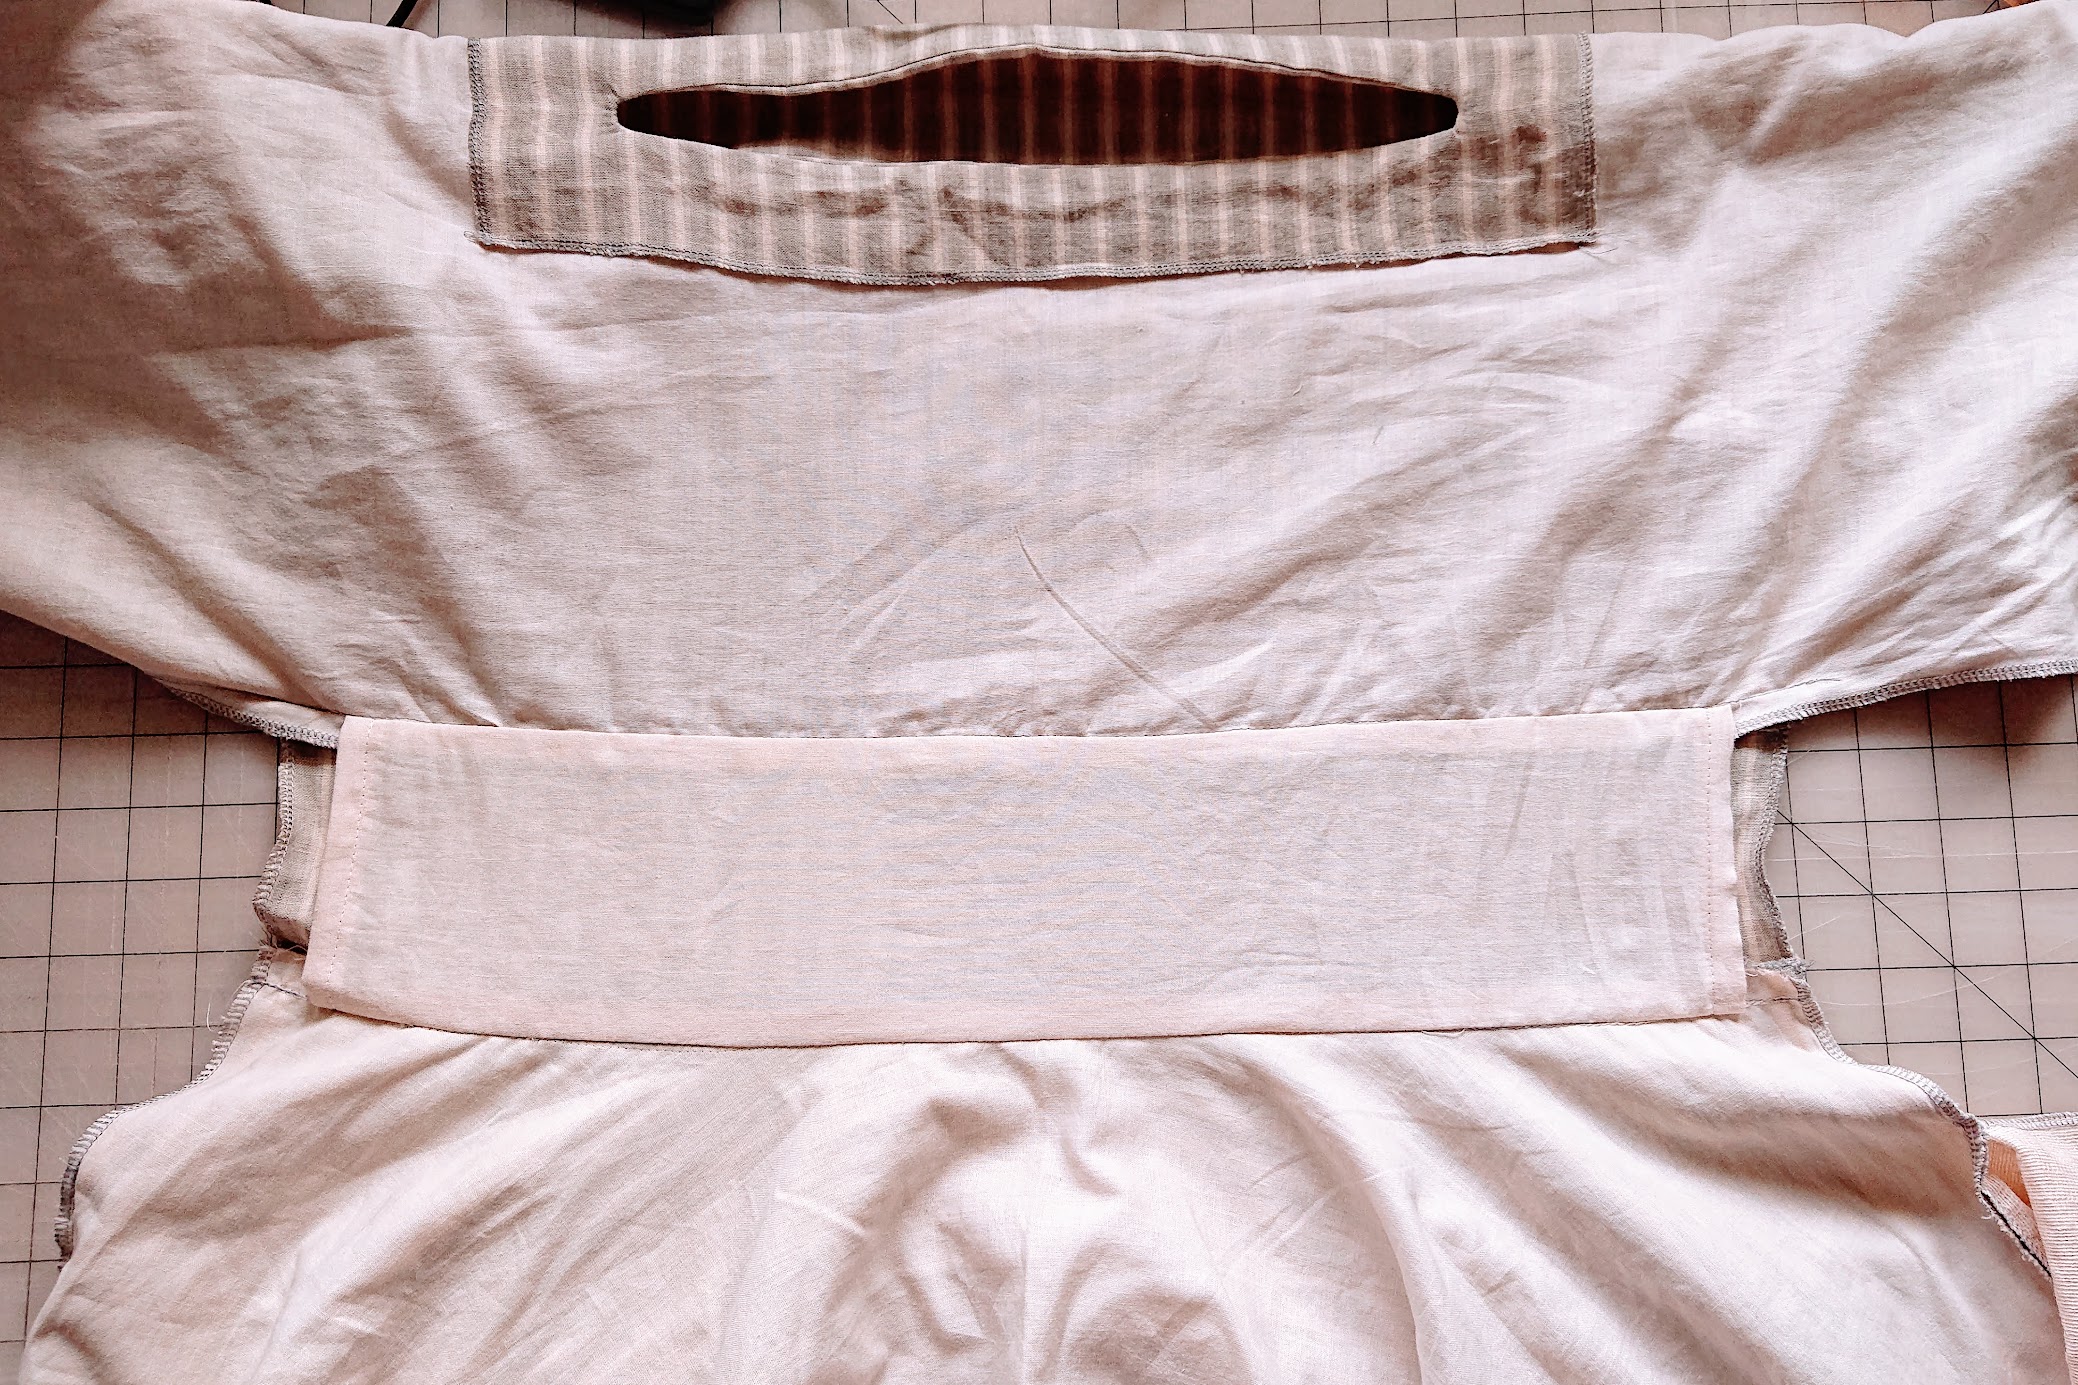
The neckline is a 12 in. straight lengthwise opening on the center of the top. It’s reinforced with a rectangular piece of fabric that’s flipped to the inside and glued on using iron on double sided adhesive tape.
3. Making skirt pieces
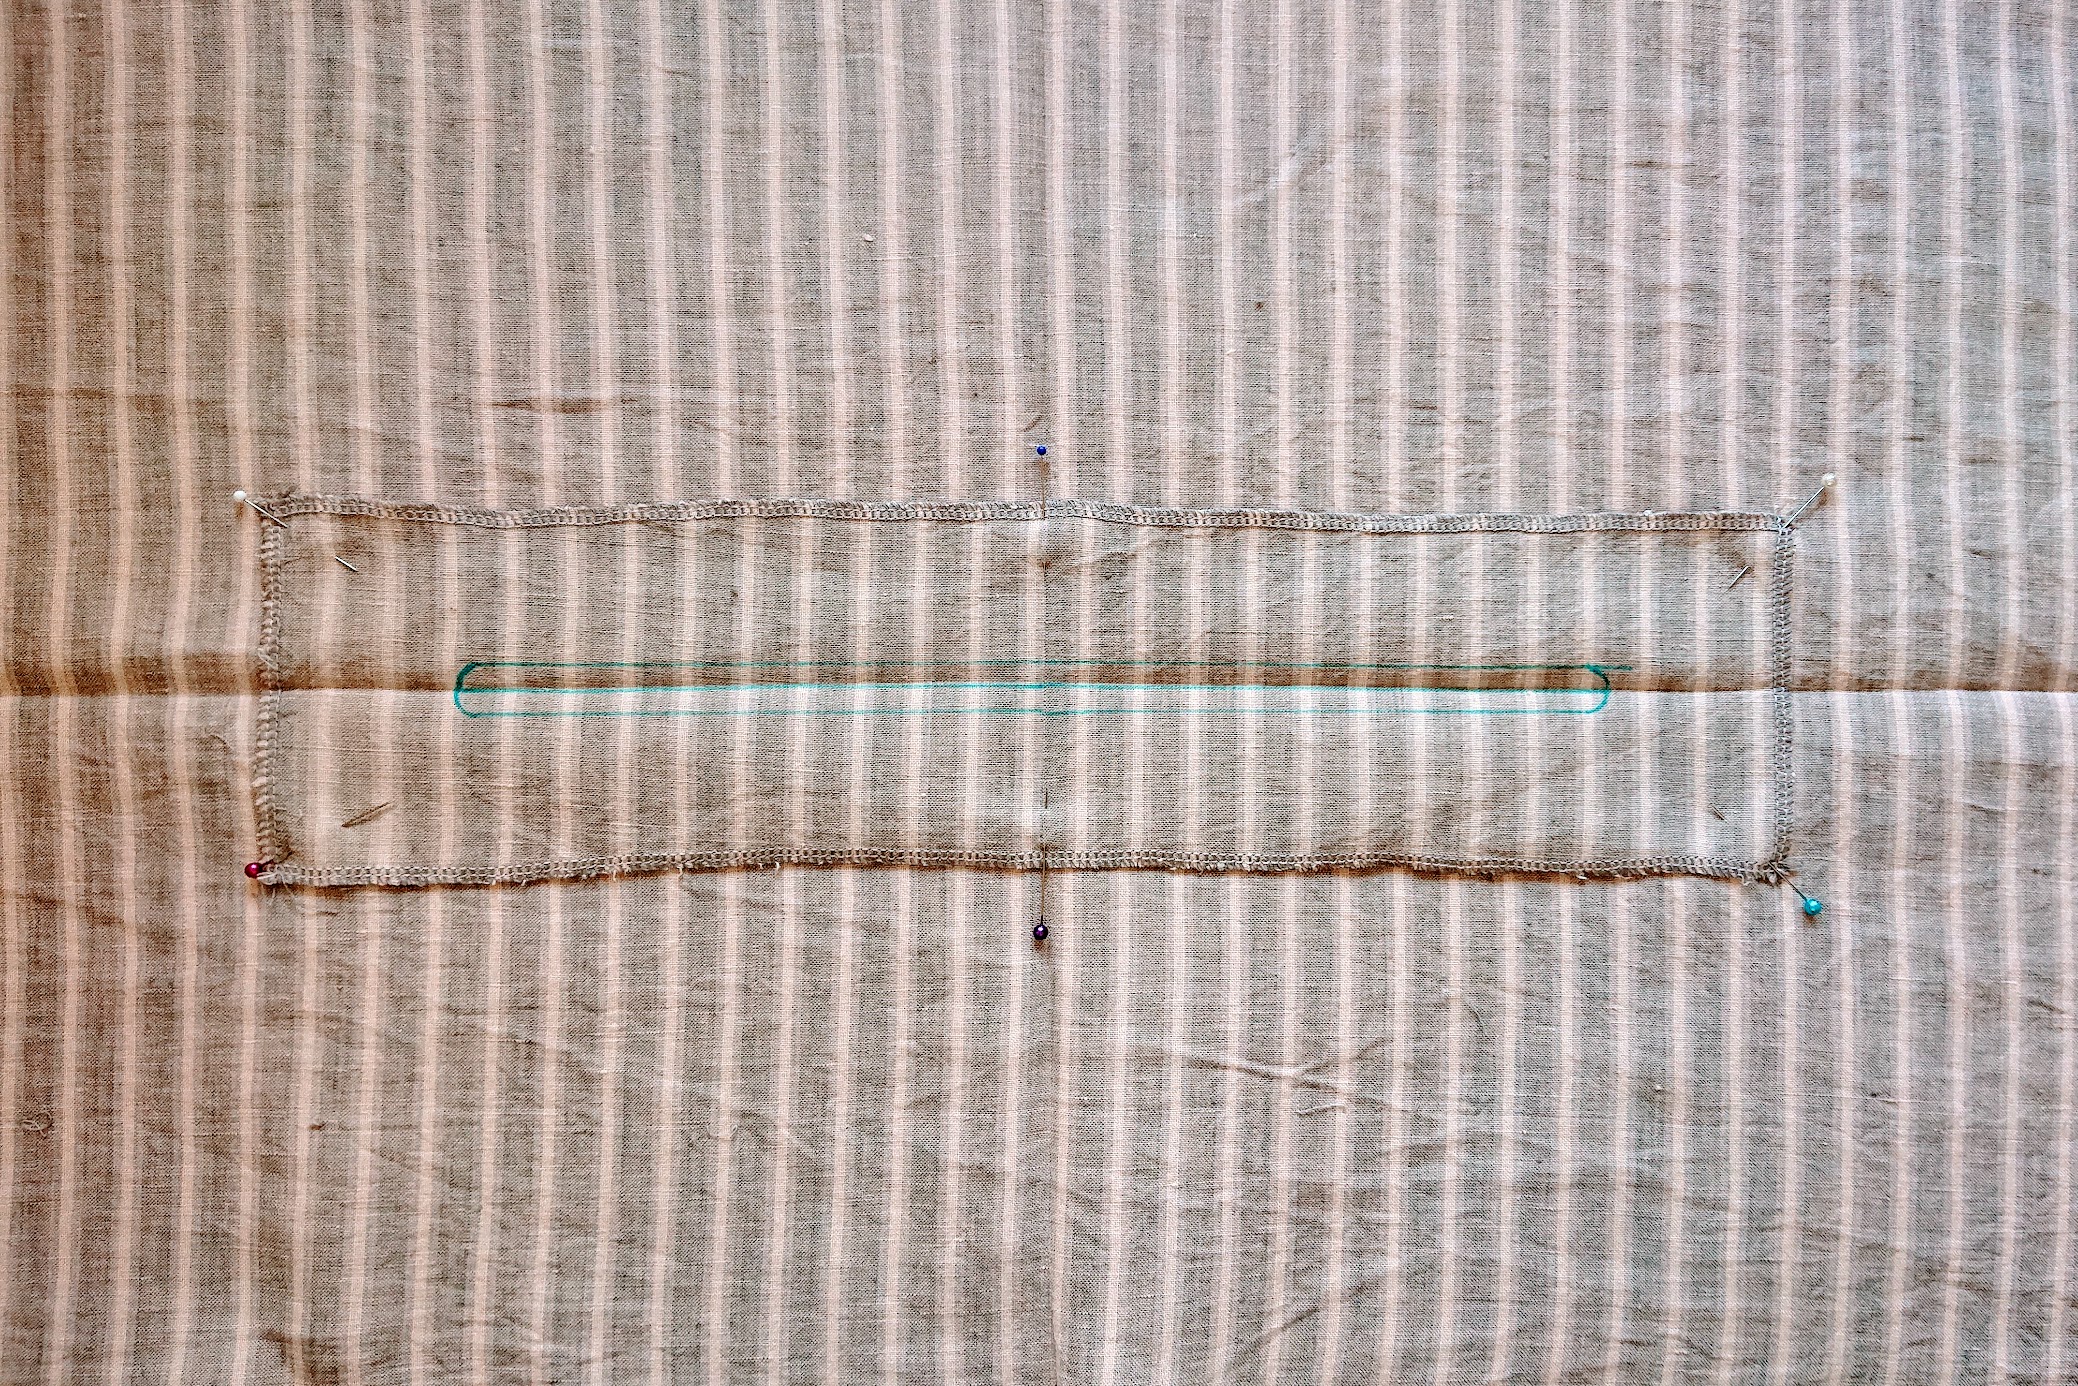
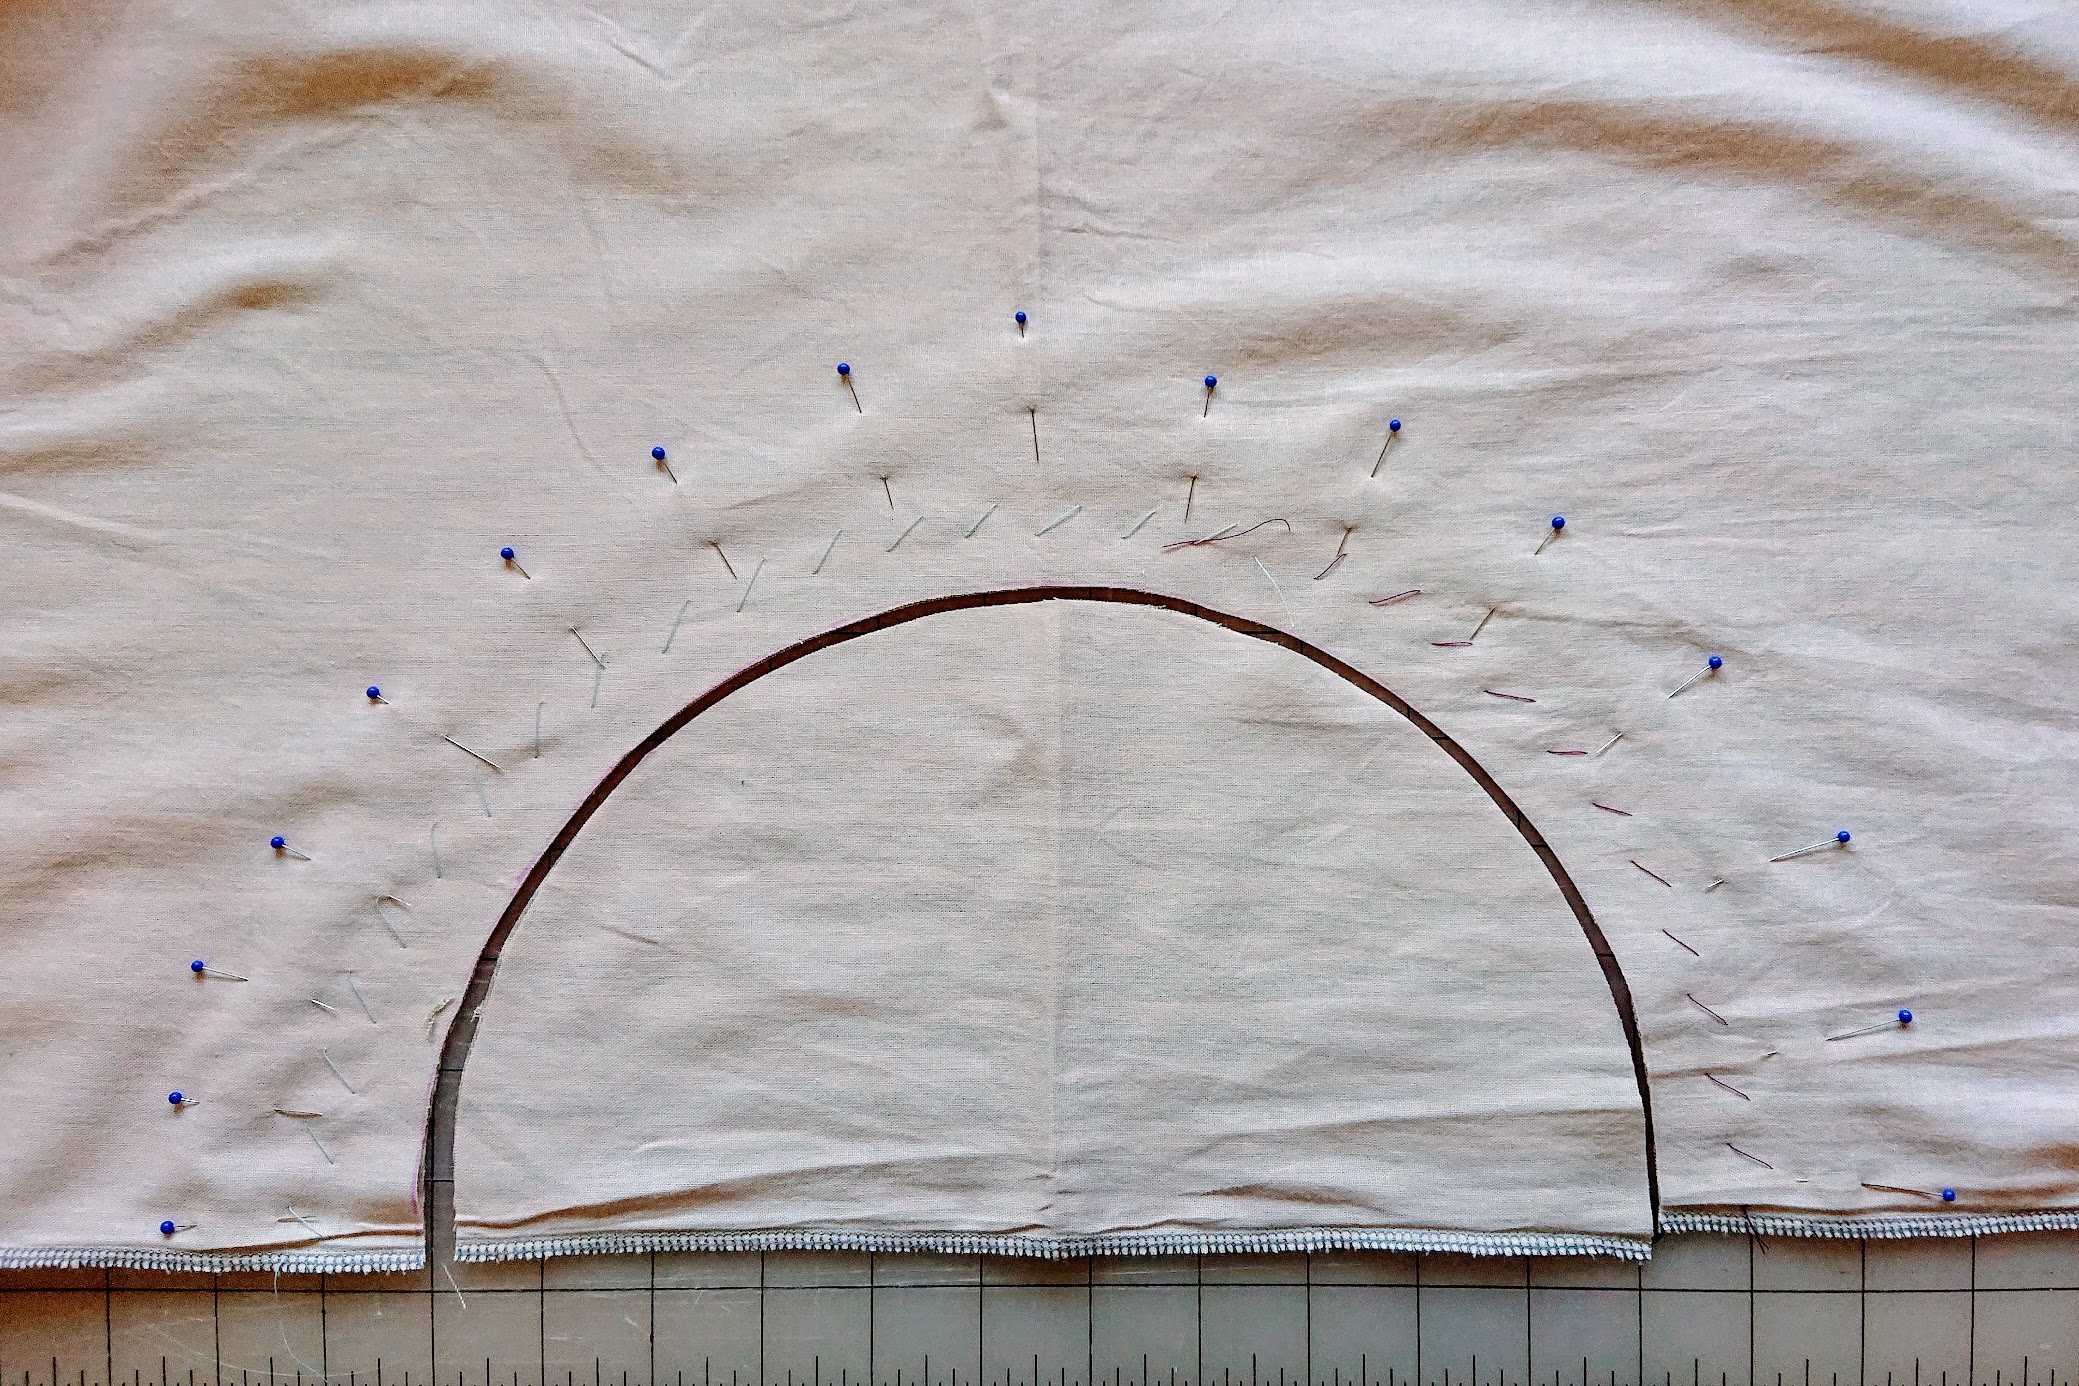
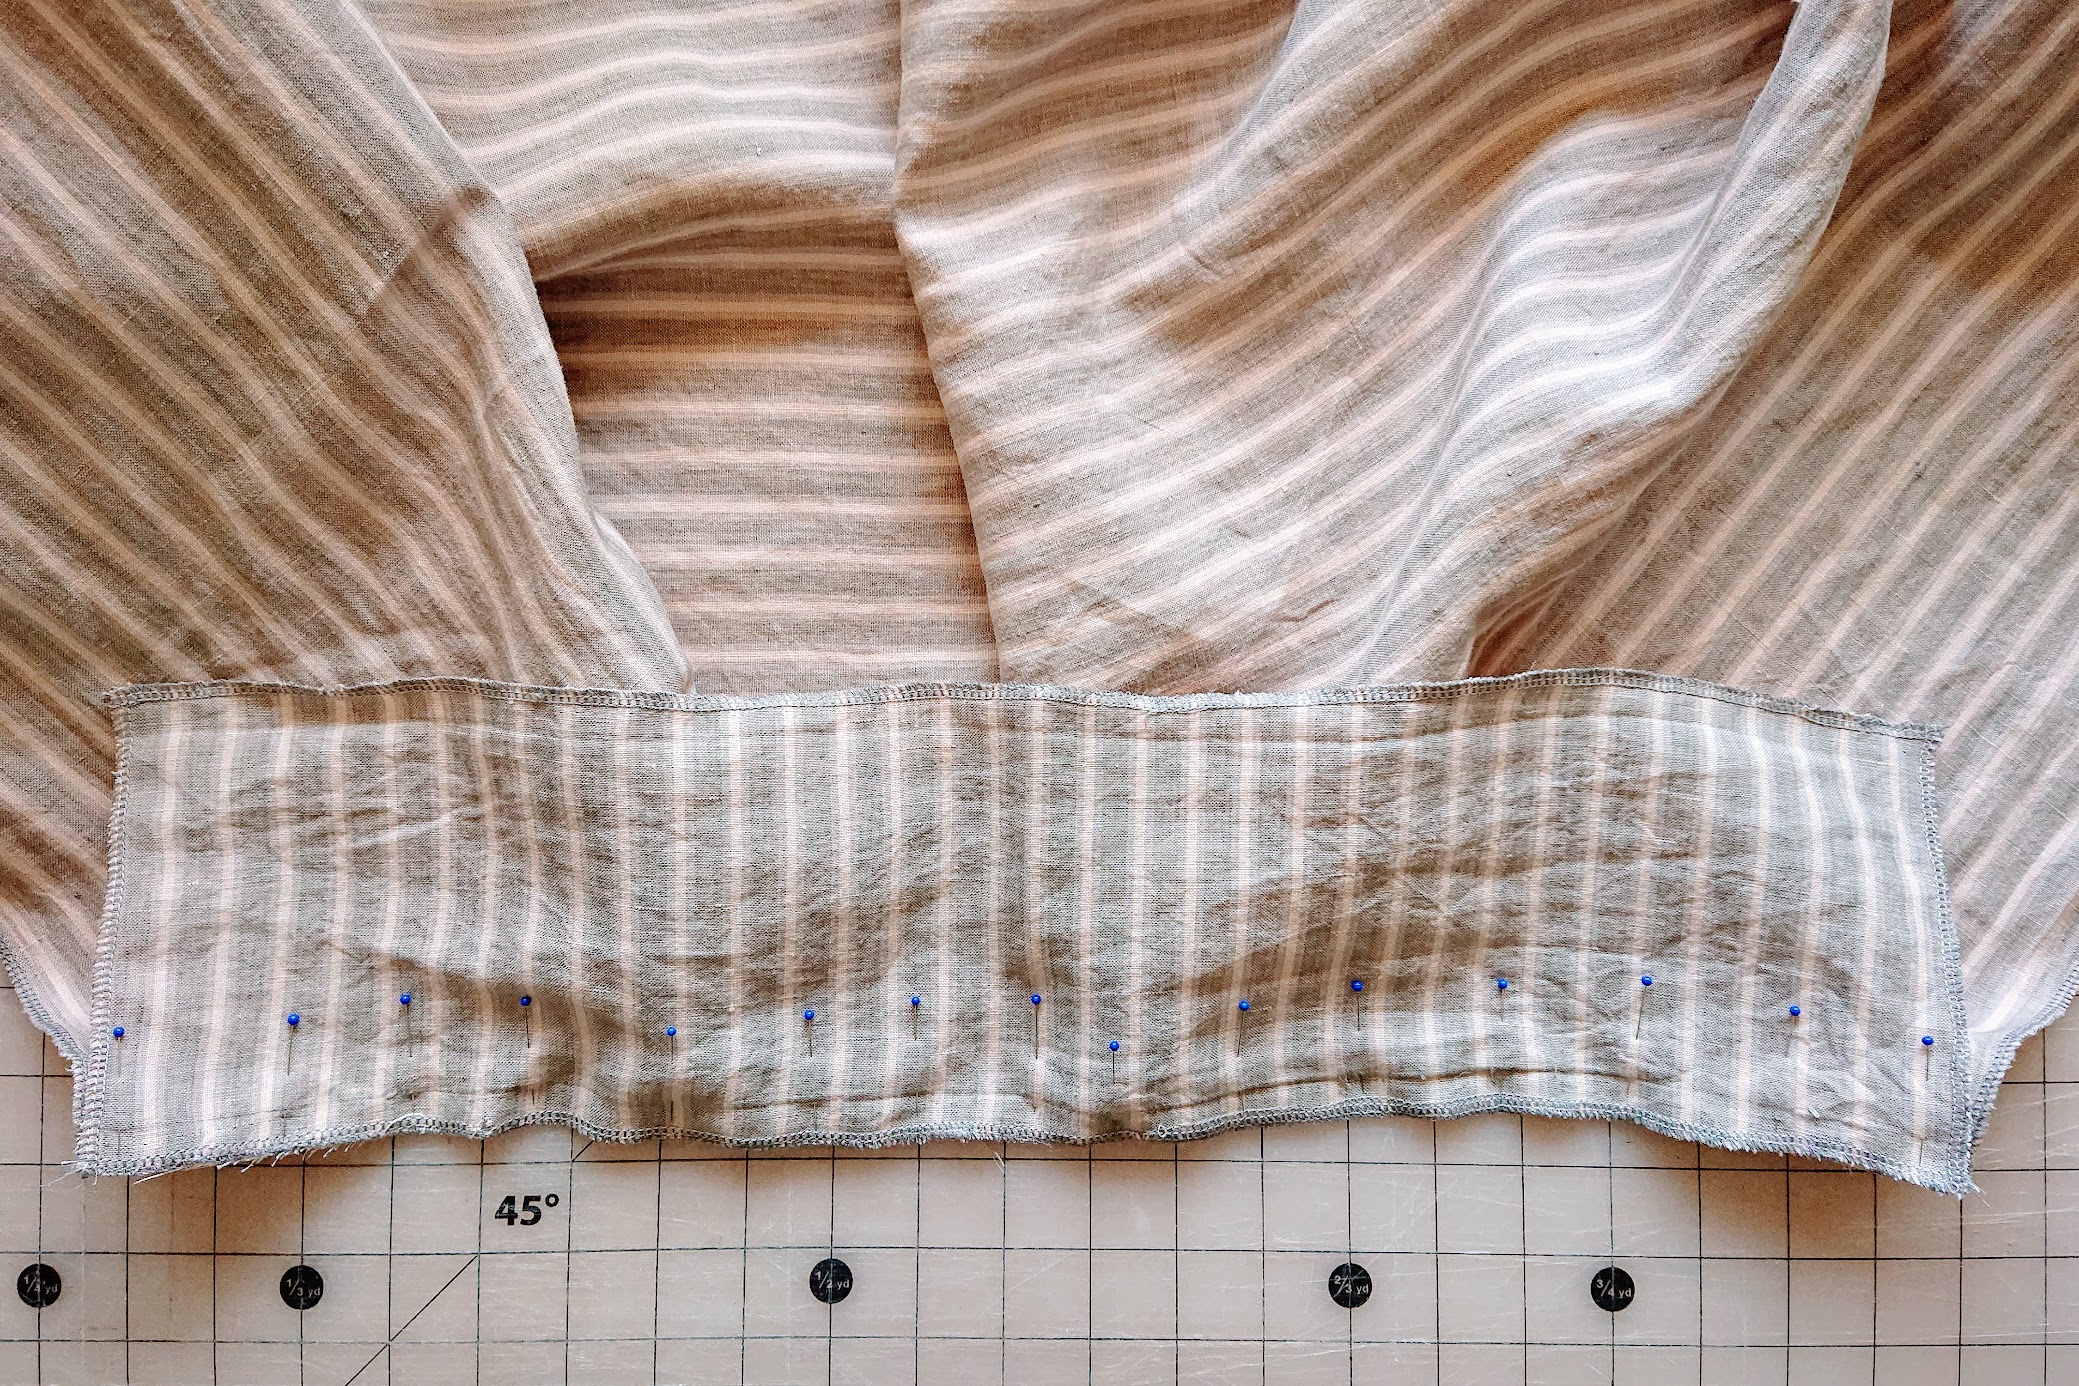
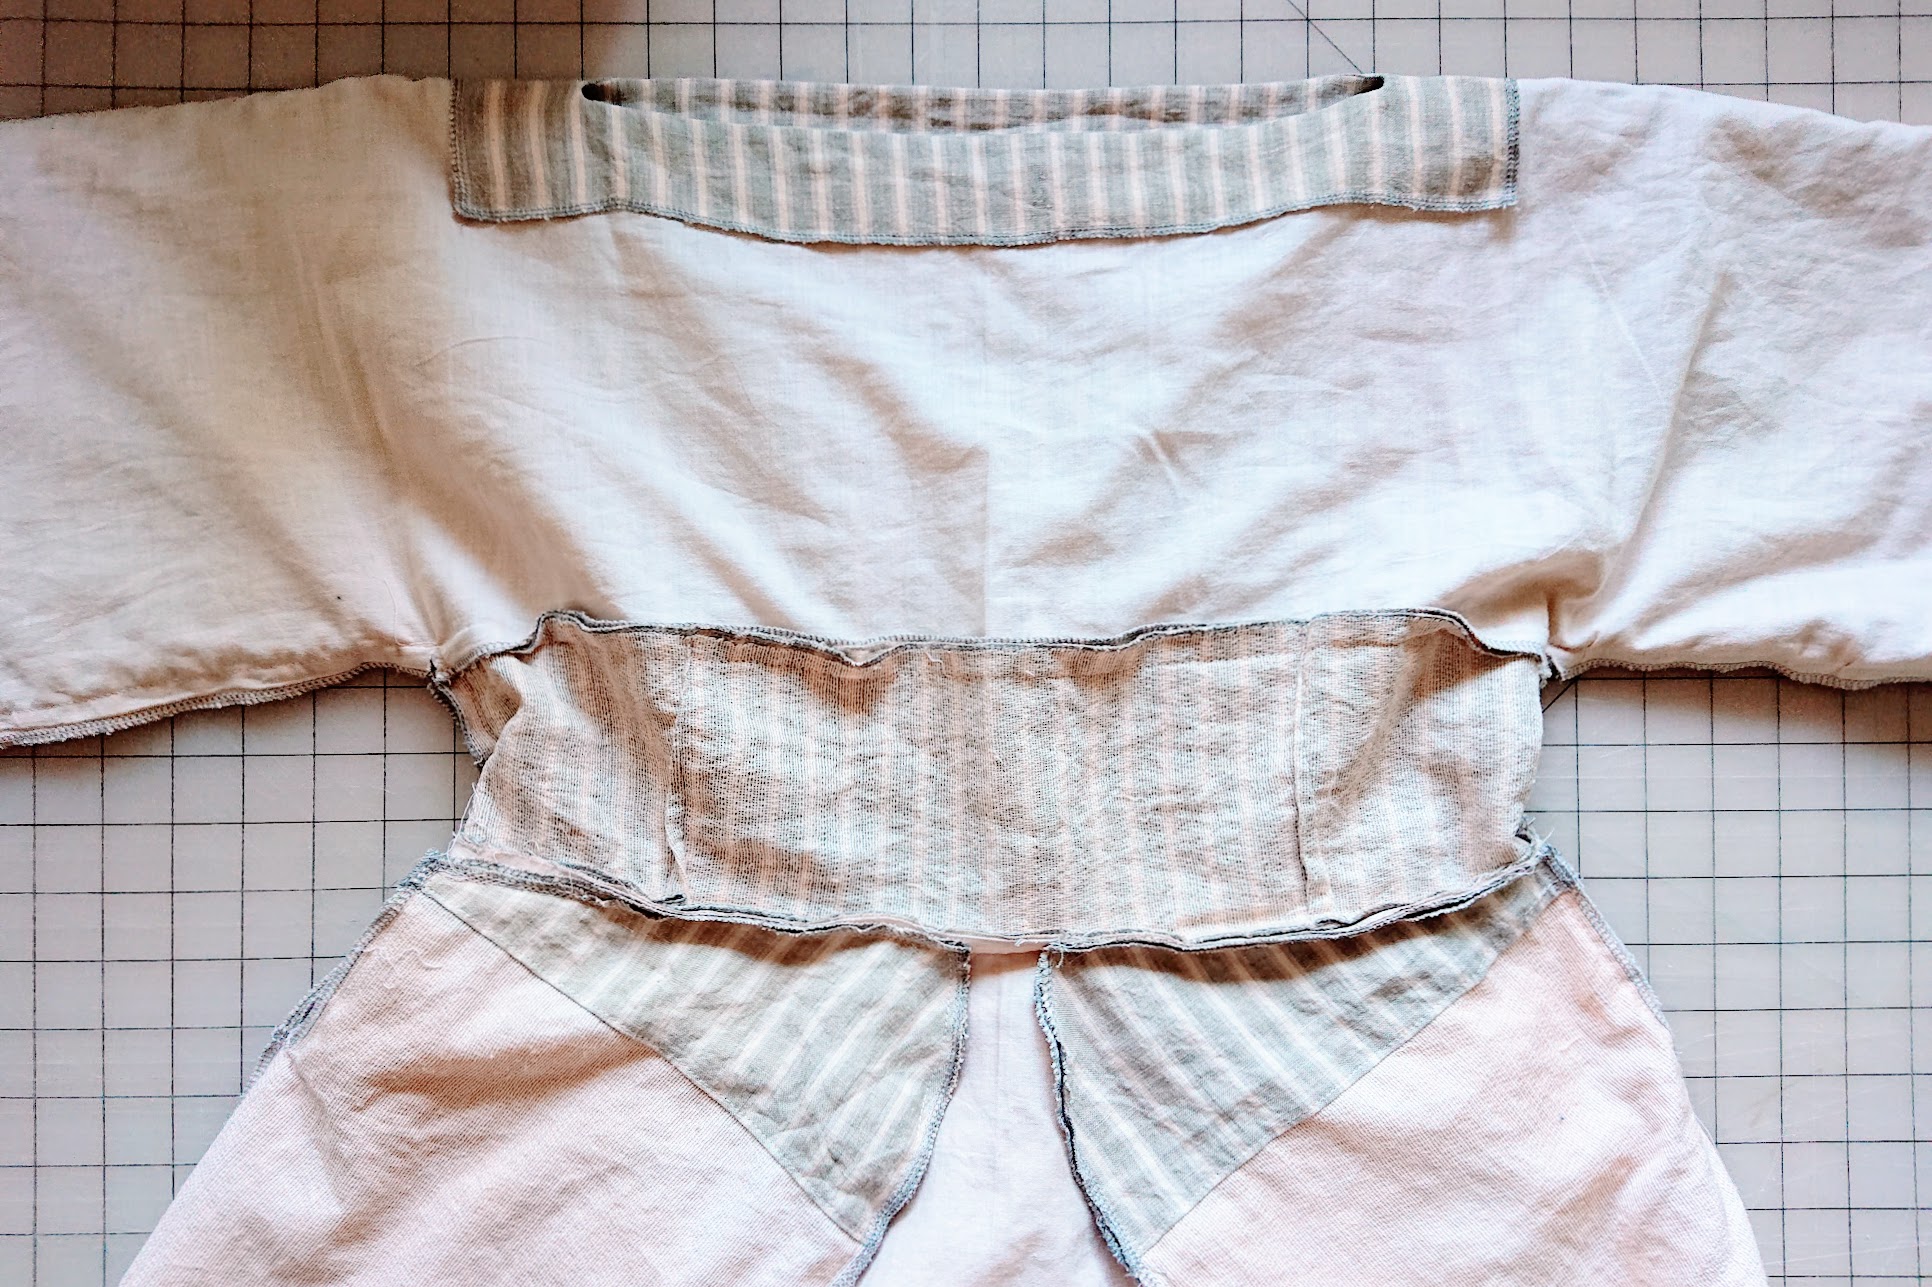
The skirt is made from two large rectangular fabrics, each with half circle openings. The front opening is made with radius of 5.75″ and the back part’s radius is 6.375″. The idea is to have an opening that fits 18″ of waistline on the front, and 20″ on the back. I made temporary hand stitches first to stabilize the skirt fabric before making half circle cuts.
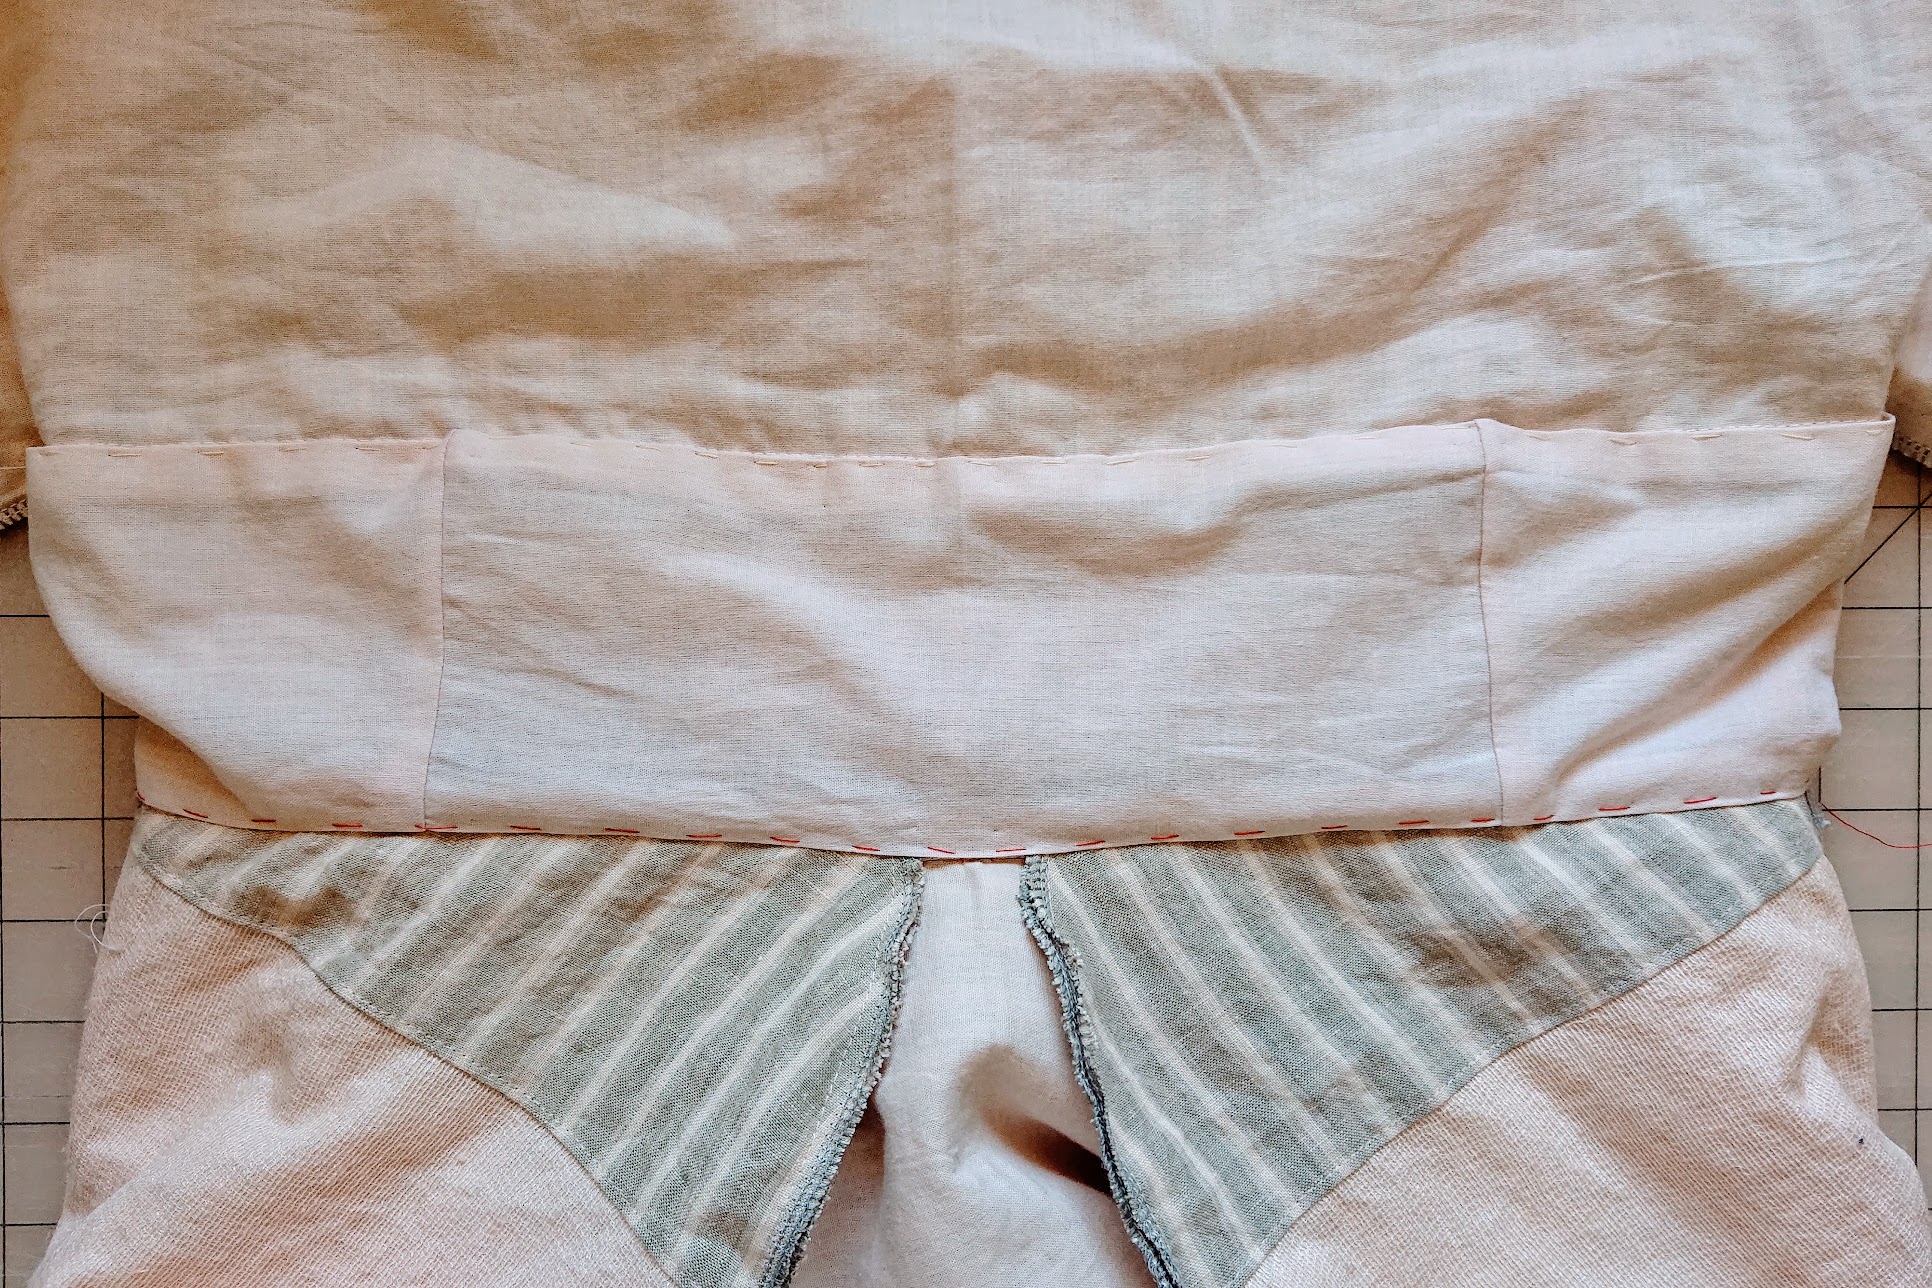
4. Making the waist parts + attaching skirt pieces
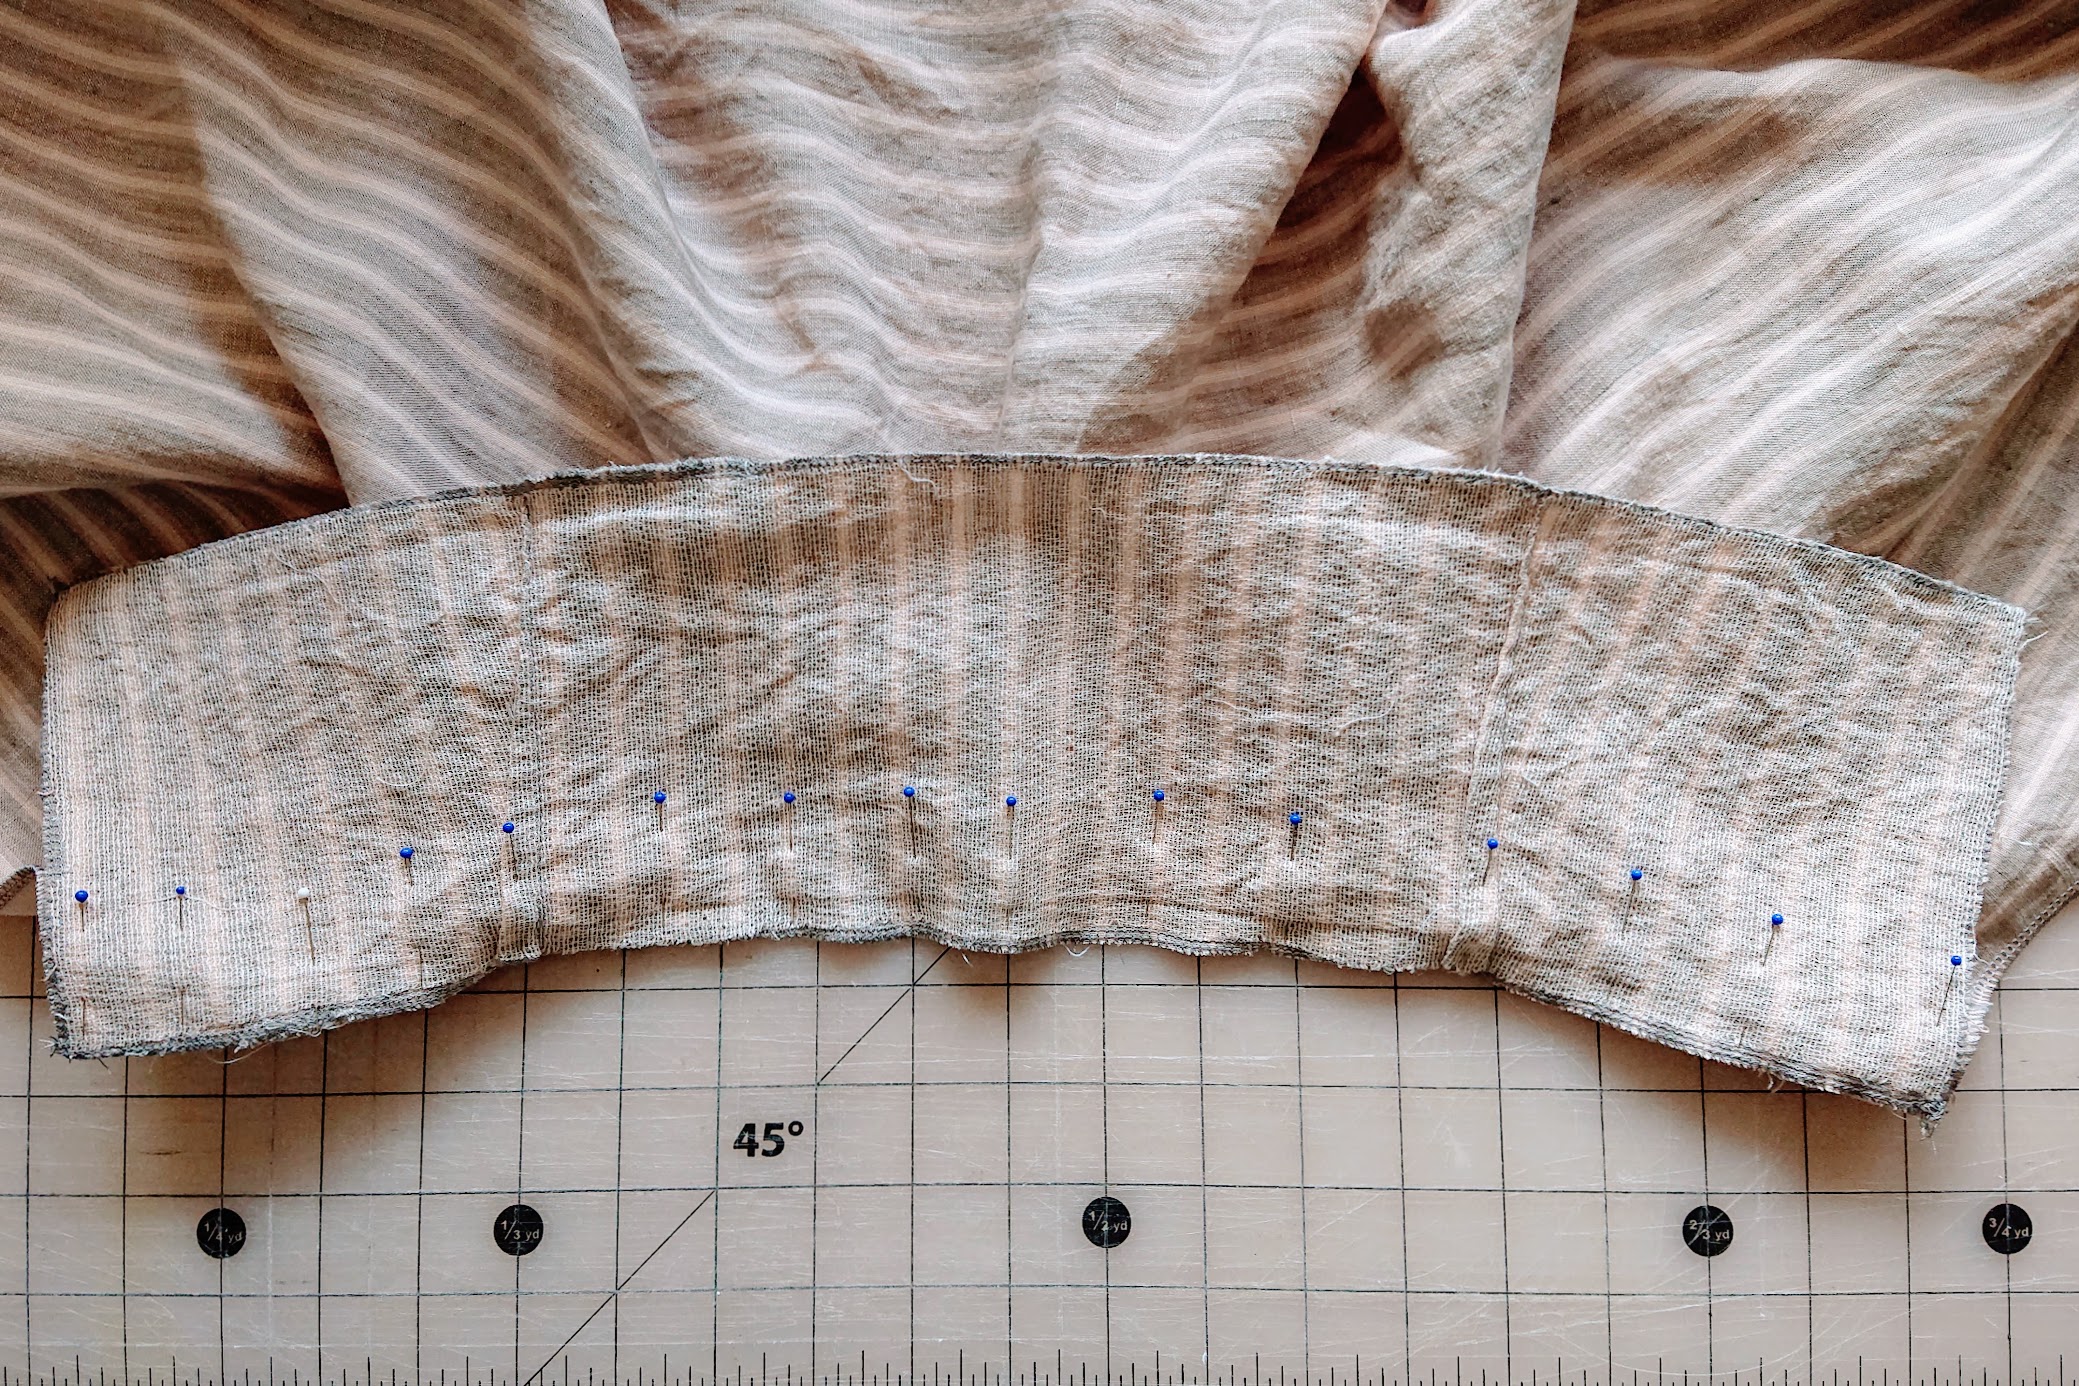
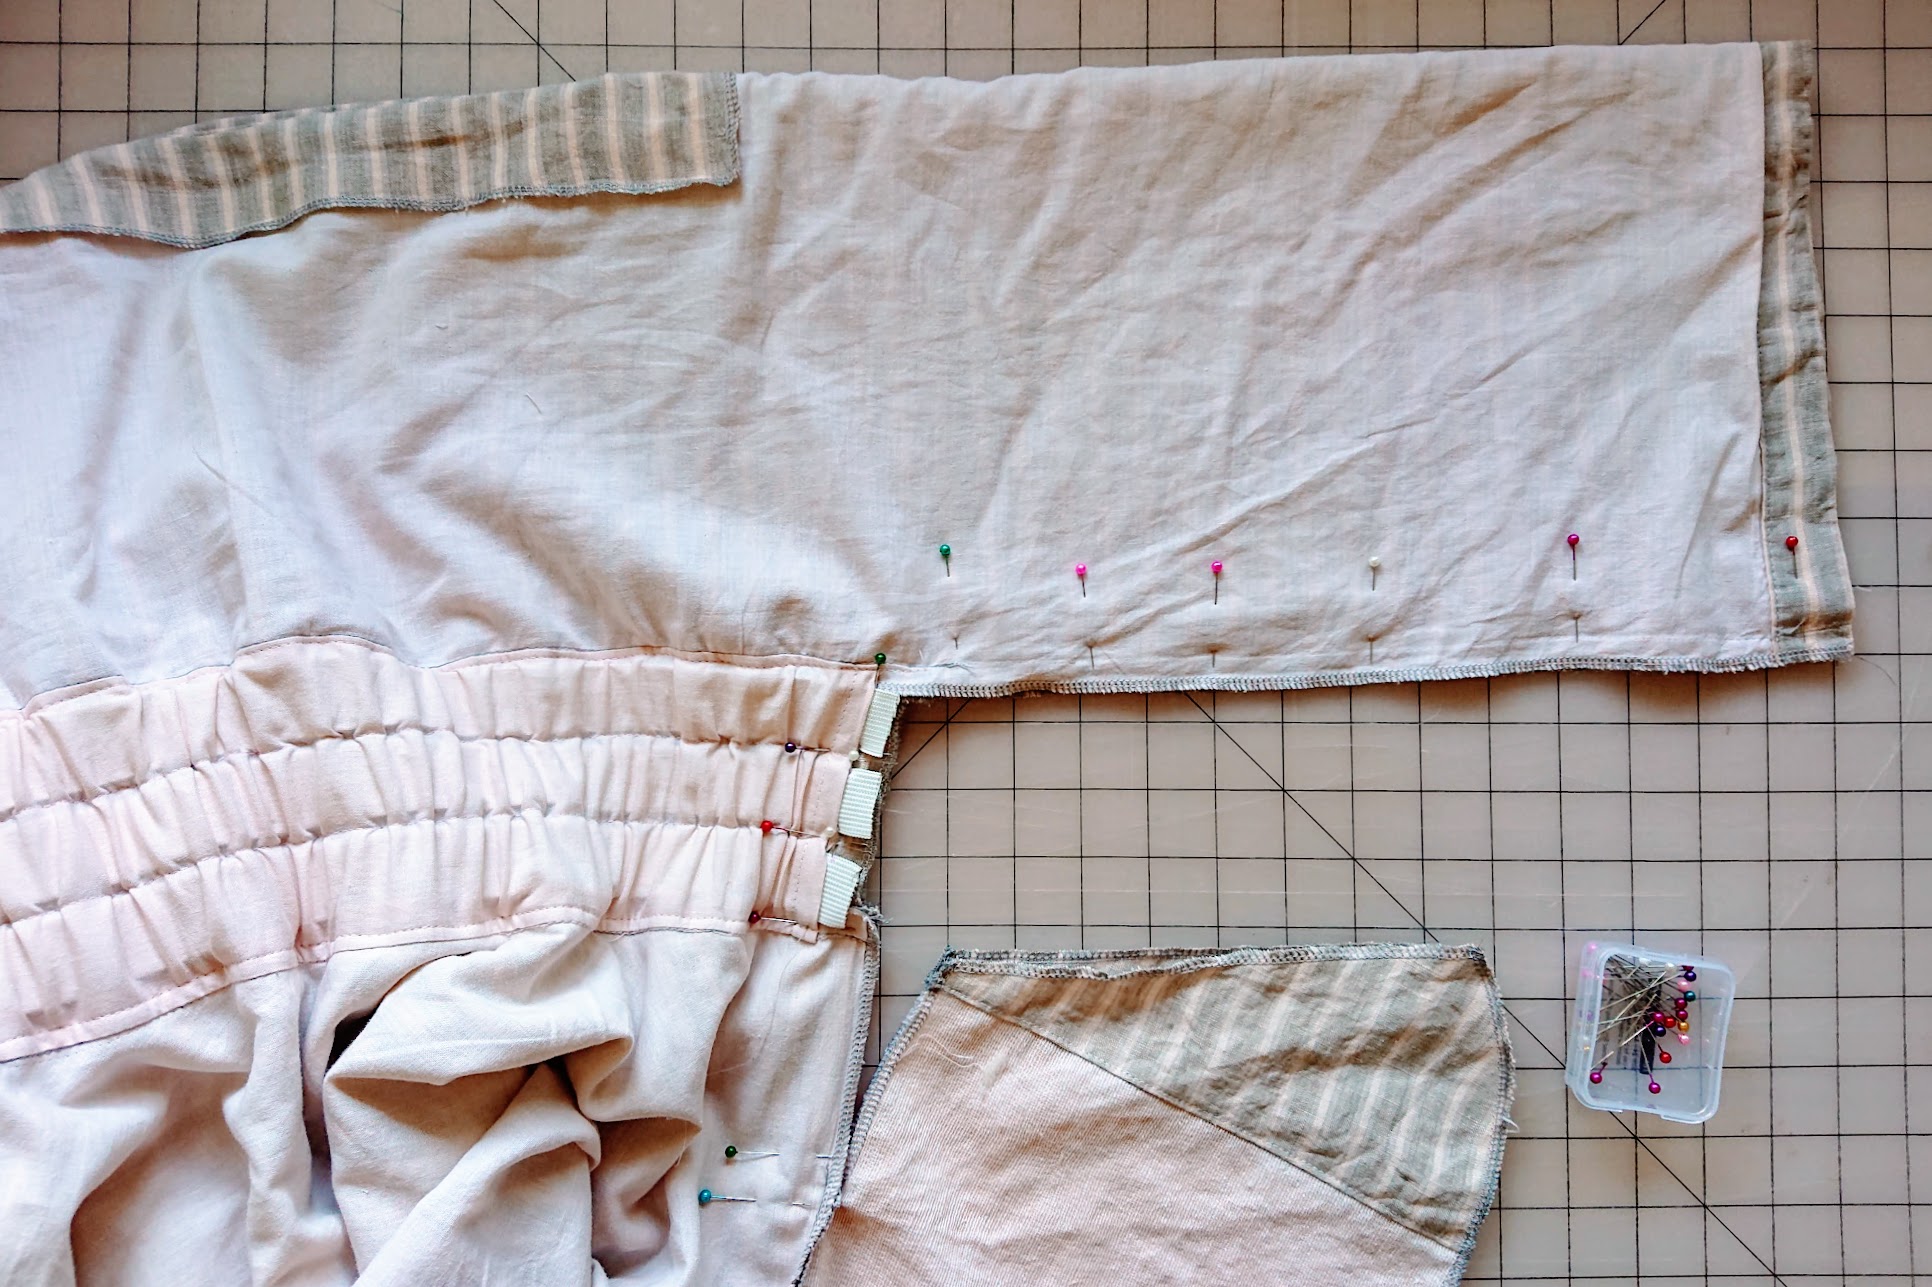
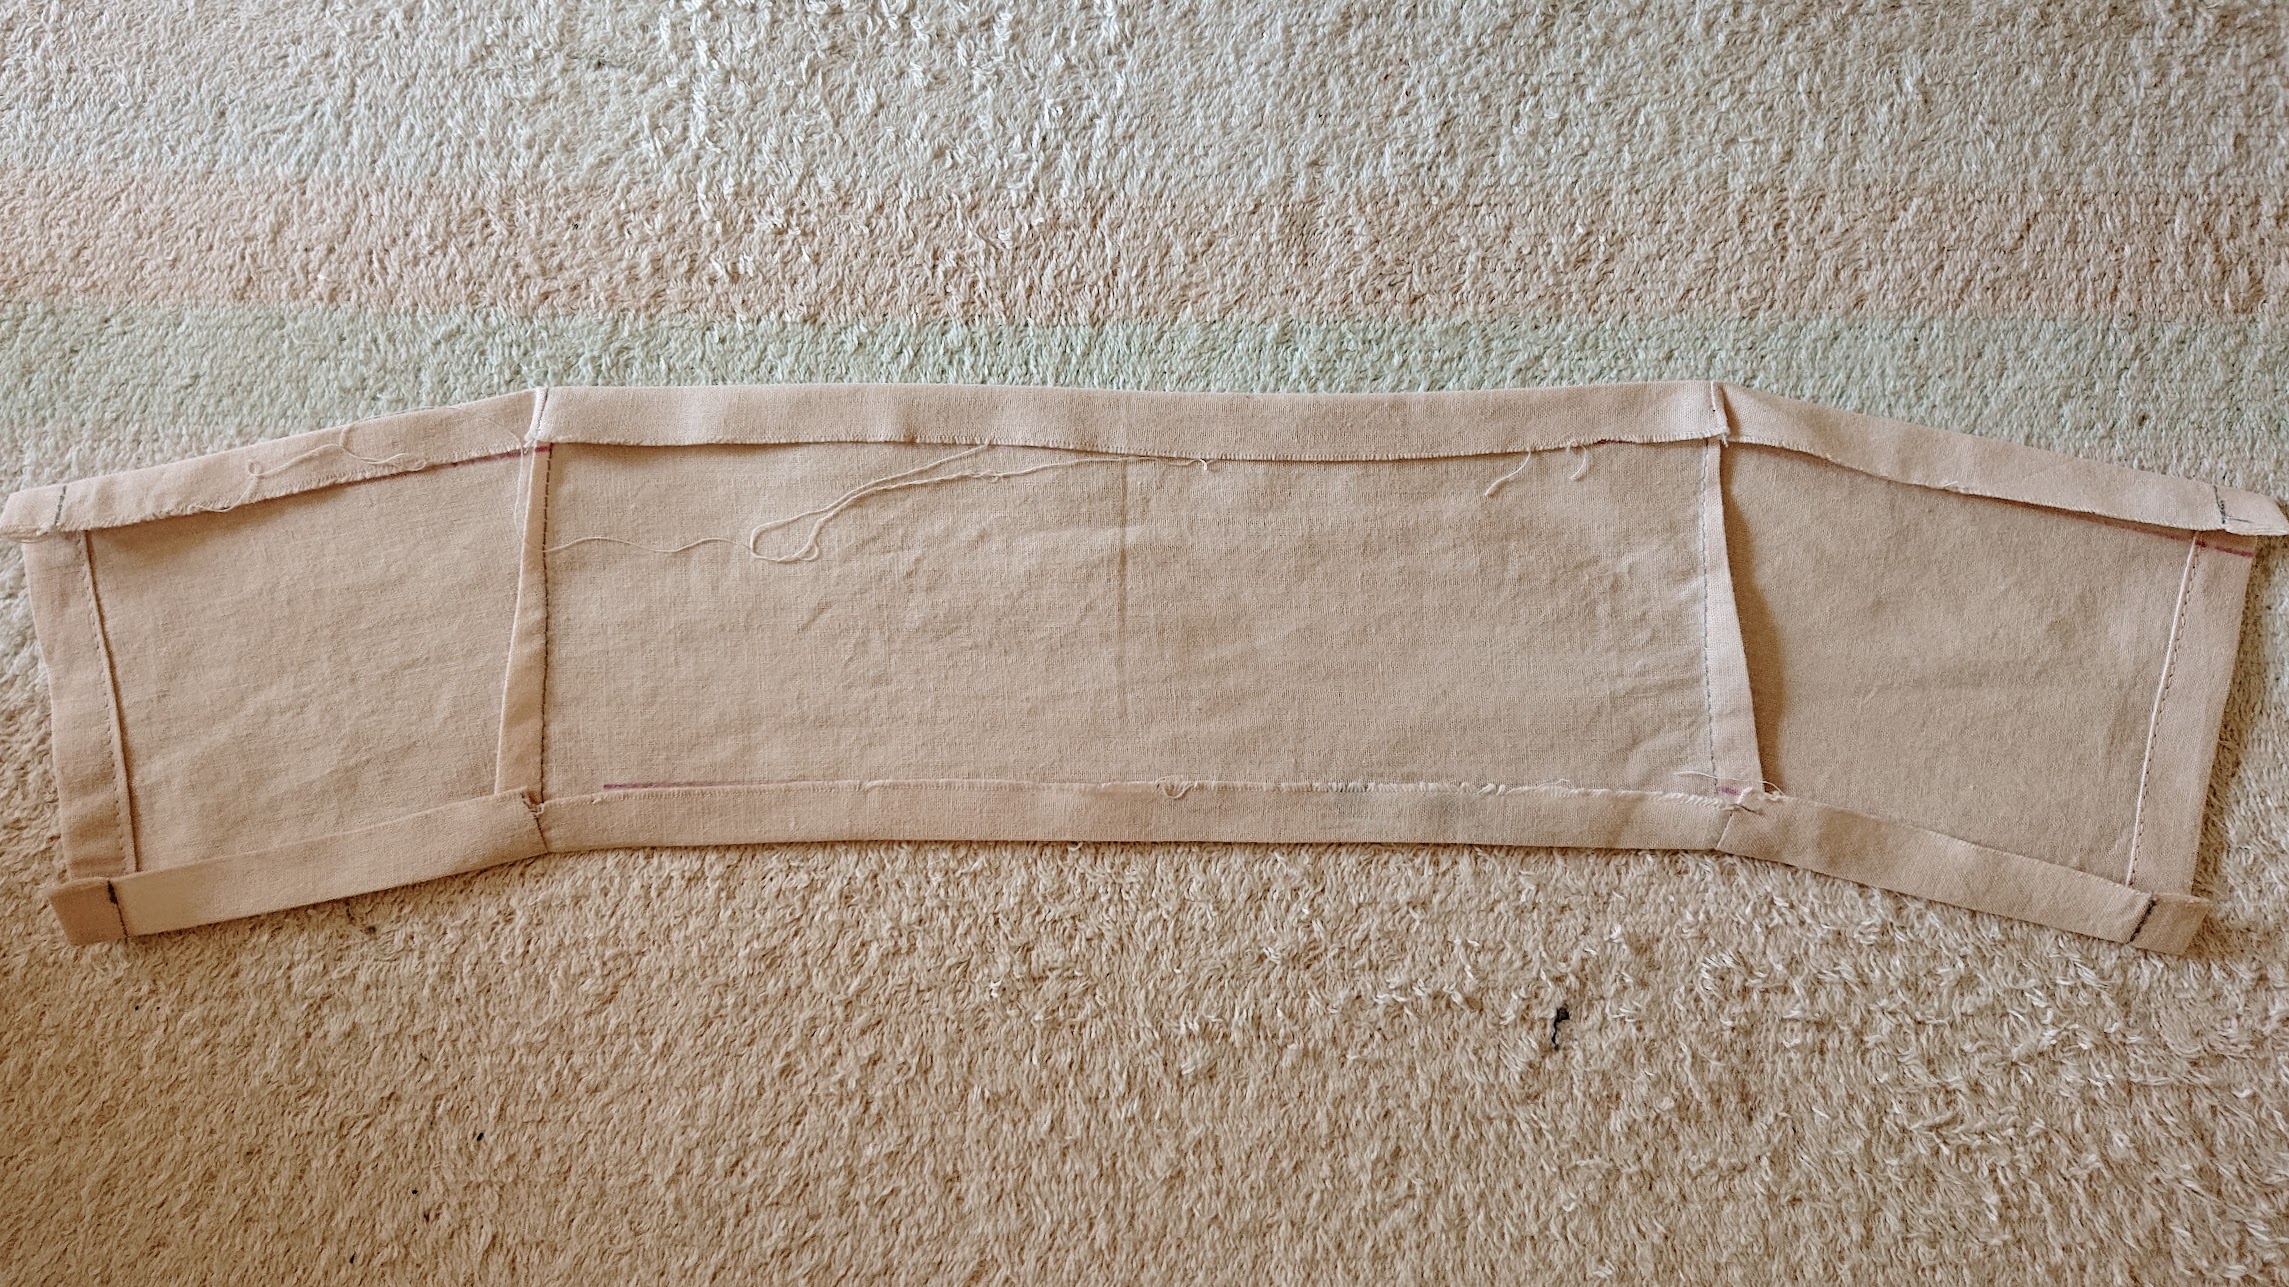
Both front and back waist parts are made with identical 4″ x 20″ fabrics. The front part has two curtain tabs shown like a giant belt loops, and two 1″ darts, each made 5″ from the center. It also has weft interfacing ironed on the back for added stability, since I would anchor two in seam pockets on the front waistline.
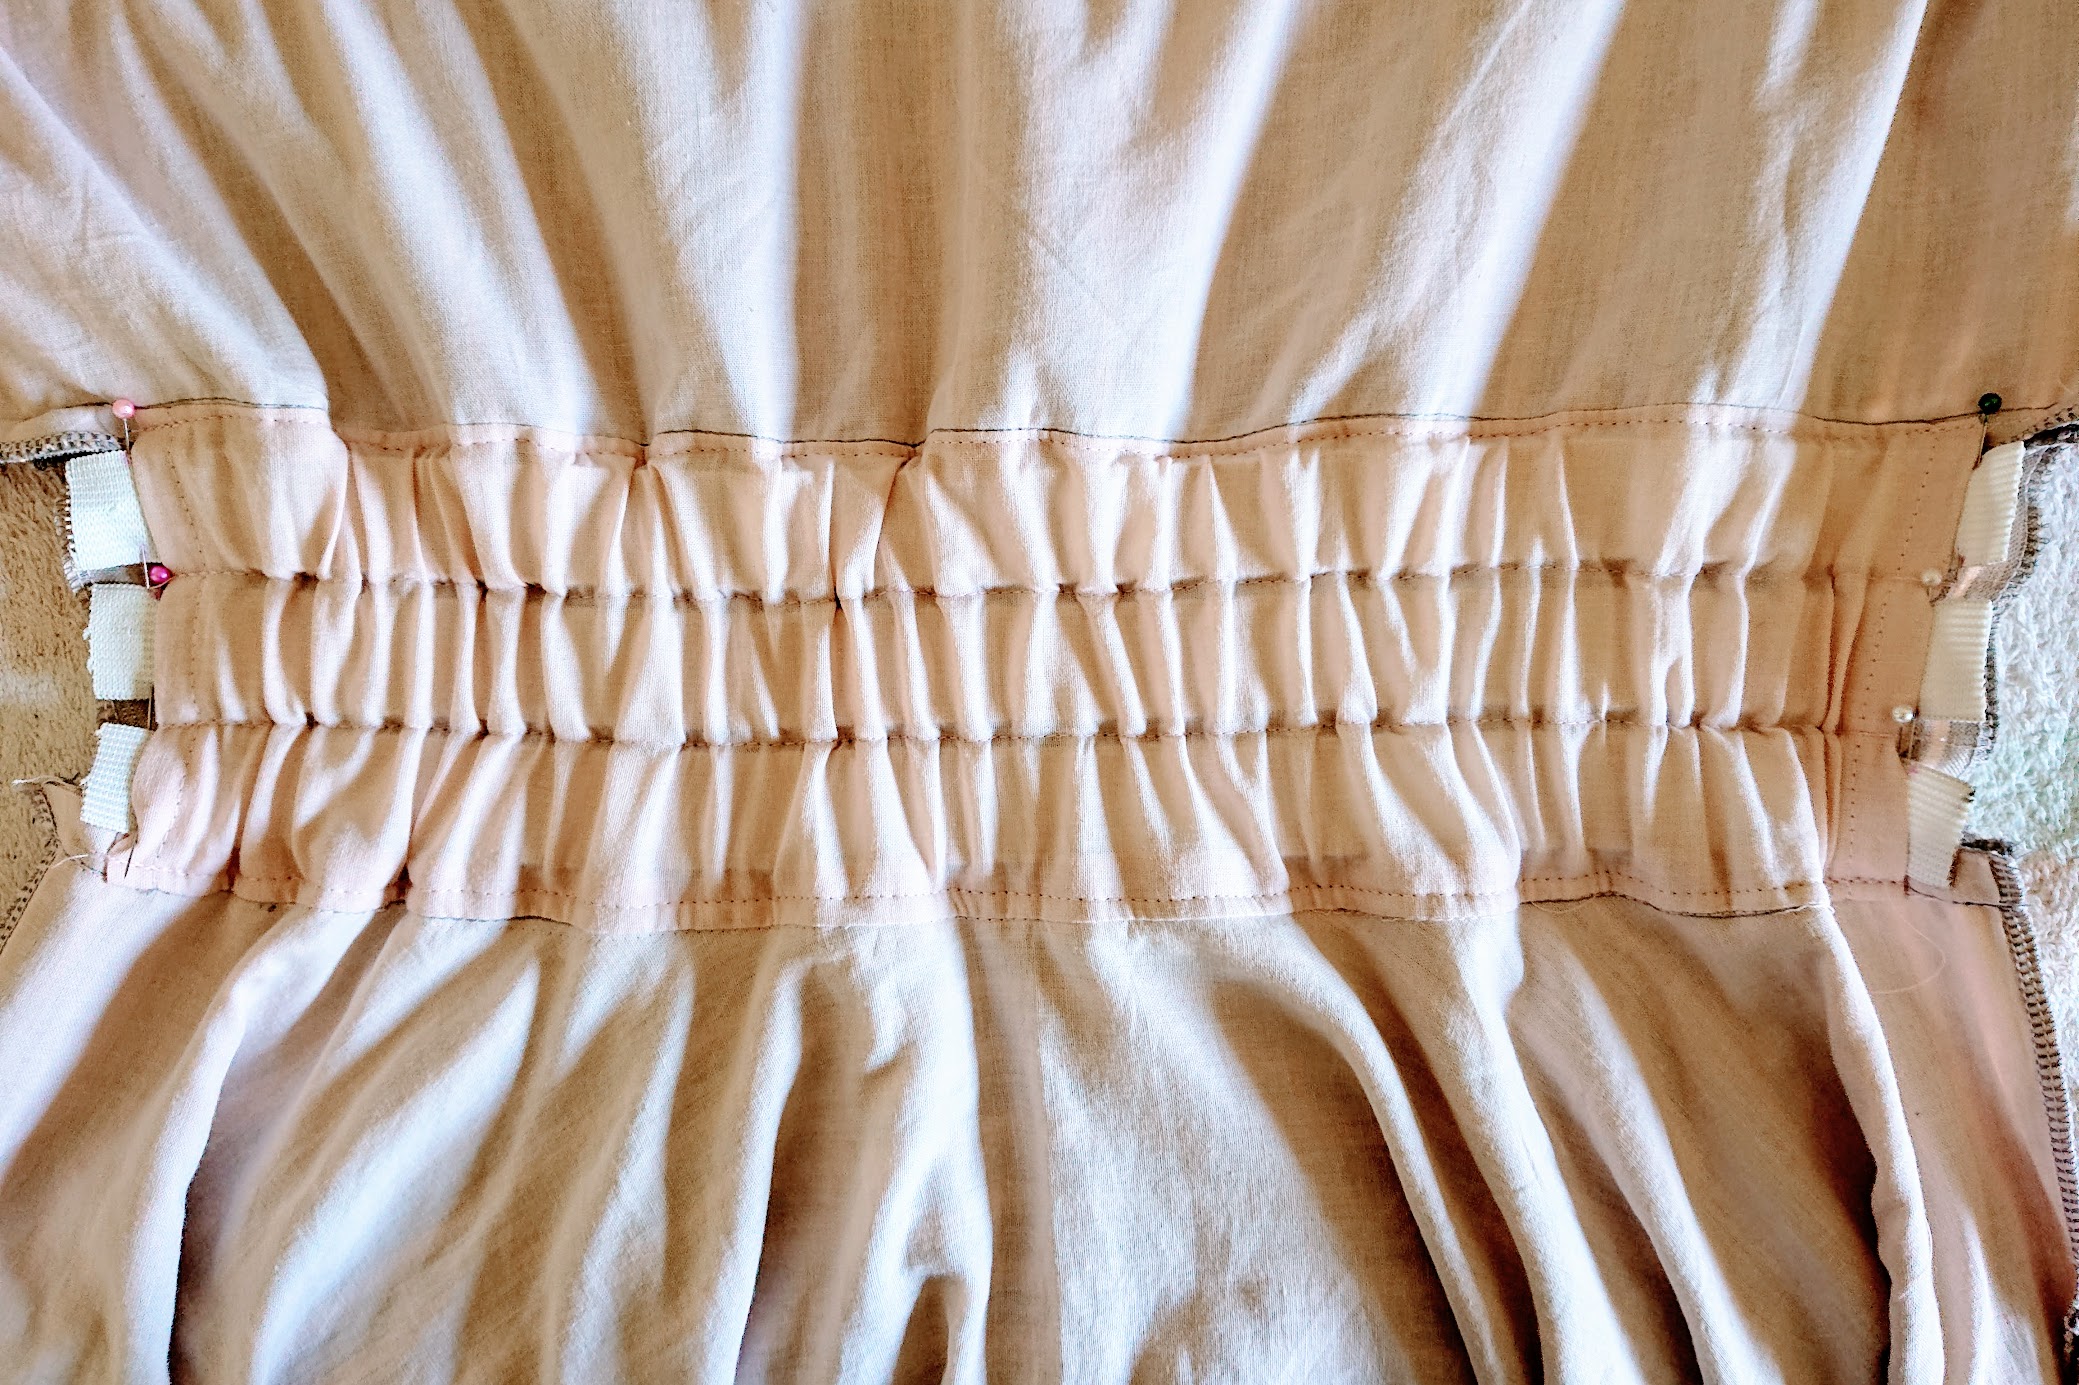
The back part has three horizontal stitches lengthwise to insert 1″ wide elastics in so it creates a gather effect. Those three lines are made after the back waist lining is set. For now, it’s time to attach the skirt pieces to their respective waist parts.
5. Finish back half of the dress
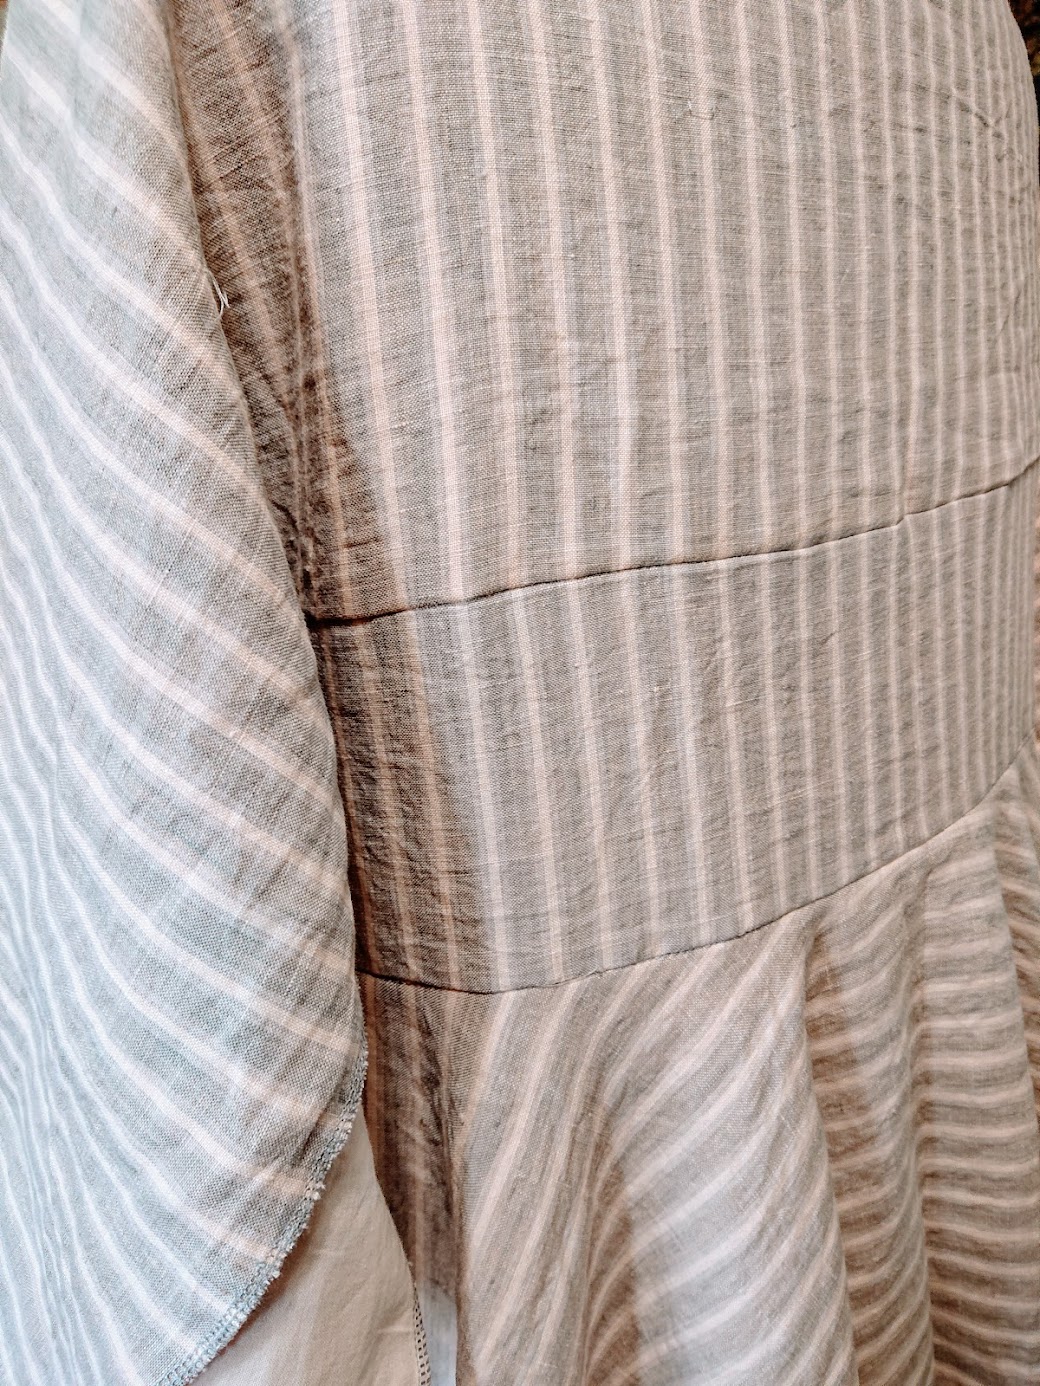
The back half of the dress was almost done, so I sew the upper part of the waist to the top . It’s quite exhilarating to see the striped lines matching!
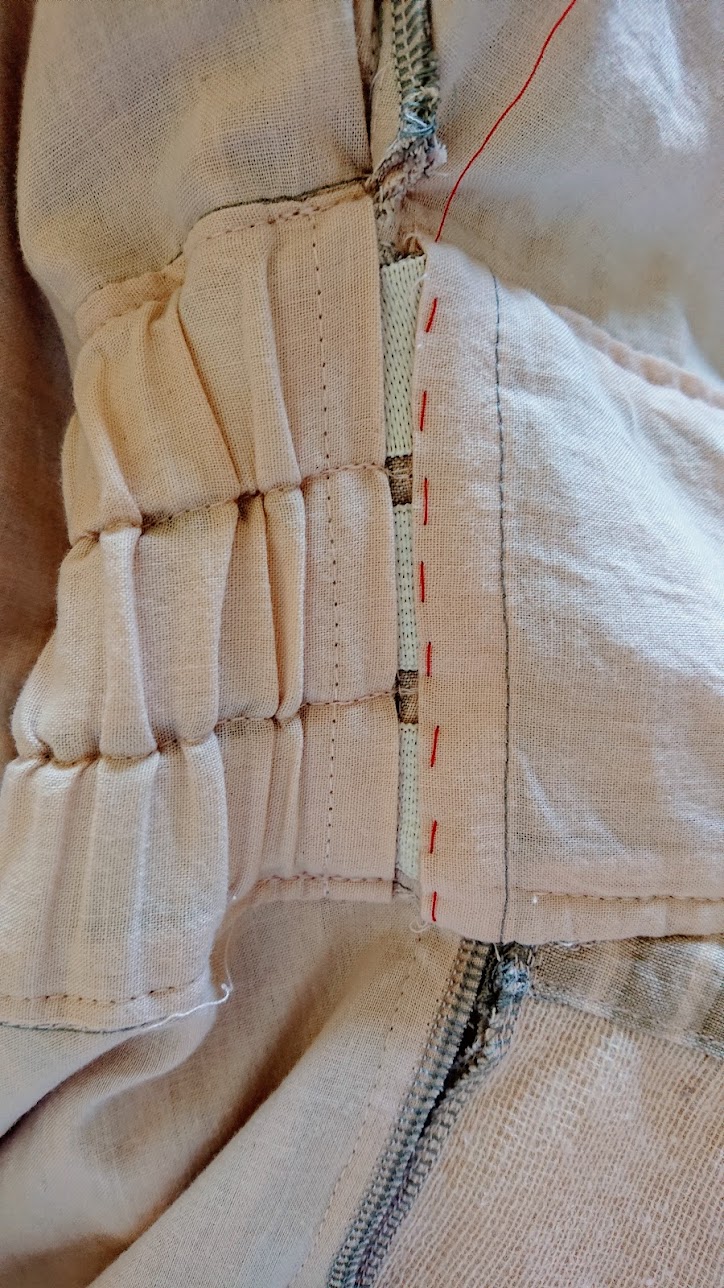
The tricky part was to make a self finished lining on the back waist so I could create three elastic casings on the back. Using the burrito method, I was able to roll the giant pile of fabric into itself to make it!
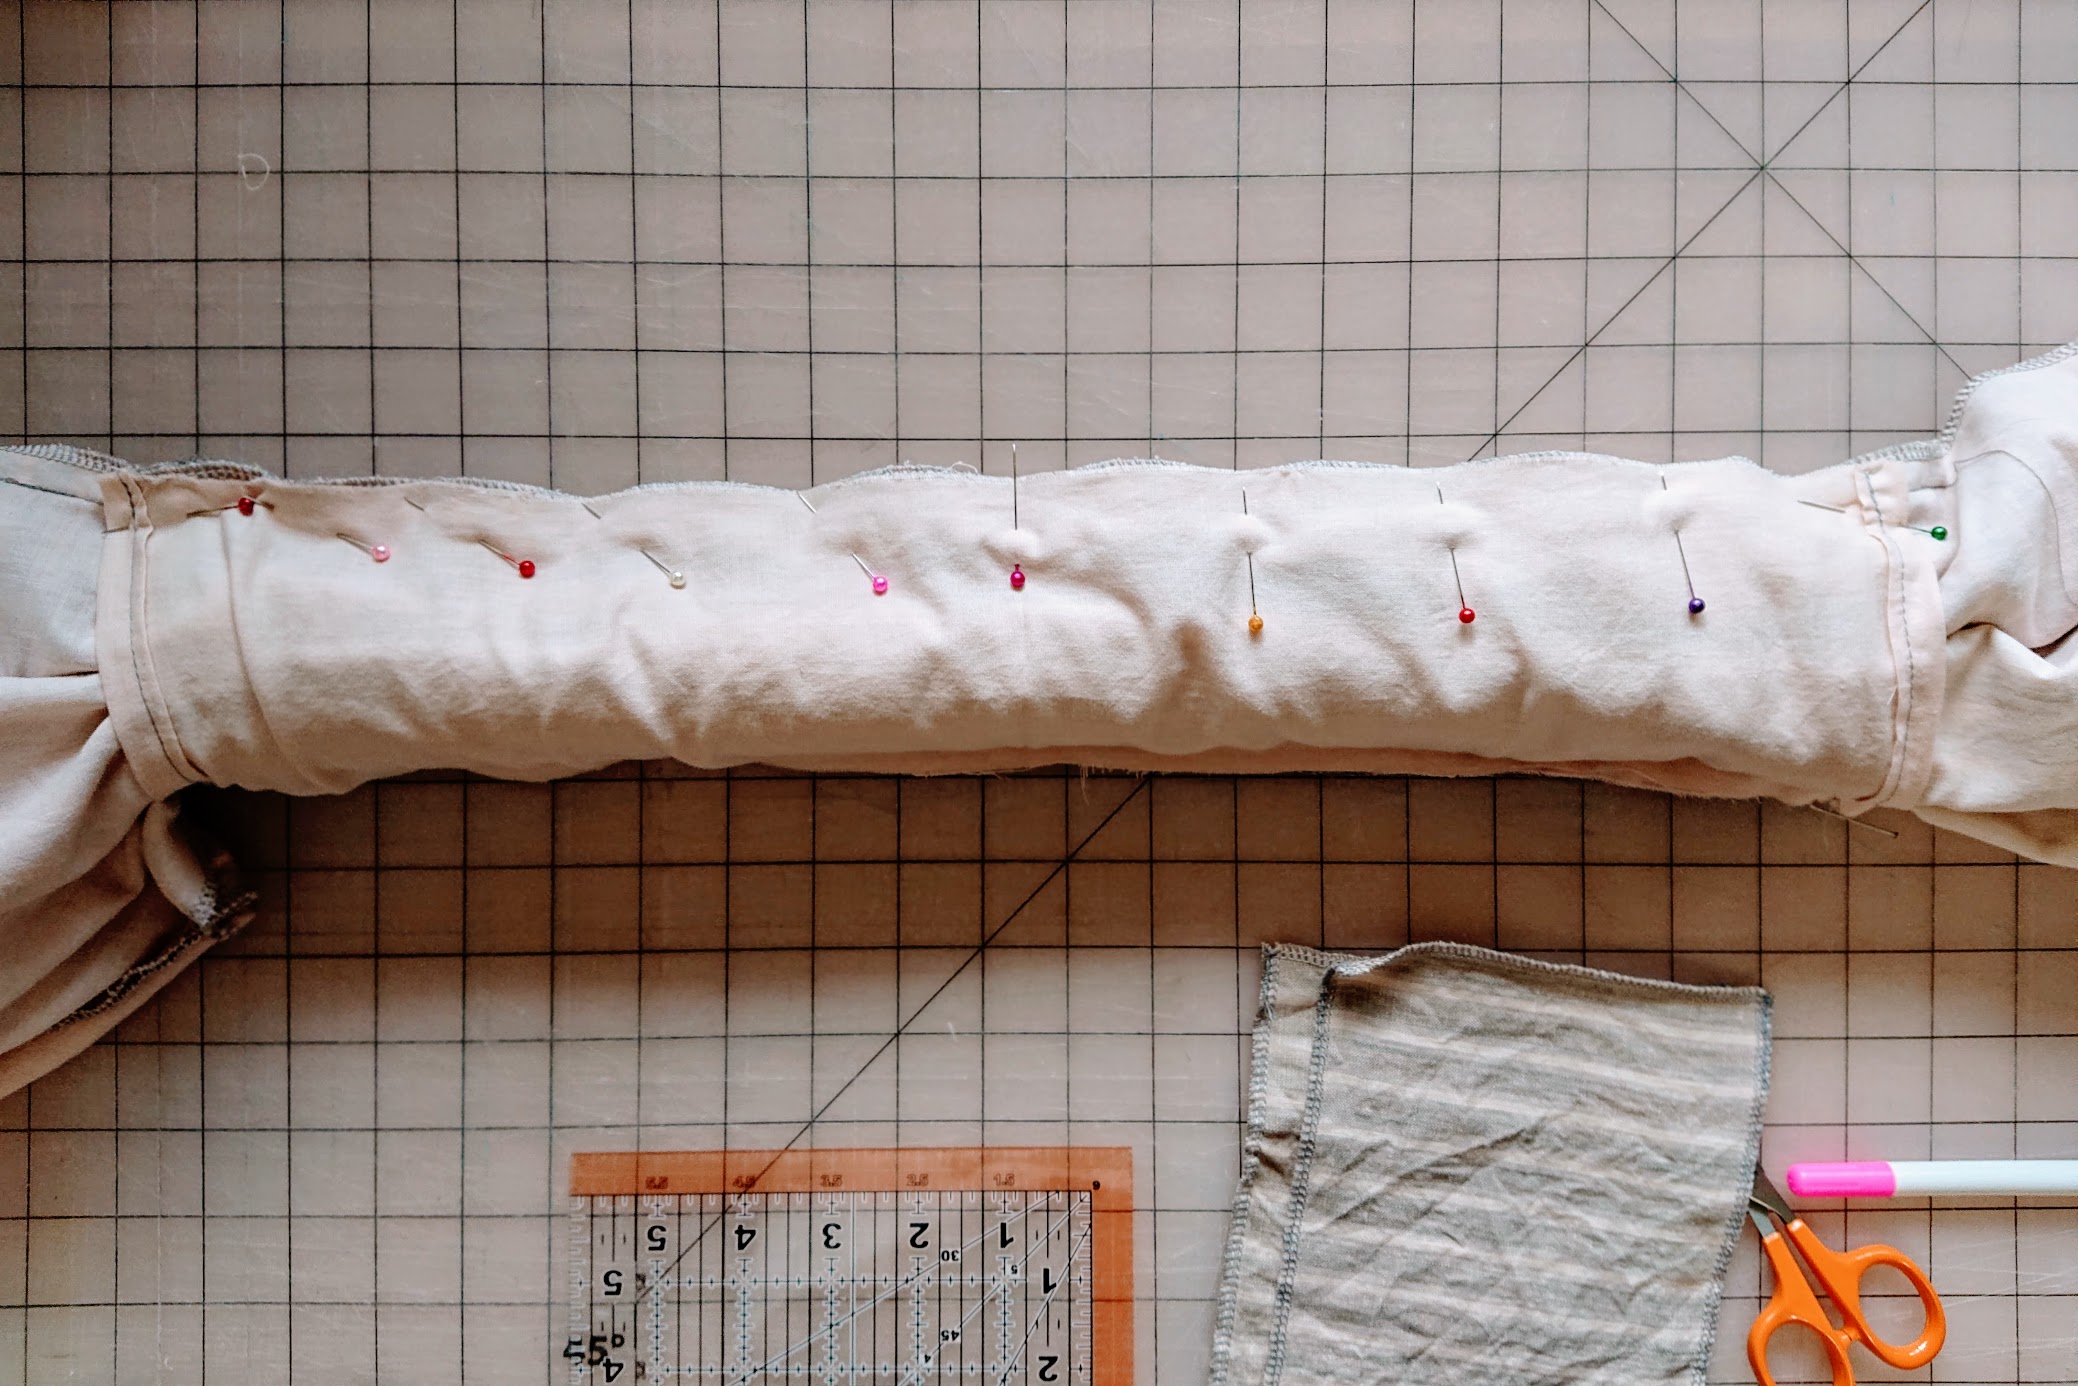
From there, the rest was smooth sailing. The three elastic casings were made, the elastics were cut in 0.5″ increased increment and inserted. The sides were pinned for now.
6. Finish the dress!
Almost there! The remaining tasks were to sew the sleeves, sew the front skirt to front waist, create, attach, and anchor the pockets to front waist, and finish the front waist lining. This last stretch was not easy, that’s for sure.
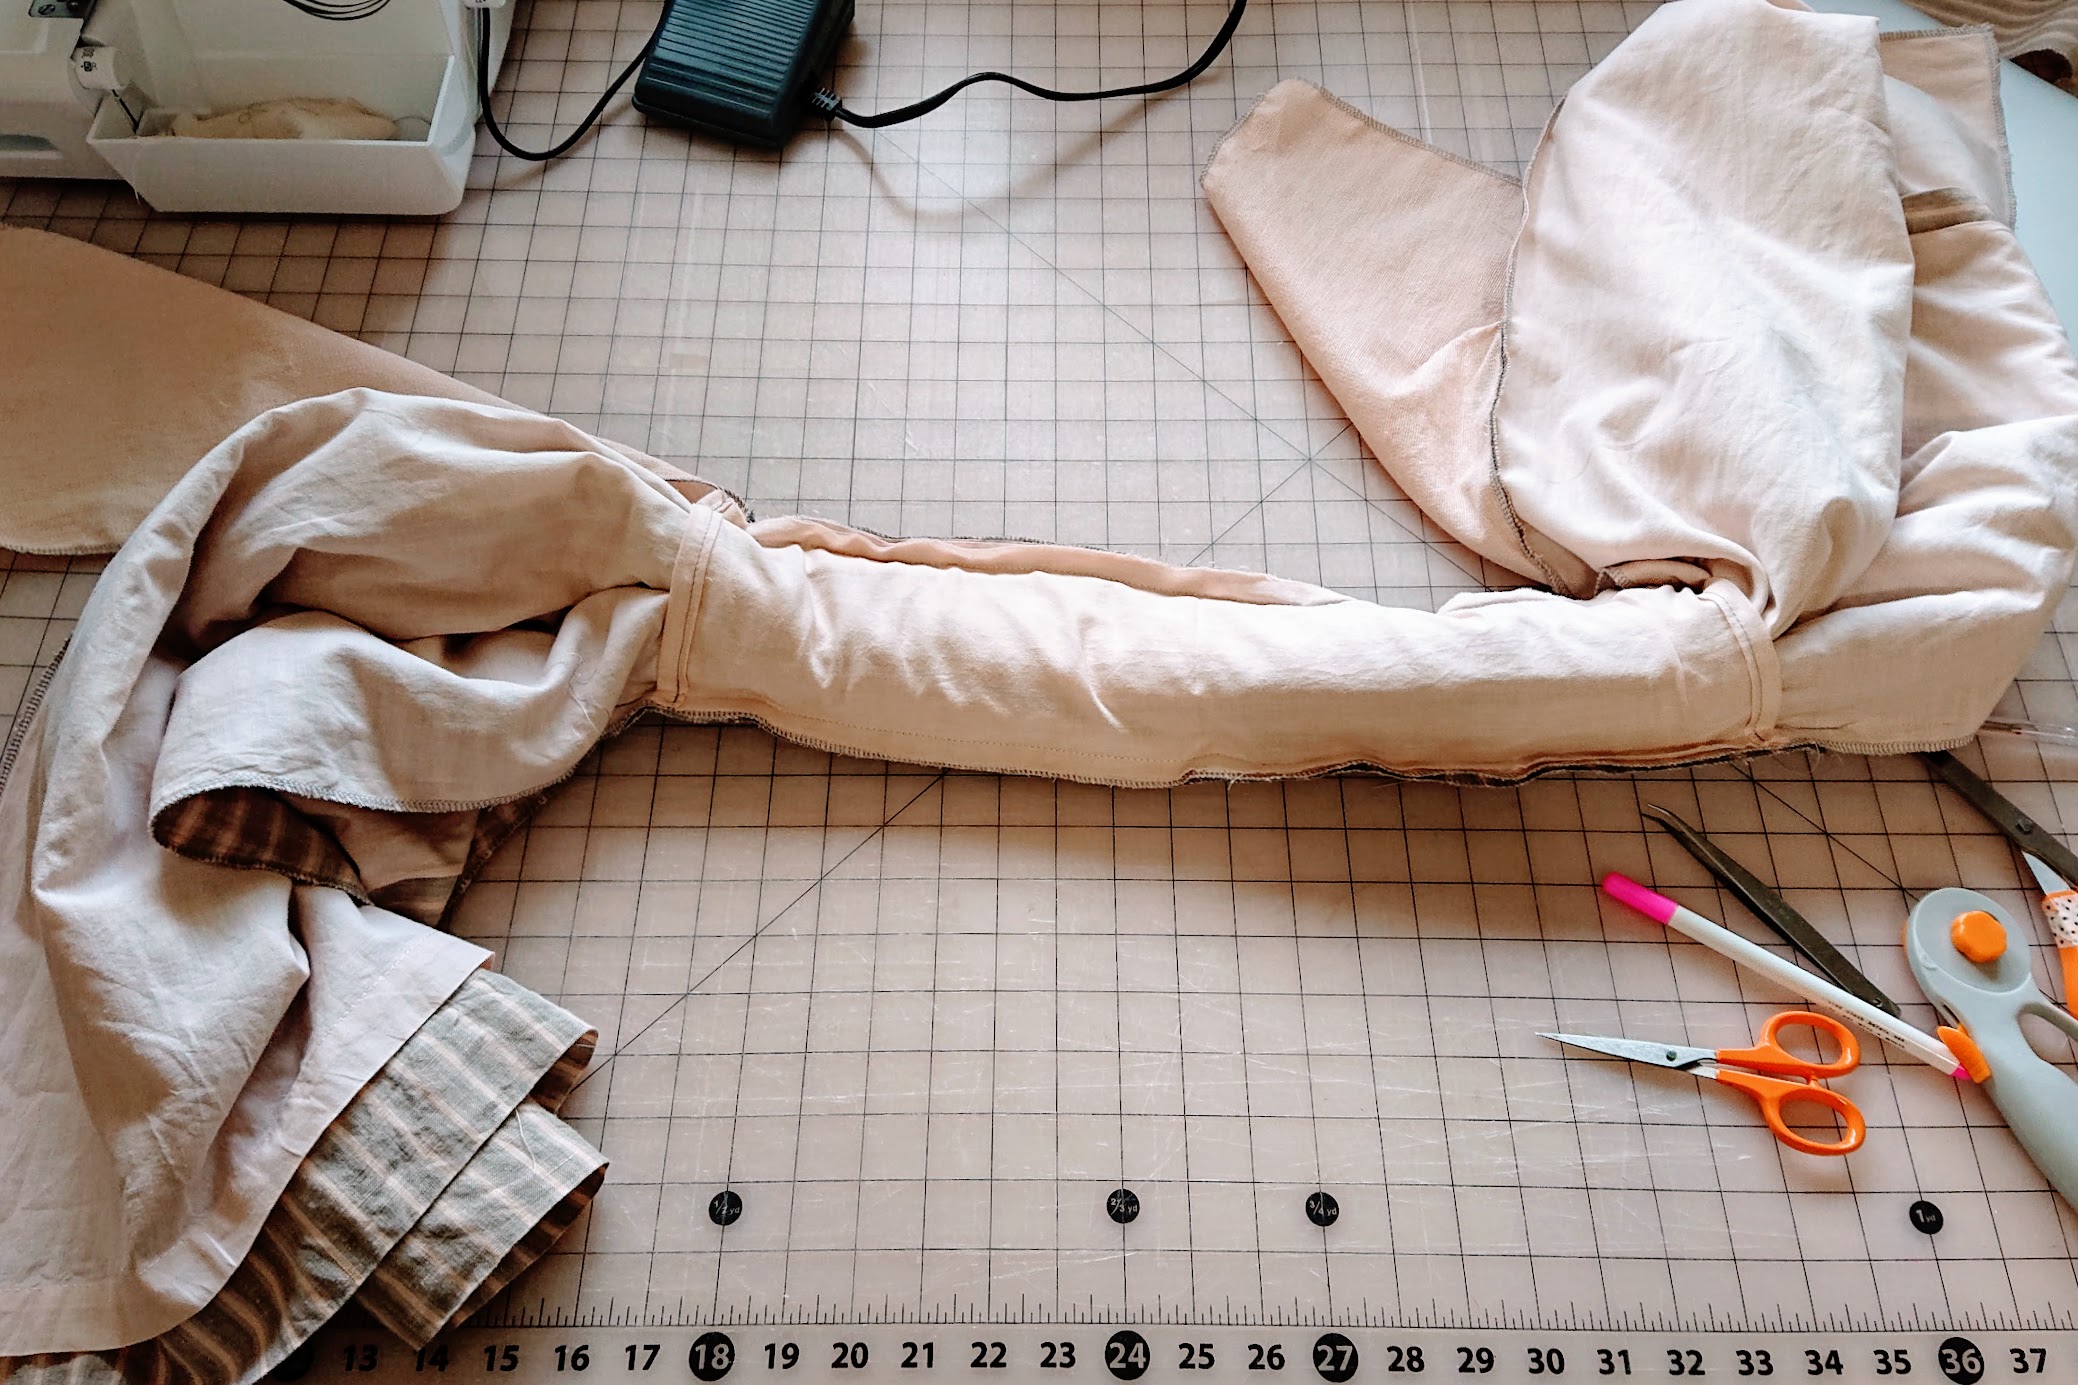
Sewing the sleeves opening was straightforward enough, though.
Then it’s all about pockets. I LOVE big pockets (who doesn’t?) and I made mine extra deep – approximately 9.5″ wide and 15″ deep measured from the pocket opening. Moreover, I made a pocket extension at the top so I could anchor it to the front waist.

It is during this pocket anchoring and front waistline finishing that I realized how difficult this project would be for my old Brother sewing machine. The industrial Juki breezed through sewing 4-6 layers like butter, but the old machine would just refused.
Before I finished sewing shut the side seams from waist to hem, I had to sew the front waist lining. I made a lining from leftover curtain cotton lining, and then temporarily stitched them by hand before machine sewing them.
After the front waist lining was sewn, I finished sewing the sides of the dress.
7. Clean up the inside stitches
Even though the dress was technically finished at this point, it would be a waste to stop here. Many garments can look good, but only well-made garments make the wearers feel amazing. At this point, the handkerchief dress looks good from the outside, but the inside can be cleaned up a little more.
The transition between front and back waist sections was looking messy, so I did both hand slip stitching and stronger machine sewing to tuck the elastic ends into the front waist lining.
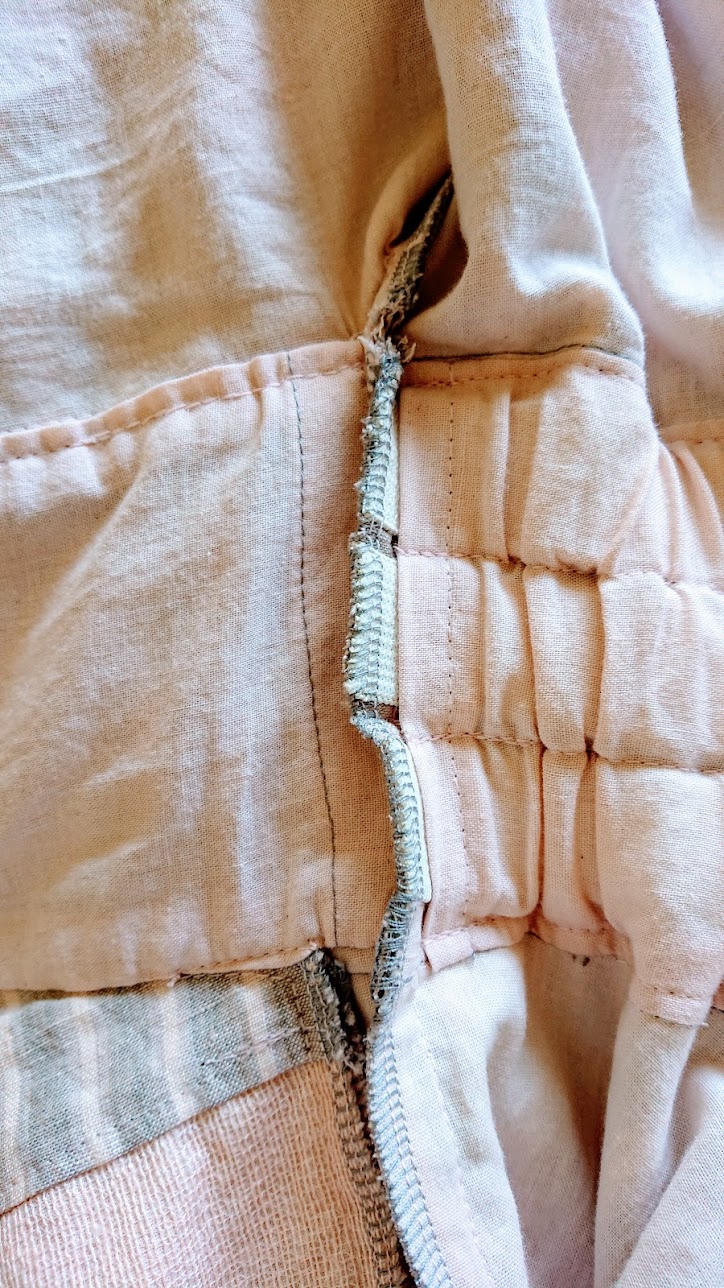
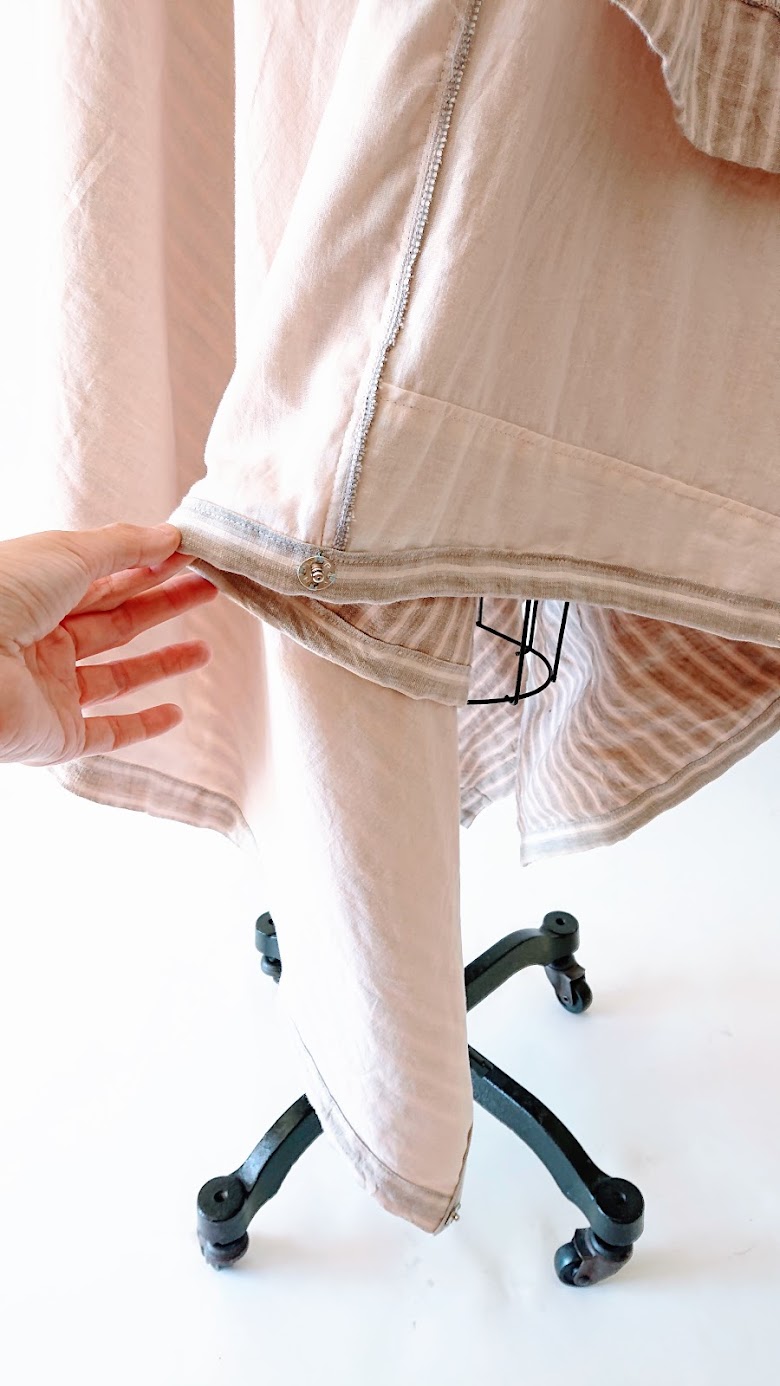
Furthermore, I also topstitched the side seams, added bias tape finishing to one side of rectangular skirt edge that wasn’t finished, as well as hand stitching four snap-on metal buttons on the skirt’s edges and centers (front-back and left-right) for more wearing options.
I’m quite proud of how the inside of the dress looks. It’s my best work so far!
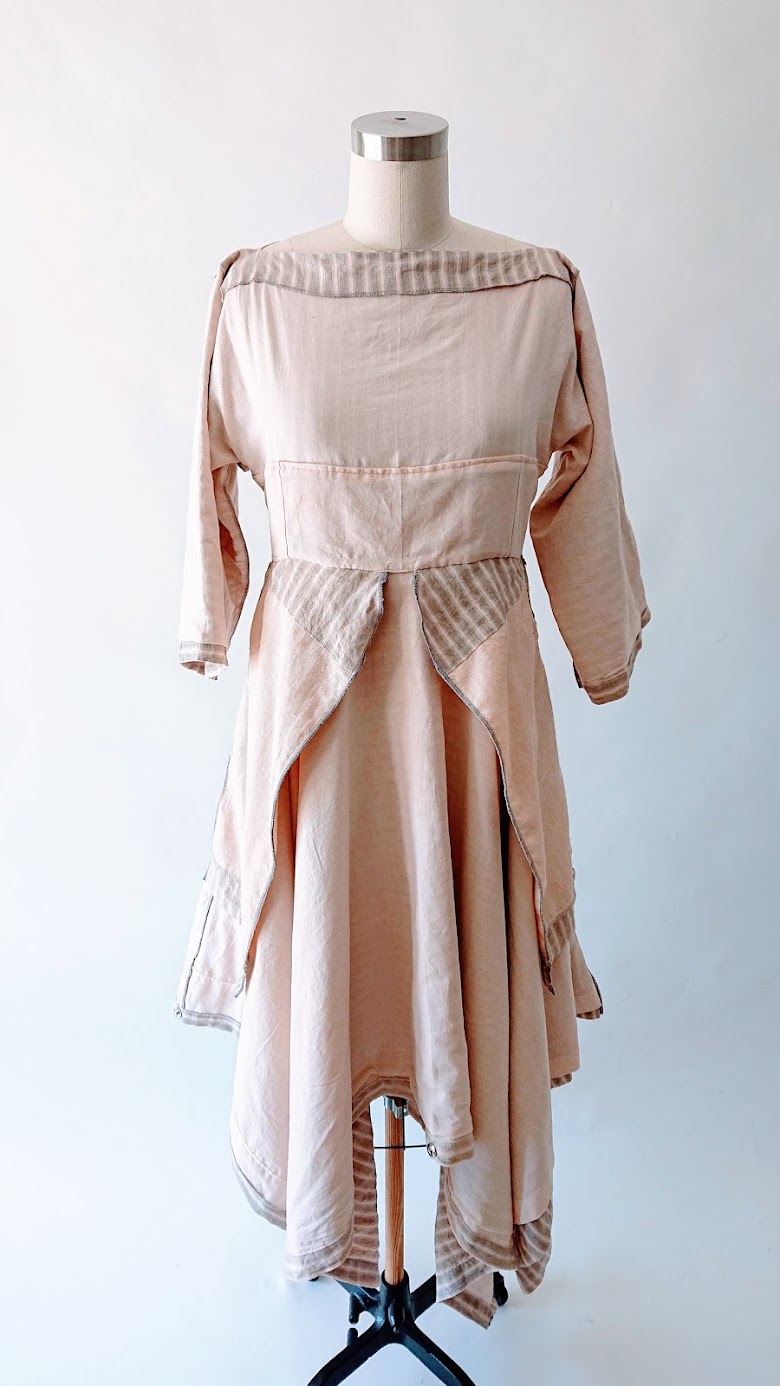
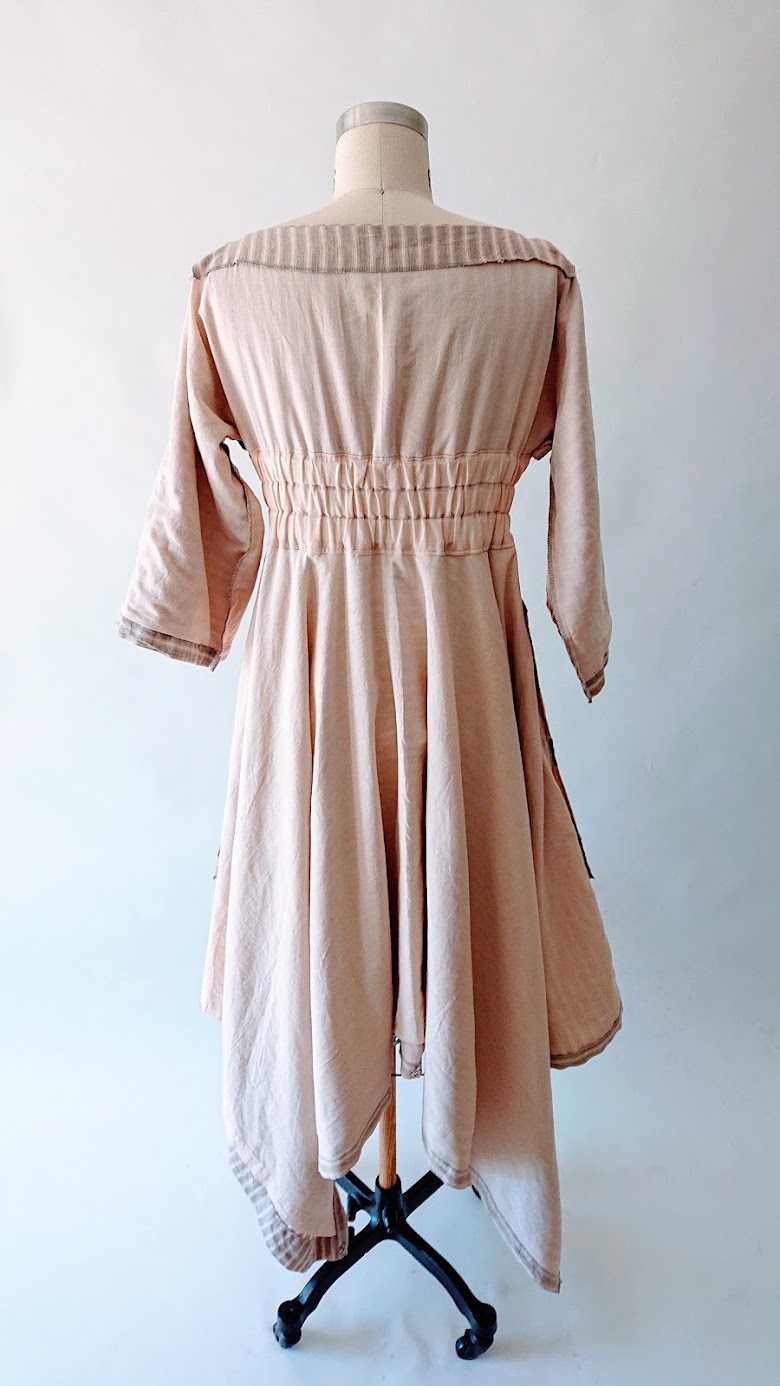
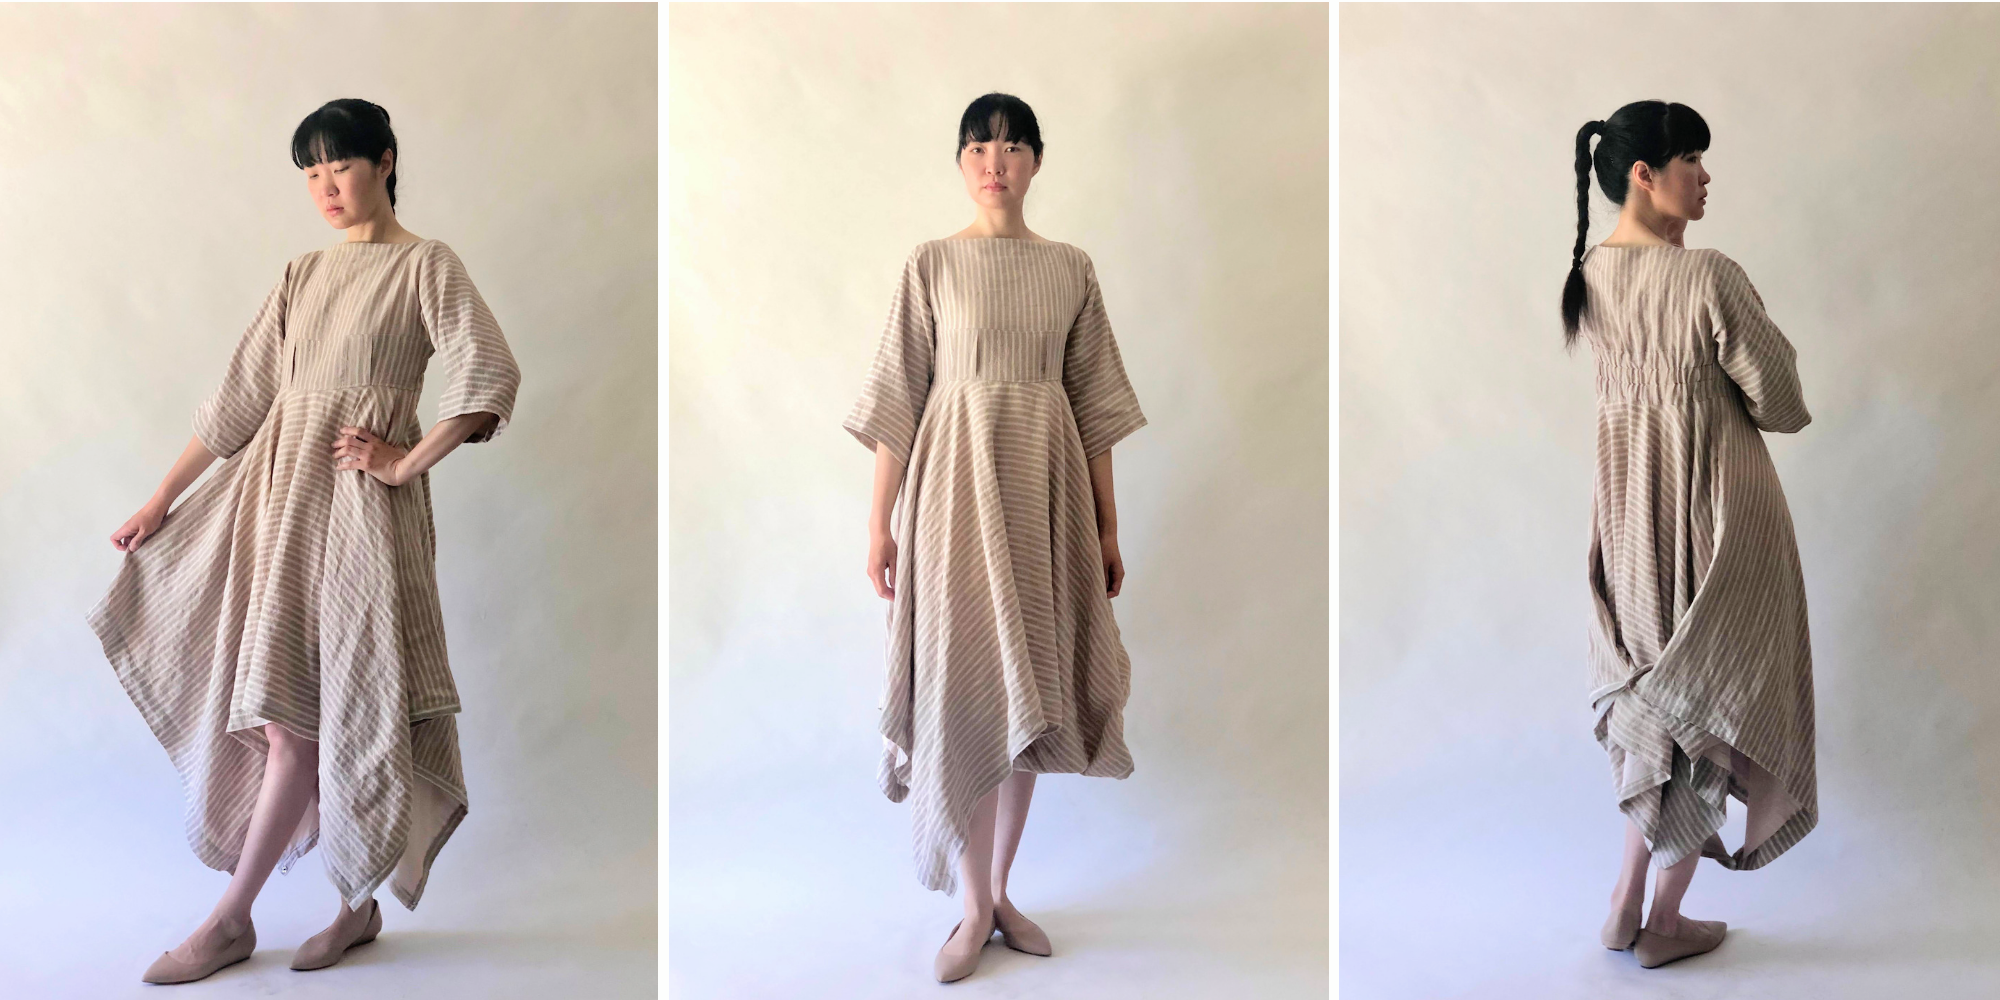
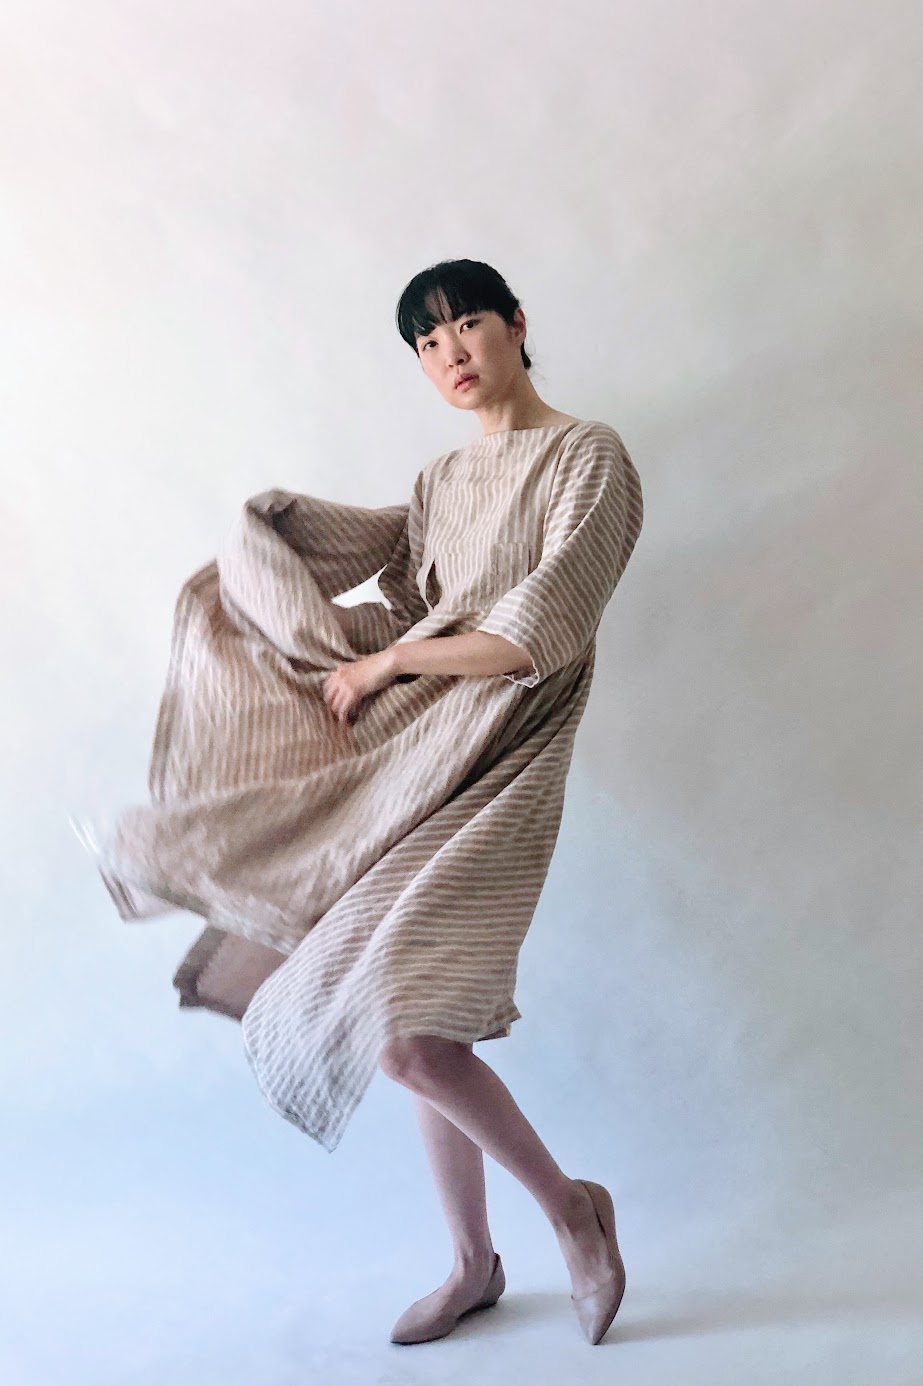
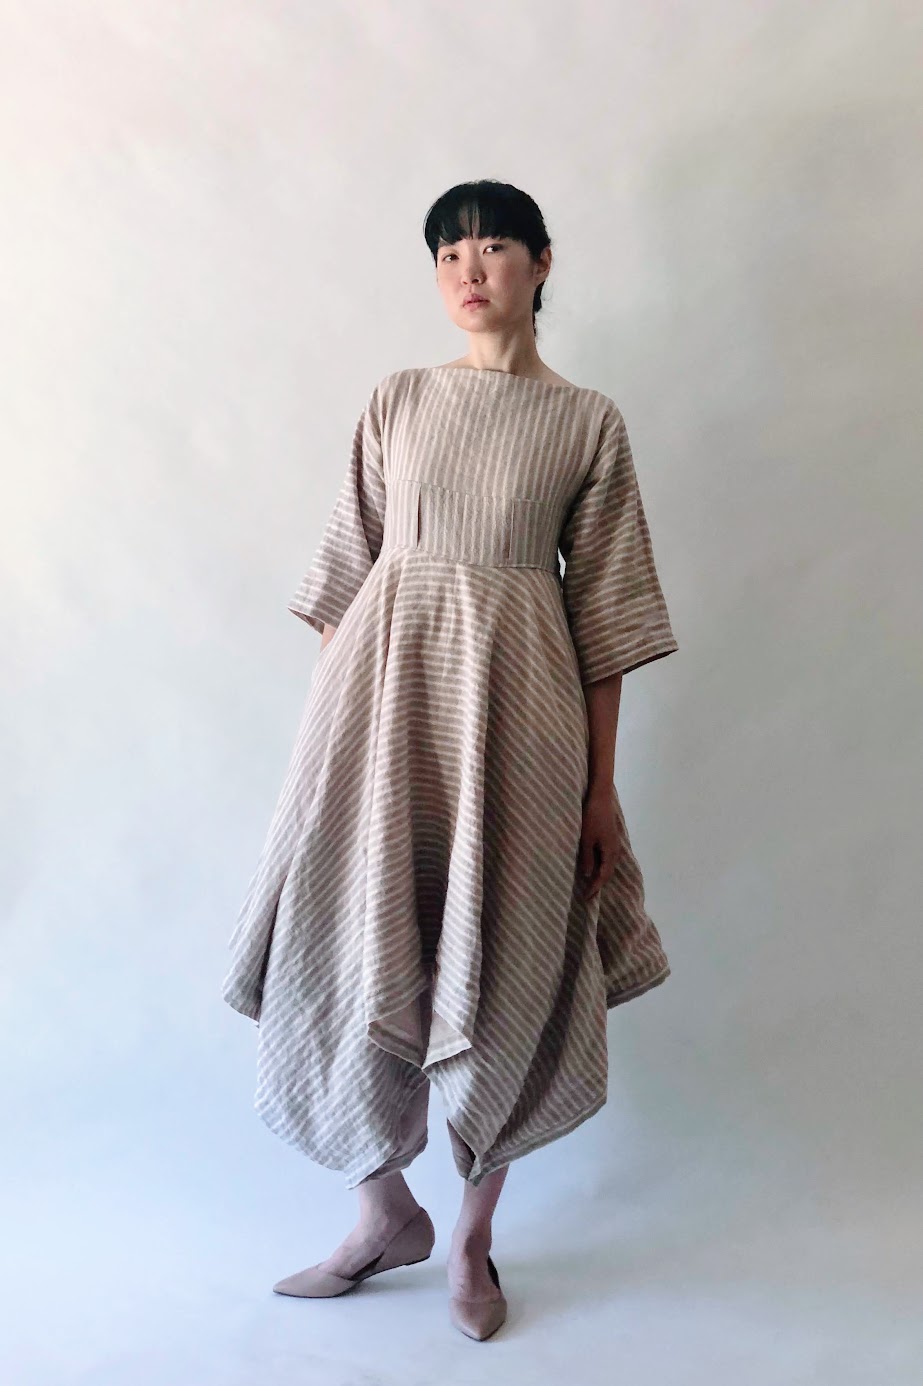
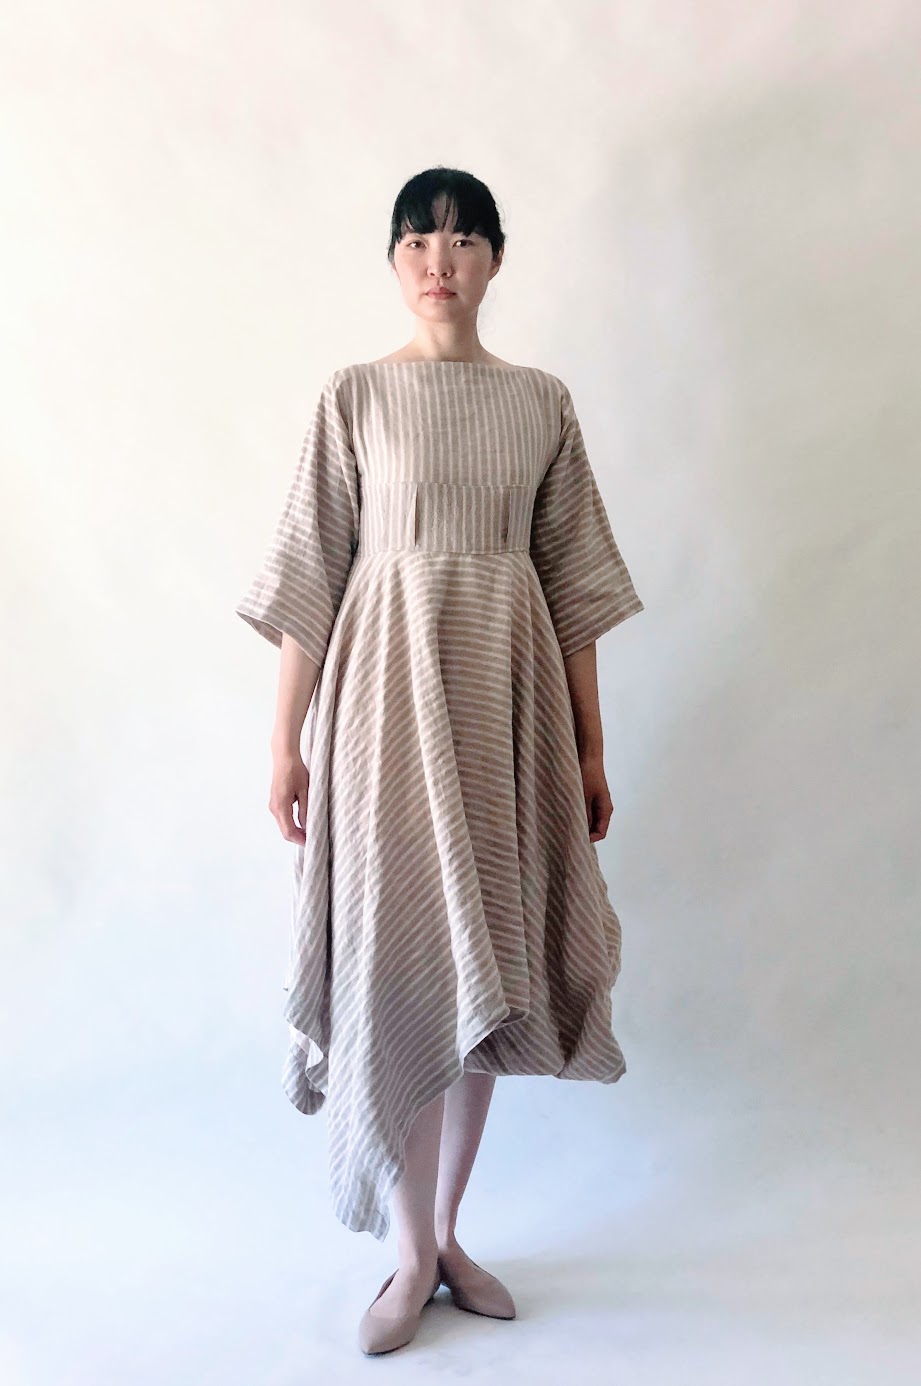
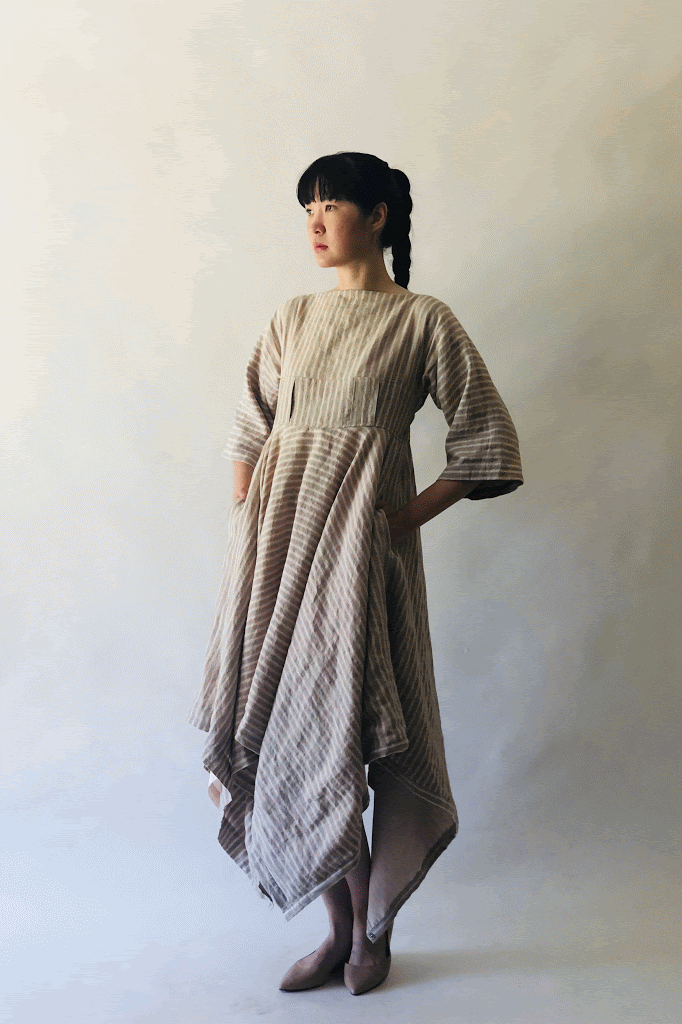
And with that, the handkerchief dress with T-shaped bodice was finally finished! For now at least. I’m already visualizing how it would look with some leaf prints around the bottom hemline.
Here’s what the T-shaped bodice and straight neckline look like, as well as the rectangular skirt panels with circular waist opening.

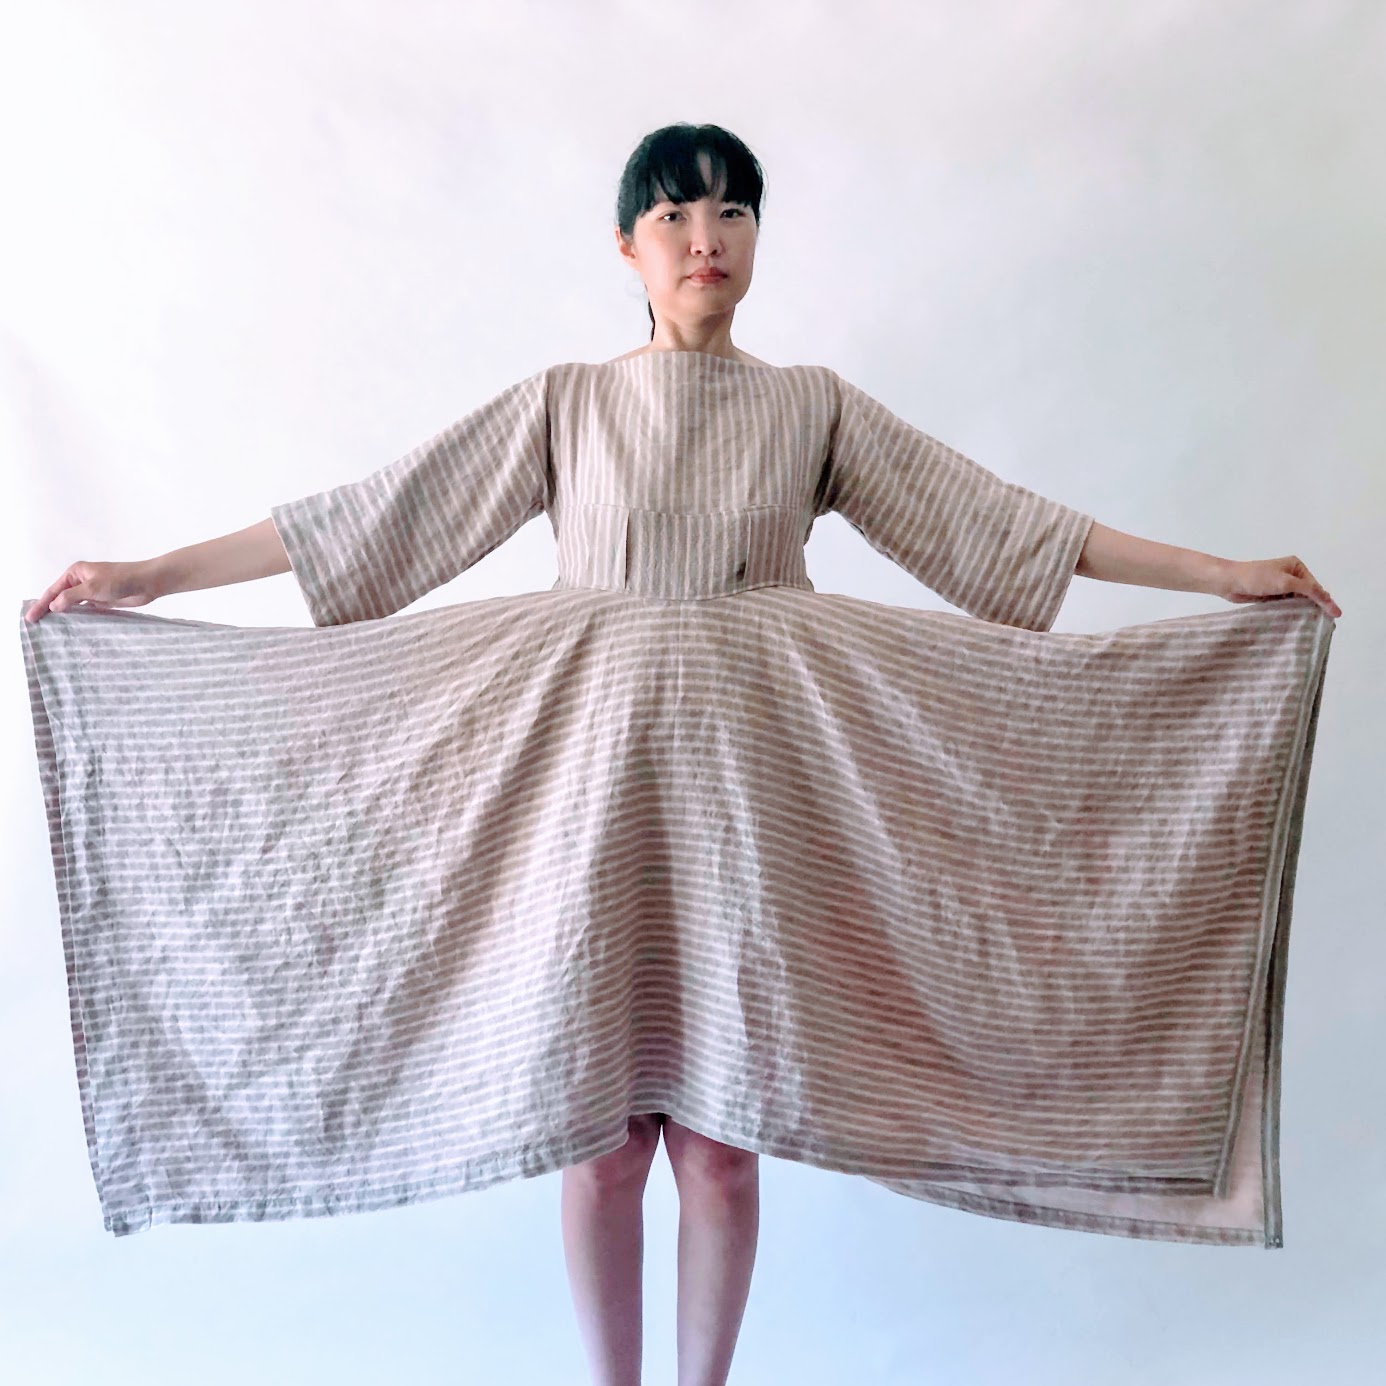
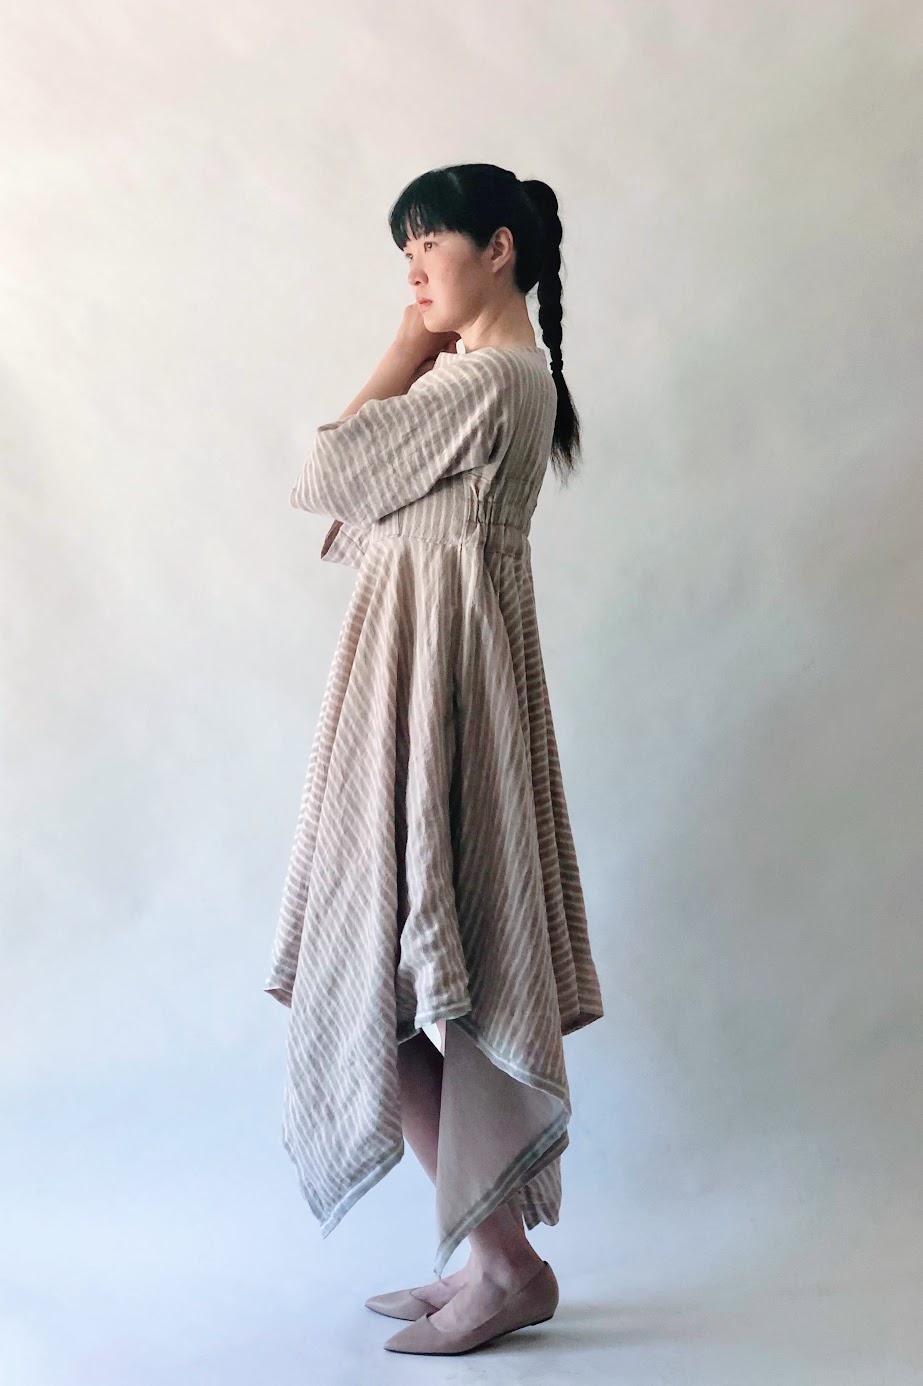
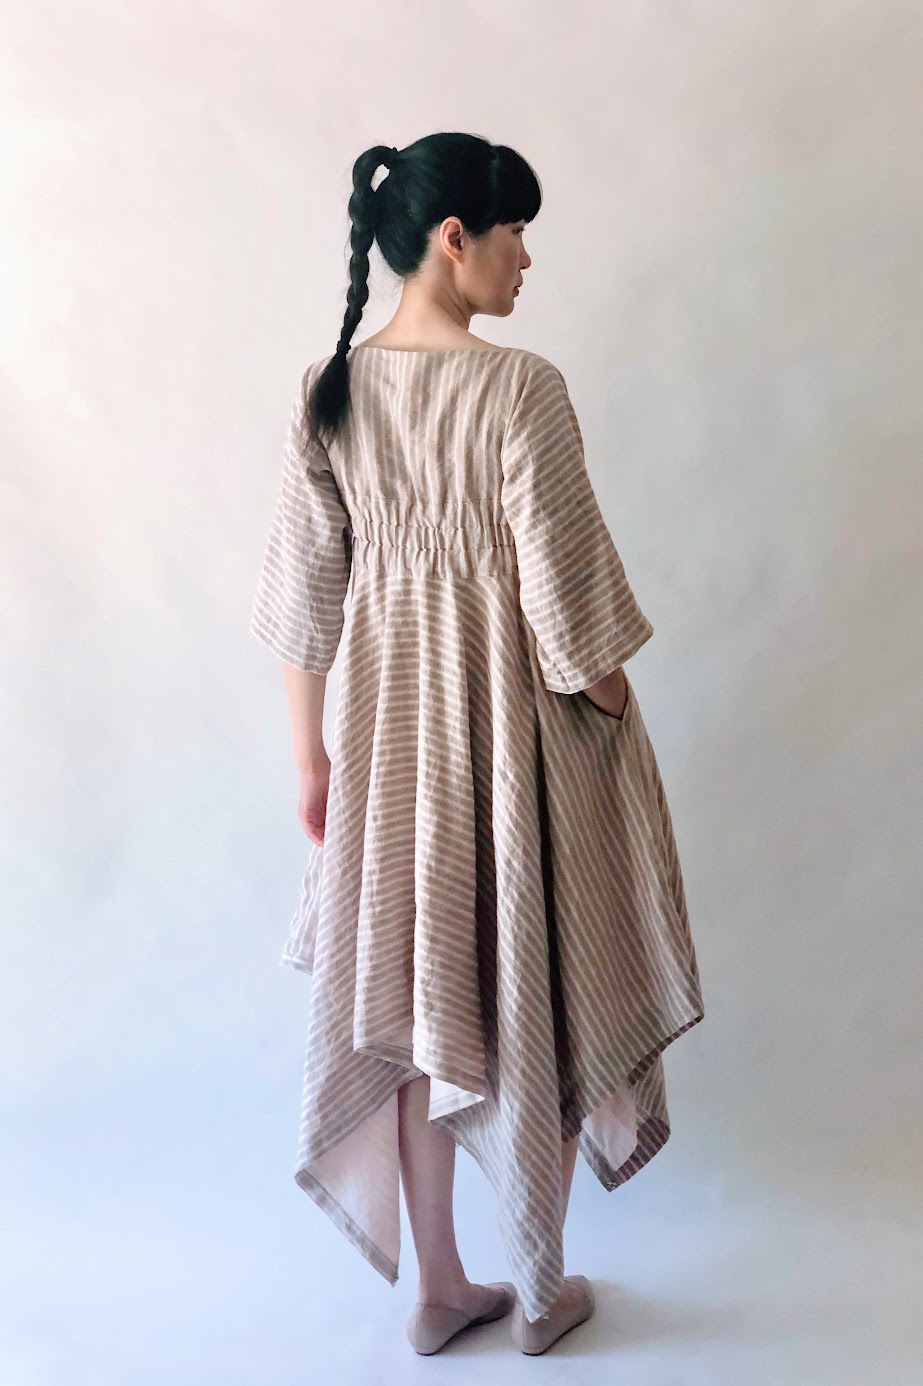
Result: Handkerchief Dress
And here it is! I’m so proud of this dress, I believe this is my best work yet.


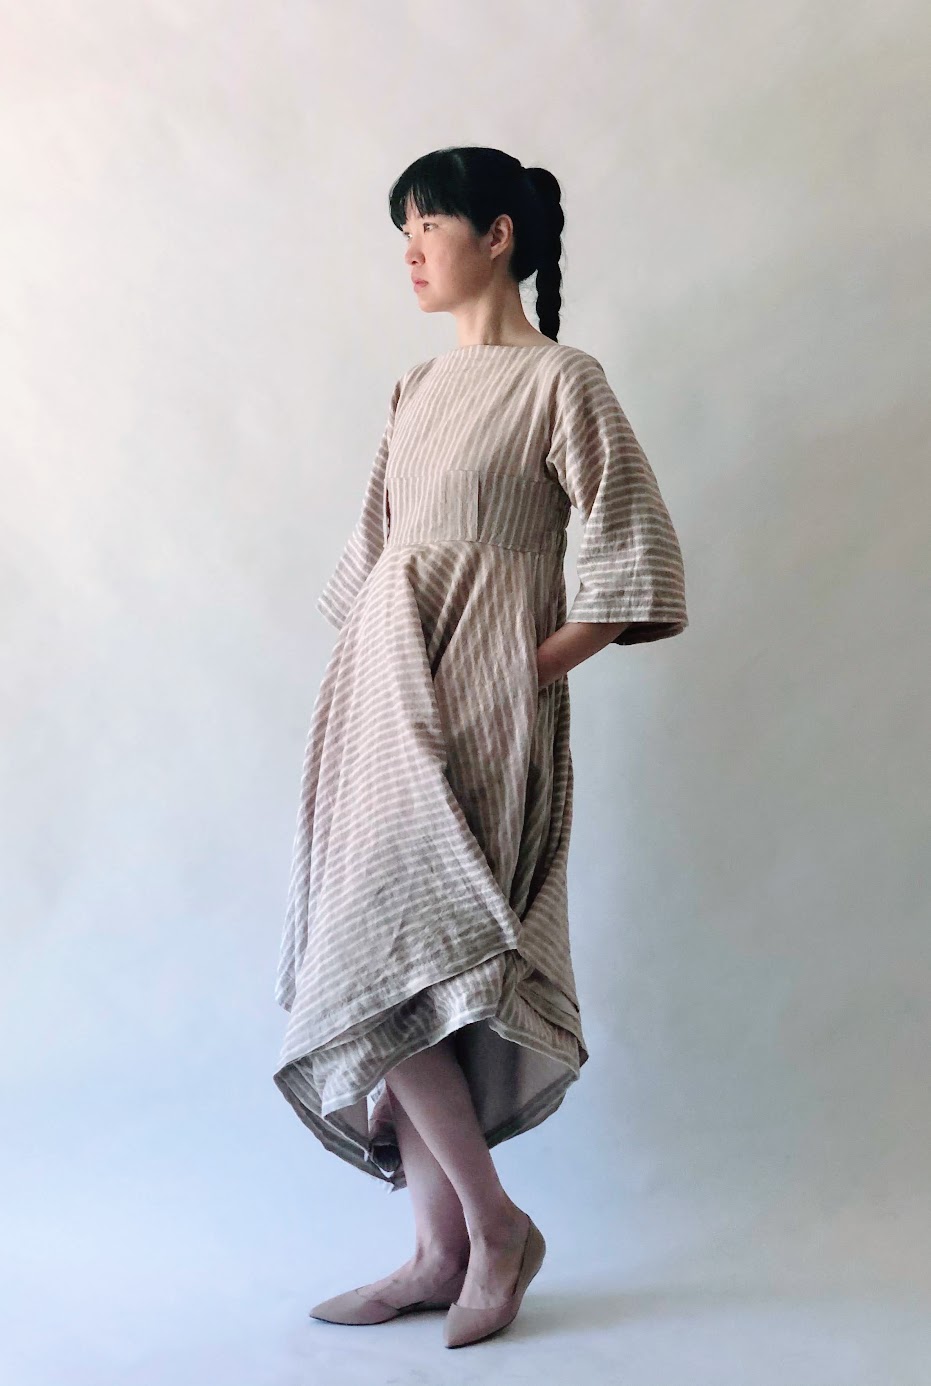
Alternative Ways to Wear
The handkerchief dress is quite sturdy, easy to slip on and off with no zippers or buttons to fuss about, and it has some weight that allows it to move elegantly. Not to mention the deep pockets… the dress is going to be one of my absolute favorites for all of these qualities.
Remember the snap-on buttons I added? So by mismatching the button snaps, I can play with altering the hemlines. Connecting the front and back button pairs will make the dress more like a jumpsuit with wide leg openings. Connecting the sides will create an origami fold effect. Criss-crossing some pairs will make an asymmetrical hemlines. You get the idea.
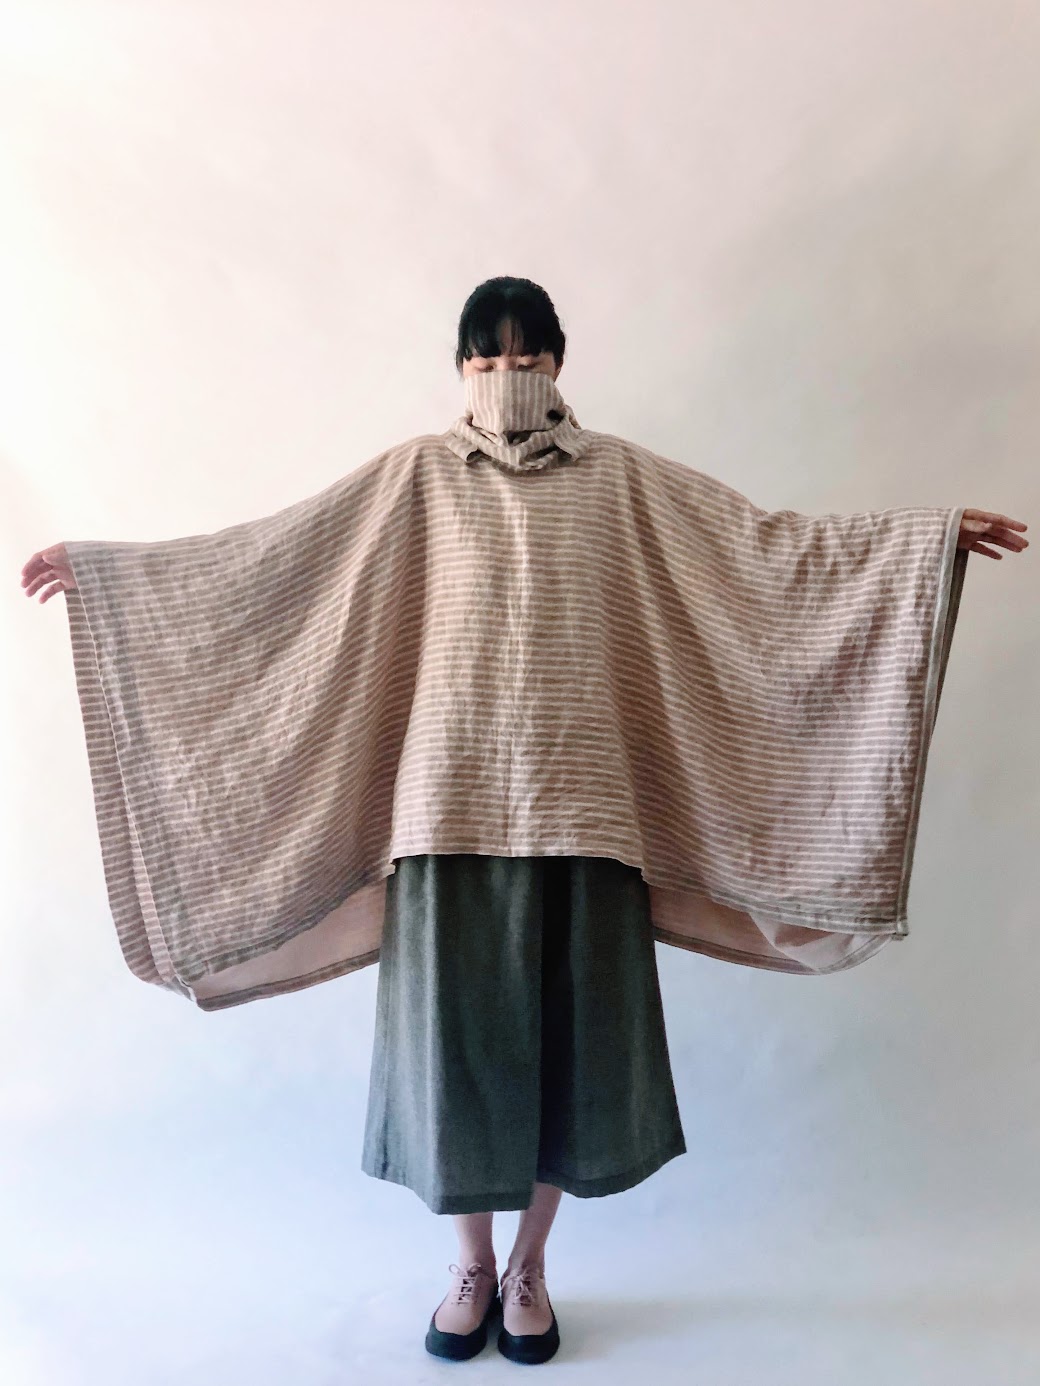
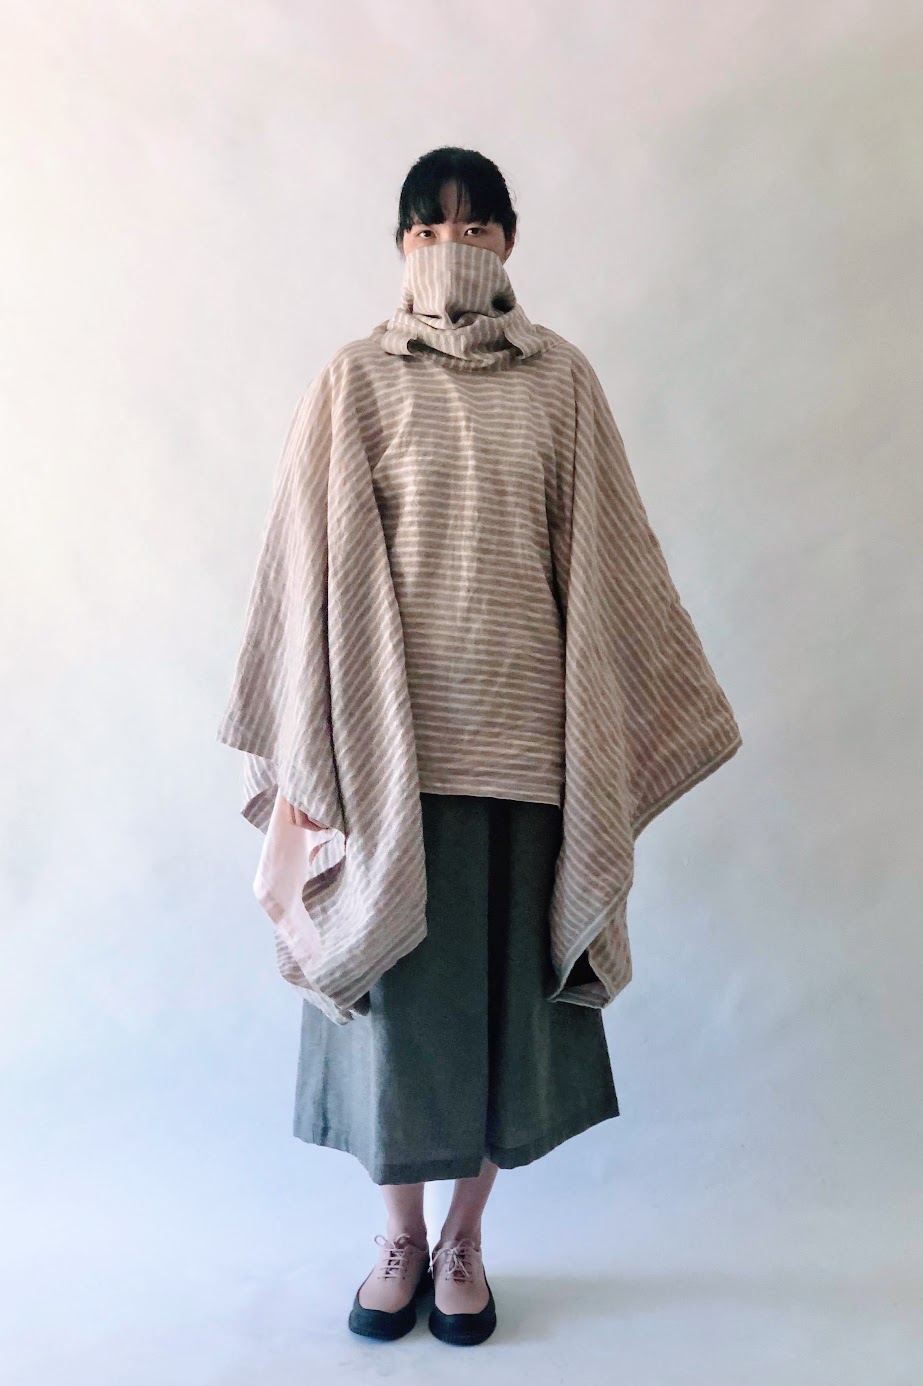
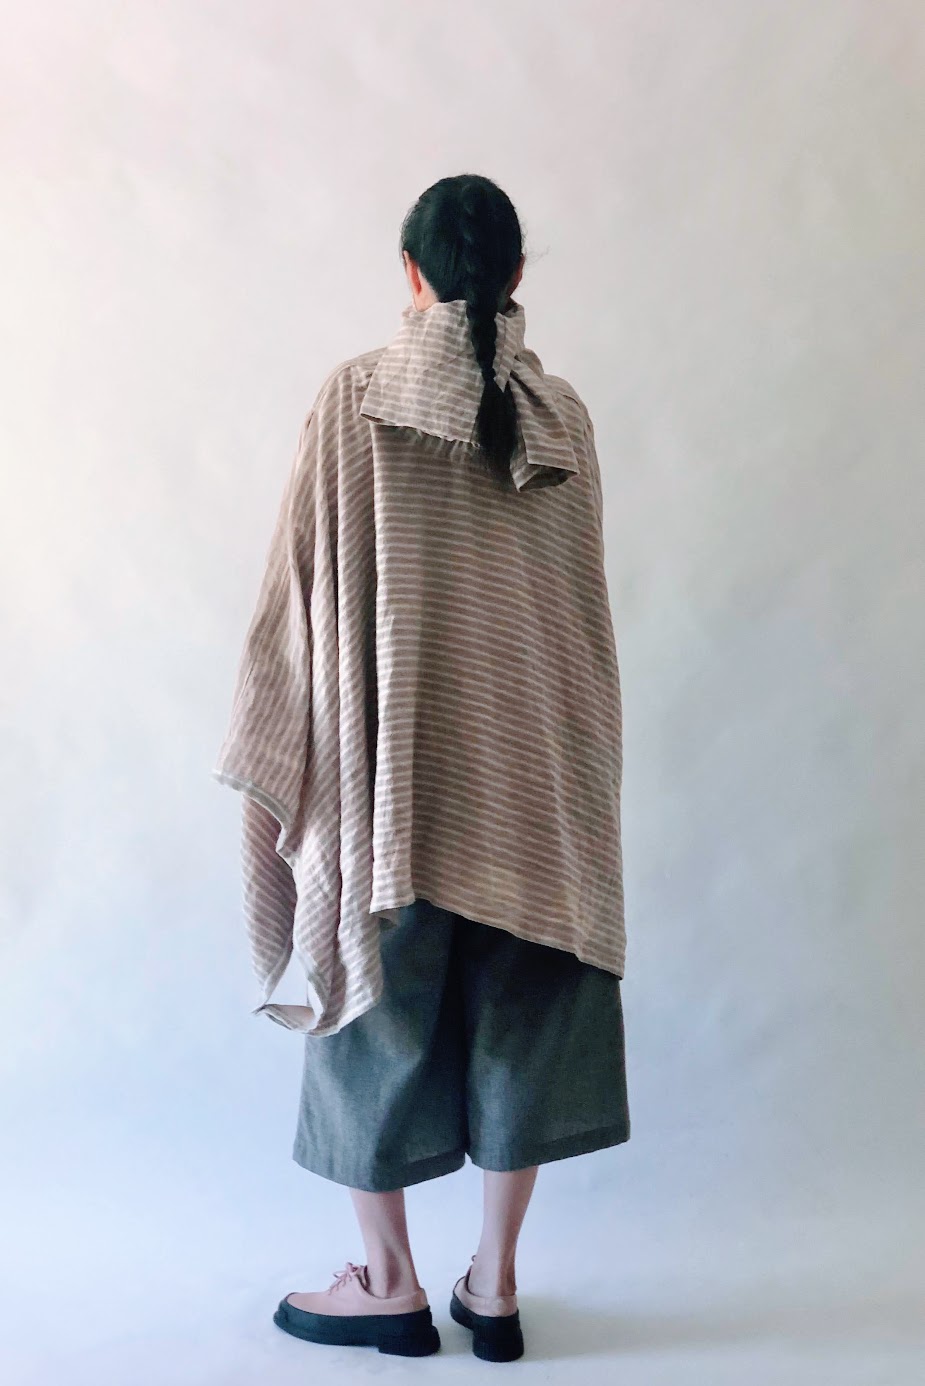
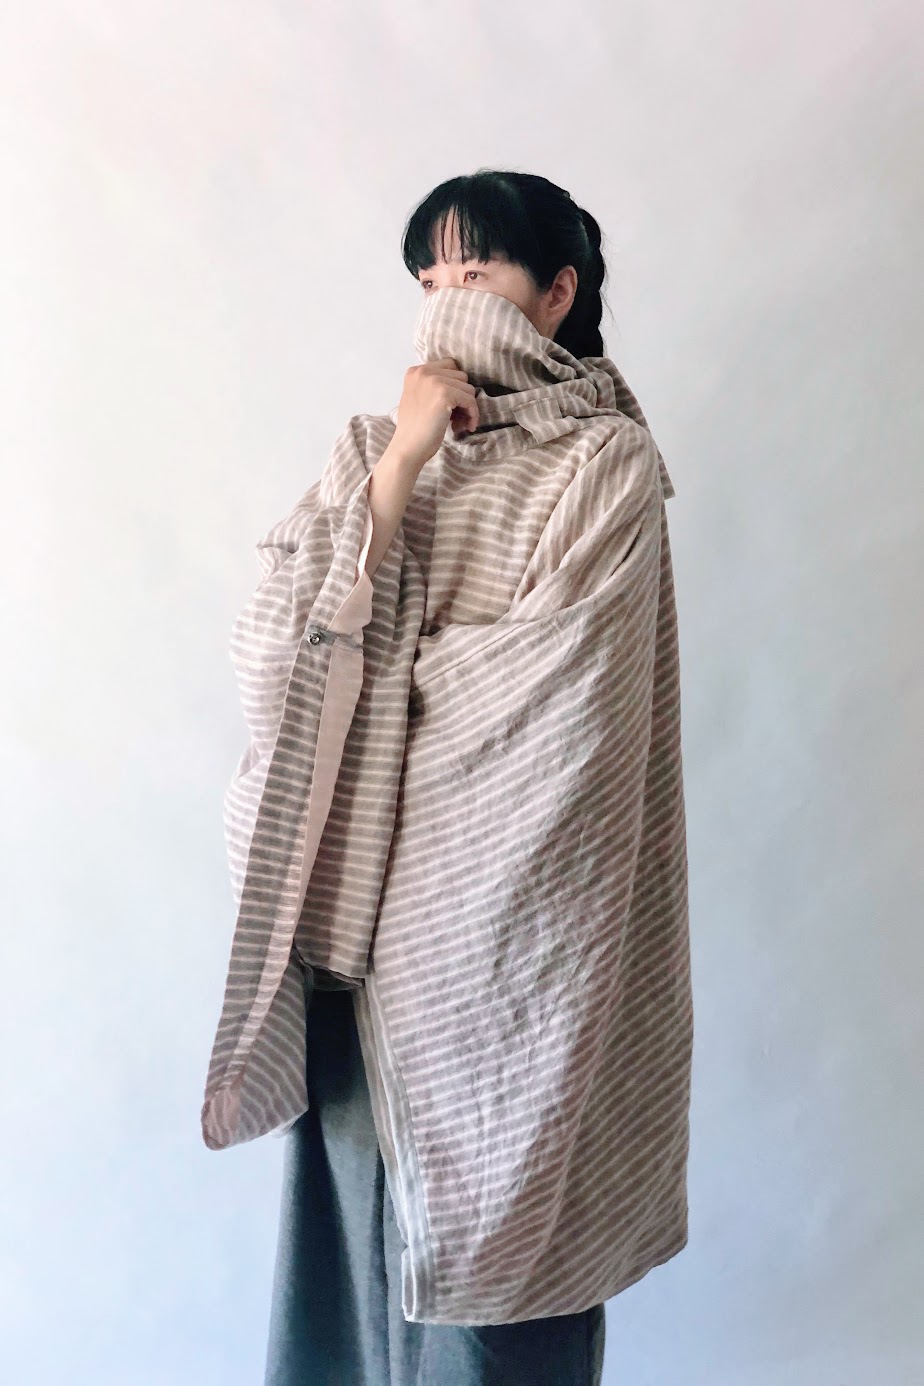
Last but certainly not least, there’s one more way to wear this dress: as a poncho with makeshift emergency face mask. The plights of people displaced from their homes or forced to seek refuge in unknown environments, along with Covid-19 pandemic fueled the motivation to incorporate this alternative wearing style into the overall design.
I have always wanted to make a garment that can be worn in several different ways, yet natural enough that you don’t have to think too much about it. By draping the waistline on the shoulders and tying the sleeves on the back, the bodice can be worn as an emergency face mask. The fabric layers of the garment are good enough to warm one’s neck and shoulders, although it’s certainly not enough to face the harsh realities of winter.
So there you have it. A handkerchief dress with T-shaped bodice that can be worn in multiple ways. Perhaps some alternative ways are more surprising than others. Or maybe not, as there are too many surprises happening in this world lately. For better or worse, we might have started to “normalize” the tragedies that are happening around us.
I hope that’s not the case, and I hope we can choose compassion and kindness to help others in their plights. Let’s start with our own community.
Thanks for reading; until next time,
Musank
Disclaimer: I may earn a small commission for my endorsement, recommendation, testimonial, and/or link to any products or services from this website. Thank you for your support!
Never Miss a Post
Enter your email below to receive the latest Fafafoom Studio post in your inbox.
Browse more posts
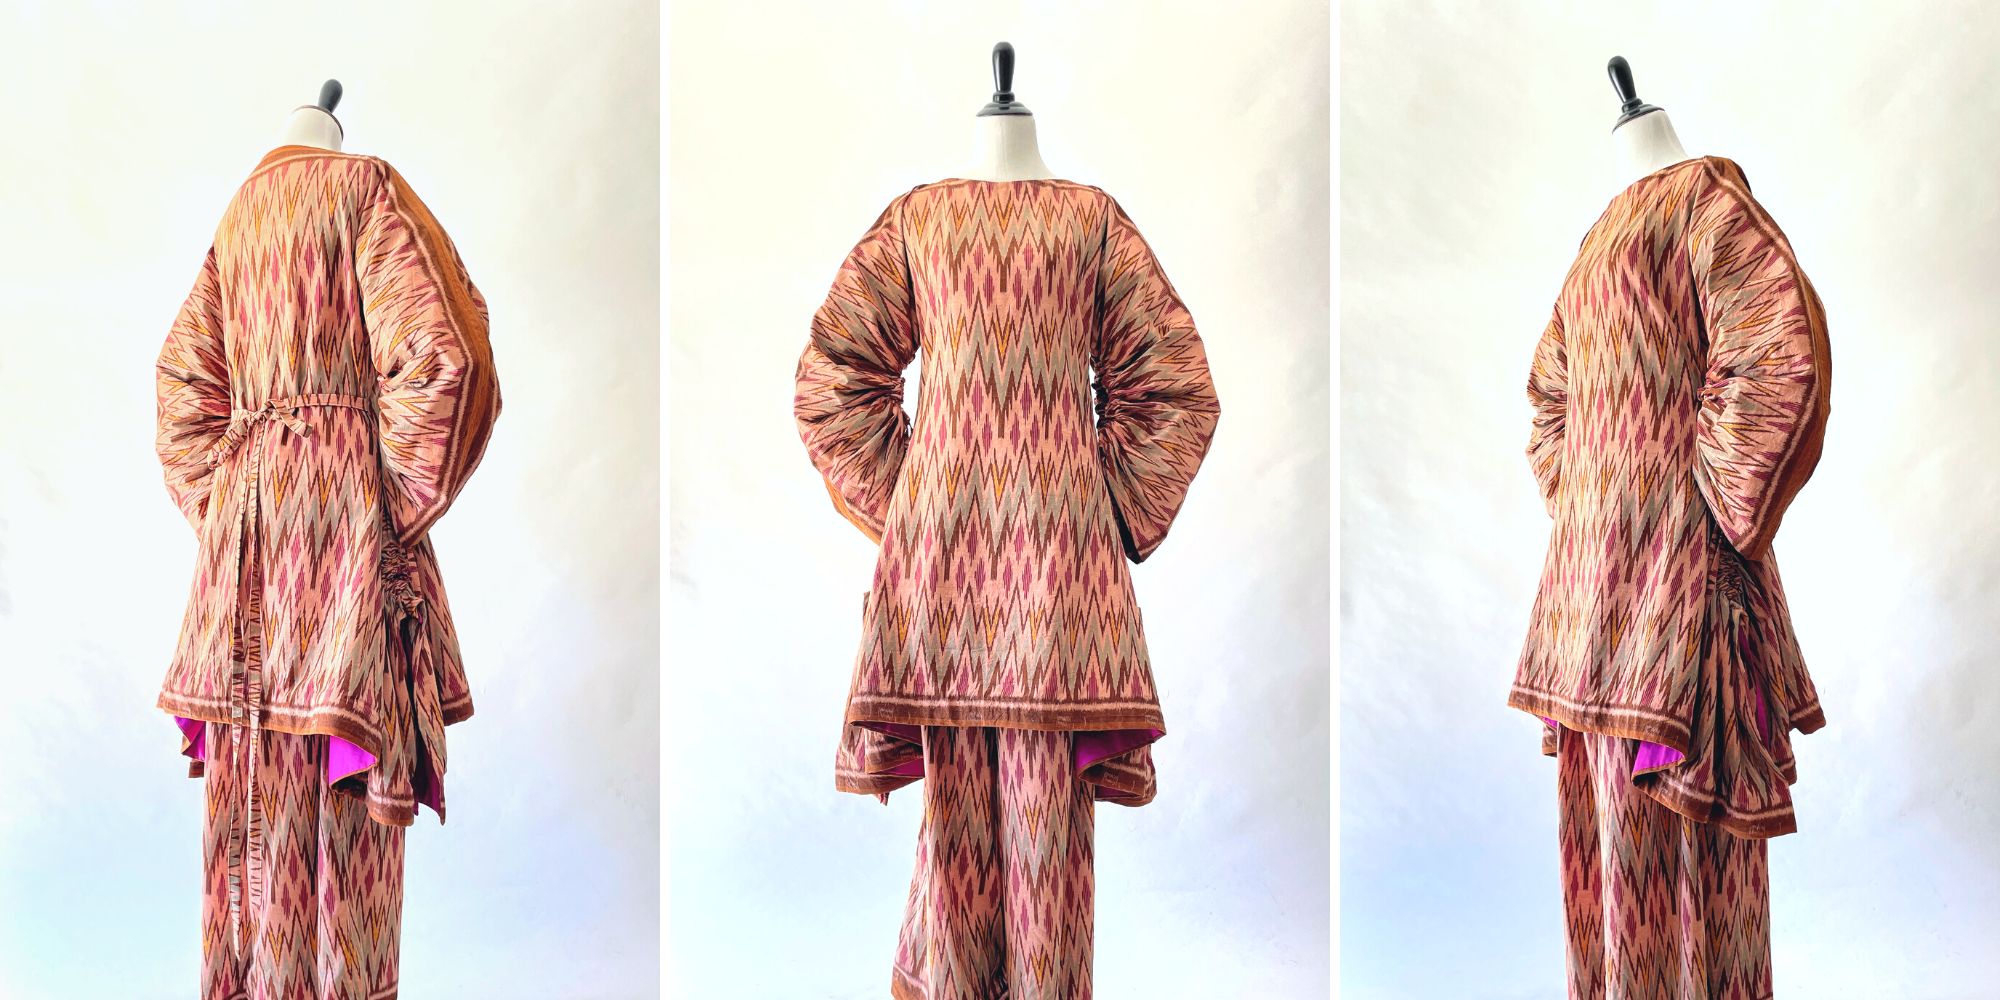
Interpreting Kebaya, Making a Modern Ethnic Ensemble
Modern Ethnic outfit is my interpretation of kebaya dressing. They are made using vintage ikat textile and inspired by several free minimal-waste patterns. Only on fafafoom.com.
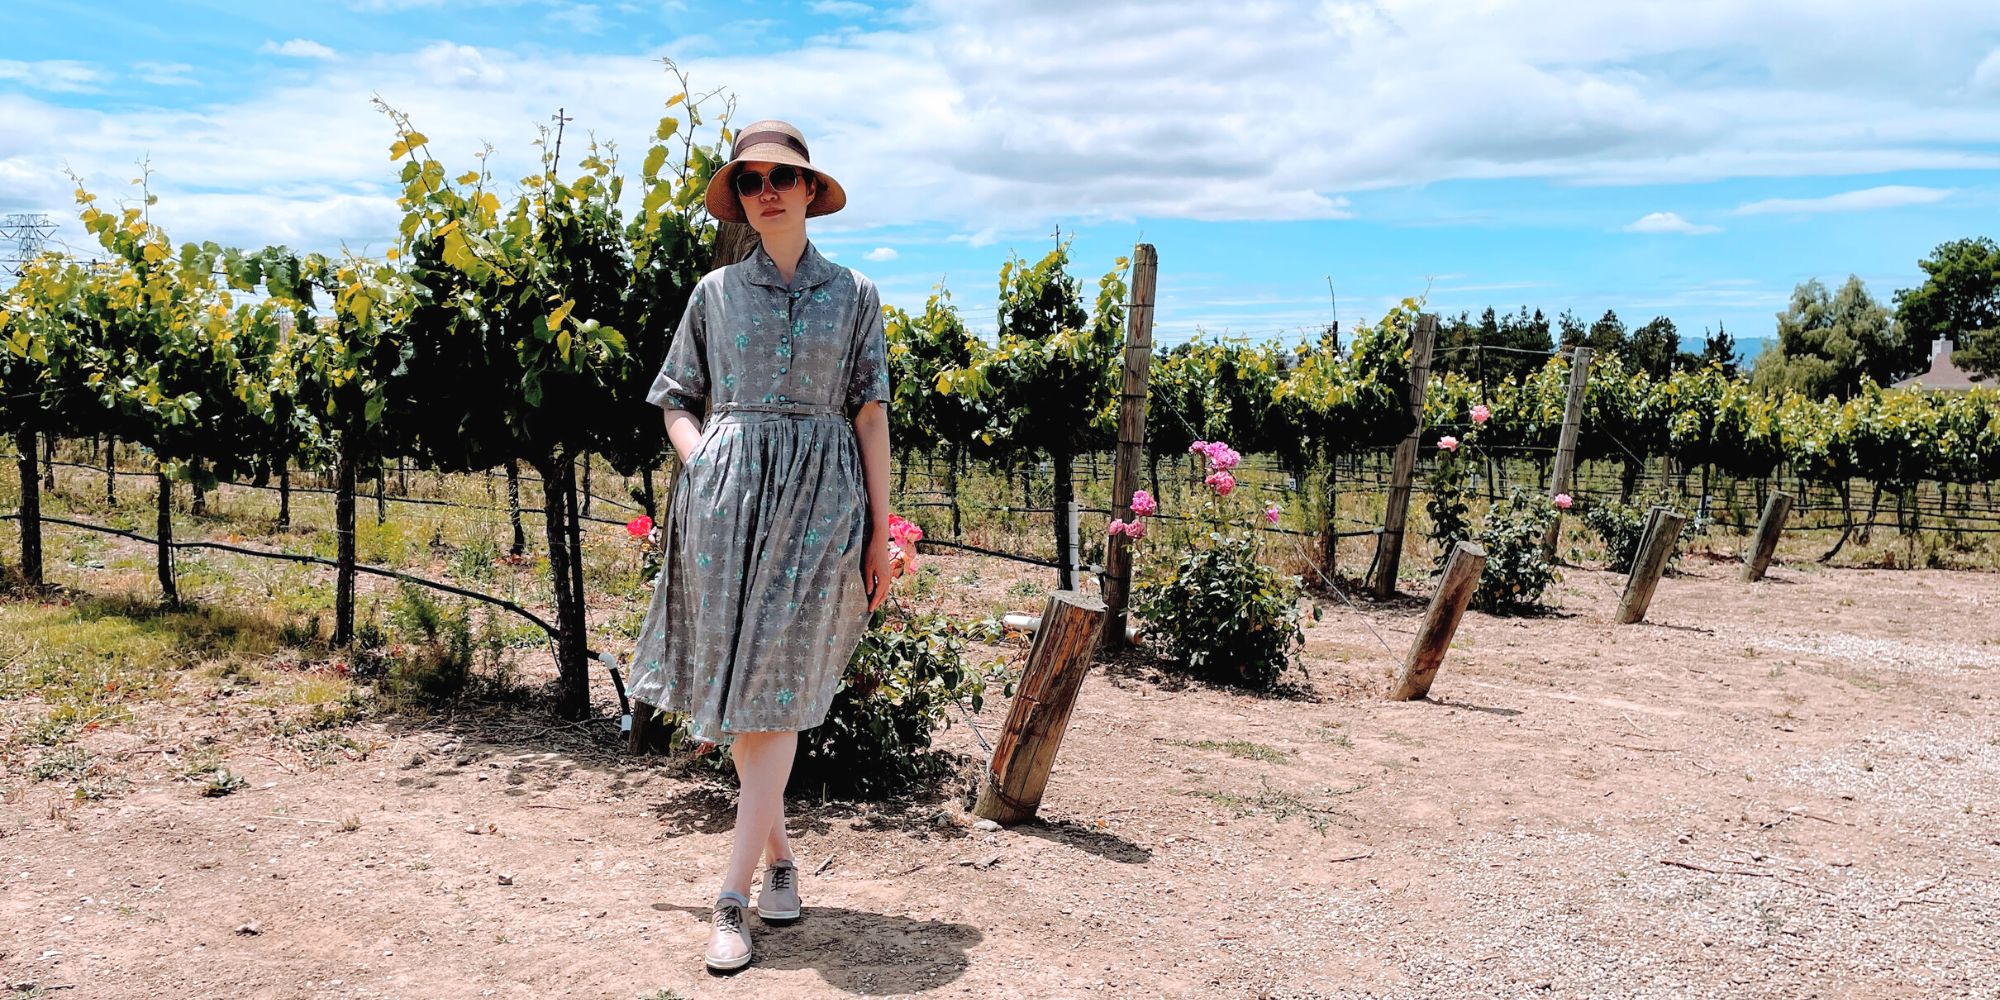
Restoring a 1950s Atomic Age Dress
Restoring and repairing a beautiful 1950s Dress for my summer 2022 wardrobe. Smart alterations include lining and inseam pockets. Only on fafafoom.com.
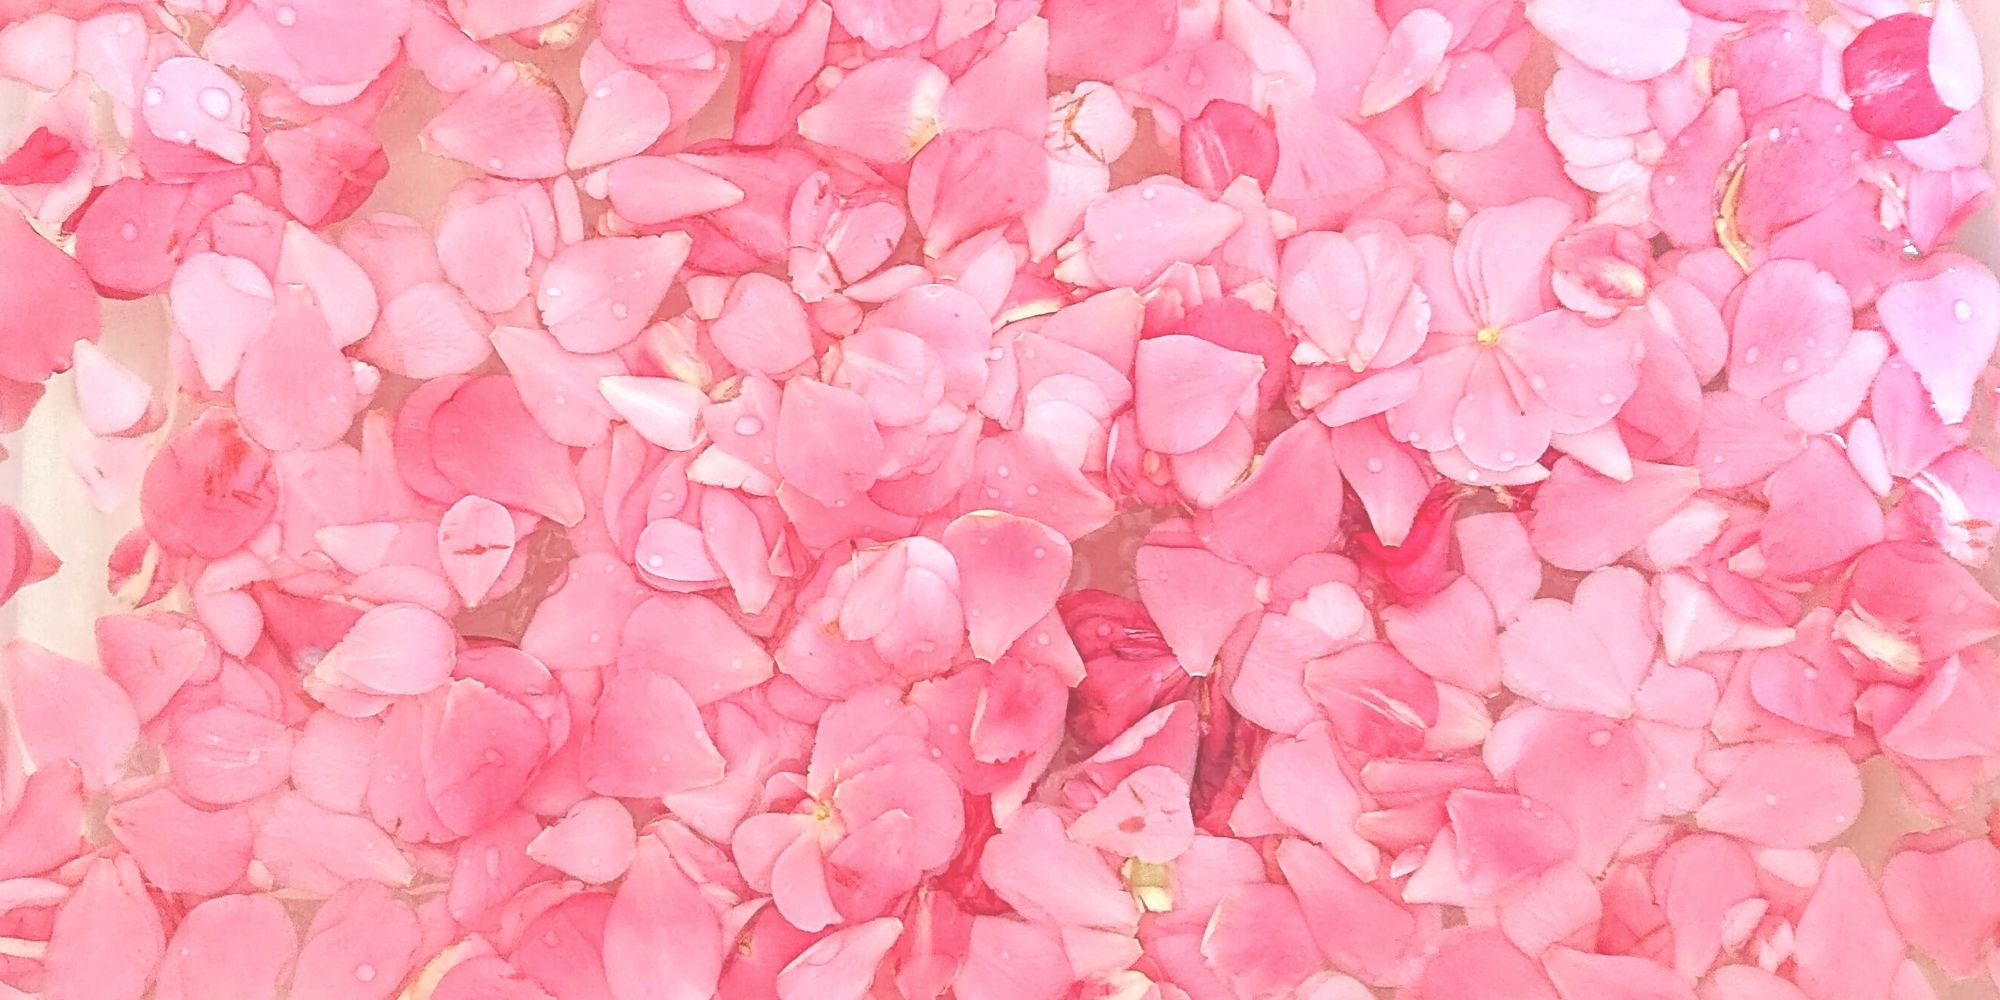
Pink Delight! Natural Dyeing with Camellia Flowers
My next experiment is dyeing with camellia flowers. Amongst all natural dyeing projects I have done so far, this is my favorite. Check out the pink delights! From fafafoom.com.
5 Slow Fashion Tips for a More Sustainable Wardrobe
Five slow fashion tips to help you transform your sustainable wardrobe for a cleaner, greener future. A guest feature from Reese Jones for Fafafoom.com.
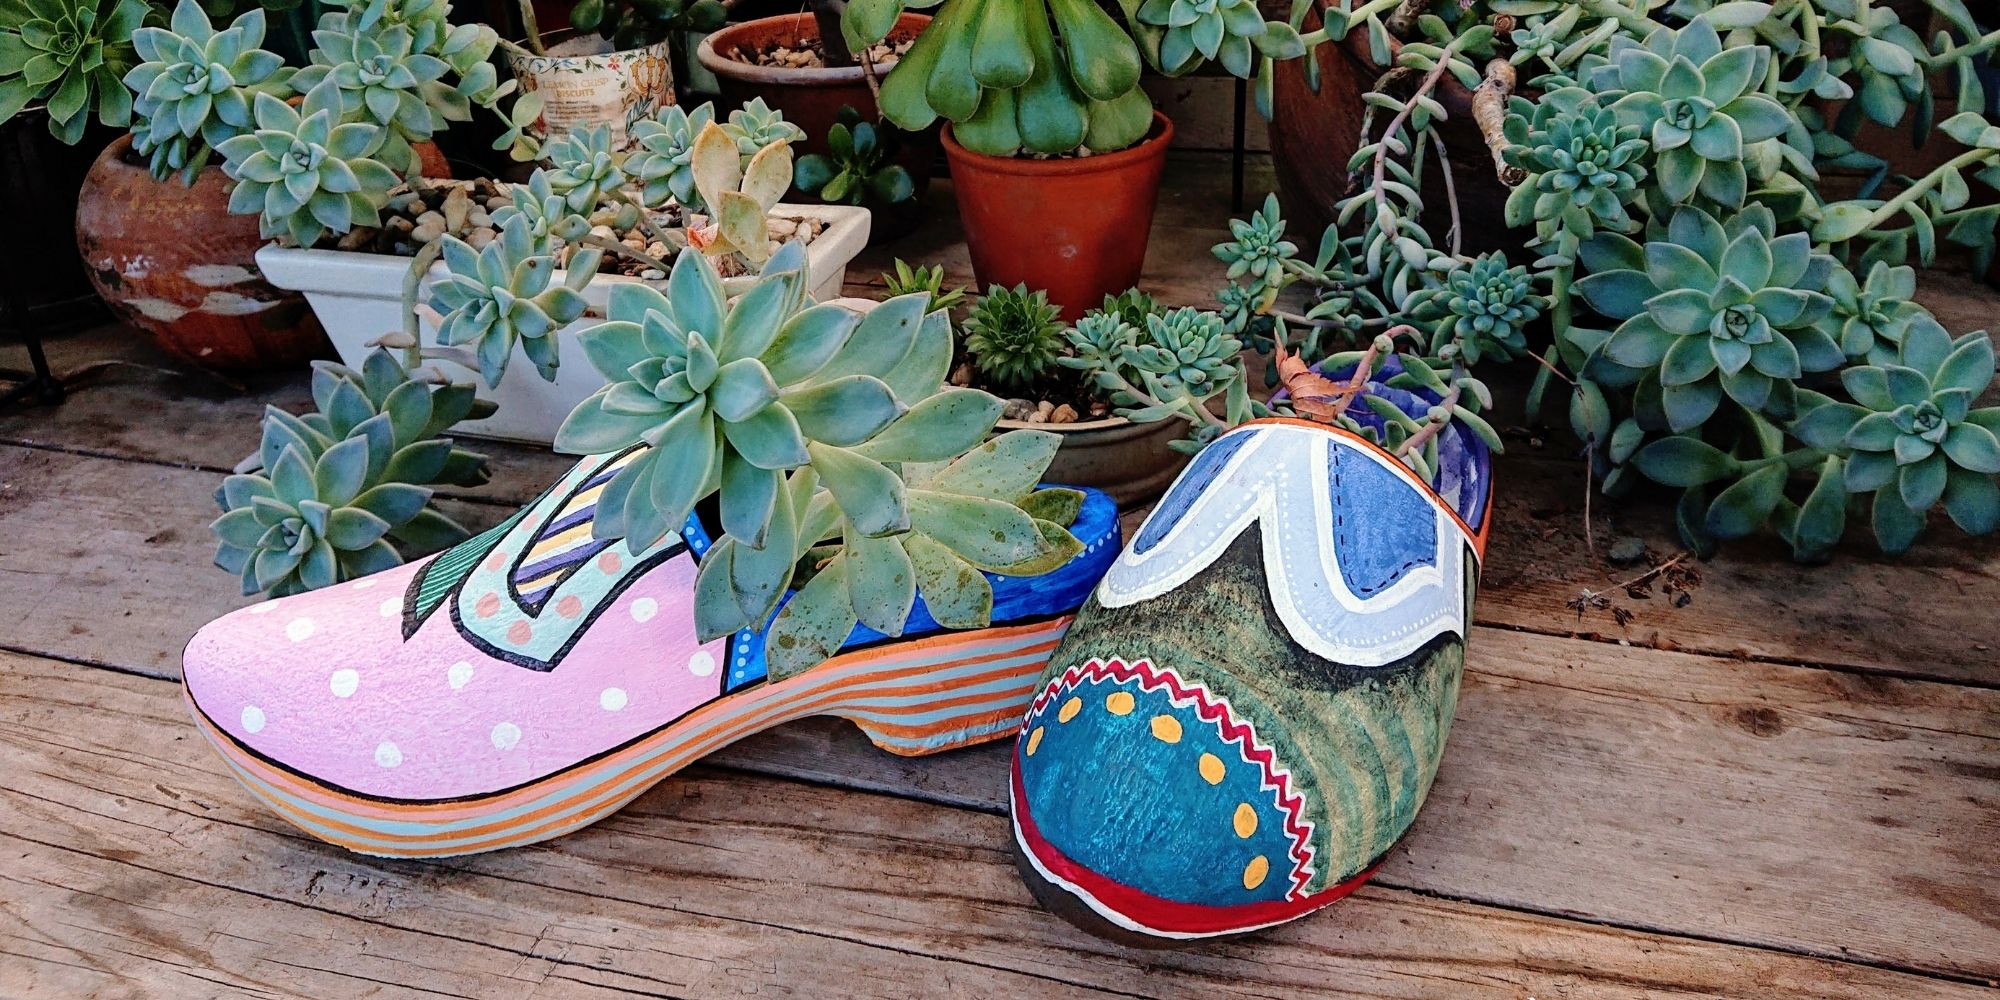
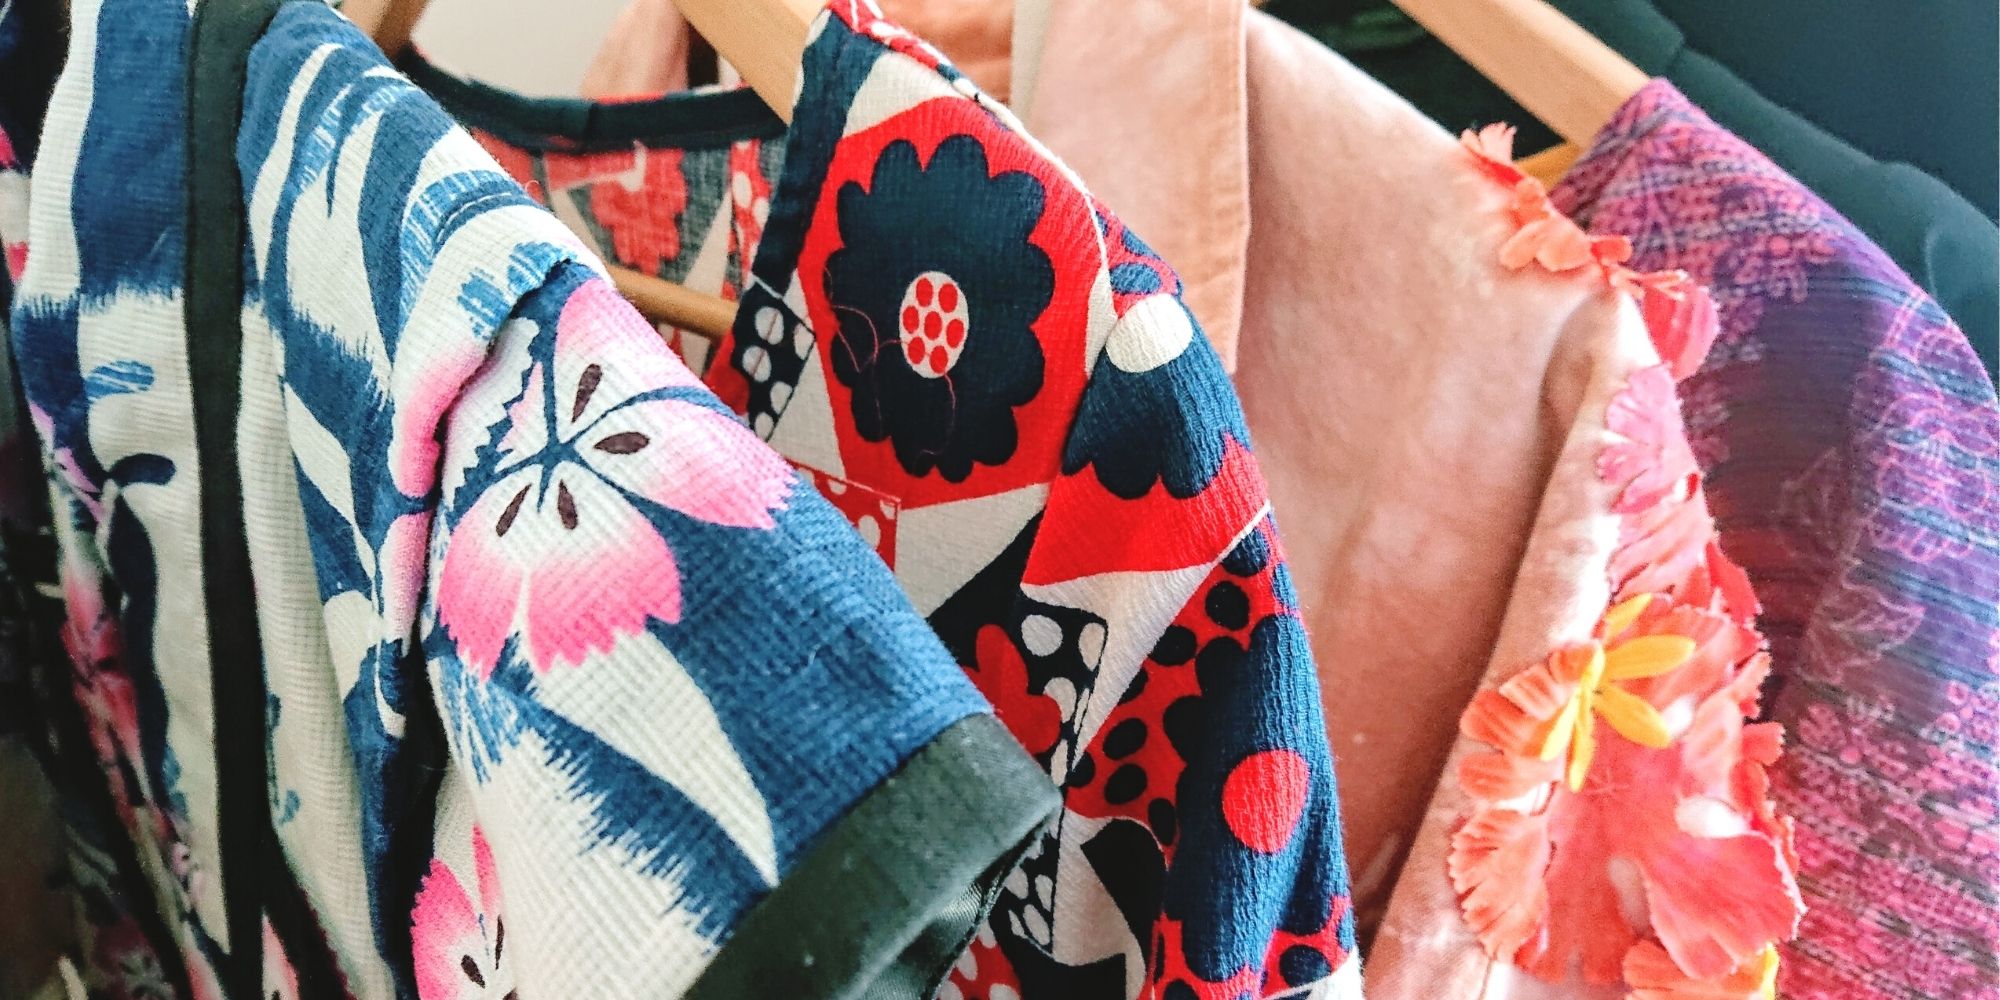
Upcycling and Repairing Ideas for Garden Decor
The garden has become a special place, especially during Covid-19 pandemic. During shelter-in-place period, I made garden decors by upcycling locally sourced items.
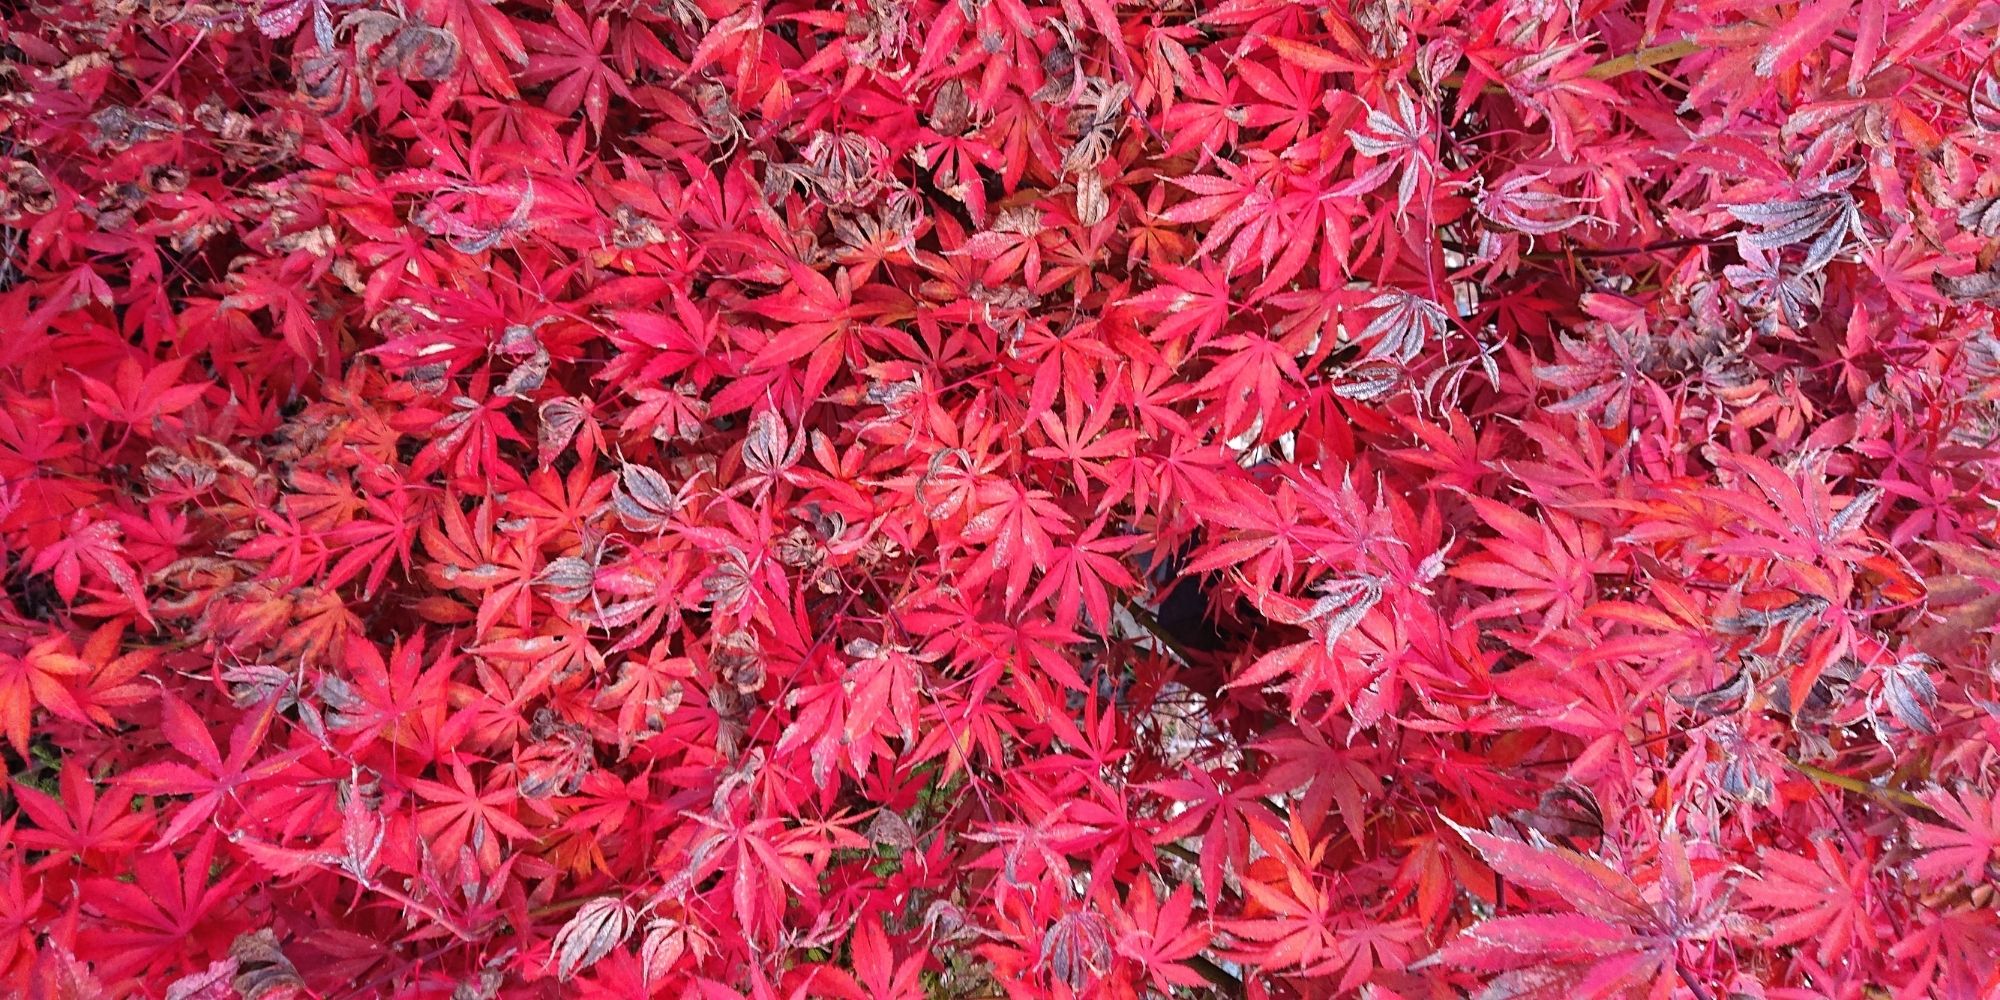
Natural Dyeing with Japanese Maple Leaves: Notes from a First-timer
Notes from my first natural dyeing experiment with Japanese maple leaves in fall season. Three batches of dyeing using fallen leaves sourced from two different trees in the garden. So much to learn and enjoy afterwards.